
1. Introducción
Thank you for choosing the VENTION Mac mini M4 Dock. This 10-in-1 aluminum stand is designed to expand the connectivity and storage capabilities of your Mac mini M4 or M4 Pro. It features an M.2 NVMe SSD enclosure, a DisplayPort for 4K video output, multiple USB 3.2 ports for high-speed data transfer, and an SD/TF card reader. This manual provides detailed instructions for setup, operation, and maintenance to ensure optimal performance of your device.
2. Producto terminadoview
The VENTION Mac mini M4 Dock integrates seamlessly with your Mac mini, offering a compact and efficient solution for expanding your workspace.
2.1 Contenido del paquete
- VENTION Mac mini M4 Dock
- Manual de usuario
- Destornillador
- Thermal Silicone Pads (x2)
2.2 Disposición del dispositivo y puertos
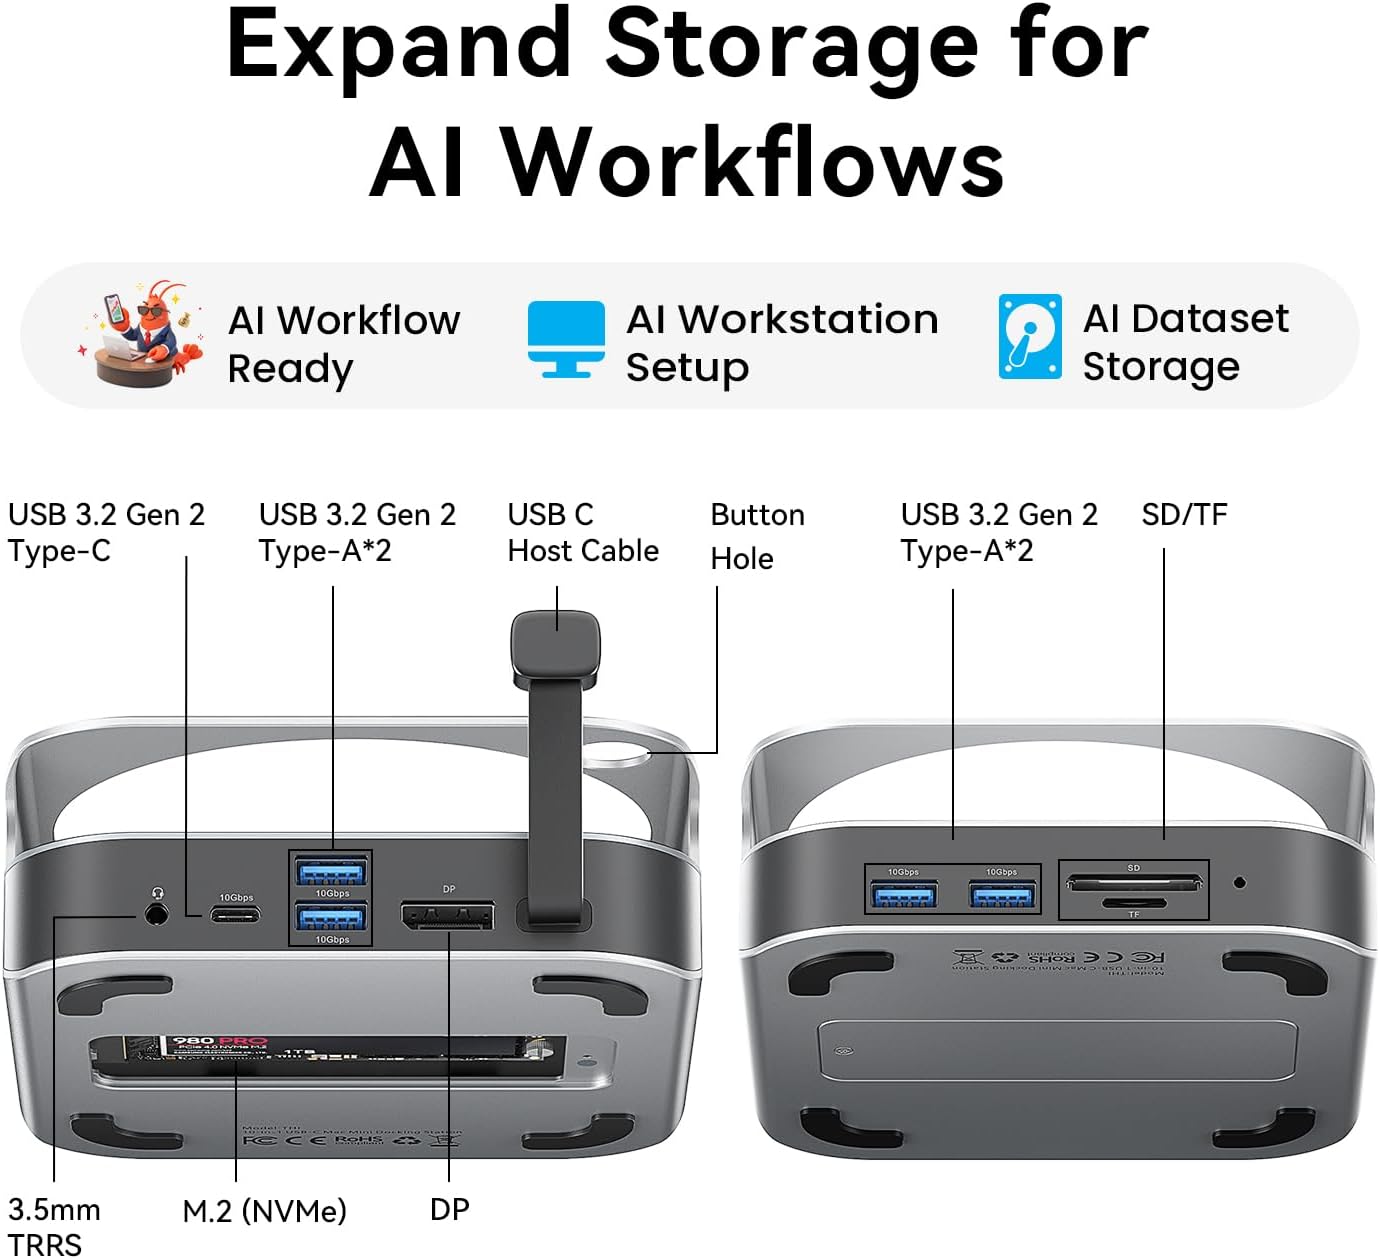
Imagen: delantera y trasera view of the VENTION Mac mini M4 Dock, highlighting all available ports and connections.
The dock features a comprehensive array of ports for enhanced connectivity:
- Puertos frontales:
- 2x USB 3.2 Gen 2 Tipo-A (10 Gbps)
- Lector de tarjetas SD
- TF Card Reader (supports simultaneous read with SD)
- Puertos traseros:
- 1x USB 3.2 Gen 2 Tipo-C (10 Gbps)
- 2x USB 3.2 Gen 2 Tipo-A (10 Gbps)
- DisplayPort (DP)
- 3.5mm Audio Jack (TRRS)
- M.2 NVMe SSD Enclosure (supports 2230/2242/2260/2280 sizes)

Image: The VENTION Mac mini M4 Dock with a Mac mini placed on top, illustrating the floating design that promotes airflow for efficient cooling.
The dock's design includes a floating stand that elevates your Mac mini, creating 360° airflow channels for optimal heat dissipation during intensive workloads. It also features a dedicated power button hole for easy access to your Mac mini's power button.

Imagen: Un primer plano view of the VENTION Mac mini M4 Dock, highlighting the cutout for easy access to the Mac mini's power button.
3. Instrucciones de configuración
Instalación de SSD NVMe M.2 3.1
The dock supports M.2 NVMe SSDs (M Key) of sizes 2230, 2242, 2260, and 2280, allowing for storage expansion up to 8TB. Follow these steps to install your SSD:
- Turn the dock upside down. Use the included screwdriver to remove the screws securing the M.2 NVMe SSD enclosure cover.
- Carefully lift off the cover.
- If your SSD requires it, place one of the provided thermal silicone pads on top of your M.2 NVMe SSD.
- Loosen the fixing screw inside the enclosure by hand or with a flat-head screwdriver.
- Align the notch on your M.2 NVMe SSD with the latch in the enclosure, insert it firmly, and press down.
- Tighten the fixing screw to secure the SSD. Ensure the thermal pad makes contact with the enclosure cover for optimal heat dissipation.
- Replace the enclosure cover and tighten the screws.

Image: Illustration of the M.2 NVMe SSD enclosure, showing compatibility with various SSD lengths (2230, 2242, 2260, 2280).
Video: A step-by-step guide demonstrating the installation process of an M.2 NVMe SSD into the VENTION Mac mini M4 Dock's enclosure.
3.2 Connecting to Mac mini
- Place your Mac mini M4 or M4 Pro securely on top of the VENTION Dock. Ensure the power button hole aligns correctly.
- Connect the integrated USB-C host cable from the dock to an available USB-C/Thunderbolt port on your Mac mini.
- Connect any necessary peripherals (monitor, keyboard, mouse, etc.) to the corresponding ports on the dock.

Image: The VENTION Mac mini M4 Dock with a Mac mini positioned on top, showcasing the integrated setup.
4. Instrucciones de funcionamiento
4.1 Display Output (DisplayPort)
The DisplayPort on the dock supports high-resolution video output:
- Mac mini M4 Pro: Resolución de hasta 4K a 240Hz.
- Mac mini M4: Resolución de hasta 4K a 144Hz.
Importante: Ensure you use a DisplayPort-to-DisplayPort cable for optimal performance and to achieve the advertised refresh rates.
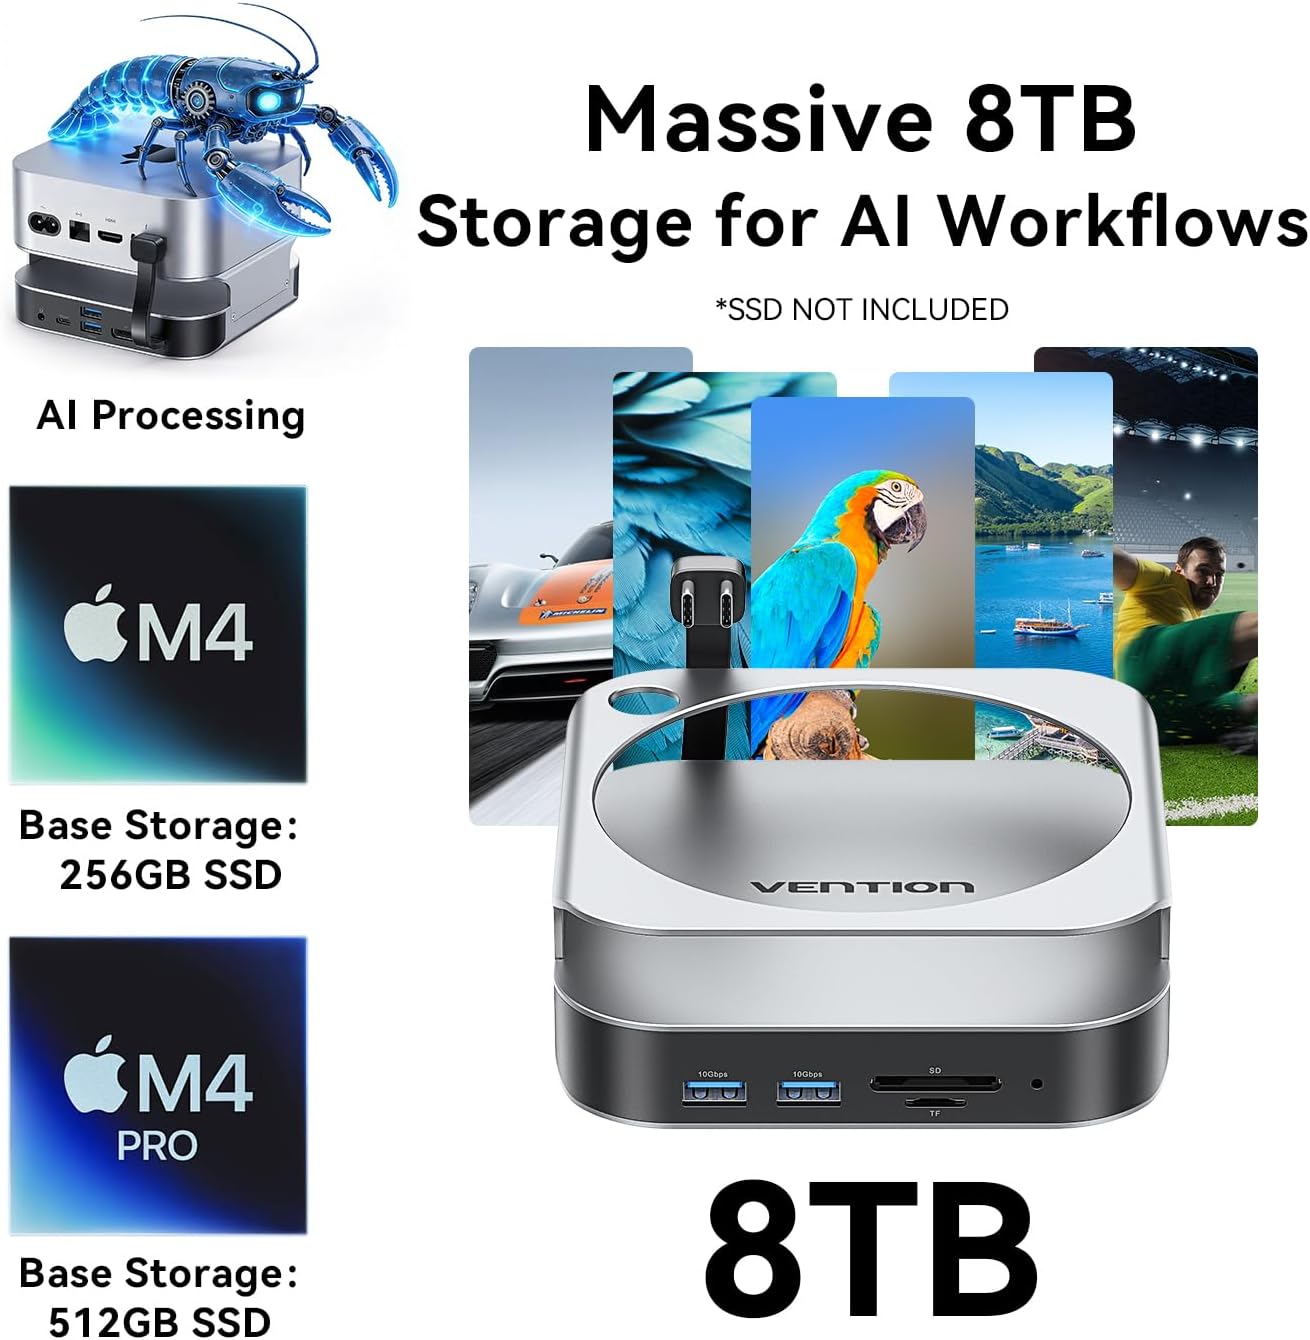
Image: A Mac mini connected to an external monitor through the VENTION Dock, demonstrating 4K display output.
4.2 High-Speed Data Transfer (USB Ports)
The dock provides 5 USB 3.2 Gen 2 ports (4x USB-A, 1x USB-C) with a data transfer speed of up to 10Gbps. This allows for rapid transfer of large files, como 1 GB en aproximadamente 1 segundo.
Vídeo: Un overview of the VENTION Mac mini M4 Dock's features, including high-speed data transfer and display capabilities.
4.3 Lector de tarjetas SD/TF
The integrated SD and TF card readers support simultaneous reading and writing, making it convenient for photographers and content creators to access media files directamente.
5. Mantenimiento
To ensure the longevity and optimal performance of your VENTION Mac mini M4 Dock, follow these maintenance guidelines:
- Limpieza: Use a soft, dry, lint-free cloth to wipe the exterior of the dock. Avoid using harsh chemicals or abrasive materials.
- Ventilación: Ensure the ventilation channels around the dock and your Mac mini are clear of obstructions to maintain proper airflow and heat dissipation.
- Almacenamiento: Cuando no utilice la base durante períodos prolongados, guárdela en un lugar fresco y seco, alejado de la luz solar directa y de temperaturas extremas.
- SSD Handling: Do not plug or unplug SSDs while the device is powered on to prevent data corruption or damage.
6. Solución de problemas
If you encounter issues with your VENTION Mac mini M4 Dock, refer to the following common solutions:
6.1 Problemas con la salida de pantalla
- Sin pantalla/parpadeo: Ensure you are using a high-quality DisplayPort-to-DisplayPort cable. Check that the cable is securely connected to both the dock and your monitor. Verify your monitor's input settings.
- Resolución/frecuencia de actualización incorrecta: Confirm your monitor supports the desired resolution and refresh rate. Adjust display settings in macOS System Settings.
6.2 SSD no reconocido
- Comprobar la instalación: Re-open the SSD enclosure and ensure the M.2 NVMe SSD is correctly seated and the fixing screw is tightened.
- Formatear SSD: For new SSDs, you may need to format them using Disk Utility in macOS before they appear in Finder.
- Ciclo de energía: Disconnect and reconnect the dock from your Mac mini.
6.3 Velocidades lentas de transferencia de datos
- Verify USB 3.2 Compatibility: Ensure the connected device (e.g., USB drive) and cable support USB 3.2 Gen 2 (10Gbps) speeds. Older USB 2.0 or 3.0 devices will operate at their respective lower speeds.
- Evite la sobrecarga: Transferring data to/from multiple high-speed devices simultaneously may reduce individual transfer rates.
6.4 El conector de audio no funciona
- Check macOS Audio Settings: Go to System Settings > Sound > Output and ensure the VENTION Dock's audio output is selected.
- Test with Different Headphones/Speakers: Rule out issues with your audio peripherals.
7. Especificaciones
| Característica | Detalle |
|---|---|
| Marca | VENCIÓN |
| Modelo | Muelle M4 |
| Color | Plata |
| Interfaz de hardware | DisplayPort, SD Card, TF Card, USB 3.2 Gen 2, USB Type-C |
| Dispositivos compatibles | Mac mini M4/M4 Pro |
| Puertos USB totales | 7 (5x USB 3.2 Gen 2, 2x USB-C for host connection) |
| Número de puertos | 10-in-1 (including M.2 NVMe slot, DisplayPort, SD/TF) |
| Compatibilidad con SSD M.2 NVMe | M Key, sizes 2230/2242/2260/2280, up to 8TB |
| Salida DisplayPort | 4K@240Hz (M4 Pro), 4K@144Hz (M4) |
| Velocidad de transferencia de datos | Hasta 10 Gbps (USB 3.2 Gen 2) |
8. Garantía y soporte
8.1 Información de garantía
The VENTION Mac mini M4 Dock comes with a Garantía de 12 meses Desde la fecha de compra. Esta garantía cubre defectos de fabricación y mal funcionamiento en condiciones normales de uso. No cubre daños causados por mal uso, accidentes, modificaciones no autorizadas o instalación incorrecta.
8.2 Atención al cliente
For technical assistance, warranty claims, or any questions regarding your VENTION product, please contact VENTION customer support through the official VENTION webSitio web o los canales de soporte de su vendedor. Tenga a mano el recibo de compra y la información del modelo del producto al contactar con el soporte.