VEVOR 4-in-1 Hat Heat Press
Manual de instrucciones de la prensa térmica para gorras 4 en 1 de VEVOR
Model: 4-in-1 Hat Heat Press
1. Introducción
This manual provides detailed instructions for the safe and efficient operation of your VEVOR 4-in-1 Hat Heat Press. This machine is designed for sublimation transfer onto various types of hats and caps, offering versatility with its multiple heating platen sizes. Please read this manual thoroughly before initial use to ensure proper setup, operation, and maintenance.

Image: The VEVOR 4-in-1 Hat Heat Press machine, showcasing its main unit, the curved heating platen, and three additional interchangeable heating pads. Various hats are displayed, indicating the machine's application.

Image: The VEVOR 4-in-1 Cap Heat Press machine with a selection of different hat styles, including baseball caps, berets, and bucket hats, demonstrating the machine's adaptability for various headwear.
2. Información de seguridad
- Utilice siempre la prensa térmica sobre una superficie estable y resistente al calor.
- Keep hands and fingers clear of the heating platen during operation to prevent burns.
- Do not touch the heating platen immediately after use; allow it to cool down.
- Asegúrese de que la máquina esté correctamente conectada a tierra para evitar descargas eléctricas.
- Desenchufe la máquina de la toma de corriente cuando no esté en uso o antes de limpiarla o realizarle mantenimiento.
- Mantenga a los niños y a las mascotas alejados de la prensa térmica durante su funcionamiento.
- No opere la máquina si el cable de alimentación o el enchufe están dañados.
- Use in a well-ventilated area to dissipate any fumes from heat transfer materials.
3. Componentes y características
Your VEVOR 4-in-1 Hat Heat Press comes with the main unit and several interchangeable heating pads to accommodate different hat sizes and styles.
- Unidad principal: Includes the frame, control panel, and primary heating platen.
- Panel de control: Features a dual-screen digital display for temperature and time, along with control buttons.
- Perilla de control de presión: Allows adjustment of the pressure applied during heat pressing.
- Interchangeable Heating Pads: Four different sizes are included for versatile application.

Image: A visual representation of the four different heating pads included with the heat press, showing their varying dimensions: 6 x 3 in (15 x 7.6 cm), 6.7 x 2.7 in (17 x 7 cm), 6.7 x 3.8 in (17 x 10 cm), and 8.1 x 3.5 in (20.6 x 9 cm).

Imagen: Un primer plano view of the heat press's control panel, highlighting the dual-screen display for time and temperature, an intelligent heating chip, and built-in secure fuses for safety and precise control.

Imagen: Un detalle view of the pressure control knob located on top of the heat press, illustrating how it can be adjusted to apply the desired pressure for different materials and transfer types.
4. Configuración
- Desembalaje: Retire con cuidado todos los componentes del embalaje. Inspeccione si presentan daños durante el transporte.
- Colocación: Place the heat press on a sturdy, flat, and heat-resistant surface. Ensure there is adequate space around the machine for safe operation and ventilation. The machine features non-slip base mats for stability.

Image: A close-up of the non-slip base mats on the bottom of the heat press, designed to ensure stable operation and prevent movement during use.
- Conexión de energía: Conecte el cable de alimentación a una toma de corriente con conexión a tierra. Asegúrese de que el voltage matches the machine's requirements (110V 60Hz).
- Attach Heating Pad: Select the appropriate heating pad for the hat you intend to press. Securely attach it to the lower platen mechanism.
5. Instrucciones de funcionamiento
Siga estos pasos para una transferencia de calor exitosa:
- Encendido: Turn on the main power switch located on the side of the machine.
- Establecer temperatura y tiempo: Use the digital control panel to set the desired temperature (0-570°F / 0-299°C) and time (0-999s) according to your transfer material's specifications. The machine will begin heating up.

Image: Step 1 of the heat transfer process, showing a laptop displaying an image and a printer with sublimation paper, indicating the first step of selecting and printing the desired image.
- Preparar sombrero: Place the hat onto the lower platen, ensuring it fits snugly. Smooth out any wrinkles.
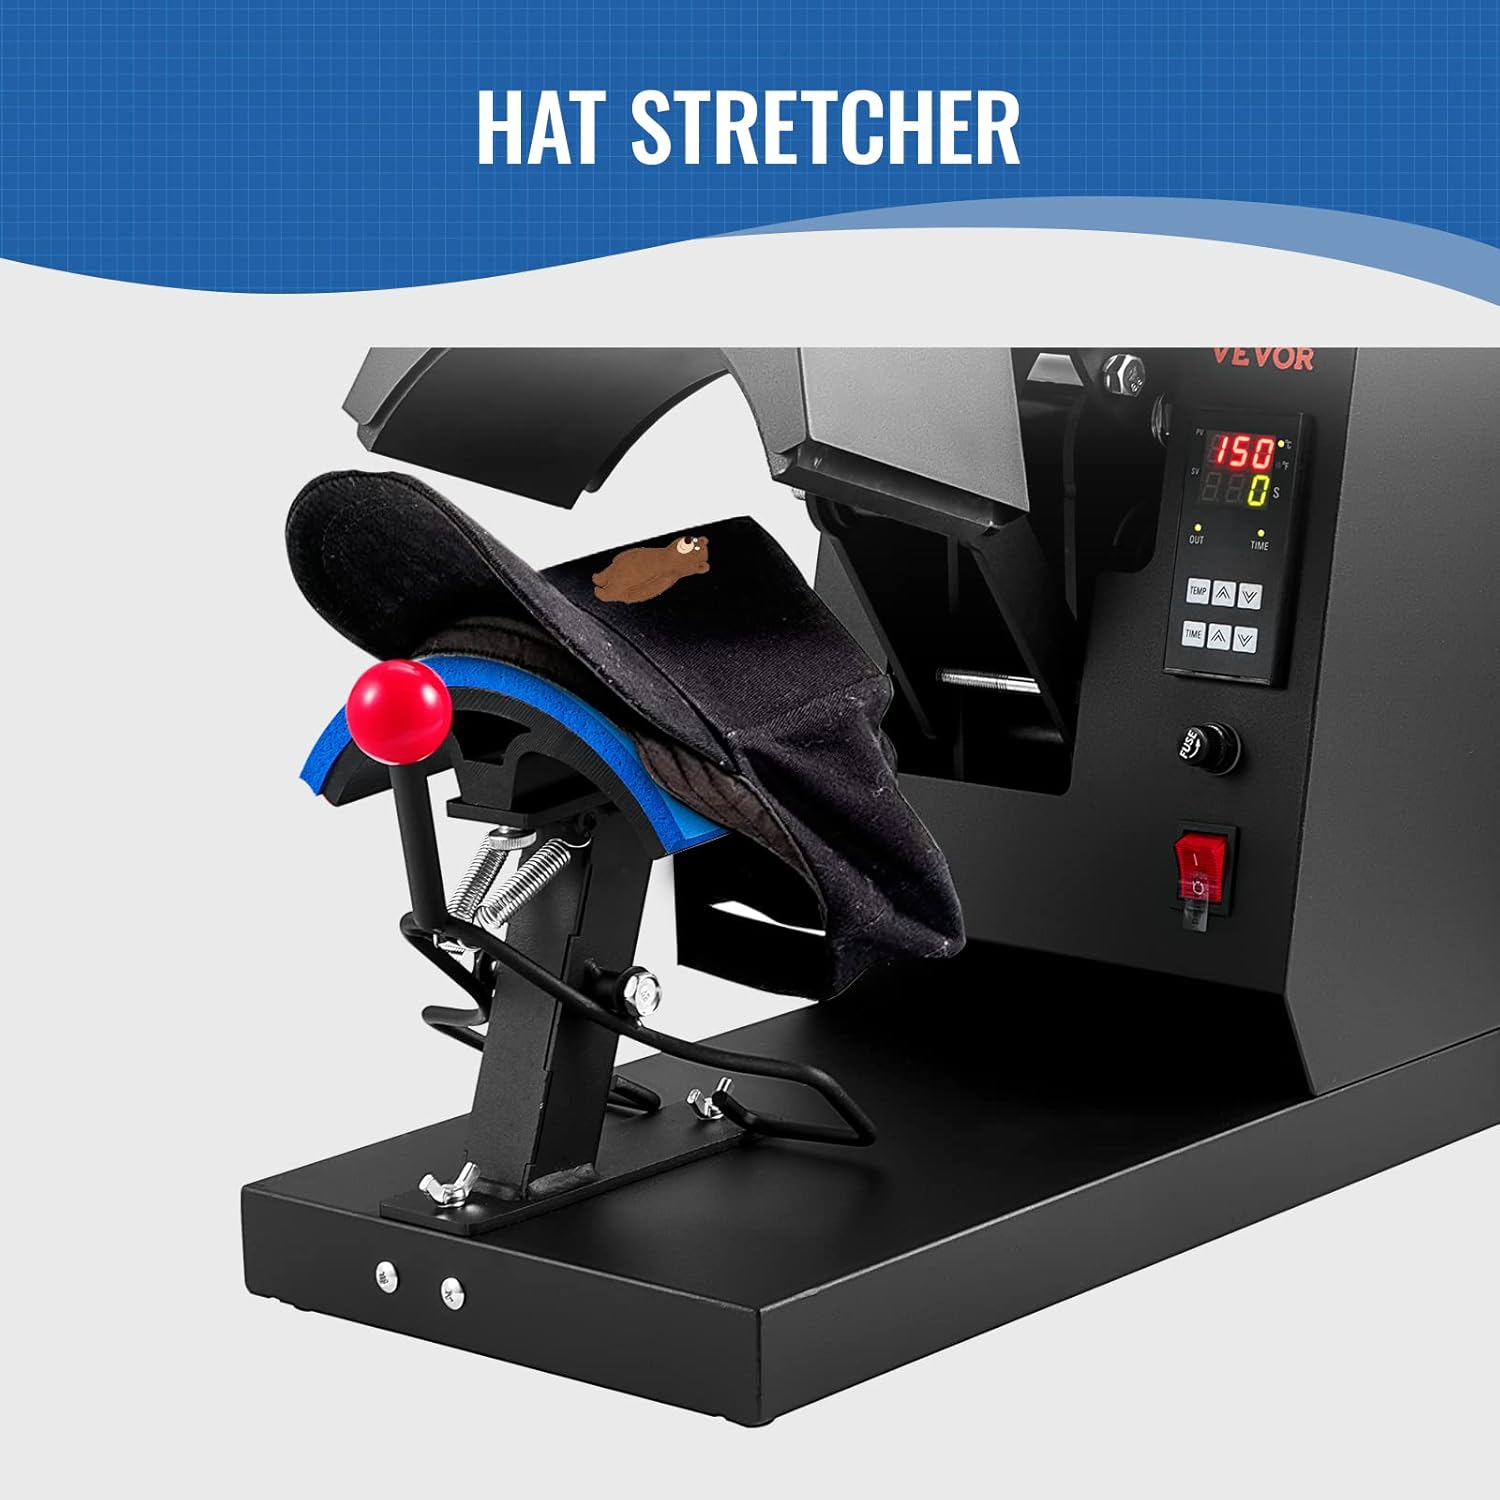
Image: A hat positioned on the hat stretcher component of the heat press, demonstrating how the hat is prepared for the transfer process.

Image: Step 2 of the heat transfer process, showing a white hat placed on the press pad with a printed sublimation paper design being applied to it.
- Apply Design: Position your transfer paper or vinyl design onto the hat. Use heat-resistant tape if necessary to secure it.
- Ajustar la presión: Use the pressure control knob to achieve the desired pressure. A firm, even pressure is typically required for most transfers.
Imagen: Un detalle view of the pressure control knob located on top of the heat press, illustrating how it can be adjusted to apply the desired pressure for different materials and transfer types.
- Prensa: Once the machine reaches the set temperature, pull down the handle to close the heating platen onto the hat. The timer will automatically start counting down.

Image: Step 3 of the heat transfer process, showing a hand adjusting the control panel and pulling down the handle of the heat press to initiate the transfer after setting time, temperature, and pressure.
- Quitarse el sombrero: When the timer alarms, lift the handle to open the platen. Carefully remove the hat and peel off the transfer paper/vinyl according to the material's instructions (hot peel or cold peel).

Image: Step 4 of the heat transfer process, illustrating the final action of taking out the finished hat from the heat press after the timer has completed its cycle.
Recommended Settings for Common Materials:
The machine is adaptable with Nylon, Linen, Cotton, Polyester Fiber and so on.
| Tipo de material | Temperatura | Tiempo |
|---|---|---|
| Papel de sublimación térmica de tinta | 356 °F / 180 °C | 60 segundos |
| HTV (vinilo de transferencia térmica) | 356 °F / 180 °C | 7s |
| Vinilo | 338 °F / 170 °C | 40 segundos |

Image: This image illustrates the "Stunning Effect Beyond Your Expectation" achieved with quick sublimation in 1 minute, showing examples of hats with transferred designs and recommended pressing times and temperatures for Thermal Dye-sublimation Paper, HTV, and Vinyl.
6. Mantenimiento
- Limpieza: Ensure the machine is unplugged and completely cool before cleaning. Use a soft, damp cloth to wipe down the exterior. For the heating platen, use a non-abrasive cleaner specifically designed for Teflon-coated surfaces if necessary.
- Almacenamiento: Guarde la prensa térmica en un entorno seco y libre de polvo cuando no esté en uso.
- Inspección regular: Revise periódicamente el cable de alimentación para detectar signos de desgaste o daños. Asegúrese de que todos los tornillos y conexiones estén bien fijados.
7. Solución de problemas
| Problema | Posible causa | Solución |
|---|---|---|
| La máquina no se enciende. | No power supply; power switch off; blown fuse. | Check power connection; turn on power switch; check and replace fuse if necessary. |
| La temperatura no alcanza el valor establecido. | Elemento calefactor defectuoso; ajuste de temperatura incorrecto. | Verify temperature setting; contact customer support if heating element is suspected. |
| La transferencia no se adhiere correctamente. | Insufficient temperature, time, or pressure; incorrect material type. | Adjust temperature, time, and pressure settings; ensure material is compatible with heat press. |
| Resultados de transferencia desiguales. | Uneven pressure; hat not properly positioned. | Adjust pressure knob for even distribution; ensure hat is flat on the platen. |
8. Especificaciones
| Dimensiones del producto | 19.69 x 10.16 x 14.25 pulgadas |
| Número de modelo del artículo | 4-in-1 Hat Heat Press |
| Código Postal | 840349916620 |
| Fabricante | VEVOR |
| ASIN | B0BWDC2KVM |
| Volumentage | 110 V 60 Hz |
| Fuerza | 580 W |
| Temperatura más alta | 0-570 ° F / 0-299 ° C |
| Intervalo de tiempo | 0-999 |

Image: A diagram illustrating the physical dimensions of the heat press (19.69 in / 50 cm length, 10.16 in / 25.8 cm width, 14.25 in / 36.2 cm height) and its electrical specifications (Voltage: 110V 60Hz, Power: 580W, Highest Temp: 0-570°F / 299°C, Time Range: 0-999s). It also shows the dimensions of the four heating pads.
9. Garantía y soporte
Para obtener información sobre la garantía y soporte técnico, consulte el sitio web oficial de VEVOR. webSitio web o contacte directamente con el servicio de atención al cliente. Conserve su recibo de compra como comprobante para cualquier reclamación de garantía.
Visita la tienda VEVOR: Tienda VEVOR en Amazon
Documentos relacionados - 4-in-1 Hat Heat Press
 |
Máquina de prensado térmico para gorras 4 en 1 VEVOR TLM2310-4S - Manual del usuario Manual de usuario completo de la prensa térmica para gorras VEVOR TLM2310-4S 4 en 1. Incluye características, especificaciones, instrucciones de uso, precauciones de seguridad y solución de problemas para la transferencia por sublimación en gorras. |
 |
Máquina de prensado térmico Seeutek: Guía del usuario y características Guía completa de la máquina de prensado térmico multiusos Seeutek, que cubre sus características, contenido del paquete, funcionamiento de la caja de control, instalaciones de accesorios para camisetas, gorras, tazas y platos, y consejos para la resolución de problemas. |
 |
Manual del usuario de la prensa portátil para sombreros JESIMAIK JM-H01 Manual de usuario de la prensa portátil para sombreros JESIMAIK, modelo JM-H01. Incluye instrucciones de seguridad, especificaciones, guía de funcionamiento, parámetros de impresión e información sobre la garantía. |
 |
Guía de usuario de la máquina de prensa de calor digital multifuncional VEVOR Guía de usuario completa para la máquina de prensa térmica digital multifuncional VEVOR, que cubre la identificación de piezas, los pasos de ensamblaje, el funcionamiento del controlador de temperatura, los métodos de impresión y la solución de problemas comunes de calidad de transferencia. |
 |
Guía de usuario de la máquina de prensa de calor digital multifuncional VEVOR Guía de usuario detallada para la máquina de prensa térmica digital multifuncional VEVOR, que cubre la configuración, el funcionamiento, el control de temperatura, las técnicas de impresión y la resolución de problemas para aplicaciones de sublimación y transferencia de calor. |
 |
Manual de usuario e instrucciones de la prensa térmica VEVOR TL1215/TL1515 Manual de usuario oficial de las prensas térmicas VEVOR, modelos TL1215 y TL1515. Ofrece instrucciones detalladas sobre el funcionamiento, la configuración, la calibración, las piezas de repuesto, la resolución de problemas y las normas de seguridad para la impresión por transferencia térmica. |
Ask a question about this manual
Ask about setup, troubleshooting, compatibility, parts, safety, or missing instructions. Manuals+ will review the question and use this page’s manual context to help answer it.