
1. Introducción
This manual provides detailed instructions for the operation and maintenance of your Jectse Smart RFID NFC Copier. This device is designed for reading, writing, and duplicating various RFID and NFC cards and keyfobs across multiple frequencies. Please read this manual thoroughly before use to ensure proper functionality and to prevent damage.
2. Producto terminadoview
The Jectse Smart RFID NFC Copier is a handheld device featuring a color display and a numeric keypad for easy operation. It supports a wide range of card types and frequencies.
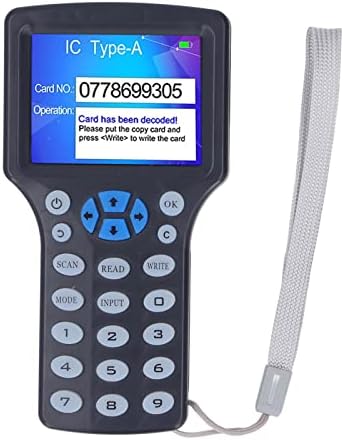
Figura 2.1: Jectse Smart RFID NFC Copier. This image shows the front view of the handheld copier with its color screen and keypad.
2.1 Componentes y controles
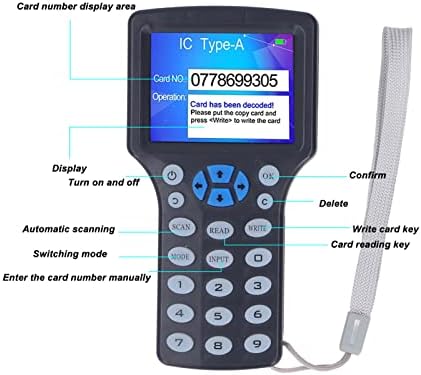
Figura 2.2: Labeled diagram of the copier's display and controls. Key elements include the display area, power button, OK button, delete button, scan button, read button, write button, mode switch, and input keys.
- Área de visualización: Shows card number, operation status, and messages.
- Botón de encendido: Enciende y apaga el dispositivo.
- Botón OK: Confirma selecciones o acciones.
- Botón C: Deletes input or cancels operations.
- Botón ESCANEAR: Initiates automatic scanning for card types.
- Botón LEER: Reads data from a card.
- Botón ESCRIBIR: Writes data to a card.
- Botón MODE: Cambia entre diferentes modos de funcionamiento.
- Botón de ENTRADA: Allows manual entry of card numbers.
- Teclado numérico (0-9): For entering data.
- Botones direccionales: For navigation on the display.
2.2 Contenido del paquete

Figura 2.3: Included accessories: USB data cable and two blue keyfobs. The package typically includes the copier unit, a USB data cable, and several writable keychains/cards.
- Jectse Smart RFID NFC Copier Unit
- Cable de datos USB
- Writable Keychains (Quantity may vary)
- Writable Cards (Quantity may vary)
3. Configuración
3.1 Fuente de alimentación
El dispositivo se puede alimentar de dos maneras:
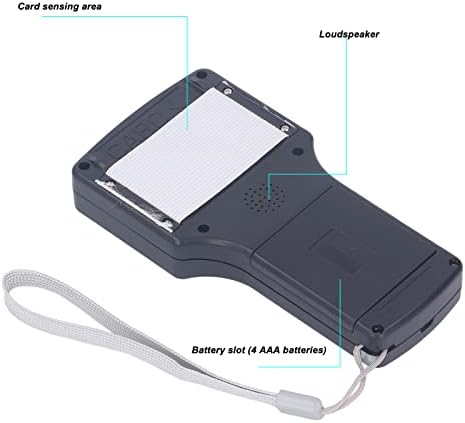
Figura 3.1: Trasero view of the copier, highlighting the battery slot and card sensing area. The battery compartment is located on the back of the device.
- Pilas AAA: Abra el compartimento de las baterías en la parte posterior del dispositivo e inserte 4 baterías AAA (no incluidas), asegurándose de la polaridad correcta.
- Fuente de alimentación USB: Connect the device to a computer or a USB power adapter using the provided USB data cable.
Presione el botón de encendido para encender el dispositivo. La pantalla se iluminará.
3.2 Connecting to a Computer (for Decryption)
For decrypting certain 13.56MHz encrypted cards, the device must be connected to a computer.
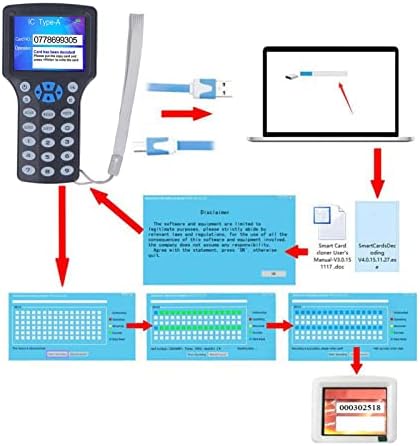
Figura 3.2: Connection diagram illustrating the copier connected to a computer via USB, with a representation of the software interface. The USB cable connects the copier to a computer for advanced functions like decryption and software interaction.
- Connect the USB data cable from the copier to an available USB port on your computer.
- The device may require specific software for decryption. Refer to the manufacturer's website or included documentation for software installation instructions.
4. Instrucciones de funcionamiento
4.1 Lectura de una tarjeta
- Encienda el dispositivo.
- Place the card or keyfob you wish to read on the card sensing area (located on the back of the device, refer to Figure 3.1).
- Presione el LEER botón.
- The display will show the card number and type if successful.
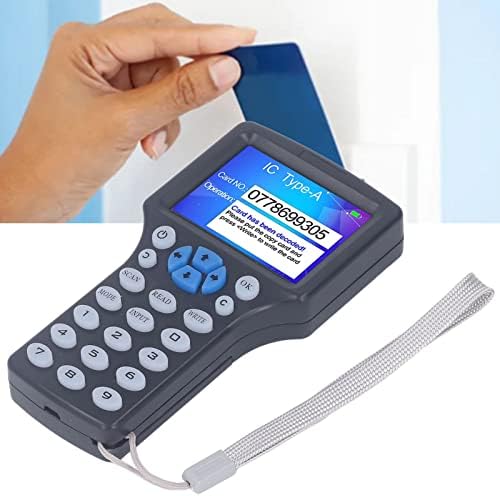
Figura 4.1: Demonstrating how to place a card on the copier for reading. The card is held flat against the back of the device.
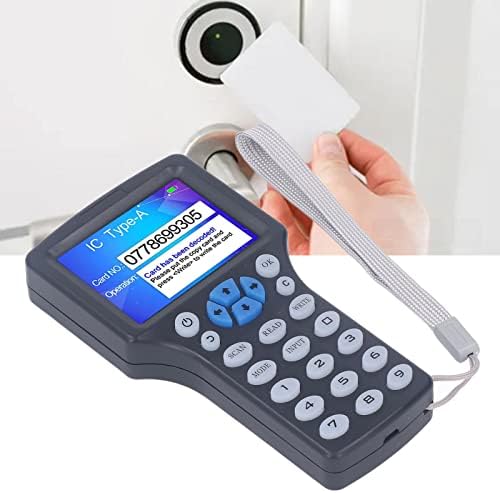
Figura 4.2: An alternative perspective of placing a card for reading. Ensure the card is positioned correctly over the sensing area.
4.2 Writing/Duplicating a Card
To duplicate a card, you must first read the source card, then write the data to a compatible writable card or keyfob.
- Follow the steps in Section 4.1 to read the source card. Ensure the card data is displayed on the screen.
- Remove the source card.
- Place a compatible writable card or keyfob (e.g., UID keychain, T5577 card) on the card sensing area.
- Presione el ESCRIBIR botón.
- The display will indicate if the writing process was successful.
Nota: For successful writing, ensure the target card is a writable type (e.g., UID cards for 13.56MHz, T5577 for 125KHz). Standard read-only cards cannot be written to.
4.3 Decrypting Encrypted 13.56MHz Cards
The device can decrypt most 13.56MHz encrypted cards when connected to a computer.
- Connect the copier to your computer via the USB cable (refer to Section 3.2).
- Launch the dedicated decryption software on your computer.
- Follow the software's instructions to initiate the decryption process. This typically involves placing the encrypted card on the copier's sensing area and allowing the software to analyze and decrypt the data.
- Once decrypted, the software will guide you through writing the decrypted data to a new writable card.
Importante: Decryption capabilities may vary depending on the encryption complexity and the specific software version. Not all encrypted cards can be decrypted.
4.4 Frequency Support
The copier supports reading and writing across a broad range of frequencies:
- 125 kHz
- 250 kHz
- 375 kHz
- 500 kHz
- 625 kHz
- 750 kHz
- 875 kHz
- 1000 kHz
- 13.56 MHz
It is compatible with various card types including ISO 14443 A cards, EM cards, T5577 cards, Ntag 213/215/216, and others.
5. Mantenimiento
- Limpieza: Utilice un paño suave y seco para limpiar el dispositivo. Evite usar limpiadores líquidos o materiales abrasivos.
- Almacenamiento: Guarde el dispositivo en un lugar fresco y seco, alejado de la luz solar directa y de temperaturas extremas.
- Reemplazo de batería: If using AAA batteries, replace all four batteries simultaneously when the low battery indicator appears on the display.
- Actualizaciones de software: Revise periódicamente las instrucciones del fabricante. website for any available software or firmware updates for enhanced functionality or compatibility.
6. Solución de problemas
| Problema | Posible causa | Solución |
|---|---|---|
| El dispositivo no se enciende. | Low or depleted batteries; USB cable not connected properly. | Replace AAA batteries or ensure USB cable is securely connected to a power source. |
| Cannot read a card. | Card not placed correctly; card type not supported; card damaged. | Ensure the card is flat against the sensing area. Try another card. Verify card type compatibility. |
| Cannot write to a card. | Target card is not writable; data not read correctly from source card; target card damaged. | Ensure the target card is a compatible writable type (e.g., UID, T5577). Re-read the source card. Try a different writable card. |
| Decryption fails for 13.56MHz card. | Card encryption too complex; software not installed or updated; device not connected to PC. | Ensure the device is connected to a PC with the correct software. Update software. Note that some advanced encryption may not be supported. |
| La pantalla está en blanco o no responde. | Power issue; device malfunction. | Check power supply. Try restarting the device. If the problem persists, contact customer support. |
7. Especificaciones
| Característica | Detalle |
|---|---|
| Nombre del modelo | Jectsegr19nkhvsb |
| Frecuencias admitidas | 125KHz, 250KHz, 375KHz, 500KHz, 625KHz, 750KHz, 875KHz, 1000KHz, 13.56MHz |
| Mostrar | HD 2.8 inch full color screen |
| Fuente de alimentación | 4 x AAA batteries or USB power supply |
| Conectividad | USB tipo A |
| Compatibilidad del sistema operativo | WinCE 5, Windows 98, Windows Vista (for PC connection/software) |
| Peso del artículo | 11.6 onzas |
| Dimensiones del paquete | 7.56 x 6.26 x 2.32 pulgadas |
| Característica especial | Diseño compacto |
8. Garantía y soporte
For warranty information and technical support, please refer to the official Jectse webSitio web o contacte a su vendedor. Conserve su recibo de compra como comprobante.
Manufacturer: Jectse