
1. Introducción
The Dasqua Dial Gauge is a high-precision measuring instrument designed for accurate measurement of object dimensions, thicknesses, and axial displacement. Manufactured and calibrated according to DIN878 standards, this tool ensures precision and stability for various industrial and laboratory applications.
Key features include a jewel bearing for smooth, precise movement and reduced friction, and an integrated copper bushing that minimizes wear and extends the instrument's lifespan. With a measurement range of 0-10 mm / 0-2 inches and a resolution of 0.01 mm / 0.0005 inches, it offers an exceptional accuracy of 0.017 mm / 0.0005 inches. Its high sensitivity and rapid response allow for the detection of minute deviations, making it ideal for checking surface flatness, parallelism, axial displacement, tool adjustment, and perpendicularity.

Figure 1: Dasqua Dial Gauge, general view.
2. Componentes incluidos
The Dasqua Dial Gauge package includes the following items:
- Dasqua Dial Gauge (Model 0-10)
- Replacement Contact Point
- ABS Storage Case
- Tarjeta de garantía
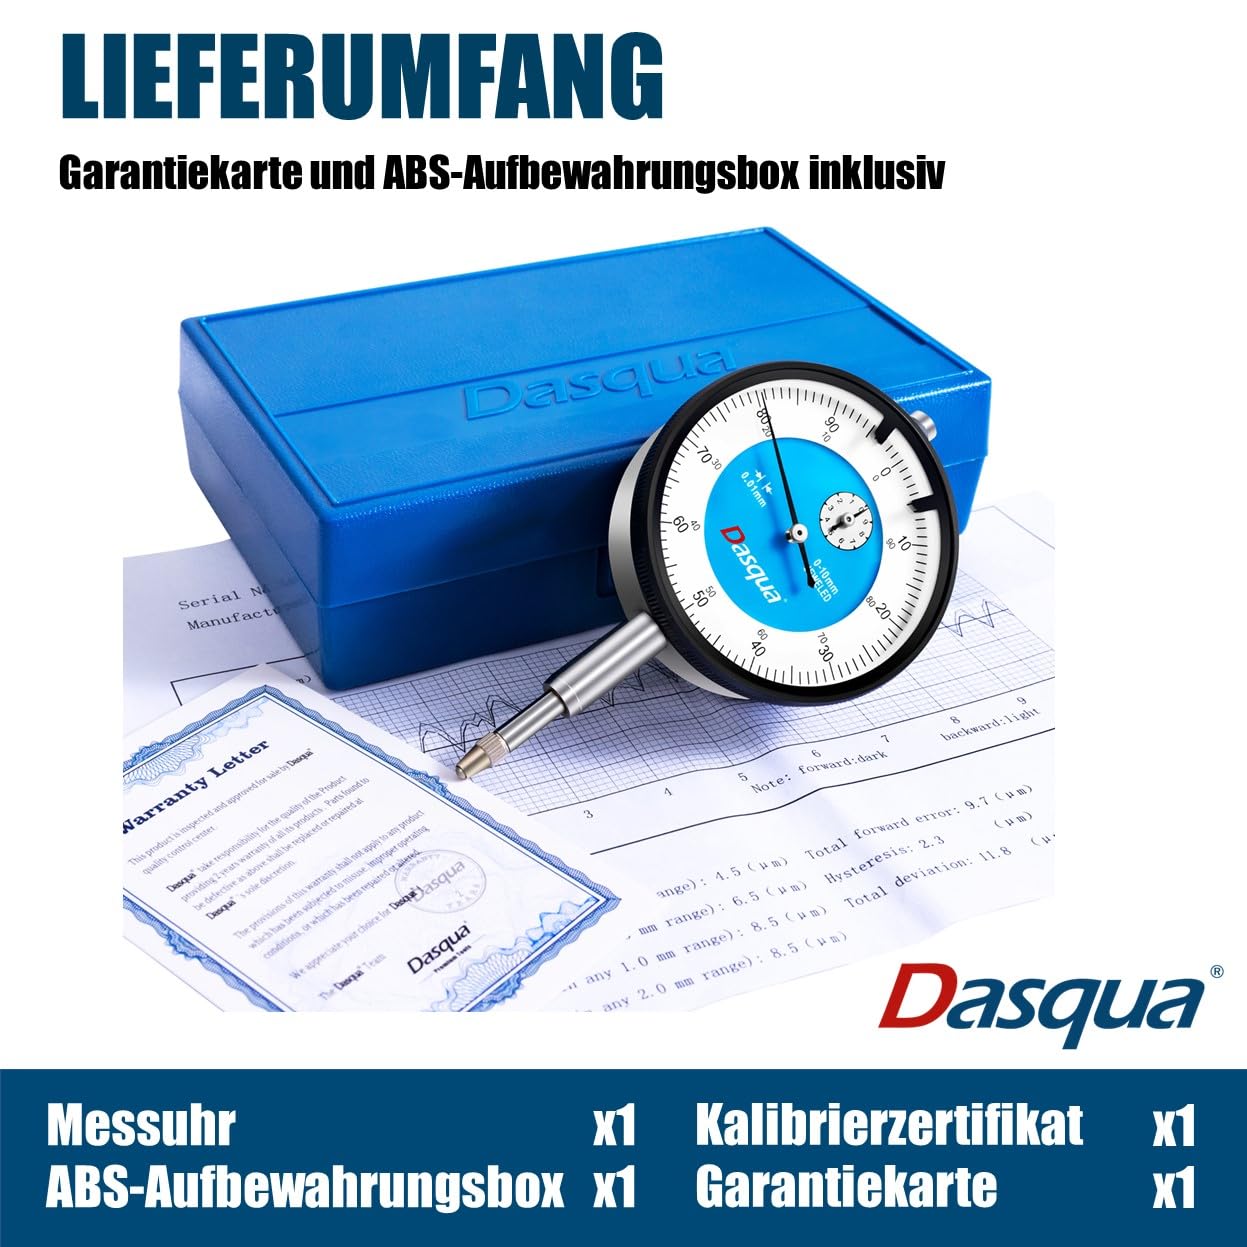
Figure 2: Included components: Dial Gauge, warranty card, and ABS storage case.
3. Configuración
- Desembalaje: Carefully remove the dial gauge from its ABS storage case. Inspect the instrument for any visible damage.
- Montaje: Securely attach the dial gauge to a suitable stand or fixture using its stem. Ensure the mounting is rigid to prevent any movement or vibration during measurement, which could affect accuracy.
- Limpieza: Before initial use, gently wipe the measuring spindle and contact point with a clean, lint-free cloth. Avoid using harsh solvents or abrasive materials.
- Punto de contacto: Verify that the standard contact point is firmly screwed into the measuring spindle. A spare contact point is provided for replacement if the original becomes worn or damaged.
- Puesta a cero:
- Position the dial gauge so its contact point rests on a known reference surface or a master workpiece.
- Gently lower the gauge until the contact point makes firm contact and the spindle is slightly compressed.
- Rotate the outer bezel of the dial until the main pointer aligns precisely with the "0" mark.
- If the gauge features tolerance indicators, adjust these markers to define your desired acceptable measurement range.
4. Instrucciones de funcionamiento
- Preparación: Ensure the workpiece surface to be measured is clean, dry, and free of any debris or contaminants that could affect accuracy.
- Posicionamiento: Carefully place the dial gauge's contact point onto the surface of the object you intend to measure.
- Medición:
- For Comparative Measurements: Zero the gauge on a master part or a known reference dimension. Then, move the gauge to the workpiece. The deviation from the zero point indicates the difference in dimension between the master and the workpiece.
- For Direct Measurements (primarily for spindle travel): The main pointer indicates the measurement value relative to the zero point. The small counter hand indicates full revolutions of the main pointer (e.g., each revolution may represent 1mm of spindle travel).
- Leyendo la escala: Read the value indicated by the main pointer on the large dial. The small counter dial indicates the number of full millimeters (or inches) traveled by the spindle.
- Detecting Deviations: Observe the pointer movement as the gauge traverses a surface to detect variations in flatness, parallelism, or runout. The high sensitivity of the gauge allows for the detection of the finest deviations.
- Tolerance Indication: If tolerance markers have been set during setup, you can easily identify if the measured value falls within the acceptable range by observing the pointer's position relative to these markers.
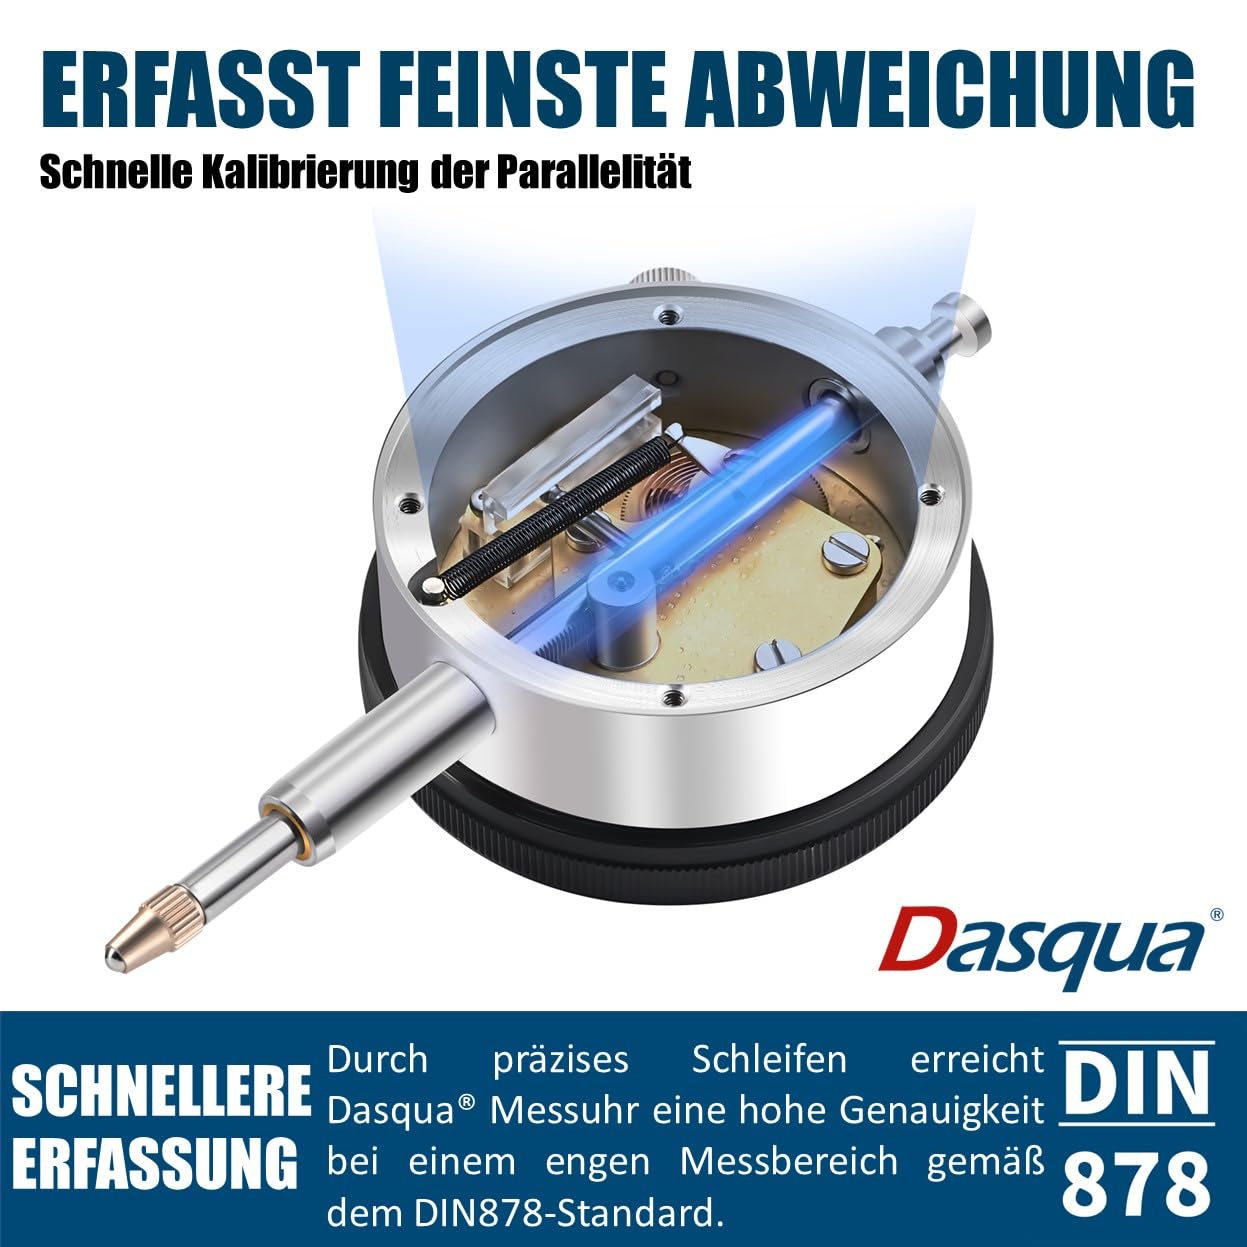
Figure 3: Internal mechanism demonstrating detection of fine deviations.

Figure 4: Jewel bearing for enhanced precision and smooth operation.
5. Mantenimiento
- Limpieza: After each use, wipe the gauge clean with a soft, dry, lint-free cloth. For stubborn dirt, a small amount of instrument cleaning fluid can be applied to the cloth, not directly to the gauge. Ensure no liquid enters the internal mechanism.
- Lubricación: The internal mechanism of the Dasqua Dial Gauge is factory-lubricated. Do not attempt to lubric lubricate internal components unless specifically instructed by Dasqua service personnel. Unauthorized lubrication can attract dust and impair performance.
- Almacenamiento: Always store the dial gauge in its original ABS storage case when not in use. Keep it in a dry, dust-free environment, away from direct sunlight, extreme temperatures, high humidity, and corrosive substances.
- Manejo: Avoid dropping or subjecting the gauge to any form of impact, as this can severely affect its accuracy and internal components. Handle with care.
- Calibración: Regular calibration by a qualified and accredited laboratory is highly recommended to maintain the instrument's accuracy, especially for critical measurement applications.

Figure 5: Copper bushing for extended durability and reduced wear.
6. Solución de problemas
This section addresses common issues you might encounter with your Dasqua Dial Gauge.
| Asunto | Posible causa | Solución |
|---|---|---|
| Pointer does not return to zero consistently. | Dirt or debris on the measuring spindle or contact point. | Clean the spindle and contact point thoroughly with a lint-free cloth. |
| Gauge not securely mounted. | Ensure the gauge is rigidly clamped to its stand or fixture. | |
| Daño en el mecanismo interno. | Contact Dasqua support for repair or replacement. | |
| Lecturas inexactas. | Improper zeroing. | Re-zero the gauge carefully on a known reference surface. |
| Worn or damaged contact point. | Replace the contact point with the spare provided. | |
| Gauge is out of calibration. | Arrange for professional calibration by a qualified laboratory. | |
| Sticking or jerky pointer movement. | Dust or foreign particles in the mechanism. | Perform gentle external cleaning. If the problem persists, professional service may be required. |
| Damage from impact. | Contact Dasqua support for inspection and repair. |
7. Especificaciones
| Fabricante | Dasqua |
| Código del fabricante | 5111-0000 |
| Peso del producto | 290 gramos |
| Dimensiones del paquete | 14.2 x 9 x 4.1 cm |
| Número de modelo del producto | 0-10 |
| Material | Plastic, Metal, Precious Stones |
| Unidades por paquete | 1 |
| Precisión de la medición | 0.017 mm / 0.0005'' |
| Componentes incluidos | Dial Gauge, Replacement Contact Point, ABS Storage Case, Warranty Card |
| Pilas incluidas | No |
| Pilas necesarias | No |
| ASIN | B0C8J1DPVL |
| Primera fecha disponible | 24 de junio de 2023 |
8. Garantía
Every Dasqua measuring tool undergoes rigorous quality control and is calibrated and approved by internationally recognized CNAS-qualified in-house laboratories, ensuring its precision and adherence to industry standards.
Dasqua products are covered by a garantía de dos años from the date of purchase. In the unlikely event of defects or operational problems within this warranty period, Dasqua is committed to resolving the issue or replacing the product free of charge. Your satisfaction is our ultimate goal.

Figure 6: 2-Year Warranty and CNAS Calibration.
9. Soporte
For technical assistance, inquiries about spare parts, or to initiate a warranty claim, please contact Dasqua customer service. Refer to the warranty card included in your package for specific contact details, or visit the official Dasqua webSitio para obtener la información de soporte más actualizada.
When contacting support, please be prepared to provide the following information to expedite assistance:
- Número de modelo del producto: 0-10
- ASIN: B0C8J1DPVL
- Fecha de compra
- Una descripción detallada del problema.