1. Introducción
Thank you for choosing the Crivit Auriol Radio-Controlled Projection Alarm Clock. This device combines a precise radio-controlled clock with a clear LCD display, dual alarms, and a convenient projection feature. This manual will guide you through the setup, operation, and maintenance of your new alarm clock.

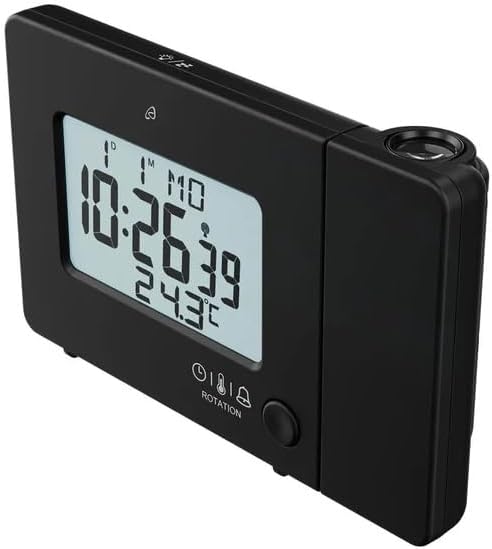
Frente view of the alarm clock displaying time, date, and temperature.
2. Instrucciones de seguridad
- Lea todas las instrucciones detenidamente antes de usar y consérvelas para futuras consultas.
- No exponga el dispositivo a temperaturas extremas, luz solar directa o humedad alta.
- Evite dejar caer o someter el dispositivo a impactos fuertes.
- No intente desmontar ni reparar el dispositivo usted mismo. Contacte con personal de servicio técnico cualificado.
- Mantenga las pilas fuera del alcance de los niños. Deseche las pilas usadas según la normativa local.
- Use only the provided AC adapter or one with identical specifications.
3. Contenido del paquete
Por favor revise el paquete para ver los siguientes artículos:
- Crivit Auriol Radio-Controlled Projection Alarm Clock (Model 373928)
- Adaptador de corriente alterna
- Baterías (preinstaladas o separadas)
- Manual de usuario (este documento)

Included AC power adapter.
4. Características del producto
- Tiempo controlado por radio: Automatic time synchronization for precise timekeeping.
- Función de proyección: Projects time, alarm times, or ambient temperature onto a wall or ceiling.
- Pivoting Projection Arm: Adjustable projection angle with easy focus adjustment.
- Pantalla LCD: Clear screen showing time, day, month, week number/day of the week, and indoor temperature.
- Alarmas duales: Two independent alarm settings with snooze function.
- Sensor táctil: Activates short-term projection and screen backlight.
- Opciones de energía: Operates via AC adapter or batteries.
- Puerto de carga USB-A: Convenient 5V, 800mA output for charging external devices.
- Brillo ajustable: Customizable display brightness.
5. Identificación de componentes
Frente View:
Frente view con pantalla LCD.
- Pantalla LCD: Shows time, date, temperature, alarm status, and radio control signal.
- Touch Sensor Area: Located above the display, for temporary backlight and projection.
- Projection Indicator: Icon indicating projection is active.
- Indicadores de alarma: Iconos para Alarma 1 y Alarma 2.
- Botón de rotación: Adjusts projection orientation.
Lado View (Projection Arm):
Lado view with projection arm extended.
- Brazo de proyección: Pivots to direct the projection.
- Rueda de enfoque: Ajusta la claridad de la imagen proyectada.
- Lente de proyección: Emits the time/temperature display.
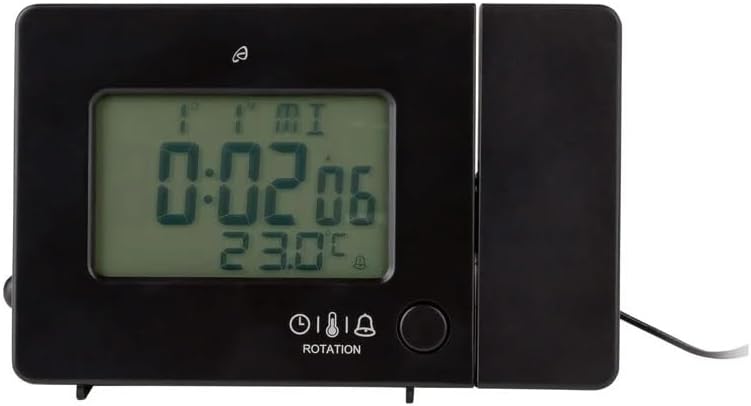
Trasero View:

Trasero view with control buttons and ports.
- -/WEEK Button: Decreases values, sets week display.
- +/ZONE Button: Increases values, sets time zone.
- Botón °C/°F: Alterna la unidad de temperatura.
- Botón LANG: Selects display language for day of the week.
- Botón 12/24: Toggles 12/24 hour format.
- Botón MODE: Cycles through settings modes (Time, Alarm 1, Alarm 2).
- Botón de ajuste: Enters setting mode for current display.
- Botón de reinicio: Resets the device to factory defaults (use a pointed object).
- Compartimento de la batería: Para baterías de respaldo.
- Puerto de entrada de CC: Para conectar el adaptador de corriente CA.
- Puerto de salida USB-A: Para cargar dispositivos externos.
6. Configuración
6.1. Encendido
The alarm clock can be powered by either the included AC adapter or batteries for backup.
- Instalación de la batería: Open the battery compartment on the rear of the unit. Insert the included batteries, observing the correct polarity (+/-). Batteries primarily serve as backup in case of power outage.
- Conexión del adaptador de CA: Connect the small plug of the AC adapter into the DC IN port on the back of the alarm clock. Plug the AC adapter into a standard wall outlet. The display will light up.
Alarm clock connected to power.
6.2. Configuración inicial y sincronización del control por radio
Upon first power-up or after a reset, the clock will automatically attempt to synchronize with the radio-controlled time signal (DCF77). This process can take several minutes to an hour, depending on your location and signal strength. During synchronization, a radio tower icon will flash on the display.
- Place the clock near a window for better signal reception.
- Evite colocarlo cerca de dispositivos electrónicos que puedan causar interferencias.
- Once synchronized, the radio tower icon will appear solid on the display.
If the radio signal is not received, you may need to set the time manually (see Section 7.1).
6.3. Basic Settings (if not automatically set or for adjustment)
Presione el COLOCAR Botón para entrar en el modo de configuración. Utilice el -/WEEK y +/ZONE botones para ajustar valores y COLOCAR para confirmar y pasar al siguiente ajuste.
- Huso horario: Adjust if you are not in the standard time zone for the radio signal.
- Formato de 12/24 horas: Presione el 12/24 button to toggle between 12-hour (with AM/PM) and 24-hour formats.
- Unidad de temperatura: Presione el ° C / ° F para cambiar entre grados Celsius y Fahrenheit.
- Idioma de la pantalla: Presione el IDIOMA button to select the language for the day of the week display (5 languages available).
7. Instrucciones de funcionamiento
7.1. Configurar la hora manualmente
If the radio-controlled time signal is weak or unavailable, you can set the time manually:
- Mantenga pulsado el COLOCAR Botón hasta que los dígitos de la hora parpadeen.
- Utilice el -/WEEK y +/ZONE Botones para ajustar la hora.
- Prensa COLOCAR to confirm and move to minutes, then year, month, and day.
- Prensa COLOCAR again to exit manual time setting.
7.2. Configuración de alarmas (Alarma 1 y Alarma 2)
El reloj cuenta con dos alarmas independientes.
- Presione el MODO button once to display Alarm 1 time, or twice for Alarm 2 time. The corresponding alarm icon (e.g., A1) will flash.
- Mientras se muestra la hora de la alarma, mantenga presionado el botón COLOCAR Botón hasta que los dígitos de la hora parpadeen.
- Utilice el -/WEEK y +/ZONE Botones para ajustar la hora.
- Prensa COLOCAR to confirm and move to minutes. Adjust minutes using -/WEEK y +/ZONE.
- Prensa COLOCAR nuevamente para confirmar y salir de la configuración de la alarma.
- Para activar/desactivar una alarma, presione el botón MODO button to display the desired alarm, then press the +/ZONE button. The alarm icon (bell) will appear/disappear on the display.
7.3. Función de repetición
Cuando suene una alarma, toque el Área del sensor táctil o presione el DORMITOR / LUZ button (if available, otherwise use the touch sensor) to activate the snooze function. The alarm will pause for approximately 5 minutes and then sound again. To stop the alarm completely, press any other button.
7.4. Función de proyección
The alarm clock can project the time, alarm times, or ambient temperature onto a wall or ceiling.
- Activar proyección: The projection is continuously active when powered by the AC adapter. If running on batteries, touch the Área del sensor táctil for short-term projection.
- Ajustar el ángulo de proyección: Pivot the projection arm to direct the image to your desired location.
- Ajustar el enfoque: Utilice el Rueda de enfoque on the projection arm to sharpen the projected image.
- Change Projected Content: Presione el MODO button repeatedly to cycle through projecting Time, Alarm 1, Alarm 2, or Temperature.
- Girar proyección: Presione el ROTACIÓN button to rotate the projected image by 90-degree increments (4 orientations available).

Time projected onto a surface.
7.5. Luz de fondo de la pantalla
When powered by the AC adapter, the display backlight is continuously on. When running on batteries, touch the Área del sensor táctil to activate the backlight for a few seconds.
7.6. Salida de carga USB
The USB-A port on the back of the unit provides a 5V, 800mA output for charging small electronic devices like smartphones or tablets. Connect your device's USB charging cable to this port.
8. Mantenimiento
- Limpieza: Limpie el dispositivo con un paño suave y seco. No utilice limpiadores abrasivos ni disolventes.
- Reemplazo de batería: If using batteries for backup, replace them annually or when the display becomes dim during power outages. Asegúrese de que la polaridad sea correcta.
- Almacenamiento: Si va a almacenar el dispositivo durante un período prolongado, retire las baterías para evitar fugas.
9. Solución de problemas
| Problema | Posible causa | Solución |
|---|---|---|
| La pantalla está en blanco o tenue. | No power, dead batteries, or AC adapter not connected. | Ensure AC adapter is securely connected. Replace batteries if using for backup. |
| Radio-controlled time not synchronizing. | Weak signal, interference, or incorrect time zone. | Move the clock to a window or open area. Avoid electronic devices. Manually set time if necessary. Check time zone setting. |
| La proyección es borrosa. | Enfoque no ajustado. | Ajustar el Rueda de enfoque on the projection arm. |
| La alarma no suena. | Alarma no activada o configurada incorrectamente. | Ensure the alarm icon is visible on the display. Recheck alarm time settings. |
| La carga USB no funciona. | Device not properly connected, or device requires more power than 800mA. | Ensure the USB cable is securely connected. Check if your device's charging requirements exceed 5V/800mA. |
10. Especificaciones

Dimensiones del producto.
- Número de modelo: 373928
- Dimensiones (L x An x Al): 15 x 3.81 x 9.5 cm (approx. 15l x 9.5H centimeters)
- Material: Plástico
- Tipo de pantalla: LCD digital
- Fuente de energía: AC Adapter (included) or Batteries (included)
- Salida USB: 5 V, 800 mA
- Características especiales: Adjustable brightness, Snooze, Projection, Radio-controlled time
- Tipo de movimiento: Cuarzo
- Tipo de montaje: Superficie de la mesa
- Uso interior / exterior: Interior
11. Garantía y soporte
This Crivit Auriol Projection Alarm Clock comes with a standard manufacturer's warranty. Please refer to the warranty card included in your package or contact your retailer for specific warranty terms and conditions.
For technical support or inquiries, please contact the customer service department of your retailer or the Crivit support line as indicated on the product packaging or official websitio.