ProCom ML250TPA-B
Manual de instrucciones del calentador de placas infrarrojo sin ventilación de propano líquido ProCom Heating ML250TPA-B de 25 000 BTU
Model: ML250TPA-B
1. Producto terminadoview
The ProCom Heating ML250TPA-B is a 25,000 BTU Liquid Propane Ventless Infrared Plaque Heater designed to provide efficient heating for indoor spaces up to 1150 sq. ft. This heater features a thermostat control for adjustable heat settings and can be used with included base feet for floor placement or mounted on a wall.

Imagen 1.1: Frente view of the ProCom ML250TPA-B heater with base feet.
Características principales:
- 25,000 BTU Output: Calienta áreas de hasta 1150 pies cuadrados.
- Diseño sin ventilación: No chimney or flue required.
- Infrared Plaque Heating: Provides radiant heat.
- Control del termostato: High/Medium/Low settings for precise temperature management.
- Push Button Ignition: For easy startup.
- Sensor de agotamiento de oxígeno (ODS): Automatically shuts off the heater if oxygen levels drop.
- Instalación flexible: Includes base feet for floor standing and hardware for wall mounting.
- No requiere electricidad: Operates independently of electrical power, ideal for outages.
2. Información de seguridad
ADVERTENCIA: La instalación, el ajuste, la alteración, el servicio o el mantenimiento inadecuados pueden causar daños a la propiedad, lesiones o la muerte. Lea completamente las instrucciones de instalación, operación y mantenimiento antes de instalar o reparar este equipo.
- This is a ventless appliance. It uses air from the room in which it is installed. Provisions for adequate combustion and ventilation air must be provided.
- Always ensure proper ventilation when operating this heater. Consider using a carbon monoxide detector for added safety.
- No almacene ni utilice gasolina u otros vapores y líquidos inflamables cerca de este o cualquier otro aparato.
- Mantenga el área alrededor del calentador limpia y libre de materiales combustibles, gasolina y otros vapores y líquidos inflamables.
- Never operate the heater in an area where it may be exposed to water.
- The Oxygen Depletion Sensor (ODS) is a safety feature that will shut off the heater if oxygen levels in the room become too low. Do not tamper con o sin pasar por este dispositivo de seguridad.
- Ensure the heater is installed on a level, stable surface if using base feet, or securely mounted to a wall according to instructions.
- Keep children and pets away from the heater, especially during operation, as surfaces can become very hot.
3. Configuración e instalación
3.1 Desembalaje e inspección
Carefully remove the heater from its packaging. Inspect the unit for any shipping damage. If any damage is found, do not attempt to install or operate the heater. Contact your retailer or ProCom customer service immediately.
3.2 Elegir una ubicación
Select a location that is clear of combustible materials. Ensure adequate clearance from walls and furniture as specified in the full manual. This heater is designed for indoor use only.
3.3 Assembly (Base Feet or Wall Mount)
The heater comes with both base feet for floor placement and hardware for wall mounting. Choose the installation method that best suits your needs.

Image 3.1: The heater package includes base feet and a wall bracket for flexible installation.
- For Floor Standing: Attach the provided base feet to the bottom of the heater using the supplied screws. Ensure the heater is stable and level.
- Para montaje en pared: Use the included wall bracket and hardware to securely mount the heater to a suitable wall surface. Follow the detailed instructions in the complete manual for proper wall mounting to ensure stability and safety.
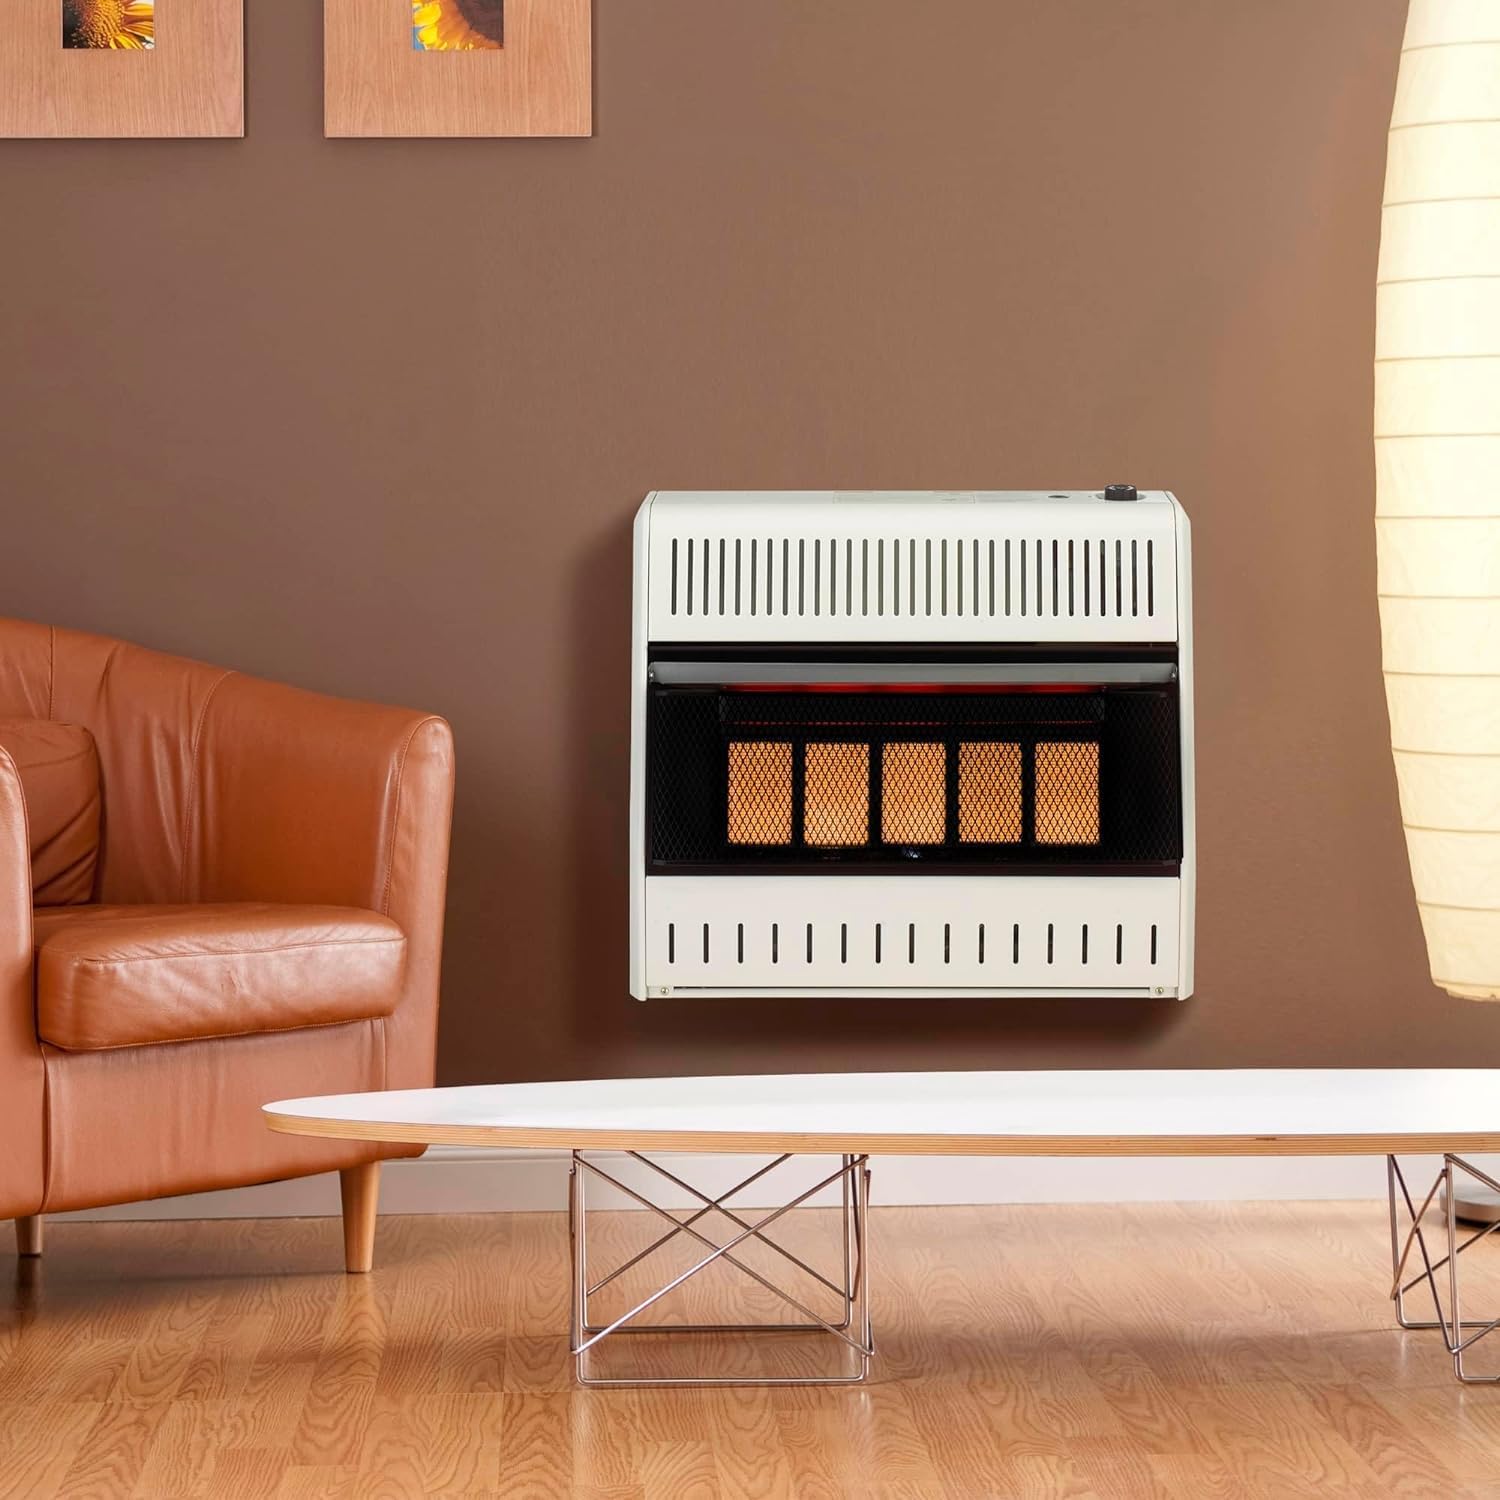
Imagen 3.2: Example of the ProCom ML250TPA-B heater installed on a wall.
3.4 Propane Gas Connection
This heater operates on Liquid Propane (LP) gas. Connection to the LP supply must be performed by a qualified service person in accordance with local codes and ordinances. The heater does not require electricity for operation.
- A 3/8" Flare x 3/8" NPT Male brass 90-degree elbow and a 12 FT Propane Regulator Hose with a female flare nut end may be required for connecting to a 20 lb propane tank, especially if using the base feet to ensure proper clearance and prevent kinking of the hose.
- Ensure all connections are tight and leak-free. Perform a leak test with a soap solution before initial operation.
4. Instrucciones de funcionamiento
4.1 Panel de control terminadoview

Image 4.1: The control panel features a Piezo Ignition button and a thermostat knob with variable heat settings.
The heater features a simple control panel with a Piezo Ignition button and a thermostat control knob. The thermostat knob allows you to select heat settings from "OFF PILOT" to various heat levels (e.g., 1-5 or High/Medium/Low).
4.2 Initial Startup Procedure
IMPORTANT: For the very first use, or after the heater has been disconnected from the propane supply for an extended period, the initial ignition may take longer than usual. This is normal as air needs to be purged from the gas lines.
- Ensure the propane supply valve is fully open.
- Turn the thermostat control knob to the "PILOT" position.
- Press and hold the thermostat control knob down firmly.
- While holding the knob down, repeatedly press the Piezo Ignition button until the pilot flame ignites. You may need to hold the knob down for several minutes (up to 10 minutes for the very first startup) to allow gas to reach the pilot.
- Once the pilot flame is lit, continue to hold the thermostat control knob down for approximately 30-60 seconds to allow the thermocouple to heat up and hold the pilot flame.
- Release the knob. If the pilot flame extinguishes, repeat steps 3-5.
- Once the pilot flame is stable, turn the thermostat control knob to your desired heat setting (e.g., 3, 4, 5, or High/Medium/Low). The main burner will ignite.
NOTE: It is recommended to perform the first ignition outdoors or in a well-ventilated area, as a thin oil layer on internal components may burn off, causing a temporary odor or light smoke.
4.3 Ajuste de la salida de calor
Rotate the thermostat control knob to adjust the heat output. Higher numbers or "High" settings will provide more heat, while lower numbers or "Low" settings will reduce the heat output. The heater will cycle on and off to maintain the set temperature.
Video 4.2: A demonstration of the ProCom Natural Gas Ventless Infrared Plaque Heater, highlighting its features and operation. Note: This video shows a natural gas model, but the operational principles for ignition and thermostat control are similar for the propane model.
5. Mantenimiento
Regular maintenance ensures the safe and efficient operation of your ProCom heater. Always disconnect the heater from the propane supply and allow it to cool completely before performing any maintenance.
- Limpieza: Mantenga limpio el exterior del calentador. Use un paño suave y seco.amp cloth to wipe down surfaces. Do not use abrasive cleaners or solvents. Ensure the air intake and exhaust vents are free from dust and debris.
- Inspección del piloto y del quemador: Periodically inspect the pilot and main burner for any obstructions or unusual flame patterns. If the pilot flame appears weak or yellow, or if the main burner flames are not blue, contact a qualified service technician.
- Inspección de la línea de gas: Regularly check the gas supply line and connections for any signs of wear, damage, or leaks.
- Almacenamiento: If storing the heater for an extended period, disconnect it from the propane supply, clean it thoroughly, and store it in a dry, safe place.
6. Solución de problemas
Antes de ponerse en contacto con el servicio de atención al cliente, vuelva aview Los siguientes problemas comunes y sus soluciones:
| Problema | Posible causa | Solución |
|---|---|---|
| Heater does not ignite or pilot light won't stay lit. |
|
|
| Heater produces an odor or light smoke on first use. | Protective oil coating burning off. | This is normal for initial operation. Ensure good ventilation. Odor/smoke should dissipate quickly. |
| Control knob does not function correctly at low settings (e.g., 1 or 2). | Possible manufacturing tolerance or design characteristic. | Ensure the knob is set to a position where the burner reliably ignites (e.g., 3 or higher). If persistent, contact customer support. |
| Heater makes a weird noise during ignition. | Intermittent ignition issue or gas flow problem. | Ensure gas supply is stable. If noise persists or ignition is unreliable, contact a qualified technician. |
7. Especificaciones
| Marca | ProCom |
| Número de modelo | ML250TPA-B |
| Tipo de combustible | Propano líquido |
| Salida BTU | 25,000 BTU |
| Cobertura de calefacción | Hasta 1150 pies cuadrados. |
| Característica especial | Overheat Protection, Oxygen Depletion Sensor (ODS) |
| Color | Blanco |
| Factor de forma | Pedestal (with base feet) |
| Uso en interiores y exteriores | Interior |
| Dimensiones del producto (Pr. x An. x Al.) | 8" de profundidad x 26.63" de ancho x 23.5" de alto |
| Tipo de montaje | Montaje en suelo, montaje en pared |
| Número de velocidades | 3 (High/Medium/Low thermostat settings) |
| Ajuste de temperatura mínima | 40 grados Fahrenheit |
| Peso del artículo | 34.6 libras |
| Código Postal | 848660008338 |
8. Garantía y soporte
For warranty information, please refer to the documentation included with your product or visit the official ProCom webSitio. Es importante conservar el comprobante de compra para cualquier reclamación de garantía.
Note on Warranty Claims: Some warranty processes may require specific documentation, such as a professional pressure reading of your propane system, to validate claims. Please review the warranty terms carefully.
For technical assistance, replacement parts, or further inquiries, please contact ProCom customer service through their official channels.
Documentos relacionados - ML250TPA-B
 |
ProCom Heating Vent-Free Gas Space Heater: Operation & Installation Manual This manual provides essential guidance for the safe operation and installation of ProCom Heating's vent-free gas space heaters (MN180TPA-B, ML150TPA-B, MN300TPA-B, ML250TPA-B), covering safety, installation, operation, maintenance, and troubleshooting. |
 |
Calentador de gas sin ventilación ProCom Heating: Manual de funcionamiento e instalación Guía completa para calentadores de gas sin ventilación ProCom Heating, que cubre la instalación, el funcionamiento, la seguridad, el mantenimiento y la resolución de problemas de los modelos MN180TPA-B, ML150TPA-B, MN300TPA-B y ML250TPA-B. |
 |
Manual de información del usuario de la caldera combinada de condensación de alta eficiencia Rheem Manual de información del usuario para calderas combinadas de condensación de alta eficiencia Rheem (modelos de 99 000 a 199 000 Btu/h) que cubre la instalación, el funcionamiento, la seguridad, el mantenimiento y la resolución de problemas para gas natural o propano. |
 |
Instrucciones de instalación y funcionamiento de la caldera combinada de condensación de alta eficiencia Ruud Manual completo de instalación y funcionamiento para los modelos de calderas combinadas de condensación de alta eficiencia Ruud (99 000, 125 000, 160 000 y 199 000 Btu/h) de gas natural o propano. Incluye instrucciones de seguridad, instalación, funcionamiento, mantenimiento y solución de problemas. |
 |
IBC Combi Boiler Express Installation Guide: Professional Installation Tips Comprehensive installation guide for the IBC Combi Boiler Express, providing essential tips and steps for professional installers. Covers unboxing, location, mounting, venting, piping, fuel conversion, and electrical connections. |
 |
Manual de servicio del calentador de agua a gas sin tanque de condensación Rheem Manual de servicio completo para los calentadores de agua a gas sin tanque de condensación Rheem, modelos RTGH-RH11DV y RTGH-RH10DV. Incluye especificaciones, descripciones de componentes, solución de problemas, mantenimiento y diagramas. |
Ask a question about this manual
Ask about setup, troubleshooting, compatibility, parts, safety, or missing instructions. Manuals+ will review the question and use this page’s manual context to help answer it.