
1. Introducción
Thank you for choosing the Commax CMV-70S 7-inch LED Intercom System. This manual provides essential information for the safe and efficient installation, operation, and maintenance of your new intercom system. Please read this manual thoroughly before use and keep it for future reference.
2. Información de seguridad
- Ensure all electrical connections are made by a qualified professional to prevent electric shock or fire.
- No exponga la unidad al agua, la humedad o temperaturas extremas.
- Do not attempt to open or repair the unit yourself. Refer all servicing to authorized personnel.
- Use only the specified power supply (AC 100V - 240V).
- Mantenga la unidad alejada de la luz solar directa y de fuentes de calor.
3. Contenido del paquete
Verifique que todos los artículos enumerados a continuación estén incluidos en su paquete. Si falta algún artículo o está dañado, comuníquese con su vendedor.
- Commax CMV-70S Monitor Unit
- Soporte de montaje
- Manual de usuario
- Screws (T)4 x 18mm (4 pcs)
- Screw (M)3 x 6mm (1 pc)
- Connection Cables (2P(1EA), 4P(3EA))
- Door Camera (if included in your specific kit)

Figura 3.1: Contenido del paquete
4. Producto terminadoview
The Commax CMV-70S features a 7-inch LED screen and intuitive touch controls for visitor communication and door access. Familiarize yourself with the components of the monitor unit:
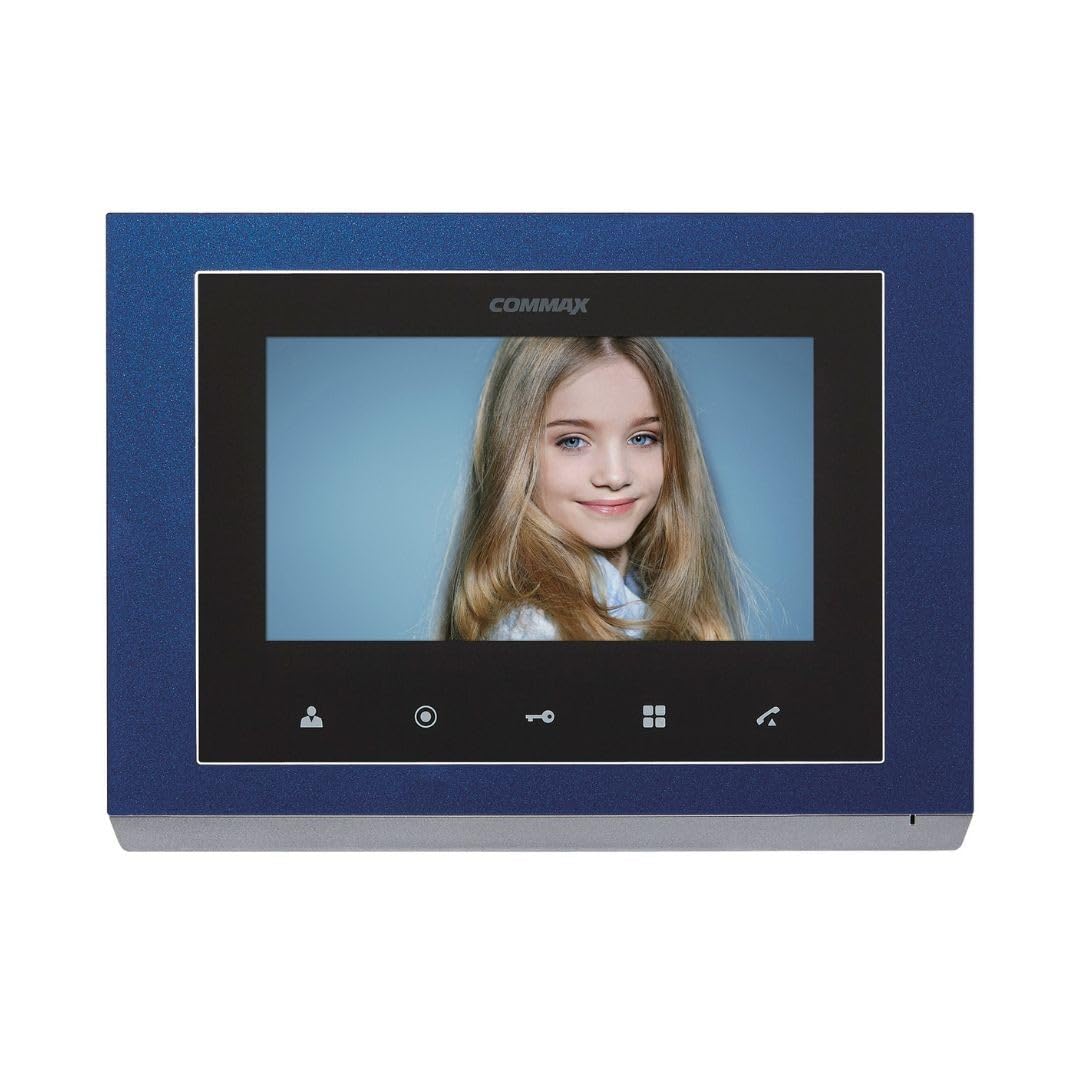
Figura 4.1: Componentes del panel frontal
Componentes del panel frontal
| No. | Nombre de la pieza | No. | Nombre de la pieza | No. | Nombre de la pieza |
|---|---|---|---|---|---|
| 1 | 7" TFTLCD | 2 | Vocero | 3 | Botón de seguimiento |
| 4 | Guard and interphone button | 5 | Botón de apertura de puerta | 6 | Menu button (touch) |
| 7 | Botón de hablar | 8 | C-MIC | 9 | Menu button (side) |
| 10 | Botón Enter | 11 | botón △ | 12 | ▽ button |
| 13 | Encendido/apagado | 14 | Terminales de conexión |
5. Configuración
5.1 Montaje del monitor
- Choose a suitable location for the monitor, typically near the main entrance or a central area.
- Fije el soporte de montaje a la pared con los tornillos incluidos. Asegúrese de que esté nivelado y firmemente fijado.
- Connect all necessary wiring to the monitor's connecting terminals (refer to Section 5.2).
- Carefully attach the monitor unit to the mounting bracket.
5.2 conexiones de cableado
The CMV-70S system requires professional hardwire installation. Refer to the diagram below for terminal connections. Ensure power is disconnected before making any wiring connections.

Figure 5.1: Connecting Terminals (Rear View)
- Conexión de energía: Connect the AC 100V - 240V power supply to the designated power terminals.
- Conexión de la cámara de la puerta: Connect the door camera to the 'CAM' terminals. The system supports up to two door cameras.
- Intercom Connection: For multi-unit setups or additional indoor phones, connect them to the 'INTER' terminals.
- Liberación de la cerradura de la puerta: Connect the electronic door lock to the appropriate terminals for remote release functionality.
This system is expandable up to two screens, two door cameras, and two indoor phones, especially when utilizing Fine View technology for single-house applications.
6. Instrucciones de funcionamiento
The Commax CMV-70S is designed for ease of use with its touch-sensitive buttons.
6.1 Funciones básicas
- Responder una llamada: When a visitor presses the call button on the door camera, the monitor will ring and display the visitor's image. Press the Talk button (7) Comunicarse.
- Escucha: Presione el Monitoring button (3) a view the outside area through the door camera at any time.
- Apertura de puerta: Durante una llamada o mientras se monitorea, presione el botón Door release button (5) Para desbloquear la puerta.
- Intercom/Guard Call: Presione el Guard and interphone button (4) to initiate a call to another indoor unit or the guard station (if configured).
6.2 Navegación por menús
The CMV-70S features both touch and side menu buttons for system settings.
- Presione el Menu button (touch) (6) or Menu button (side) (9) para acceder a la configuración del sistema.
- Utilice el △ button (11) y ▽ button (12) para navegar por las opciones del menú.
- Presione el Enter button (10) para seleccionar una opción o confirmar una configuración.
- El Power ON/OFF button (13) controls the unit's power.
7. Mantenimiento
- Limpieza: Wipe the monitor screen and body with a soft, dry cloth. Do not use abrasive cleaners or solvents.
- Ciclo de energía: If the unit is unresponsive, try turning it off using the Power ON/OFF button (13), waiting a few seconds, and then turning it back on.
- Controles periódicos: Revise periódicamente todas las conexiones del cableado para asegurarse de que sean seguras.
8. Solución de problemas
If you encounter issues with your Commax CMV-70S, refer to the following common problems and solutions:
| Problema | Posible causa | Solución |
|---|---|---|
| No hay imagen en la pantalla | Power off; Loose connection; Faulty camera | Check power (13); Verify wiring (14); Test camera connection. |
| No hay sonido durante la llamada | Volume too low; Faulty speaker/microphone; Loose connection | Adjust volume in menu; Check wiring; Contact support. |
| La cerradura de la puerta no funcionaasing | Incorrect wiring; Faulty lock; Insufficient power | Verify lock wiring; Test lock independently; Ensure adequate power supply. |
| Monitor unresponsive | Fallo de software; problema de energía | Perform a power cycle (13); Check power connection. |
If the problem persists after trying these solutions, please contact Commax customer support or a qualified technician.
9. Especificaciones
| Característica | Especificación |
|---|---|
| Fabricante | Commax |
| Número de modelo | CMV-70S |
| Tamaño de pantalla | LED de 7 pulgadas |
| Fuente de poder | Corded Electric (AC 100V - 240V) |
| Consumo de energía | 6 vatios |
| Tecnología de conectividad | Cableado |
| Método de instalación | Professional Hardwire |
| Dispositivos compatibles | Apartment complex, single house |
| Capacidad de expansión | Up to 2 screens, 2 door cameras, 2 indoor phones (Fine View technology for single house) |
| Componentes incluidos | Security screen, door camera |
| Peso del artículo | 1.2 kilogramos |
| Dimensiones del paquete | 30.4 x 24.8 x 6.9 cm |
| Material | Plástico |
| Color | Azul |
| Tipo de alerta | Sólo movimiento |
| Pilas necesarias | No |
10. Garantía y soporte
Commax products are designed for reliability and performance. For warranty information, technical support, or service inquiries, please refer to the warranty card included with your product or visit the official Commax webSitio. Conserve su recibo de compra como comprobante para reclamaciones de garantía.