
1. Introducción
This manual provides detailed instructions for the installation, operation, maintenance, and troubleshooting of the Fydun ZL-7901A Incubator Controller. This device is designed for precise and automatic control of temperature and humidity in various incubation environments, ensuring optimal conditions for successful hatching.
2. Producto terminadoview
The Fydun ZL-7901A is a high-precision digital incubator controller capable of managing both temperature and humidity. It features a clear display and intuitive controls for easy programming and monitoring.
Características principales:
- Control preciso: High-accuracy temperature and humidity regulation for stable incubator environments.
- Fuerte antiinterferencia: Designed for reliable operation in various conditions.
- High Stability and Accuracy: Ensures consistent performance for critical incubation processes.
- Amplia aplicación: Suitable for a variety of eggs including chicken, duck, goose, pigeon, quail, parrot, and peacock.
- Operación automática: Fully automatic control reduces manual intervention.
Componentes:

Figura 2.1: Frente view of the Fydun ZL-7901A Incubator Controller, showing the display and control buttons.

Figura 2.2: The ZL-7901A controller packaged with its temperature and humidity sensors and connecting cables.

Figura 2.3: The ZL-7901A controller shown in an incubator environment, demonstrating its application for egg incubation.
3. Información de seguridad
- Lea todas las instrucciones cuidadosamente antes de la instalación y operación.
- Asegúrese de que la fuente de alimentación voltage matches the controller's requirements (100V-240V).
- All wiring should be performed by a qualified professional to prevent electrical hazards.
- No exponga el controlador al agua ni a la humedad excesiva.
- Mantenga el dispositivo alejado de materiales inflamables.
- Desconecte la alimentación antes de realizar cualquier mantenimiento o cambio de cableado.
- Este dispositivo no es un juguete. Mantener fuera del alcance de los niños.
4. Configuración e instalación
4.1 Montaje del controlador
The ZL-7901A controller is designed for panel mounting. Ensure a secure and stable location within your incubator setup.

Figura 4.1: Lado view illustrating the mounting bracket for panel installation.
4.2 conexiones de cableado
Carefully connect the power supply, sensors, and output devices (heater, humidifier, fan, egg turner) to the appropriate terminals on the back of the controller. Refer to the wiring diagram provided with your product for specific connections. Ensure all connections are tight and secure.

Figura 4.2: Trasero view of the controller, showing the terminal blocks for electrical connections.
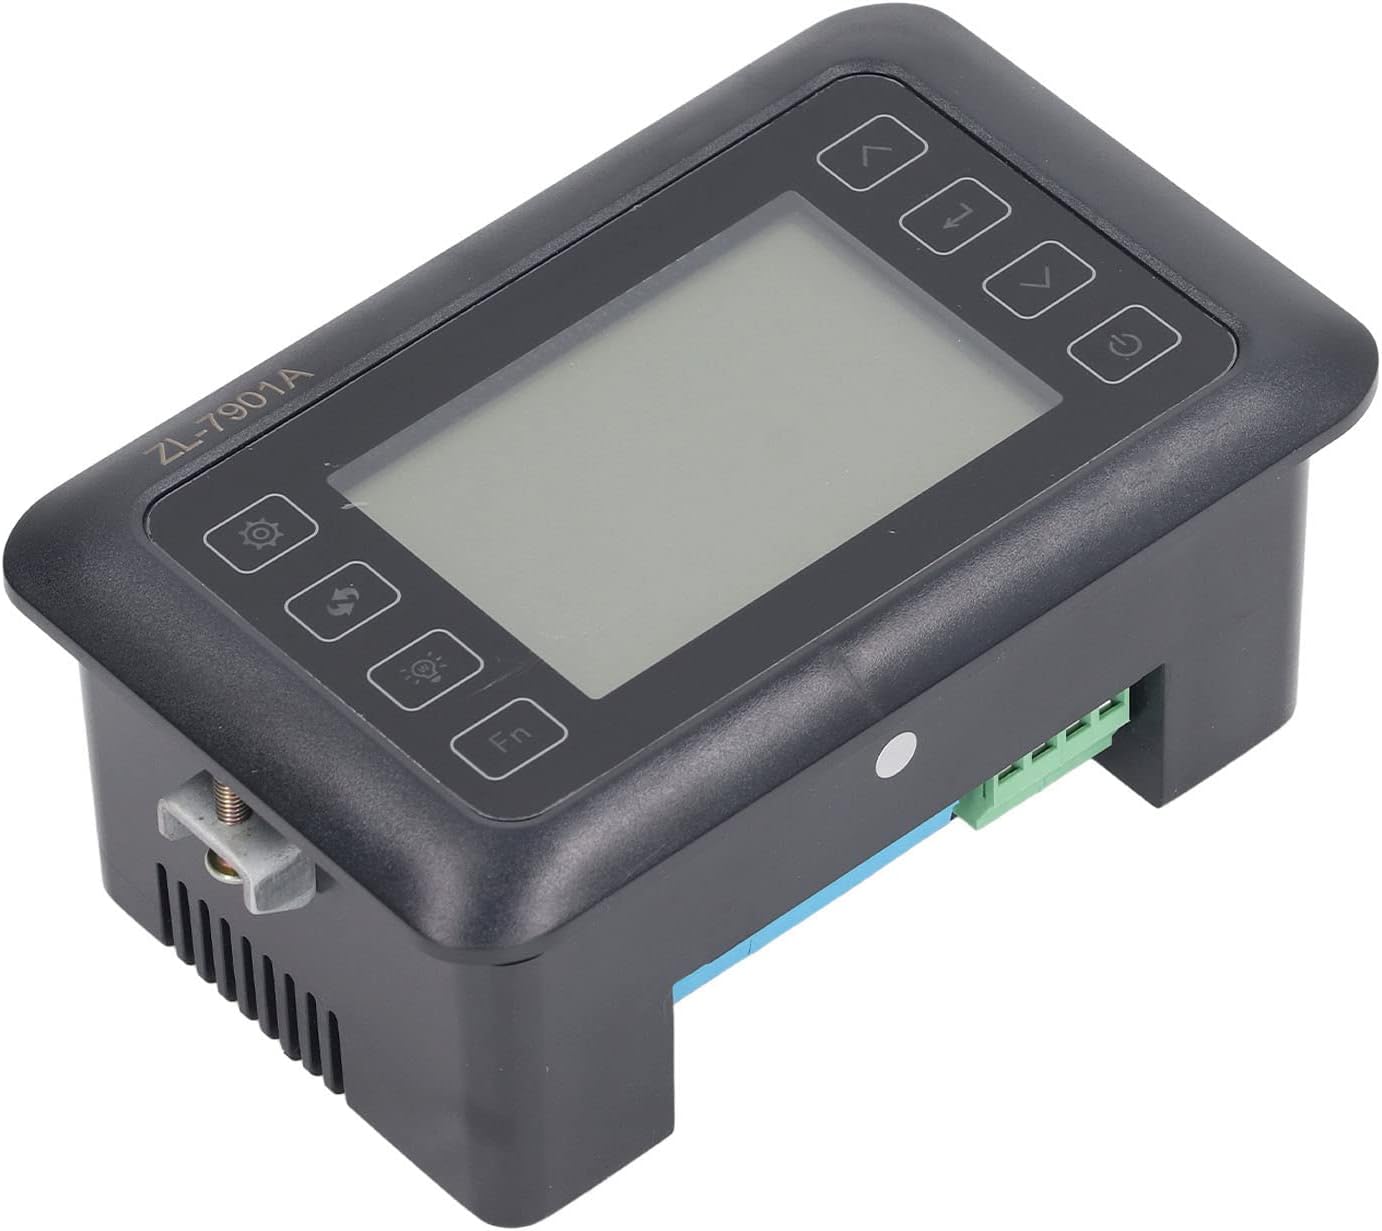
Figura 4.3: Angular view highlighting the various connection points on the controller's side.
After all connections are made, double-check them for correctness before applying power.
5. Instrucciones de funcionamiento
5.1 Encendido y apagado
Presione el Botón de encendido to turn the controller on or off. The display will illuminate upon power-on. The power button is located on the right side of the controller's front panel.
5.2 Visualización sobreview
The main display shows the current temperature and humidity readings. Additional indicators may show the status of heating, humidifying, and turning functions.
5.3 Configuración de parámetros
- Presione el Botón de configuración (gear icon) to enter the parameter setting mode. This button is on the left side of the controller's front panel.
- Utilice el Up (flecha hacia arriba) y Abajo (down arrow) buttons to navigate through different parameters (e.g., target temperature, target humidity, egg turning interval). These buttons are on the right side of the controller's front panel.
- Presione el Botón Enter (return arrow icon) to select a parameter for editing. This button is on the right side of the controller's front panel.
- Utilice el Up y Abajo botones para ajustar el valor.
- Presione el Botón Enter de nuevo para confirmar el nuevo valor.
- Repeat for all desired parameters.
- Salga del modo de configuración presionando el botón Botón de configuración de nuevo o esperando un tiempo de espera.
Nota: Consult the full product manual (if provided separately) for a complete list of parameters and their functions.
5.4 botones de función
- Botón de luz (light bulb icon): Controls the internal light of the incubator (if connected). This button is on the left side of the controller's front panel.
- Botón Fn: Activates special functions or enters advanced settings. Refer to the detailed manual for specific Fn button operations. This button is on the left side of the controller's front panel.
6. Mantenimiento
6.1 Limpieza
- Ensure the controller is powered off and disconnected from the power source before cleaning.
- Wipe the exterior of the controller with a soft, dry cloth.
- No utilice limpiadores abrasivos, solventes ni sumerja la unidad en agua.
- Keep the sensor probes clean and free from debris to ensure accurate readings.
6.2 Cuidado del sensor
Handle the temperature and humidity sensors with care. Avoid bending or damaging the cables. If readings appear inaccurate, gently clean the sensor tips. Do not attempt to disassemble the sensors.
7. Solución de problemas
| Problema | Posible causa | Solución |
|---|---|---|
| El controlador no se enciende. | No hay suministro de energía; conexión suelta; cable de alimentación defectuoso. | Check power outlet; ensure all connections are secure; test power cable. |
| Lecturas inexactas de temperatura y humedad. | Sensor dirty or damaged; sensor not properly placed; calibration needed. | Clean sensor; reposition sensor away from direct airflow/heat; refer to advanced settings for calibration (if available). |
| Heater/Humidifier not activating. | Output device not connected; setpoint not reached; faulty output device. | Verify wiring connections; check setpoint values; test heater/humidifier independently. |
| La pantalla muestra el código de error. | Sensor fault; internal error. | Note the error code and consult the full product manual or contact support. |
8. Especificaciones
| Característica | Detalle |
|---|---|
| Modelo | ZL-7901A |
| Marca | Fydun |
| Vol de entradatage | 100 V-240 V CA |
| Tipo de control | Fully Automatic Digital Temperature and Humidity Control |
| Exactitud | High precision for both temperature and humidity |
| Solicitud | Incubators for various poultry and bird eggs |
| Montaje | Montaje en panel |
9. Garantía y soporte
Fydun is committed to providing quality products and excellent customer service. If you encounter any issues or have questions regarding your ZL-7901A Incubator Controller, please contact our customer service team.
For support, please refer to the contact information provided with your purchase or visit the official Fydun store on Amazon: Fydun Amazon Store.
Our professional customer service team is ready to assist you promptly.