
1. Introducción
This manual provides detailed instructions for the installation, operation, and maintenance of your EBTOOLS T20 4K Dash Cam. Please read this manual thoroughly before using the device to ensure proper functionality and safety.
Contenido del paquete:
- Dash Cam (Main Unit)
- Línea de carga (tipo C)
- Backup Camera with Line
- Car Charger with Line
- Gancho
- Paquete de tornillos
- White Adhesive
- Manual de usuario
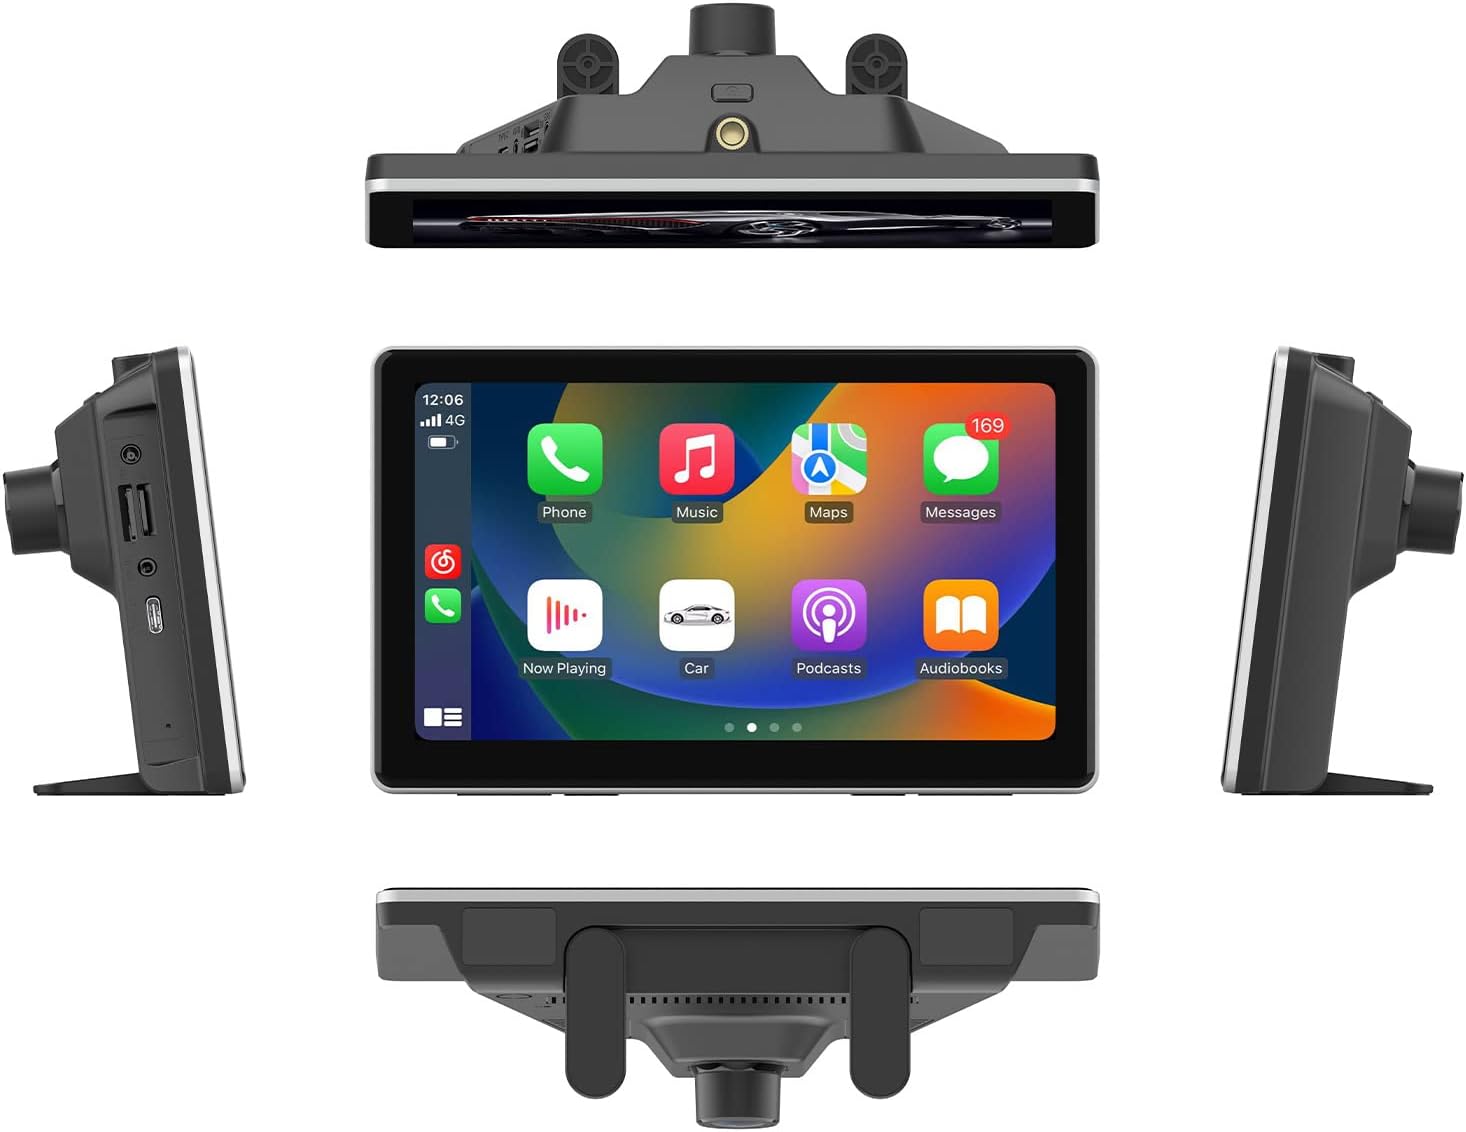
Figura 1.1: Included components of the EBTOOLS T20 Dash Cam package. This image displays the main dash cam unit, charging cable, backup camera, car charger, mounting hook, screw pack, and adhesive pad.
2. Especificaciones
| Característica | Descripción |
|---|---|
| Procesador | Allwinner V535, DDR32GB |
| Módulo inalámbrico | 2.4/5 GHz |
| Bluetooth | BT5.0 Support |
| Transmisor FM | Supports original car audio output |
| Tamaño de pantalla | 7 pulgadas |
| Resolución de pantalla | 1024 x 600 |
| Fuente de alimentación | Type-C, Car Charger, Line (standard car charger) |
| Almacenamiento | Memory card (up to 256GB, C10 U1 recommended, not included) |
| Cámaras | Dual external AHD camera (5V) |
| Batería | Batería de litio incorporada de 500 mAh |
| Características especiales | Multi-language support, Parking Monitoring, Mobile App Control, G-Sensor Collision Locking, Intelligent Voice Control, Carplay, Android Auto, Automatic App Reconnection. |
3. Configuración e instalación
3.1 Instalación de la unidad principal
- Seleccione una ubicación adecuada en el tablero o parabrisas que no obstruya su view o interferir con las bolsas de aire.
- Limpie bien la superficie de montaje.
- Attach the dash cam to the chosen location using the provided adhesive mount or suction cup mount (if included). Ensure it is securely fastened.
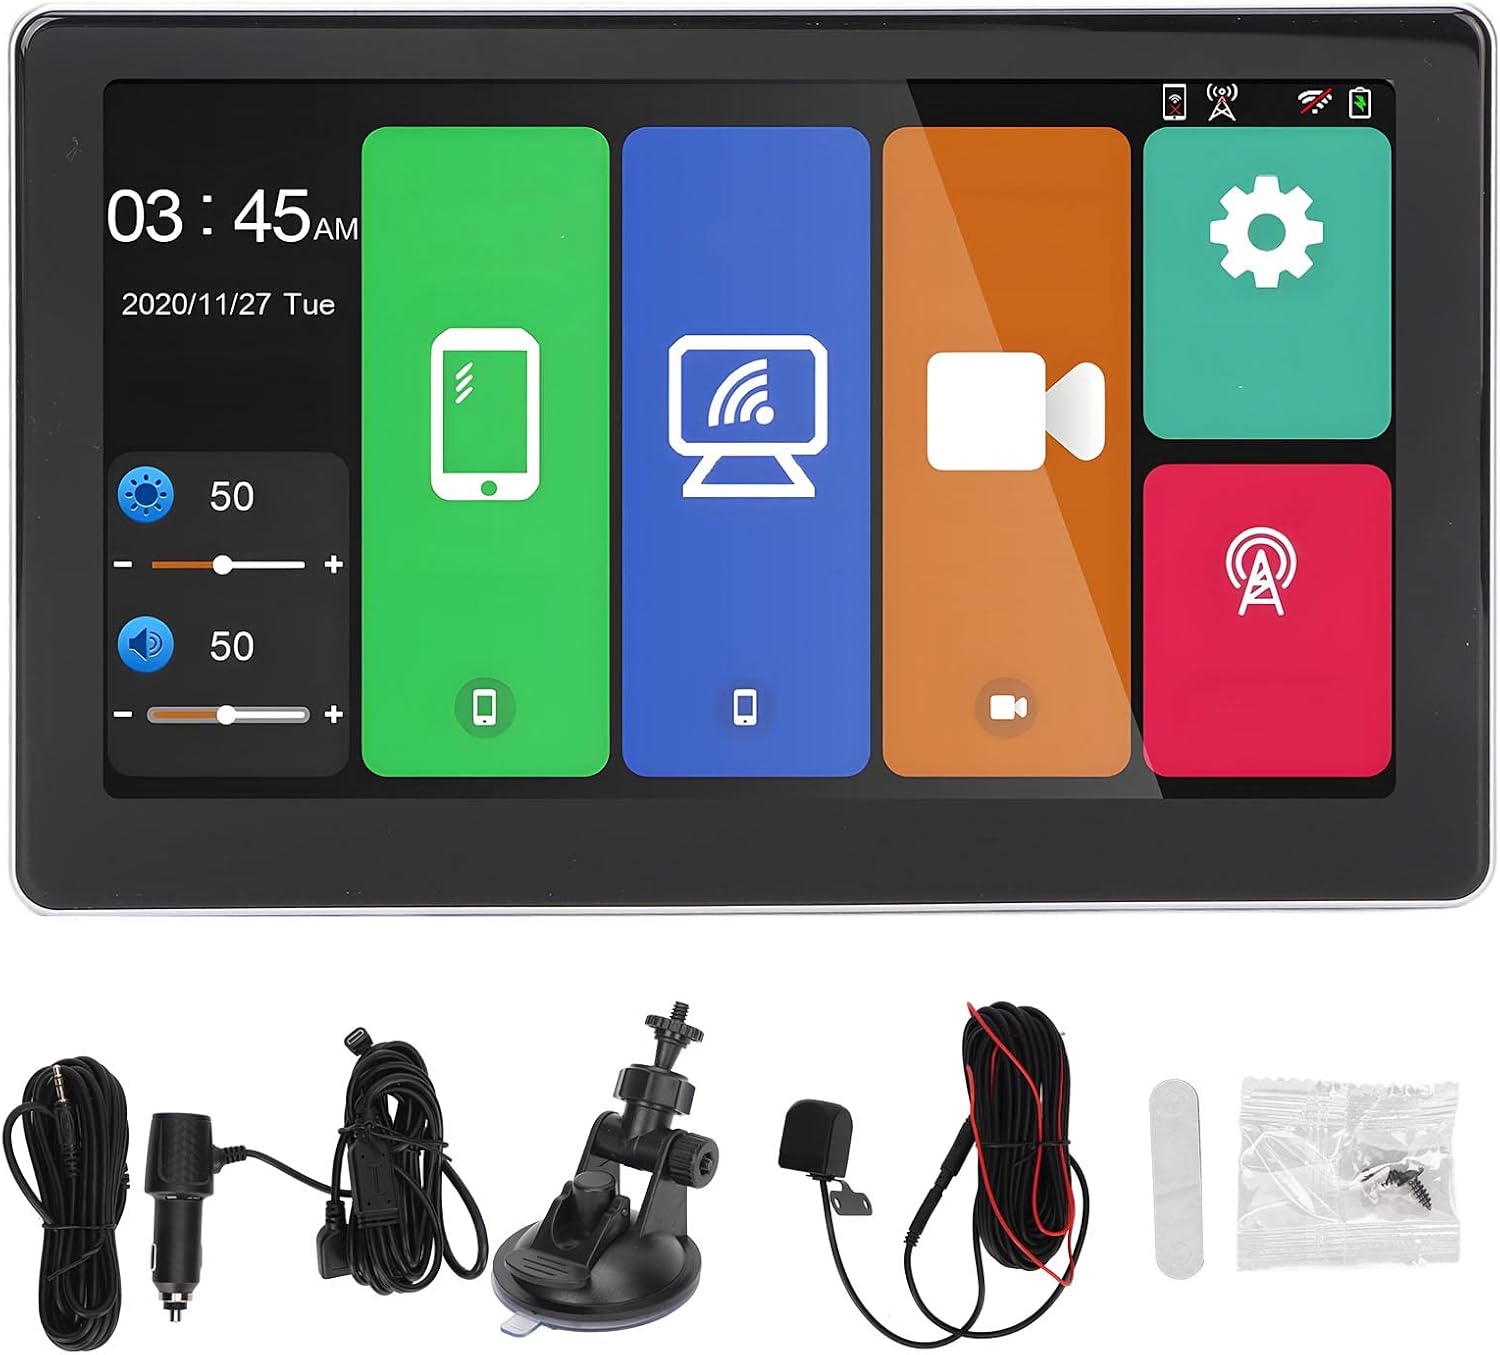
Figura 3.1: The EBTOOLS T20 Dash Cam mounted on a vehicle dashboard, shown from multiple perspectives to illustrate its placement and screen orientation.
3.2 Conexión de alimentación
- Connect the Type-C charging line to the dash cam.
- Conecte el cargador de automóvil a la toma de corriente de 12 V de su vehículo (toma del encendedor de cigarrillos).
- Coloque el cable de forma ordenada para evitar interferencias con los controles de conducción.
3.3 Instalación de la cámara de respaldo (opcional)
- Mount the backup camera at the rear of your vehicle, typically above the license plate or on the rear bumper.
- Route the backup camera cable to the main dash cam unit. Ensure the cable is securely tucked away and protected from external elements.
- Connect the backup camera cable to the designated input port on the main dash cam unit.

Figura 3.2: Display of the reverse image function on the dash cam screen, featuring dynamic parking guidelines to assist with vehicle maneuvering in reverse.
3.4 Inserción de la tarjeta de memoria
- Asegúrese de que la cámara del tablero esté apagada.
- Insert a compatible memory card (up to 256GB, C10 U1 recommended) into the designated slot.
- Format the memory card through the dash cam's settings menu upon first use to ensure optimal performance.
4. Instrucciones de funcionamiento
4.1 Encendido / Apagado
The dash cam will automatically power on when your vehicle starts and power off when the ignition is turned off (if connected to a switched power source).
4.2 Interfaz principalview

Figura 4.1: The main user interface of the EBTOOLS T20 Dash Cam, featuring a 7-inch screen with intuitive icons for various functions such as phone connectivity, Wi-Fi, camera recording, and system settings.
4.3 Modos de grabación
- Grabación en bucle: The dash cam continuously records video in segments. When the memory card is full, the oldest filese sobrescriben.
- G-Sensor Collision Locking: In the event of a sudden impact or collision, the G-sensor will automatically lock the current video segment to prevent it from being overwritten.
- Monitoreo de estacionamiento: When enabled, the dash cam will automatically start recording if it detects motion or impact while the vehicle is parked. This feature requires a continuous power supply (hardwire kit, sold separately, may be required for extended parking monitoring).
4.4 Características de conectividad
4.4.1 Carplay / Android Auto
The dash cam supports both Carplay (for iOS devices) and Android Auto (for Android devices). Connect your smartphone via Bluetooth or USB to access navigation, music, calls, and other compatible apps directly on the dash cam screen.

Figura 4.2: The Carplay interface displayed on the EBTOOLS T20 Dash Cam screen, illustrating access to common smartphone applications like phone, music, and navigation.
4.4.2 Mobile App Control (Roadcam App)
Download the Roadcam app on your smartphone to control the dash cam, view vivir footage, download recorded videos, and adjust settings wirelessly. The app supports independent and automatic back connection.
Transmisión FM 4.4.3
Transmit audio from the dash cam to your vehicle's original car audio system via FM radio. Adjust the FM frequency on the dash cam and tune your car radio to the same frequency.

Figura 4.3: Illustration of the FM signal transmission feature, where the dash cam's audio is broadcast to the vehicle's FM radio, allowing playback through the car's speakers.
4.4.4 Salida de audio auxiliar
For a wired audio connection, use an AUX cable to connect the dash cam to your car's AUX input. This provides a direct audio signal to your car's sound system.

Figura 4.4: Connection diagram for AUX audio output, detailing how to link the dash cam to a car's audio system using an AUX cable for direct sound transmission.
4.5 Control de voz inteligente
The dash cam supports intelligent voice commands for hands-free operation of certain functions. Refer to the on-screen prompts or app for available commands.
5. Mantenimiento
- Limpieza: Use a soft, dry cloth to clean the dash cam screen and lens. Avoid abrasive cleaners or solvents.
- Tarjeta de memoria: Regularly format the memory card (e.g., once a month) to maintain optimal recording performance and prevent data corruption. Back up important files antes de formatear.
- Actualizaciones de firmware: Verifique el fabricante website or the Roadcam app for available firmware updates to ensure your device has the latest features and improvements.
- Temperatura: Evite exponer la cámara del tablero a temperaturas extremas durante períodos prolongados, ya que esto puede afectar la vida útil de la batería y el rendimiento del dispositivo.
6. Solución de problemas
- La Dash Cam no se enciende:
- Asegúrese de que el cargador del automóvil esté conectado correctamente tanto a la cámara del tablero como a la toma de corriente del vehículo.
- Verifique si la toma de corriente de 12 V del vehículo funciona correctamente.
- Verifique que el cable tipo C esté conectado de forma segura.
- Problemas de grabación (por ejemplo, congelamiento, fotogramas saltados):
- Format the memory card. A corrupted card can cause recording problems.
- Ensure you are using a high-speed memory card (Class 10, U1 or higher).
- Try a different memory card to rule out card malfunction.
- Mala calidad de imagen:
- Limpie las lentes de la cámara con un paño suave.
- Asegúrese de que se haya quitado la película protectora de las lentes.
- Check settings for video resolution and WDR (Wide Dynamic Range) to ensure they are configured optimally.
- Carplay/Android Auto no se conecta:
- Ensure Bluetooth is enabled on both the dash cam and your smartphone.
- Try reconnecting your phone via USB cable.
- Reinicie tanto la cámara del tablero como su teléfono inteligente.
- FM transmission static/interference:
- Adjust the FM frequency on the dash cam to an unused frequency in your area.
- Ensure your car radio is tuned to the exact same frequency.
- Minimize other electronic devices that might cause interference.
7. Garantía y soporte
Para obtener información sobre la garantía y soporte técnico, consulte el sitio web oficial de EBTOOLS. webSitio web o contacte con su servicio de atención al cliente. Conserve su recibo de compra como comprobante.
Fabricante: EBTHERRAMIENTAS
Número de modelo: T20
ASIN: B0CLH3T8TX
Fecha de primera disponibilidad: 18 de febrero de 2025