
Weber Genesis S-415
Weber Genesis S-415 Liquid Propane Gas Grill Instruction Manual
Model: Genesis S-415 | Brand: Weber
1. Producto terminadoview
El Weber Genesis S-415 Liquid Propane Gas Grill is designed for outdoor cooking, offering durability and performance. It features a 4-burner system with PureBlu burners for consistent heat distribution. The grill includes stainless steel cooking grates and FLAVORIZER Bars. It is compatible with the WEBER CRAFTED Outdoor Kitchen Collection for expanded cooking techniques. A liquid propane tank is sold separately.

Imagen: Frente view del Weber Genesis S-415 Liquid Propane Gas Grill in stainless steel.
2. Configuración y montaje
Asamblea de la Weber Genesis S-415 grill is required. Please follow the detailed instructions provided in the included user manual for proper and safe assembly. Ensure all components are present and securely fastened before first use.
Pasos clave para el montaje:
- Desembale todos los componentes y compruébelos con la lista de piezas.
- Assemble the main cart structure, ensuring all screws and bolts are tightened.
- Install the burner system and connect the gas lines according to local codes and safety guidelines.
- Place the cooking grates and FLAVORIZER Bars.
- Attach side tables and any additional accessories.
- Perform a leak test on all gas connections before initial operation.
3. Instrucciones de funcionamiento
Before operating, ensure the grill is on a level, stable surface and the propane tank is securely connected and open.
3.1 Encendido de los quemadores principales
- Abra la tapa de la parrilla.
- Abra el suministro de gas en el tanque de propano.
- Push and turn the control knob for the far-left burner to the START/HIGH position.
- Press the igniter button (if applicable) or use a long-stemmed lighter to ignite the burner.
- Once the first burner is lit, turn on adjacent burners to the HIGH position as needed.
- Cierre la tapa y precaliente la parrilla a la temperatura deseada.
3.2 Uso del quemador lateral
The side burner provides additional cooking versatility for sauces, side dishes, or boiling. Ensure the side burner lid is open before lighting.
- Abra la tapa del quemador lateral.
- Push and turn the side burner control knob to the START/HIGH position.
- Press the igniter button or use a long-stemmed lighter to ignite.
- Adjust the flame to the desired cooking level.

Imagen: Lateral view del Weber Genesis S-415 Liquid Propane Gas Grill, showing the side table and controls.
4. Características
- PureBlu Burners: Unique tapered design for consistent flame and even heat distribution, minimizing clogs.
- Stainless Steel Grates and FLAVORIZER Bars: Durable cooking grates for quick heating. FLAVORIZER Bars vaporize juices, enhance flavor, and prevent flare-ups.
- Sistema de gestión de grasa: Features a pull-out grease tray located under the cookbox for easy disposal and cleaning.
- WEBER CRAFTED Outdoor Kitchen Collection Compatibility: Cooking grates accommodate a frame kit and custom-fit grillware (sold separately) for diverse cooking methods like pizza, griddling, and more.
- Estante de calentamiento: Keeps food warm, toasts buns, or grills smaller items while the main course cooks below.
- Mesas auxiliares: Provides convenient space for platters, seasonings, and tools.
Video: This video demonstrates the versatility of the Weber Crafted Outdoor Kitchen Collection, showcasing various grillware accessories like flat tops, baking stones, roasting baskets, and woks, which can be used with the Genesis S-415 grill.
5. Mantenimiento
El mantenimiento regular garantiza un rendimiento óptimo y la longevidad de su parrilla.
5.1 Limpieza de las rejillas de cocción
- Preheat the grill on high for 10-15 minutes after each use.
- Brush the grates with a grill brush to remove food residue.
- For deeper cleaning, allow grates to cool, then wash with warm soapy water and rinse thoroughly.
5.2 Sistema de gestión de grasa
- Regularly check and empty the pull-out grease tray to prevent grease fires.
- Clean the grease tray and catch pan with warm soapy water.
5.3 Limpieza exterior
- Wipe down stainless steel surfaces with a stainless steel cleaner and a soft cloth.
- Avoid abrasive cleaners or pads that can scratch the finish.
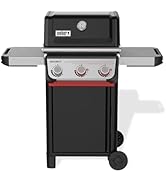
Image: A hand demonstrating the removal of the grease tray for cleaning.
6. Solución de problemas
Si tiene problemas con su parrilla, consulte los siguientes consejos comunes de solución de problemas:
- El quemador no enciende: Check if the propane tank is open and has sufficient gas. Ensure gas lines are not kinked. Verify igniter is sparking.
- Calor desigual: Clean burners and FLAVORIZER Bars to remove any blockages. Ensure proper gas flow.
- Llama baja: Check for a tripped "bypass" on the regulator (often caused by opening the tank valve too quickly). Turn off all burners and the tank, wait a few minutes, then slowly open the tank valve fully before lighting burners.
- Incendios de grasa: Regularly clean the grease management system. Trim excess fat from meats before grilling.
7. Especificaciones
| Característica | Detalle |
|---|---|
| Marca | Weber |
| Nombre del modelo | Genesis S-415 Liquid Propane Gas Grill, Stainless Steel |
| Dimensiones del producto | 27" de profundidad x 64.5" de ancho x 48.1" de alto |
| Tipo de combustible | Gas (propano líquido) |
| Recuento del quemador principal | 4 |
| Área de superficie de cocción | 820 pulgadas cuadradas |
| Material | Acero inoxidable |
| Peso del artículo | 211 libras (95.71 kilogramos) |
| Requiere ensamblaje | Sí |
| Sistema de cocción | Weber's PureBlu Burner System with FLAVORIZER Bars |
| Código Postal | 077924999079 |
| Número de modelo del artículo | 1500539 |
8. Garantía y soporte
El Weber Genesis S-415 grill is built to last and is backed by a manufacturer's warranty. For specific warranty details, please refer to the warranty card included with your product or visit the official Weber websitio.
For customer support, replacement parts, or additional information, please contact Weber directly. You can also explore protection plans available for extended coverage.
- Fabricante: Weber
- Planes de protección: Disponemos de planes de protección de 3 y 4 años.
Ask a question about this manual
Ask about setup, troubleshooting, compatibility, parts, safety, or missing instructions. Manuals+ will review the question and use this page’s manual context to help answer it.