Introducción
This manual provides detailed instructions for the installation, operation, and maintenance of your EsaSam Double Din Car Stereo Multimedia Radio. Please read this manual thoroughly before using the product to ensure proper function and safety.
This multimedia radio is designed for Toyota Camry models from 2006 to 2011. It features a 9-inch touchscreen, GPS navigation, MP5 player, DSP, RDS FM radio, Carplay, and Android Auto capabilities.
Producto terminadoview
The EsaSam Car Stereo is an advanced in-dash multimedia system. Key features include:
- Android 11 Operating System (or Android 12 based on specific batch)
- 9-inch Capacitive Multi-Touch IPS Screen (1024*600 or 1280*720 resolution)
- Built-in GPS Navigation with support for online and offline maps
- Carplay inalámbrico y Android Auto
- Bluetooth 4.0 para llamadas manos libres y transmisión de música
- Radio FM/AM/RDS
- Built-in WiFi and 4G LTE support (SIM card slot)
- Soporte para control del volante
- Incluye AHD Trasero View Cámara
- Various RAM/ROM configurations (e.g., 8 core m400s 4GB RAM + 64GB ROM)
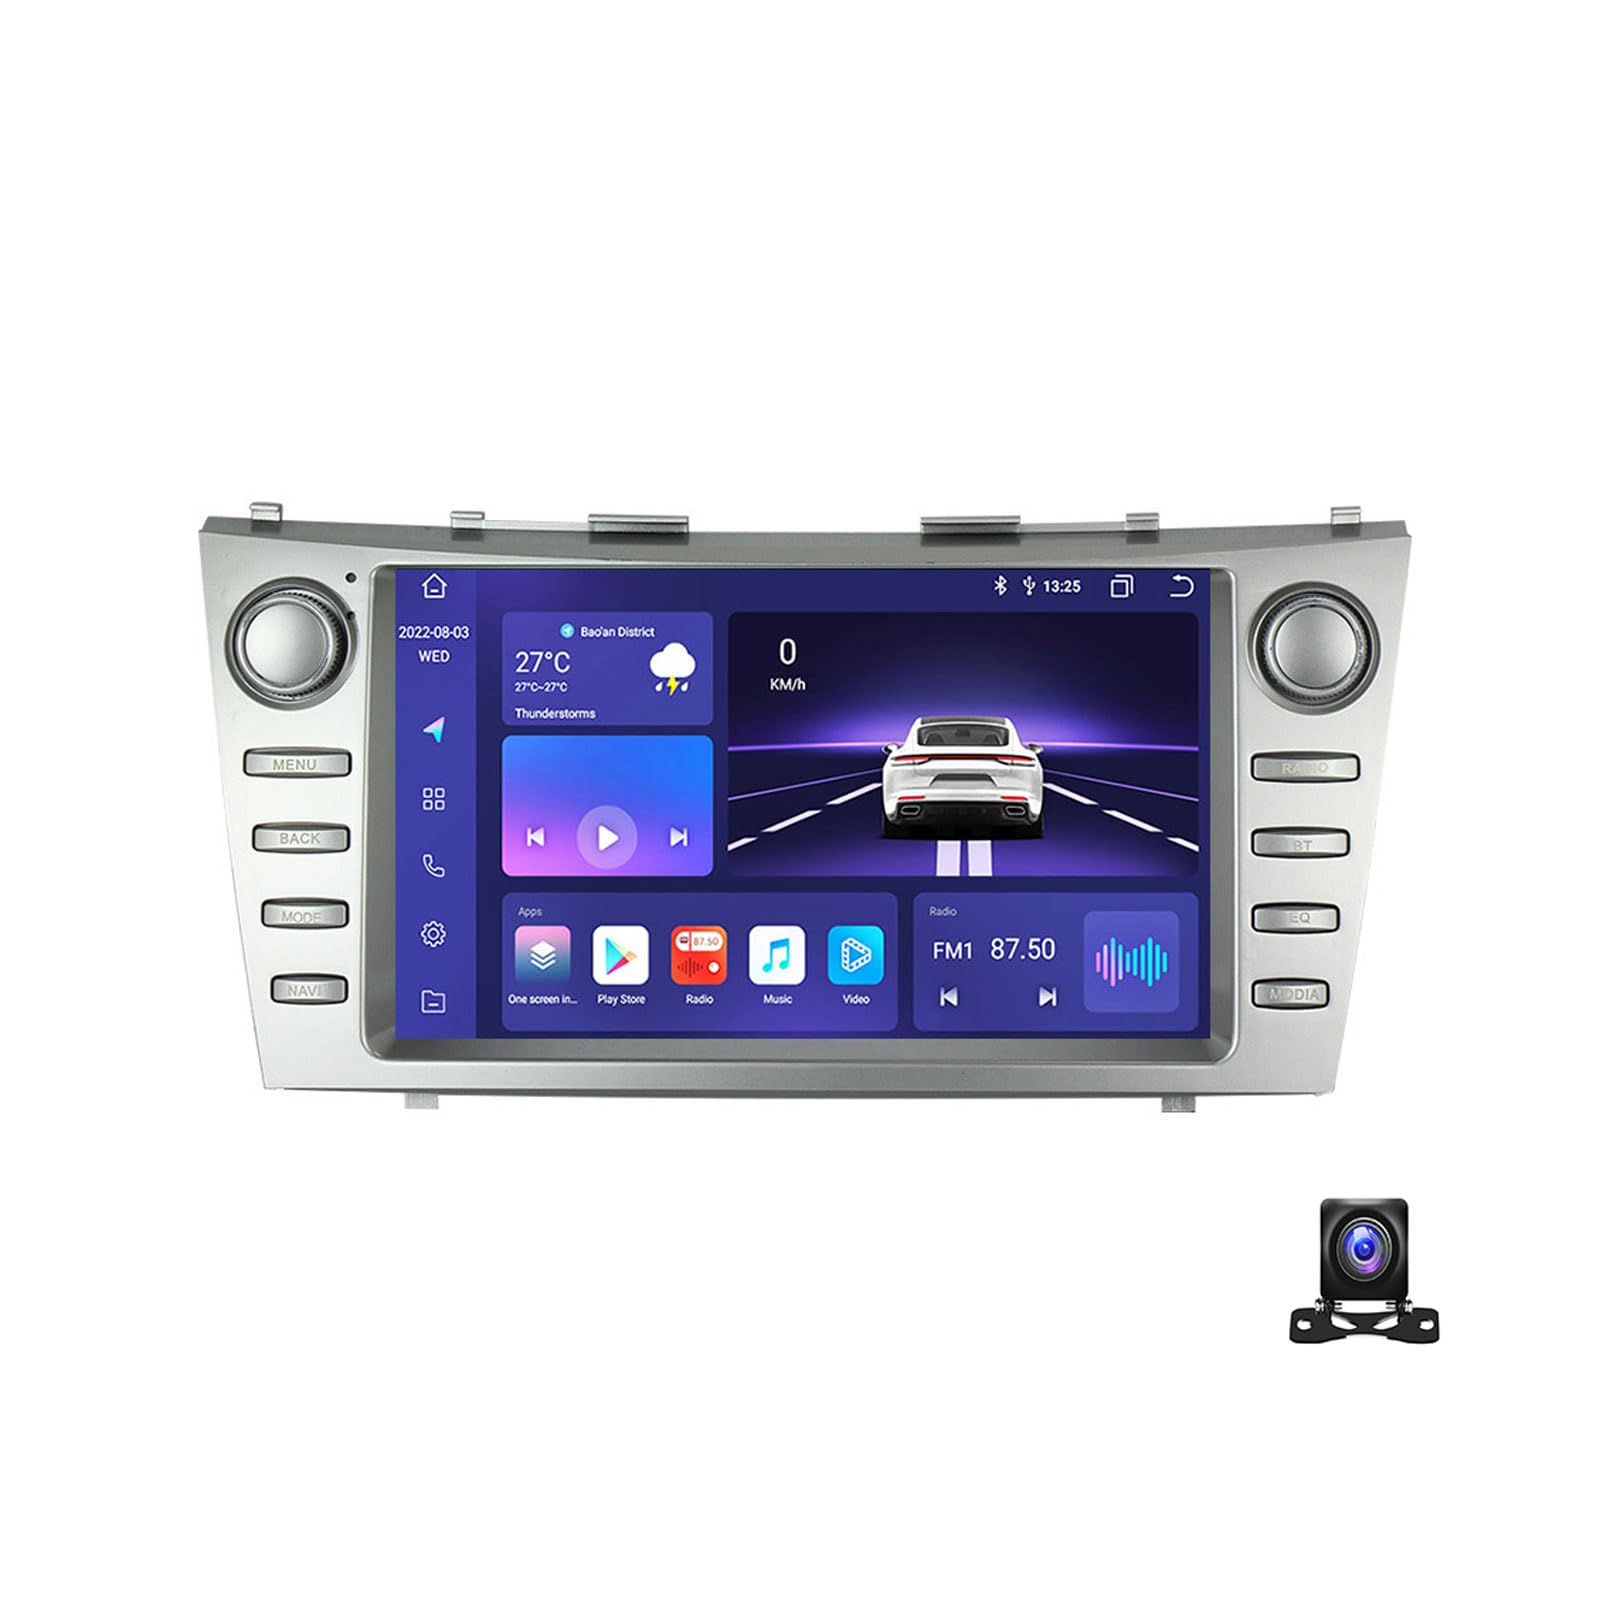
Figure 1: EsaSam Double Din Car Stereo Unit. This image shows the front view of the car stereo with its 9-inch touchscreen display.
Compatibilidad del vehículo
This unit is compatible with Toyota Camry models manufactured between 2006 and 2011. Before installation, verify that your vehicle's original center console matches the product's design to ensure proper fitment.

Figure 2: Comparison of original Toyota Camry dashboard radio and the EsaSam unit installed. The top left shows the original radio, top right shows the EsaSam unit, and the bottom image shows the EsaSam unit installed in the dashboard.
Configuración e instalación
Se recomienda la instalación profesional. Asegúrese de que la batería del vehículo esté desconectada antes de comenzar la instalación.
Conexiones de cableado
Connect the provided wiring harness to the corresponding ports on the car stereo and your vehicle's wiring system. Pay close attention to the power, speaker, and accessory connections.
- Cable de energía: Conecte el cable amarillo (12 V constantes), el cable rojo (12 V accesorio) y el cable negro (tierra).
- Cables de altavoz: Conecte cada cable del altavoz a sus terminales positivos y negativos correspondientes.
- Antena GPS: Conecte la antena GPS y colóquela en un lugar con visibilidad despejada. view del cielo.
- Antena 4G: If applicable, connect the 4G antenna for cellular data connectivity.
- Trasero View Cámara: Conecte el AHD trasero view Conecte la cámara a la entrada dedicada. Asegúrese de que el cable del disparador de reversa esté conectado al circuito de la luz de reversa del vehículo.
- Cables USB: Connect the USB extension cables for external storage or device charging.

Figure 3: Wiring connections and accessories for the EsaSam car stereo. This image illustrates various cable connections including RCA, audio out, reversing camera, microphone, GPS antenna, and 4G antenna. It also shows detailed wiring for AUX-IN, AMP control, cooling fan, and video outputs.
Encendido inicial y configuración
- After all connections are secure, reconnect the vehicle's battery.
- Turn on the vehicle's ignition. The stereo should power on.
- Siga las instrucciones en pantalla para la configuración inicial, incluida la selección del idioma y la zona horaria.
- Control del volante (SWC): To configure SWC, navigate to system settings and follow the on-screen instructions to map your vehicle's steering wheel buttons. This may involve learning or configuring the CANBUS protocol.
- Contraseña de fábrica: For M200S~M800S models, the factory password is 3368. For M100S~M150S models, the factory password is 8888.

Figure 4: Initial setup steps for the car stereo. This image shows connecting the unit, navigating to device sound settings, and confirming the cooling fan operation, alongside features like Carplay, 4G LTE, and 5GHz WiFi.
Instrucciones de funcionamiento
Interfaz de pantalla táctil
The unit features a responsive 9-inch IPS touchscreen. Navigate through menus and applications by tapping, swiping, and pinching (for zoom, where applicable).
Navegación (GPS)
The stereo comes with built-in GPS. You can use pre-installed offline maps (requires WiFi for initial download) or online navigation apps (e.g., Google Maps) via WiFi or 4G connection.
- To use offline maps, connect to WiFi and download the desired map regions.
- For online navigation, ensure the unit is connected to the internet via WiFi or a 4G SIM card.
Figure 5: GPS Navigation interface. This image displays the navigation screen with map data and supported GPS systems like GPS, BDS, and GLONASS.
Funcionalidad Bluetooth
Empareje su teléfono inteligente a través de Bluetooth 4.0 para llamadas manos libres y transmisión de audio.
- Vaya a la configuración de Bluetooth en el estéreo.
- Habilite Bluetooth en su teléfono inteligente y busque dispositivos disponibles.
- Select the stereo's Bluetooth name (e.g., "CarBT") from your phone's list and pair.
- Una vez emparejado, podrá realizar/recibir llamadas y reproducir música a través de los altavoces del automóvil.

Figure 6: Bluetooth function interface. This image shows the Bluetooth menu with options for music, contacts, and call records, along with an illustration of hands-free calling.
Carplay / Android Auto
The unit supports wireless Carplay and Android Auto. Connect your smartphone to access compatible apps, navigation, and media directly on the stereo screen.
- Conexión inalámbrica: Ensure your phone's WiFi and Bluetooth are enabled. Follow the on-screen instructions on the stereo to connect.
- Wired Connection (if applicable): Connect your phone via a USB cable to the designated USB port.
Figure 7: Carplay and Android Auto interface. This image shows the Carplay and Android Auto screens, detailing connection steps for both wireless and wired methods.
Radio FM/AM/RDS
Access the radio function to listen to FM and AM stations. RDS (Radio Data System) provides additional information like station name and song title where available.
- Utilice la función de escaneo para buscar y guardar automáticamente las estaciones disponibles.
- Sintonice manualmente frecuencias específicas.
- Guarde sus estaciones favoritas como preajustes para un acceso rápido.
Trasero View Cámara
Cuando el vehículo se pone en reversa, la pantalla cambiará automáticamente a la parte trasera. view camera feed, providing a clear image for safe parking and maneuvering.
Figura 8: Cámara de marcha atrás AHD view. This image illustrates the clear picture quality of the AHD rear-view camera, showing the vehicle's rear perspective on the stereo screen.
Mantenimiento
Limpieza de la pantalla
Utilice un paño suave y sin pelusa para limpiar suavemente la pantalla táctil. Para manchas difíciles, limpie ligeramenteampEnjuague el paño con agua o un limpiador de pantallas. Evite materiales abrasivos o productos químicos agresivos.
Actualizaciones de software
Periodically check for software updates to ensure optimal performance and access to new features. Updates can typically be performed via WiFi connection.
Solución de problemas
| Problema | Posible causa | Solución |
|---|---|---|
| La unidad no se enciende. | Cableado incorrecto, fusible quemado, conexión suelta. | Check power connections (yellow, red, black wires). Inspect vehicle's fuse box for blown fuses. Ensure all connectors are securely seated. |
| No hay sonido de los altavoces. | Cables de altavoz conectados incorrectamente, volumen demasiado bajo, silencio activado. | Verifique el cableado de los altavoces. Suba el volumen. Compruebe si la unidad está silenciada. |
| La señal GPS es débil o inexacta. | GPS antenna improperly placed, obstructions. | Reubique la antena GPS en una posición con vista despejada. view del cielo (por ejemplo, tablero de instrumentos, debajo del parabrisas). |
| Problemas de conexión Bluetooth. | Teléfono no detectable, proceso de emparejamiento incorrecto. | Ensure Bluetooth is enabled on both devices. Restart both the stereo and your phone. Re-attempt pairing. |
| Los controles del volante no funcionan. | SWC not configured, incorrect CANBUS settings. | Go to system settings and reconfigure the Steering Wheel Control function. Consult a professional if issues persist. |
Presupuesto
| Característica | Detalle |
|---|---|
| Modelo | 8 core m400s 4g+64g |
| Sistema operativo | Android 11 (or Android 12, depending on specific batch) |
| Tamaño de pantalla | 9 pulgadas |
| Resolución de pantalla | 1024*600 or 1280*720 (Capacitive Multi-Touch IPS) |
| Procesador | 8-core (Specifics vary by model, e.g., Unisoc UIS8581A for M200S/M400S) |
| RAM | 4 GB DDR3 |
| memoria de sólo lectura | 64 GB |
| Versión de Bluetooth | 4.0 (or 5.0 for some models) |
| Wi-Fi | Built-in WiFi (Support 5GHz WiFi 802.11 b/g/n) |
| 4G LTE | Supported (with SIM card slot) |
| Sintonizador de radio | FM/AM/RDS (FM: 87.5-108.5MHz, AM: 520-1700 Hz) |
| GPS | Built-in, supports online/offline maps (GPS, BDS, GLONASS) |
| Carplay/Android Auto | Inalámbrico |
| Soporte de formato de video | HD 1080P |
| Salida de audio | AUX-IN, Subwoofer audio output |
| Accesorios incluidos | Frame, Power Adapter, AHD Rear View Camera, GPS Antenna, 4G Antenna (for 4G models) |

Figure 9: Car multimedia player parameter table. This table provides a detailed comparison of different models (M100CP, M200S, M300S, M400S, M500S, M600S, M700S, M800S) including their internet connectivity, OS, core processor, RAM/ROM, Carplay/Android Auto support, Bluetooth version, resolution, screen type, cooling fan, DSP, and RDS features.
Garantía y soporte
For warranty information and technical support, please refer to the documentation provided with your purchase or contact EsaSam customer service. Keep your purchase receipt for warranty claims.
Additional accessories like DVR, TPMS, DAB+, and OBD2 require separate purchase and are not included with the standard unit.

Figure 10: Optional accessories and UI designs. This image shows additional features like ADAS DVR, OBD II, and TPMS (sold separately), along with various user interface designs.