
1. Introducción
This manual provides instructions for the proper setup, operation, and maintenance of your Luqeeg Smart Two-Way Voice Intercom System. This wireless intercom system is designed to facilitate communication within homes, offices, or other environments, offering a convenient way to speak with individuals in different rooms or areas without shouting. It is particularly useful for caregivers, families with young children, or individuals requiring assistance.

Figura 1: The intercom system is suitable for diverse applications, including assisting caregivers, monitoring children, and providing peace of mind for pregnant women.
2. Contenido del paquete
Verifique que todos los artículos enumerados a continuación estén incluidos en su paquete. Si falta algún artículo o está dañado, comuníquese con atención al cliente.
- Intercom Unit (2x)
- Base de carga (2x)
- Cable de carga USB (2x)
- Manual de usuario (este documento)
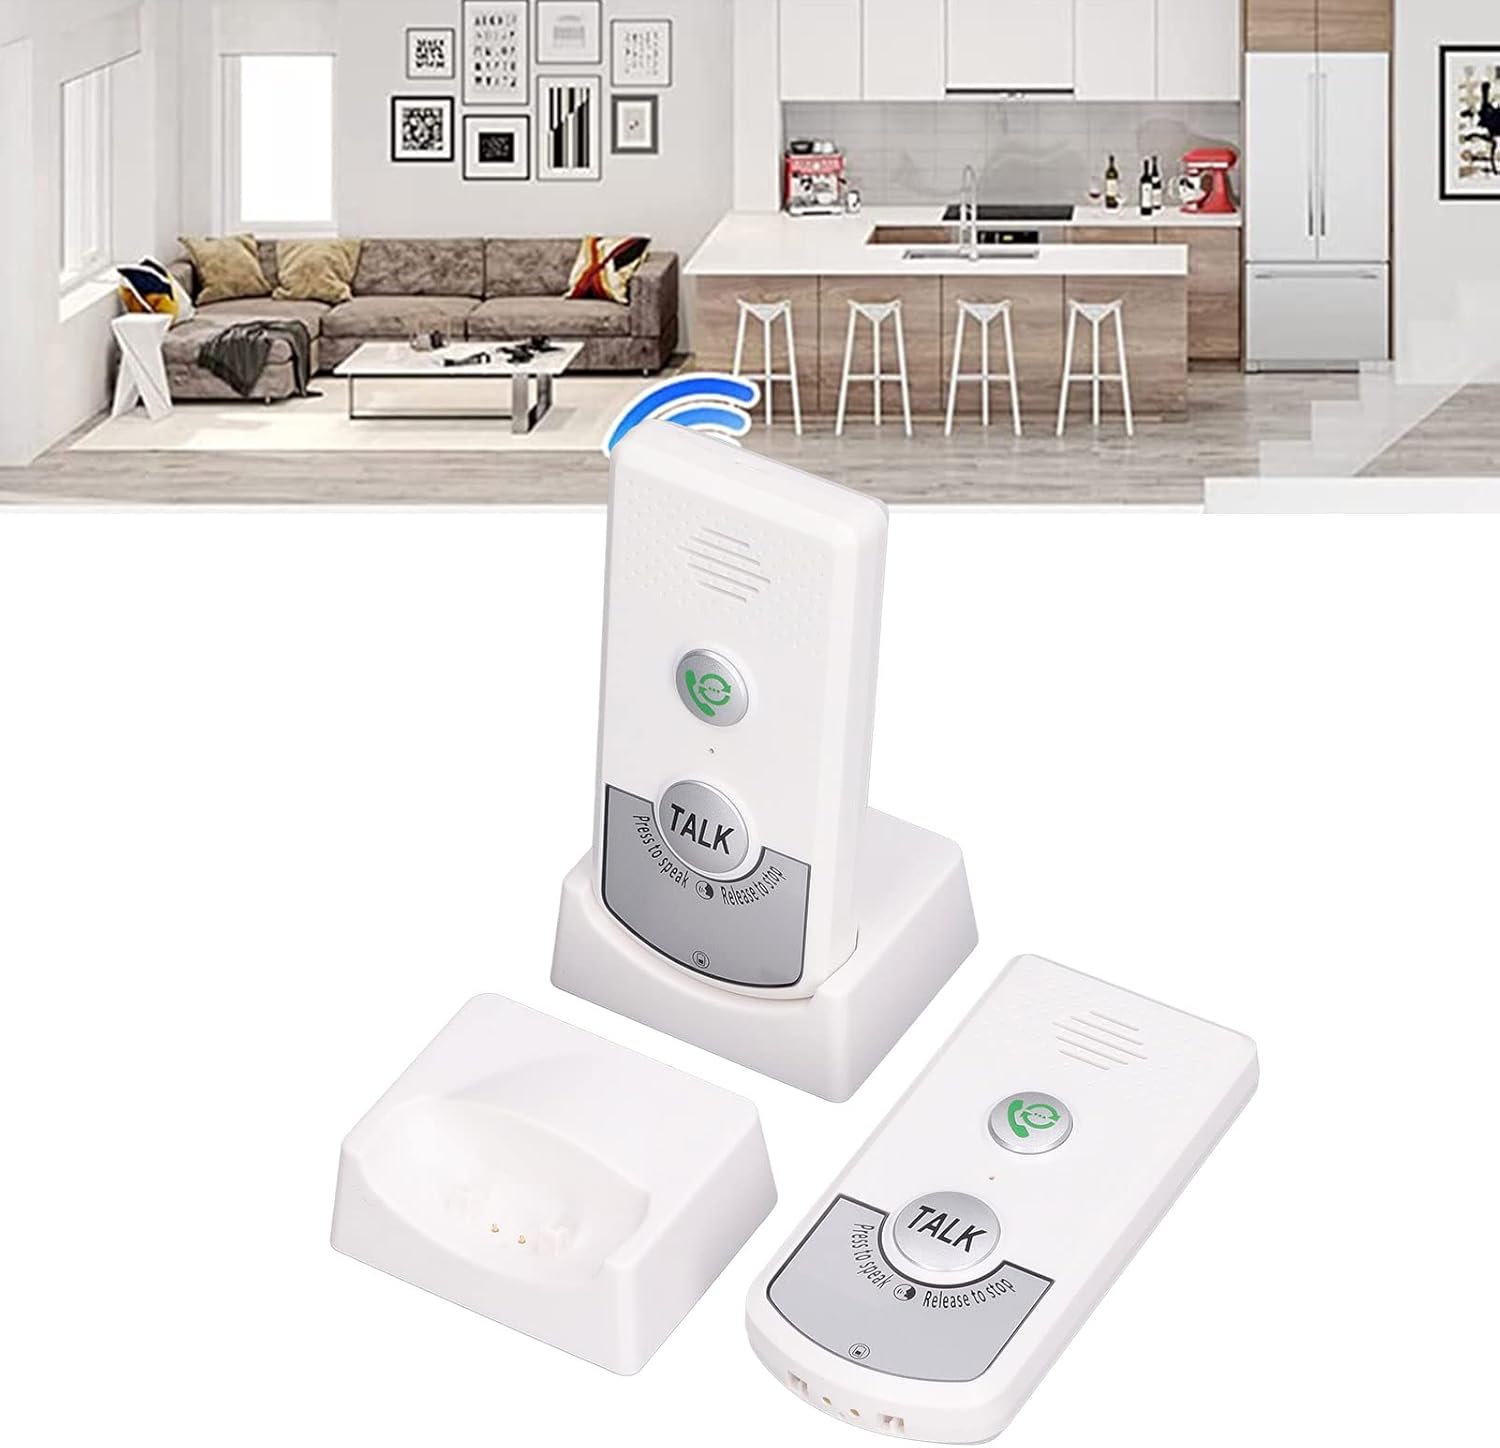
Figura 2: Contents of the Luqeeg Smart Two-Way Voice Intercom System package.
3. Producto terminadoview
Familiarícese con los componentes y controles de su unidad de intercomunicación.

Figura 3: Frente view of the intercom unit, highlighting key controls.
- Botón de llamada: Press to initiate a call to the other intercom unit.
- Botón HABLAR: Mantenga presionado para hablar y suéltelo para escuchar.
- Vocero: Outputs audio from the other unit.
- Micrófono: Captures your voice during communication.
- Control de volumen: Adjusts the speaker volume (3 levels).
- Channel Switch (A/B): Selects the communication channel.
- Puerto de carga (USB-C): Located on the back/bottom for power input.
- Luz indicadora: Provides status information (e.g., charging, low battery, call status).

Figura 4: Trasero view of the intercom unit, showing the charging port and information label.
4. Configuración
Follow these steps to set up your intercom system for first use.
- Cargar las unidades: Connect each intercom unit to its charging base using the provided USB cables and a compatible USB power adapter (not included). The indicator light will show charging status. A full charge provides up to 48 hours of endurance.
- Seleccione un canal: Each unit has a channel switch (A or B). Ensure both intercom units are set to the same channel (e.g., both on 'A' or both on 'B') for them to communicate.
- Colocación: Place the intercom units in desired locations within your home or facility. Consider areas where communication is most needed, such as a living room, bedroom, kitchen, or garage. The system is designed for multi-floor communication.

Figura 5: Example of intercom unit placement for multi-level communication.
5. Instrucciones de funcionamiento
Learn how to use your intercom system for effective two-way communication.
- Iniciar una llamada: Press the Call Button (green phone icon) on your unit. The other unit will ring to alert the recipient.
- Discurso: Once the call is established or if you wish to speak directly, press and hold the large "TALK" button. Speak clearly into the microphone.
- Escuchando: Release the "TALK" button to listen for a response from the other unit. The system operates in a push-to-talk, release-to-listen manner.
- Ajuste del volumen: Use the volume control buttons on the side of the unit to increase or decrease the speaker volume to one of the three available levels.
- Terminar una llamada: Calls typically end when both parties stop pressing the "TALK" button.

Figura 6: Visual representation of two-way intercom communication.
6. Mantenimiento
Proper care ensures the longevity and optimal performance of your intercom system.
- Limpieza: Limpie las unidades con un paño suave y seco. No utilice limpiadores abrasivos ni disolventes.
- Cuidado de la batería: Recharge the units regularly, approximately every two days, to maintain battery health and ensure continuous operation. Avoid fully depleting the battery frequently.
- Almacenamiento: Guarde las unidades en un lugar fresco y seco cuando no las utilice durante períodos prolongados.
7. Solución de problemas
Consulte esta sección para obtener soluciones a problemas comunes.
| Problema | Posible causa | Solución |
|---|---|---|
| Sin sonido o mala calidad de audio | Incorrect channel, low volume, out of range, battery low. | Ensure both units are on the same channel (A or B). Adjust volume. Move units closer. Charge batteries. |
| La unidad no enciende | Batería agotada. | Connect to charging base and charge for at least 30 minutes. |
| Luz indicadora parpadeante en rojo | Batería baja. | Recargue la unidad inmediatamente. |
| Indicator light flashing green | Indoor doorbell (call received). | This indicates an incoming call. Respond by pressing the TALK button. |
| Cannot communicate between units | Diferentes canales seleccionados. | Verify both units are set to the same channel (A or B). |
8. Especificaciones
Key technical details of the Luqeeg Smart Two-Way Voice Intercom System.
| Característica | Detalle |
|---|---|
| Número de modelo | Luqeegdhgx643e9t-12 |
| Peso del artículo | 10.8 onzas |
| Dimensiones del paquete | 5.51 x 3.54 x 2.76 pulgadas |
| Color | Blanco |
| Canales | 2 (A and B) |
| Niveles de volumen | 3 niveles ajustables |
| Resistencia de la batería | Hasta 48 horas |
| Vol. De cargatage | 5 V CC |
9. Garantía y soporte
For warranty information, please refer to the documentation provided at the time of purchase or contact your retailer. For technical support or further assistance, please contact Luqeeg customer service through their official channels.