1. Introducción
Thank you for choosing the SFT Preamplifier Pickup System. This innovative device is designed to significantly enhance the acoustic properties of your guitar, providing rich, resonant tones and versatile effects. This manual will guide you through the installation, operation, and maintenance of your new preampsistema elevador.
2. Características principales
- SFT (Same Frequency Trans) Technology: Drives the guitar body to phonate, increasing frequency response and making the sound more resonant, solid, and dynamic, even without an external ampmás duradero.
- Efectos integrados: Features built-in Reverb, Chorus, and Delay effects for creative sound shaping.
- Dual-Pickup System: Combines a piezo pickup and a microphone to capture comprehensive details of your playing, adding extensiveness and dynamics.
- Conectividad Bluetooth: Allows connection to a mobile phone for playing along with background music or tracks.
- Batería recargable: Equipped with a 2000mAh rechargeable Li-ion battery for portable use.
- Construcción duradera: Made from Acrylonitrile Butadiene Styrene (ABS) material.
3. Contenido del paquete
Por favor verifique que todos los artículos estén presentes en el paquete:
- 1 x SFT Preamplifier Pickup
- 1 x conector de clavija final
- 1 x Cuerno Vibrador
- 1 x cable de captación
- 1 x cable tipo C
- 2 x pinza
4. Configuración e instalación
Nota importante: Este es un pre a bordoamplifier system that requires opening holes in your guitar for proper installation. Professional installation by a qualified luthier or guitar technician is highly recommended to avoid damage to your instrument.
4.1. Componentes sobreview

Figura 4.1: Sobreview of the SFT Preamplifier Pickup System's controls and interfaces.
4.2. Pasos de instalación (se recomienda instalación profesional)
- Prepara la guitarra: Carefully mark the locations for the preamplifier unit, end-pin jack, and vibrating horn on your guitar.
- Perforar agujeros: Precisely drill the necessary holes for mounting the components. Ensure correct sizing to prevent damage.
- Install End-Pin Jack: Secure the end-pin jack at the designated location, typically at the bottom of the guitar.
- Mount Vibrating Horn: Install the vibrating horn inside the guitar body, ensuring it has clear contact with the soundboard for optimal resonance transmission.
- Connect Pickup Wire: Connect the pickup wire from the piezo pickup (usually under the saddle) to the preampUnidad Lifier.
- Instalar PreampUnidad elevadora: Mount the preamplifier unit securely, ensuring all connections are firm.
- Insertar batería: Open the battery compartment and insert the 2000mAh rechargeable battery. Ensure correct polarity.

Figure 4.2: Battery compartment with 2000mAh battery.
5. Instrucciones de funcionamiento
5.1. Encendido / apagado
Locate the power button or switch on the preamplifier unit. Press and hold (or toggle) to power the unit on or off. The Dial LED Lamp will illuminate when the unit is active.
5.2. Ajuste de efectos
El preamplifier features dedicated controls for Reverb, Chorus, and Delay effects. Rotate the corresponding knobs to adjust the intensity of each effect. Experiment with different settings to find your desired sound.
5.3. Conexión Bluetooth (BT)
The unit is equipped with Bluetooth functionality (BT5.0). To connect to your mobile phone or other Bluetooth-enabled device:
- Asegúrese de que el preampEl elevador está encendido.
- Activa el Bluetooth en tu dispositivo móvil.
- Buscar available devices. The preamplifier debe aparecer como un dispositivo detectable.
- Seleccione el preamplifier from the list to pair. Once paired, you can play background music through the system, which will be mixed with your guitar sound.

Figure 5.1: Bluetooth and other features.
5.4. Uso del micrófono
The system includes a microphone as part of its dual-pickup setup. For the microphone to be effective and audible, the preamplifier must be connected to an external speaker or amplifier. Adjust the 'Mic' control knob to blend the microphone signal with the piezo pickup signal.
6. Mantenimiento
6.1. Carga de la batería
El preamplifier is equipped with a 2000mAh rechargeable battery. When the battery indicator shows low power, connect the provided Type-C cable to the charging port on the unit and to a suitable USB power source. The charging rate is increased by 50% with the Type-C interface.

Figura 6.1: Carga del preamplifier via Type-C cable.
6.2. Limpieza
Wipe the unit with a soft, dry cloth. Do not use abrasive cleaners or solvents, as these may damage the finish or internal components.
6.3. Almacenamiento
Cuando no se utilice durante períodos prolongados, guarde el productoamplifier in a cool, dry place away from direct sunlight and extreme temperatures. It is advisable to fully charge the battery before long-term storage.
7. Solución de problemas
- Sin salida de sonido:
- Asegúrese de que la unidad esté encendida y completamente cargada.
- Check all cable connections (pickup wire, end-pin jack to ampmás duradero).
- Verifique que el volumen de su amplifier/speaker is turned up.
- El micrófono no funciona:
- The microphone requires connection to an external speaker or amplifier to be effective. Ensure your system is connected.
- Adjust the 'Mic' control knob to increase the microphone signal.
- Problemas de conexión Bluetooth:
- Asegúrese de que el preamplifier is in pairing mode or discoverable.
- Desactive y active el Bluetooth en su dispositivo móvil.
- Move closer to the preamplifier to ensure you are within Bluetooth range.
- Poor Resonance/Effects:
- Ensure the vibrating horn is properly installed and making good contact with the guitar's soundboard.
- Adjust the Reverb, Chorus, and Delay knobs to desired levels.
8. Especificaciones
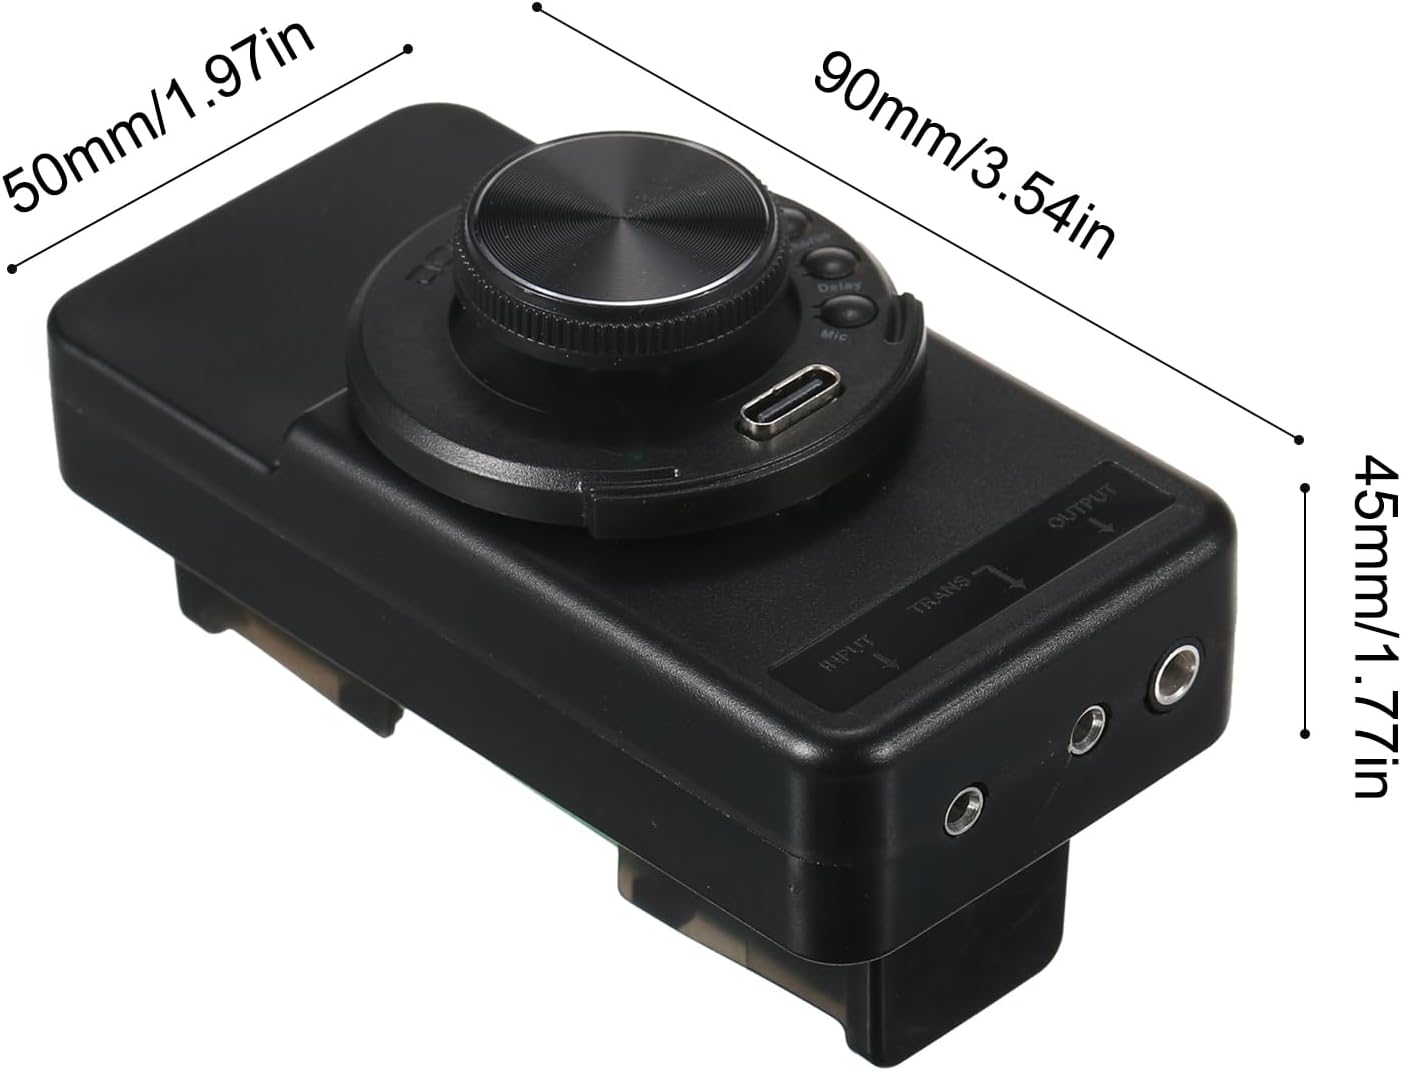
Figura 8.1: Dimensiones del producto.
| Característica | Especificación |
|---|---|
| Modelo | OS1 Resonance Pickup |
| Material | Acrilonitrilo butadieno estireno (ABS) |
| Batería | 1 batería recargable de iones de litio de 2000 mAh |
| Tamaño del artículo | 90 x 50 x 45 mm (3.54 x 1.97 x 1.77 pulgadas) |
| Peso del artículo | 207 gramos (7.30 onzas) |
| Dispositivos compatibles | Guitarra |
| Color | Negro |
| País natal | Porcelana |
9. Garantía y soporte
Specific warranty information for this product is not provided in the available documentation. For details regarding warranty coverage, technical support, or service, please refer to the manufacturer's official website or contact the retailer from whom you purchased the product. Please retain your proof of purchase for any warranty claims.


