
Introducción
This manual provides detailed instructions for the GAMFAMI TERIOS Wireless Controller. Please read this manual carefully before using the product to ensure proper operation and to maximize your gaming experience. This controller is designed for use with PlayStation 4, PS4 Pro, and PS4 Slim consoles.
Características del producto
- Joysticks de efecto Hall: Equipped with Hall joysticks to prevent drift and ensure a longer lifespan with smooth, precise control.
- Programación macro: Two programmable back buttons (M1, M2) allow mapping of various inputs (X, O, Triangle, Square, Up, Down, Left, Right, L3, R3, L1, R1, L2, R2) for enhanced gameplay.
- Conectividad inalámbrica: Enjoy a seamless wireless gaming experience with Bluetooth technology.
- Vibración de doble choque: Enhanced dual shock motors provide immersive haptic feedback for a realistic gaming experience.
- Función turbo: Activate the Turbo feature for rapid, repeated button presses, offering a competitive advantage.
- Batería de larga duración: Features a 1000mAh rechargeable battery for extended play sessions.
- Diseño ergonómico: Lightweight and durable ABS construction with textured grips for comfortable handling.
- Built-in Speaker & 3.5mm Audio Jack: Provides high-quality audio directly from the controller and supports headset connection.
Contenido del paquete
Por favor, compruebe el contenido del paquete al desembalarlo:
- GAMFAMI TERIOS Wireless Controller
- Cable de carga USB
- Manual de instrucciones
Disposición del controlador
Familiarize yourself with the buttons and features of your GAMFAMI TERIOS Wireless Controller.
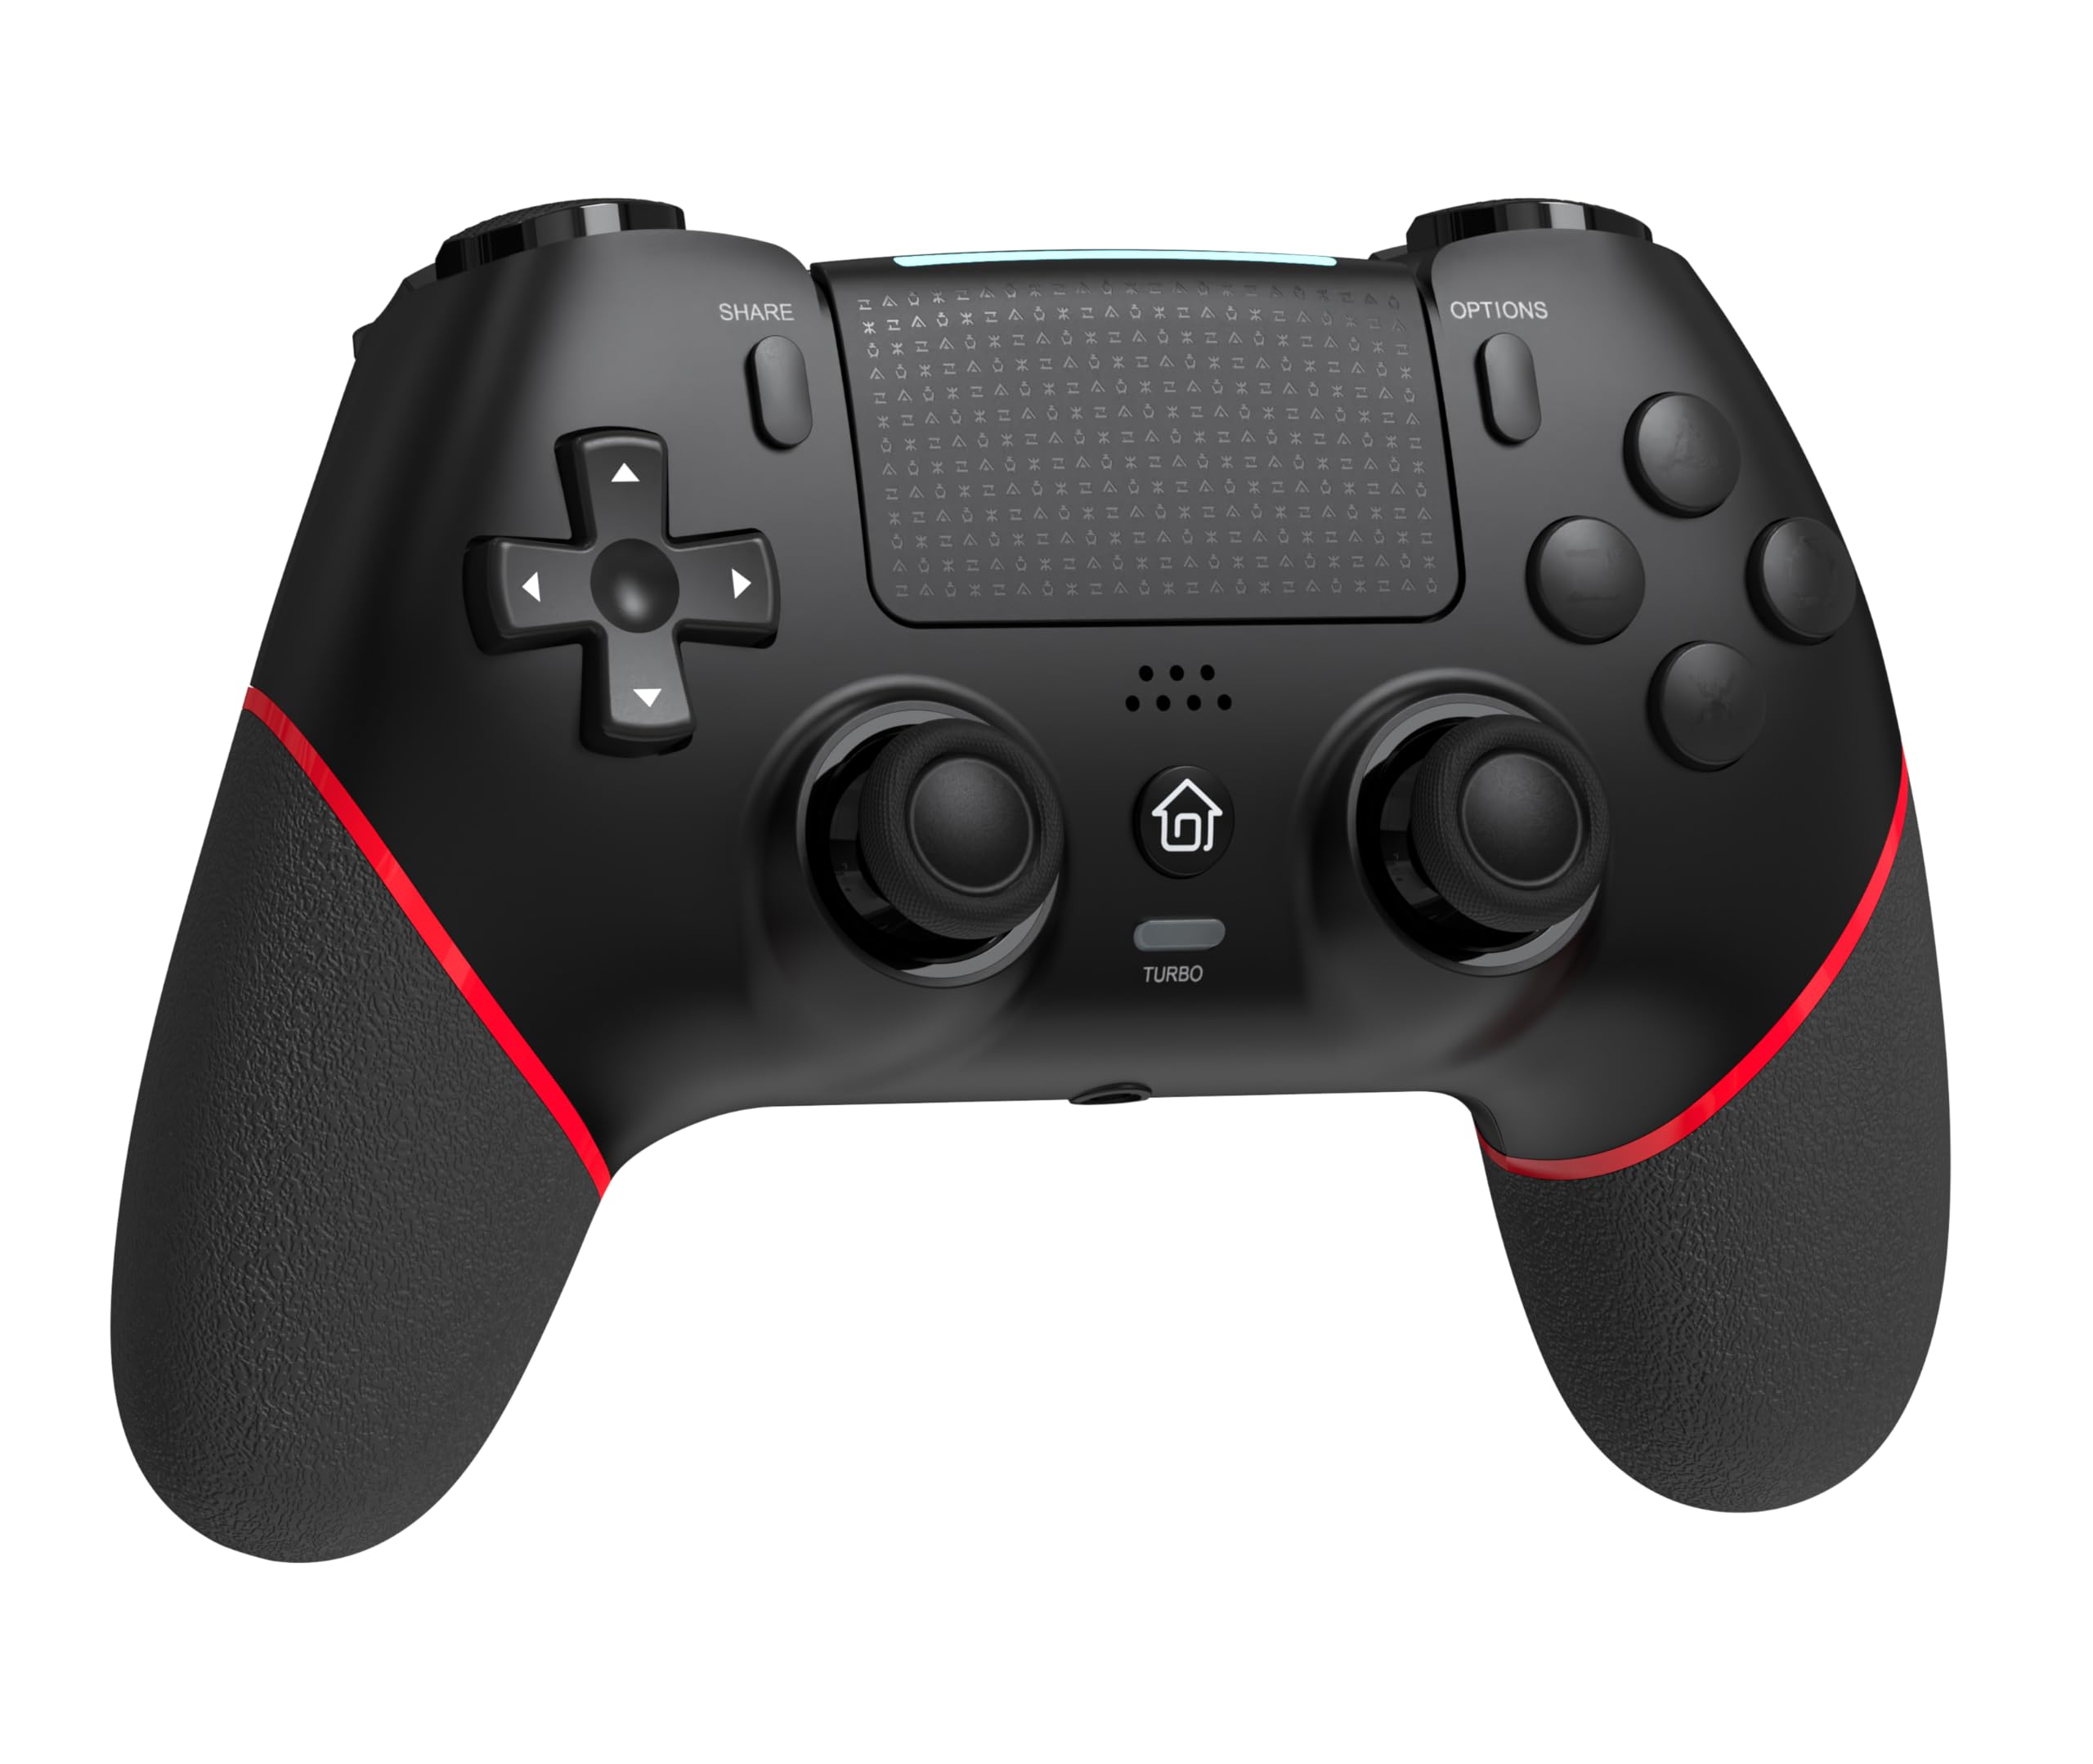
Frente view of the GAMFAMI TERIOS Wireless Controller, showing the joysticks, D-pad, action buttons, Share, Options, Home, and Turbo buttons, and the touchpad.
- Pad direccional (D-Pad): Para entrada direccional.
- Botones de acción (triángulo, círculo, cruz, cuadrado): Botones de acción estándar de PlayStation.
- Joysticks analógicos izquierdo/derecho: For precise movement and camera control. Features Hall Effect technology.
- Botón COMPARTIR: Para compartir contenido de juego.
- Botón OPCIONES: Para menús y opciones del juego.
- Botón PS (botón de inicio): To access the PS4 system menu.
- Botones L1/R1: Botones de hombro.
- Disparadores L2/R2: Disparadores analógicos.
- Panel táctil: Multi-touch input area.
- Botones M1/M2: Botones traseros programables.
- Botón TURBO: Activa/desactiva la función turbo.
- Conector para auriculares de 3.5 mm: Para conectar unos auriculares compatibles.
- Puerto USB-C: Para cargar y conexión por cable.

Atrás view of the controller, highlighting the M1 and M2 programmable buttons and product information.
Configuración y conexión
Pairing with PS4/PS4 Pro/PS4 Slim
- Asegúrese de que su consola PS4 esté encendida.
- Connect the controller to your PS4 console using the included USB charging cable.
- Press the PS button on the controller. The light bar will flash, indicating it is pairing.
- Una vez que la barra de luz se vuelve sólida, el controlador está emparejado exitosamente y listo para usar.
- Ahora puedes desconectar el cable USB para jugar de forma inalámbrica.
Reconnecting to PS4
After initial pairing, simply press the PS button on the controller to reconnect wirelessly to your PS4 console.
Instrucciones de funcionamiento
Usando la función Turbo
- Mantenga pulsado el TURBO botón.
- Mientras sostenía TURBO, press the action button (e.g., Cross, Circle, Square, Triangle, L1, R1, L2, R2) you wish to apply the turbo function to.
- Suelte ambos botones. El botón de acción seleccionado repetirá rápidamente su acción al mantenerlo pulsado.
- To disable turbo for a specific button, repeat the process: hold TURBO and press the turbo-enabled action button.
- To disable turbo for all buttons, press and hold the TURBO Botón durante 5 segundos.
Programación de macros (botones M1/M2)
The M1 and M2 buttons on the back of the controller can be programmed to replicate other button inputs.
- Mantenga pulsado el COMPARTIR botón y el M1 or M2 button simultaneously for 3 seconds until the light bar flashes rapidly. This indicates macro programming mode.
- Press the button(s) you wish to map to M1 or M2 (e.g., X, O, Triangle, Square, Up, Down, Left, Right, L3, R3, L1, R1, L2, R2). You can map a single button or a sequence of buttons.
- Presione el M1 or M2 button again to save the macro. The light bar will stop flashing rapidly and return to its normal state.
- To clear a macro, repeat step 1, then press the M1 or M2 button twice without pressing any other buttons.

Illustration of the advanced buttons and their programming capabilities.
Gestión de carga y batería
El controlador está equipado con una batería recargable de 1000 mAh.
Carga del controlador
- Connect the included USB charging cable to the USB-C port on the controller.
- Connect the other end of the cable to a USB port on your PS4 console (when powered on or in rest mode) or a compatible USB wall adapter (5V/1A recommended).
- La barra de luz del controlador parpadeará lentamente en color naranja mientras se carga.
- Una vez completamente cargada, la barra de luz se apagará.
Indicación del nivel de batería
The controller's light bar will indicate battery status. A low battery will cause the light bar to flash red. It is recommended to charge the controller when this occurs.
Mantenimiento
- Limpieza: Utilice un paño suave y seco para limpiar el mando. No utilice productos químicos agresivos ni materiales abrasivos.
- Almacenamiento: Guarde el controlador en un lugar fresco y seco, alejado de la luz solar directa y de temperaturas extremas.
- Evite las gotas: Proteja el controlador de caídas e impactos que puedan dañar los componentes internos.
Solución de problemas
| Problema | Solución |
|---|---|
| El controlador no se conecta/empareja. |
|
| Controller experiences input lag or disconnection. |
|
| Joysticks exhibit drift. |

Illustration of Hall Effect joystick technology, designed to prevent drift. |
| El controlador no carga. |
|
Presupuesto
| Nombre del modelo | TERIOS |
| Marca | GAMFAMI |
| Dispositivos compatibles | PS4, PS4 Pro, PS4 Slim |
| Tipo de controlador | Mando para juegos |
| Tecnología de conectividad | Bluetooth (inalámbrico) |
| Fuente de poder | Funciona con pilas |
| Capacidad de la batería | 1000 mAh |
| Peso del artículo | 0.37 kilogramos |
| Color | Negro Rojo |
Garantía y soporte
For warranty information and technical support, please refer to the documentation included with your purchase or visit the official GAMFAMI webSitio. Conserve su recibo de compra como comprobante de compra para cualquier reclamación de garantía.
For further assistance, please contact GAMFAMI customer service through their official channels.