
1. Introducción
This user manual provides comprehensive instructions for the installation, configuration, and operation of your KuWFi CPE120 and CPE130 2.4G Wireless WiFi Bridge and Outdoor Access Point. Please read this manual carefully before using the device to ensure proper setup and optimal performance. Keep this manual for future reference.
2. Producto terminadoview
The KuWFi CPE120 and CPE130 are 300Mbps outdoor wireless devices designed to extend Wi-Fi coverage over long distances, up to 1KM. They support Point-to-Point (PTP) and Point-to-Multi-Point (PTMP) connections, functioning as both a wireless bridge and an access point. These devices are built for outdoor use, featuring waterproof, dustproof, and lightning protection.
2.1. CPE120 Features
- 300Mbps Outdoor Wireless WiFi Bridge.
- Supports 1KM Long Range WiFi Extender functionality.
- LED display for configuring PTP/PTMP connections.
- Supports AP and Bridge operation modes.
- Resistente al agua, al polvo y a los rayos.
- Temperatura de funcionamiento: -30℃ a 55℃.
2.2. CPE130 Features
- Economic 300Mbps outdoor CPE.
- LED display support for 1KM Long Range.
- Improved wireless networking for extended coverage.
- Seamless wireless connectivity for homes and secondary buildings.
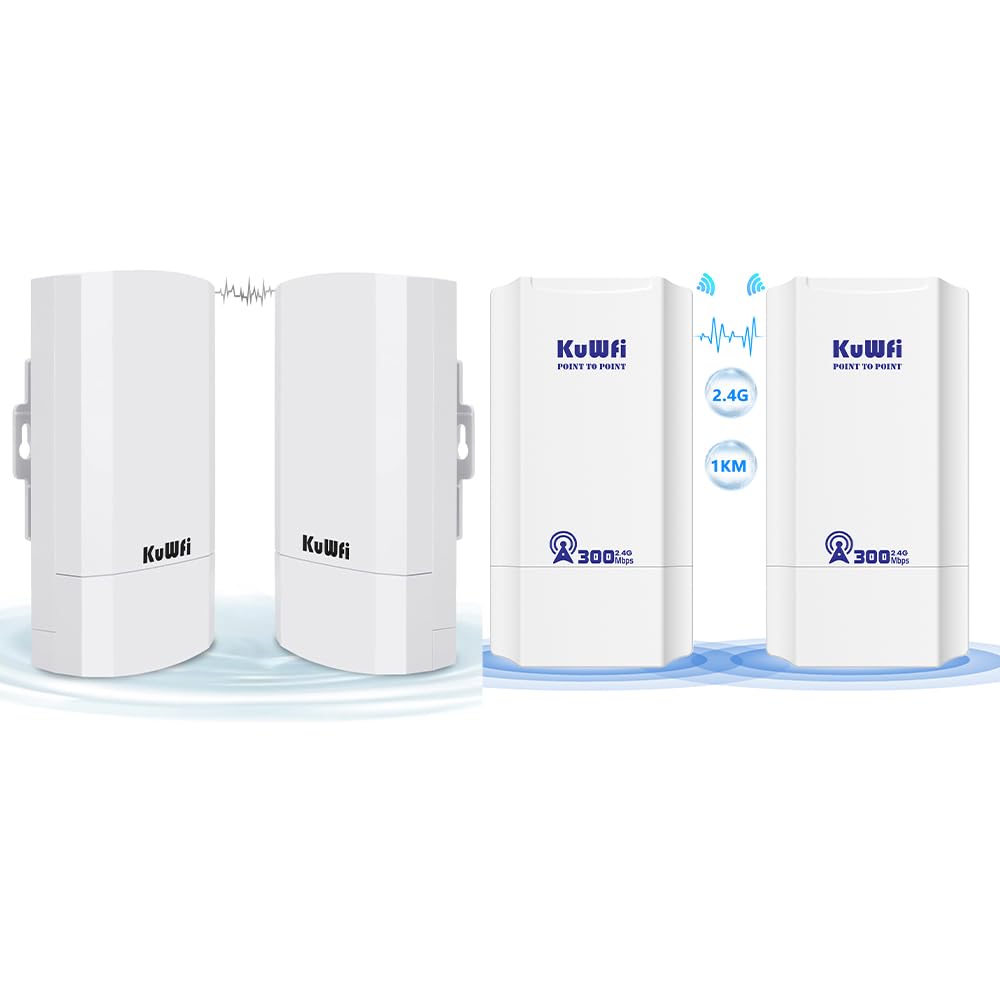
Figure 2.1: KuWFi CPE120/CPE130 Wireless Bridge Devices.

Figure 2.2: KuWFi CPE device highlighting 1KM long-range capability.
3. Contenido del paquete
Al abrir el paquete, verifique que todos los elementos enumerados a continuación estén presentes y en buenas condiciones:
- KuWFi CPE120/CPE130 Wireless Bridge Device(s)
- PoE (Power over Ethernet) Injector(s)
- Cable(s) Ethernet
- Mounting Accessories (e.g., zip ties)
- Manual de usuario (este documento)

Figura 3.1: Accesorios incluidos y dimensiones del dispositivo.
4. Hardware terminadoview
Familiarize yourself with the physical components of the CPE device.
4.1. Puertos e indicadores
Each CPE device features the following ports and LED indicators on its underside:
- Puerto WAN: Used for connecting to the network (e.g., router, NVR) and for Power over Ethernet (PoE) input.
- Puerto LAN: Used for connecting to client devices (e.g., IP camera, PC).
- Botón de reinicio: Used to reset the device to factory defaults. Press and hold for approximately 5-10 seconds while the device is powered on.
- Pantalla LED: A digital display showing configuration status (e.g., '8.8.8.8' for Master, '8.8.8.9' for Slave, or other status codes).
- Luces indicadoras:
- LED de encendido: Indica el estado de energía.
- LED de WAN: Indica actividad del puerto WAN.
- LED de LAN: Indica actividad del puerto LAN.
- LED de intensidad de la señal: Multiple LEDs indicating wireless signal strength.

Figure 4.1: CPE Device Ports and Indicators (Master and Slave examparchivos).

Figura 4.2: detallada view of CPE device ports and controls.
5. Configuración e instalación
The KuWFi CPE devices can be configured for Point-to-Point (PTP) or Point-to-Multi-Point (PTMP) connections. One device will act as the Maestro, and the other(s) as esclavo(s).
5.1. Basic Connection Diagram (PTP)
For a basic Point-to-Point setup, you will need two CPE devices. One acts as the Master, connected to your network source (e.g., router), and the other as the Slave, connected to your client device (e.g., IP camera, PC).
- Master Device Setup:
- Connect an Ethernet cable from your router/NVR to the WAN port of the Master CPE device.
- Power the Master CPE device using the provided PoE injector.
- Ensure the LED display on the Master device shows the correct configuration (e.g., '8.8.8.8').
- Slave Device Setup:
- Connect an Ethernet cable from the LAN port of the Slave CPE device to your client device (e.g., IP camera, PC).
- Power the Slave CPE device using the provided PoE injector.
- Ensure the LED display on the Slave device shows the correct configuration (e.g., '8.8.8.9').
- Montaje: Mount the devices outdoors in a clear line of sight for optimal signal transmission. Use the provided mounting accessories.

Figure 5.1: Point-to-Point Extended Network Diagram.

Figure 5.2: Point-to-Point and Point-to-Multi-Point Extended Camera Monitoring Range.
Figure 5.3: Wireless Bridge Master and Slave Connection ExampLes.
5.2. Configuring Master/Slave Roles
The CPE devices typically use an LED display for initial configuration. Refer to the device's quick start guide or the manufacturer's website for specific steps on how to set one device as Master and the other(s) as Slave(s) using the LED display or a web interfaz.
- Maestro: Connects to the main network source (e.g., router).
- Esclavo: Connects to the remote client device(s).
6. Modos de funcionamiento
The KuWFi CPE devices support two primary operating modes:
- Modo AP (Punto de acceso): In this mode, the device acts as a wireless access point, broadcasting a Wi-Fi signal for other devices to connect to. This is typically used when the CPE is connected to a wired network and needs to provide wireless access.
- Modo Puente: In this mode, the device creates a wireless link between two wired networks or extends a wired network wirelessly. This is the primary mode for PTP/PTMP connections, where one CPE bridges the network to another CPE.
7. Mantenimiento
To ensure the longevity and optimal performance of your KuWFi CPE devices, follow these maintenance guidelines:
- Limpieza: Periodically clean the exterior of the devices with a soft, dry cloth. Do not use liquid cleaners or aerosols.
- Actualizaciones de firmware: Check the KuWFi official websitiowww.kuwfi.com) for the latest firmware updates. Keeping the firmware updated can improve performance, add new features, and fix bugs.
- Protección ambiental: Ensure the devices are securely mounted and protected from extreme weather conditions beyond their specified operating range.
8. Solución de problemas
If you encounter issues with your KuWFi CPE devices, refer to the following common troubleshooting steps:
- Sin energía:
- Ensure the PoE injector is properly connected and receiving power.
- Compruebe todas las conexiones de cables.
- Sin conexión de red:
- Verify that the Master and Slave devices are correctly configured (e.g., LED display shows correct codes).
- Check the WAN/LAN LED indicators for activity.
- Ensure there is a clear line of sight between the Master and Slave devices.
- Try resetting both devices to factory defaults and reconfiguring them.
- Confirm that the connected router/NVR is functioning correctly.
- Señal débil/velocidad lenta:
- Adjust the alignment of the devices to ensure optimal signal strength.
- Check for obstructions between the devices.
- Ensure the distance between devices does not exceed the recommended range (1KM).
- Minimiza la interferencia de otros dispositivos inalámbricos de 2.4 GHz.
- No se puede acceder Web Interface (if applicable):
- Ensure your computer is connected to the CPE's LAN port or a network segment that can reach the CPE's IP address.
- Verify the CPE's default IP address (refer to the quick start guide or device label).
- Temporarily disable your computer's firewall.
For further assistance, please visit the KuWFi support websitio o póngase en contacto con el servicio de atención al cliente.
9. Especificaciones
| Característica | Descripción |
|---|---|
| Marca | KuWFi |
| Nombre del modelo | CPE120, CPE130 |
| Característica especial | Modo de punto de acceso, WPS |
| Clase de banda de frecuencia | Banda única (2.4 GHz) |
| Estándar de comunicación inalámbrica | 802.11n |
| Dispositivos compatibles | Portátil, computadora personal, teléfono inteligente, tableta |
| Tecnología de conectividad | Wifi |
| Tipo de antena | Fijado |
| Protocolo de seguridad | WPS (configuración protegida de Wi-Fi) |
| Método de control | Touch (referring to LED display interaction) |
| Ancho de banda del puerto LAN | 1000 Mbps |
| Velocidad máxima de transferencia de datos ascendente | 300 megabits por segundo |
| Is Modem Compatible | No |
| Cobertura | 1KM Long Range |
| Temperatura de funcionamiento | -30℃ a 55℃ |
| Temperatura de almacenamiento | -40℃ a 70℃ |
| Impermeable / a prueba de polvo | Sí |
| Protección contra rayos | Sí |
10. Información de seguridad
Tenga en cuenta las siguientes precauciones de seguridad:
- No abra el dispositivo casing. Deje todo servicio a personal cualificado.
- Asegúrese de que haya una conexión a tierra adecuada para la protección contra rayos.
- Use only the power adapter and PoE injector provided by the manufacturer.
- Evite colocar el dispositivo cerca de fuentes de calor o bajo la luz solar directa durante períodos prolongados.
- Keep the device away from water or excessive humidity.
11. Garantía y soporte
Specific warranty information is not provided within this manual. For details regarding warranty coverage, technical support, or customer service, please refer to the product packaging, the official KuWFi websitiowww.kuwfi.com), or contact your retailer.