
1. Introducción
The HUMZOR NP716 is an advanced bidirectional automotive diagnostic scan tool designed for comprehensive vehicle system analysis and maintenance. This device features ECU coding capabilities, all-system diagnostics, and over 17 special reset functions. Equipped with an Android 11.0 operating system and a 5.5-inch screen, it provides a user-friendly interface for efficient vehicle servicing. This manual provides detailed instructions for setting up, operating, maintaining, and troubleshooting your NP716 device.
2. Producto terminadoview
2.1 Características principales
- Control bidireccional: Perform active tests to control vehicle components and systems.
- Codificación de la ECU: Customize vehicle settings and perform module replacement functions.
- Todos los diagnósticos del sistema: Leer y borrar códigos de falla, view live data, and retrieve ECU information for all available vehicle systems.
- 17+ Special Reset Functions: Includes ABS Bleeding, Oil Reset, SAS Reset, TPMS Reset, EPB Reset, DPF Reset, Battery Reset, Injector Code, Throttle Learning, Gear Learning, CVT Learning, Windows, Suspension, Light, and Seat Reset.
- Sistema operativo: Android 11.0 for a smooth and intuitive user experience.
- Mostrar: Pantalla táctil de 5.5 pulgadas.
- Conectividad: Built-in Wi-Fi module.
- Actualizaciones de software: Incluye 3 años de actualizaciones de software gratuitas.
2.2 Contenido del paquete
The NP716 package typically includes the following components:
- HUMZOR NP716 Diagnostic Tablet
- VCI (Vehicle Communication Interface) Connector
- Cable de carga USB
- Adaptador de corriente
- Estuche protector de transporte
- Quick Start Guide (refer to this manual for full instructions)

Image 2.2.1: The HUMZOR NP716 diagnostic tablet, VCI module, and protective carrying case.

Image 2.2.2: A visual representation of the items included in the NP716 product package.
2.3 Dimensiones del dispositivo
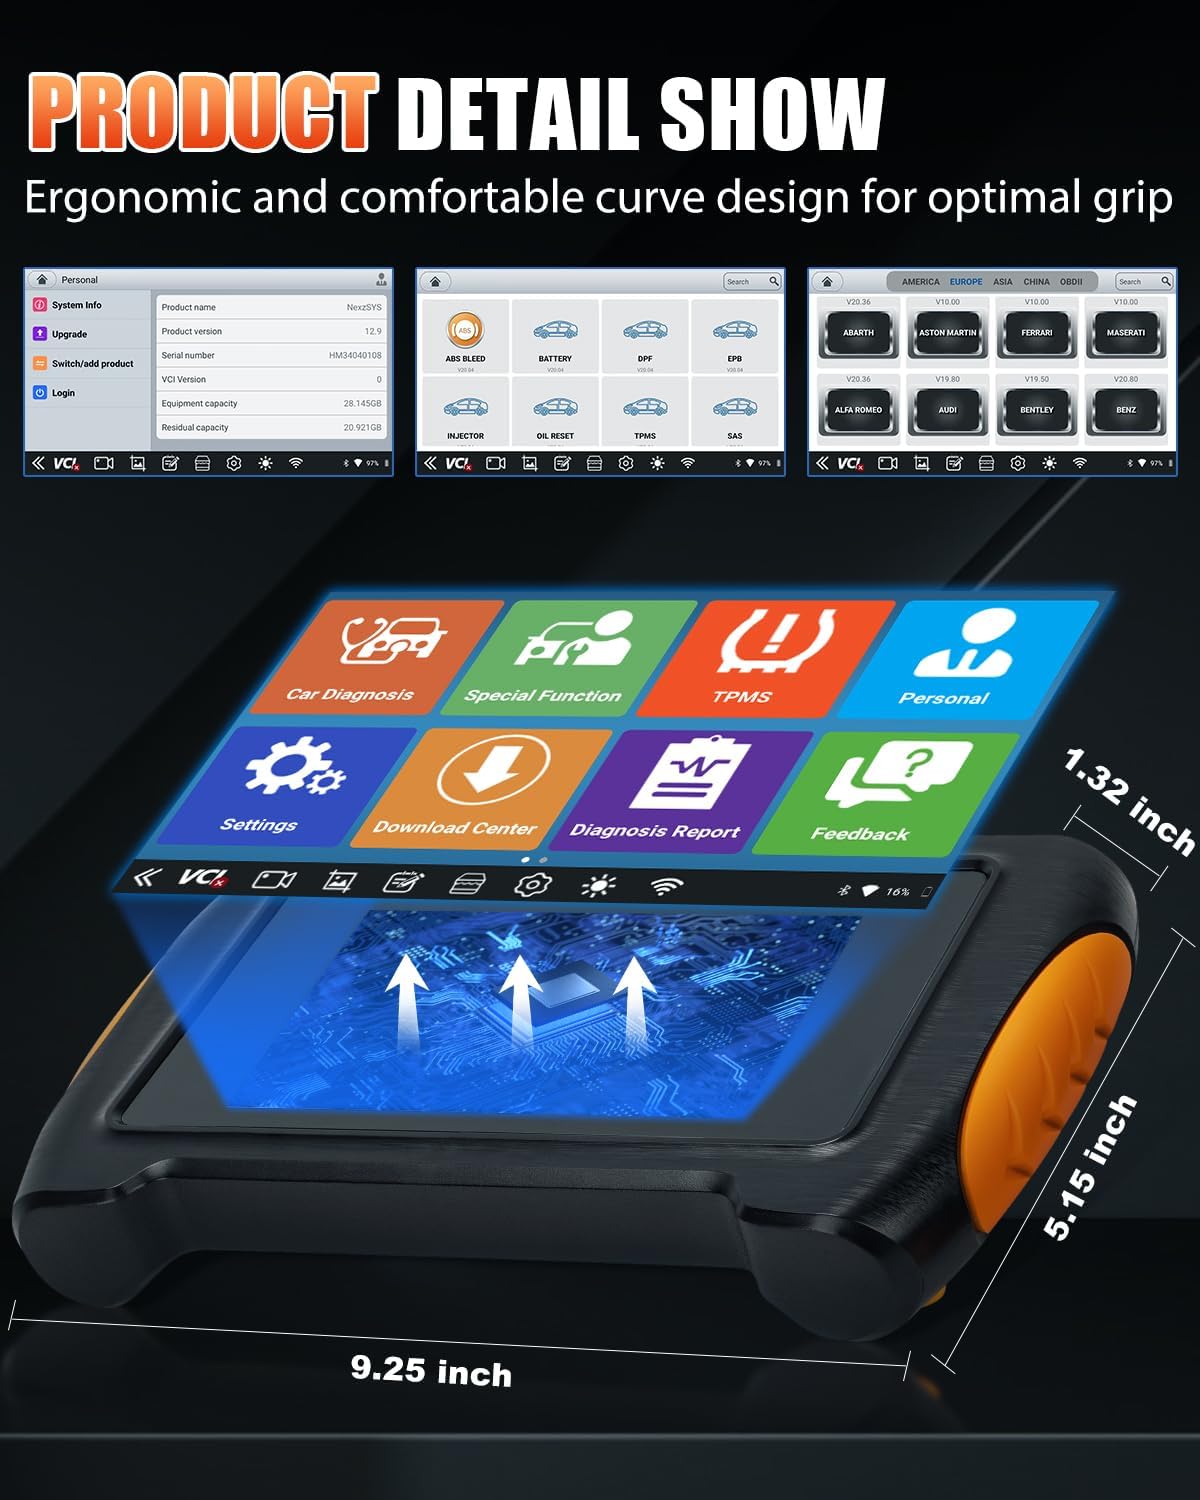
Image 2.3.1: The NP716 tablet showing approximate dimensions: 9.25 inches length, 5.15 inches width, and 1.32 inches thickness.
3. Configuración
3.1 Carga inicial
Before first use, ensure the NP716 tablet is fully charged. Connect the provided USB charging cable to the tablet and the power adapter, then plug the adapter into a standard electrical outlet. The charging indicator will illuminate.
3.2 Encendido / Apagado
- Encendido: Mantenga presionado el botón de encendido ubicado en el costado de la tableta hasta que la pantalla se ilumine.
- Apagado: Mantenga presionado el botón de Encendido, luego seleccione ‘Apagar’ de las opciones que aparecen en la pantalla.
3.3 Conexión VCI
The VCI (Vehicle Communication Interface) module connects the NP716 tablet to your vehicle's OBD-II port.
- Localice el puerto OBD-II del vehículo, generalmente debajo del tablero del lado del conductor.
- Plug the VCI module firmly into the OBD-II port. The VCI indicator lights should illuminate.
- The NP716 tablet will automatically attempt to establish a wireless connection with the VCI module. Ensure Bluetooth and Wi-Fi are enabled on the tablet.
3.4 Wi-Fi and Software Updates
Connect the NP716 to a stable Wi-Fi network to download vehicle software and system updates.
- From the main menu, tap 'Settings'.
- Select 'Wi-Fi' and choose your desired network. Enter the password if prompted.
- Once connected, navigate to the 'Download Center' or 'Upgrade' section on the main menu to download and install available software updates. Regular updates ensure compatibility with newer vehicles and improved functionality.
4. Instrucciones de funcionamiento
4.1 Navegación por la interfaz principal
The NP716 operates on Android 11.0, providing a familiar tablet-like interface. The main screen features icons for various functions:
- Car Diagnosis: For standard OBD-II and full system diagnostics.
- Funcion especial: Access to various reset and service functions.
- Sistema de monitoreo de presión de los neumáticos: Dedicated functions for Tire Pressure Monitoring Systems.
- Personal: Usuario profesionalfile y configuraciones.
- Ajustes: Configuración del dispositivo.
- Centro de descargas: Manage software downloads and updates.
- Informe de diagnóstico: View and manage saved diagnostic reports.
- Comentario: Provide feedback to the manufacturer.
4.2 Car Diagnosis (OE-Level Full System Diagnostic)
This function allows for comprehensive scanning of all available electronic control units (ECUs) in the vehicle.

Image 4.2.1: The diagnostic interface displaying various vehicle systems such as ENG (Engine), SRS (Airbag), ABS (Anti-lock Braking System), AFS (Adaptive Front-lighting System), and Battery.
- Tap 'Car Diagnosis' on the main menu.
- Select the vehicle make, model, and year. The tool can often identify the VIN automatically.
- Choose 'Auto Scan' for a full system scan or select specific systems (e.g., Engine, ABS, SRS, Transmission).
- The tool will display diagnostic trouble codes (DTCs), live data streams, and freeze frame data.
- Leer códigos: Retrieve current, pending, and permanent DTCs.
- Códigos claros: Erase DTCs after repairs have been made. Nota: Clearing codes does not fix the underlying problem.
- View Datos en tiempo real: Monitor real-time sensor data and operating parameters.
4.3 Control bidireccional (pruebas activas)
Bidirectional control allows the diagnostic tool to send commands to vehicle ECUs to perform specific tests and functions, verifying component integrity.
- Within the 'Car Diagnosis' section, after selecting the vehicle, navigate to 'Active Test' or 'Bidirectional Control'.
- Select the component or system you wish to test (e.g., fuel pump, ABS motor, window motor).
- Siga las instrucciones en pantalla para activar o desactivar el componente y observar su respuesta.
4.4 Funciones especiales (más de 17 servicios de reinicio)
The NP716 offers a wide range of service and reset functions for common maintenance tasks.

Image 4.4.1: A visual representation of the various special functions, including ABS Bleeding, Battery Reset, DPF Reset, EPB Reset, Injector Code, Oil Reset, TPMS Reset, SAS Reset, Throttle Learning, Gear Learning, CVT Learning, Windows, Suspension, Light, and Seat Reset.
Para acceder a estas funciones:
- Tap 'Special Function' on the main menu.
- Select the desired reset or service function from the list.
- Follow the on-screen instructions carefully, as specific procedures may vary by vehicle make and model.
Common special functions include:
- Purga del ABS: Bleeds air from the ABS system after brake component replacement.
- Reinicio de aceite: Restablece la luz de servicio de aceite y calcula el intervalo óptimo de cambio de vida útil del aceite.
- Restablecimiento de SAS: Calibrates the Steering Angle Sensor after replacement or alignment.
- Restablecimiento de TPMS: Resets Tire Pressure Monitoring System sensors.
- Restablecimiento del EPB: Restablece el freno de estacionamiento electrónico después de reemplazar las pastillas de freno.
- Restablecimiento del DPF: Performs Diesel Particulate Filter regeneration and reset.
- Reinicio de la batería: Registers new battery replacement with the vehicle's ECU.
- Código del inyector: Programa nuevos códigos de inyectores en la ECU.
- Aprendizaje del acelerador: Adapta el cuerpo del acelerador a su nueva posición después de la limpieza o el reemplazo.
4.5 Codificación de la ECU
ECU Coding allows for advanced customization and adaptation of vehicle modules. This function should only be performed by experienced technicians.
- Access 'ECU Coding' through the 'Car Diagnosis' menu after vehicle identification.
- Select the specific control module for coding.
- Follow the on-screen instructions to perform coding, adaptations, or module replacement procedures.
- Advertencia: Incorrect ECU coding can lead to vehicle malfunctions. Always ensure you have the correct procedures and data before proceeding.
5. Mantenimiento
5.1 Cuidado del dispositivo
- Mantenga el dispositivo limpio con un paño suave y seco. Evite el uso de limpiadores abrasivos o disolventes.
- Guarde el dispositivo en su estuche protector de transporte cuando no esté en uso para evitar daños.
- Evite exponer el dispositivo a temperaturas extremas, luz solar directa o alta humedad.
5.2 Gestión de la batería
The NP716 is equipped with a Lithium Ion battery. To prolong battery life:
- Cargue el dispositivo periódicamente, evitando que se descargue por completo.
- Si va a almacenar el dispositivo durante un período prolongado, asegúrese de que esté cargado aproximadamente entre el 50 y el 70 %.
5.3 Actualizaciones de software
Regularly check for and install software updates via the 'Download Center' to ensure optimal performance, expanded vehicle coverage, and new features.
6. Solución de problemas
6.1 El dispositivo no se enciende
- Asegúrese de que la batería esté cargada. Conecte el dispositivo al adaptador de corriente y vuelva a intentarlo.
- If the device is unresponsive, perform a hard reset by holding the power button for approximately 10-15 seconds.
6.2 VCI Connection Issues
- Verify the VCI module is securely plugged into the vehicle's OBD-II port.
- Check if the VCI indicator lights are on.
- Ensure Bluetooth and Wi-Fi are enabled on the NP716 tablet.
- Restart both the NP716 tablet and the vehicle's ignition.
6.3 Unable to Communicate with Vehicle
- Confirm the vehicle's ignition is in the 'ON' position (engine off).
- Ensure the VCI is properly connected and communicating with the tablet.
- Verify that the correct vehicle make, model, and year have been selected in the diagnostic software.
- Check for any blown fuses in the vehicle's OBD-II circuit.
6.4 Fallas de actualización de software
- Asegúrese de tener una conexión Wi-Fi estable y fuerte.
- Verifique que haya suficiente espacio de almacenamiento en el dispositivo.
- Try restarting the device and attempting the update again.
7. Especificaciones
| Característica | Especificación |
|---|---|
| Marca | Humzor |
| Modelo | NexzPad (NP716) |
| Sistema operativo | Androide 11.0 |
| Tamaño de pantalla | 5.5 pulgadas |
| Fuente de poder | Funciona con pilas (1 batería de iones de litio incluida) |
| Peso del artículo | 907 gramos |
| Dimensiones del paquete | 38.1 x 30.48 x 10.16 cm |
| Número de pieza del fabricante | NP716-HZ02 |
8. Garantía y soporte
For warranty information and technical support, please refer to the documentation provided with your purchase or contact HUMZOR customer service directly. Keep your purchase receipt as proof of purchase for warranty claims.
For the latest software updates and additional resources, visit the official HUMZOR websitio.