
Introducción
This manual provides essential information for the setup, operation, maintenance, and troubleshooting of your GIGABYTE MO34WQC2 34-inch QD-OLED Curved Gaming Monitor. Please read this manual thoroughly before using the product to ensure correct usage and optimal performance.
The GIGABYTE MO34WQC2 monitor features a 34-inch curved QD-OLED display, offering a 0.03ms GTG response time and a 240 Hz refresh rate for smooth visual experiences. It includes Type-C KVM functionality, allowing seamless switching between multiple devices.
Características principales:
- 3rd Gen QD-OLED Panel: Delivers high image quality and gaming performance.
- GIGABYTE OLED Care: AI-based algorithm to minimize burn-in risks with adjustable settings.
- Frecuencia de actualización de 240 Hz y tiempo de respuesta de 0.03 ms: Ensures ultra-smooth motion clarity and responsiveness.
- Life-Like Colors: Features 1.5M:1 contrast ratio, 99% DCI-P3 color gamut, and 10-bit color depth.
- VESA DisplayHDR True Black 400 & ClearMR 13000: Provides realistic contrast and top-tier motion clarity.
- AMD FreeSync Premium Pro: Reduces screen tearing and stuttering, especially in HDR content.
- Características tácticas: Includes Game Assist (timer, crosshairs, PIP/PBP), Black Equalizer 2.0, and Dashboard for enhanced gameplay.
- Garantía de 3 años: Covers panel burn-in (terms may vary by region).
Instrucciones de instalación
1. Desembalaje y montaje
Retire con cuidado el monitor y todos los componentes del embalaje. Coloque el monitor boca abajo sobre una superficie suave y limpia para evitar rayones.

This image shows the GIGABYTE MO34WQC2 monitor with its stand, viewed from the front. The monitor is curved and displays a vibrant, colorful image.
Colocación del soporte:
- Coloque el soporte en el panel del monitor. Asegúrese de que encaje firmemente en su lugar.
- Coloque la base del soporte en el cuello del soporte y apriete el tornillo en la parte inferior de la base.
Alternatively, the monitor supports VESA 100x100mm wall mounts. Refer to the image below for VESA mounting points.

This image illustrates the adjustable stand of the GIGABYTE MO34WQC2 monitor, showing its tilt range (-5° to +20°) and height adjustment (130mm). A close-up inset highlights the VESA 100x100mm mounting area on the back of the monitor.
2. Cables de conexión
Connect the necessary cables to the monitor's I/O ports. Ensure all connections are firm.

This diagram shows the input/output ports on the back of the GIGABYTE MO34WQC2 monitor. Ports include HDMI 2.1 (in), DP 1.4 (in), USB Type-C (DP Alt), Mic, Headphone, USB 3.2 (Upstream), and USB 3.2 (Downstream).
- Cable de energía: Conecte el cable de alimentación al monitor y a una toma de corriente.
- Entrada de video: Connect your PC or gaming console using an HDMI 2.1, DisplayPort 1.4, or USB Type-C cable.
- USB ascendente: For KVM functionality and USB hub use, connect a USB 3.2 Upstream cable from your PC to the monitor.
- Audio: Connect headphones or external speakers to the Headphone jack if desired.
Instrucciones de funcionamiento
1. Encendido y apagado
Presione el botón de encendido, generalmente ubicado en la parte posterior o inferior del monitor, para encenderlo o apagarlo. El indicador de encendido se iluminará cuando el monitor esté encendido.
2. Navegación en pantalla (OSD)
The monitor features a joystick control for navigating the OSD menu. This joystick is typically located on the back of the monitor.
- Prensa: Entrar al menú OSD / Confirmar selección.
- Arriba abajo: Navegar por las opciones del menú.
- Izquierda/Derecha: Adjust settings / Navigate sub-menus.
3. Funcionalidad KVM
The built-in KVM (Keyboard, Video, Mouse) switch allows you to control multiple devices (e.g., a desktop PC and a laptop) with a single keyboard and mouse connected to the monitor. To use KVM, ensure both devices are connected to the monitor via video input (HDMI/DP/USB-C) and the USB Upstream cable from the primary device.

This image shows the GIGABYTE MO34WQC2 monitor connected to a desktop PC via HDMI/DP and a laptop via USB Type-C, illustrating how the Type-C KVM feature allows switching between devices with a single button press.
Switch between connected devices using the dedicated KVM button or through the OSD menu.
4. Configuración de pantalla
Acceda al menú OSD para ajustar varias configuraciones de pantalla:
- Imagen: Brillo, Contraste, Nitidez, Temperatura de color.
- Color: Gamma, Hue, Saturation.
- Juego de azar: Overdrive, FreeSync Premium Pro, Black Equalizer 2.0, Crosshair, Timer.
- Aporte: Select input source (HDMI, DisplayPort, USB-C).
- Sistema: Language, OSD Timeout, Power LED.
5. GIGABYTE OLED Care
The monitor includes AI-based OLED Care features to prevent burn-in. These settings can be accessed and adjusted via the OSD menu. It is recommended to keep these features enabled for optimal panel longevity.
Mantenimiento
1. Limpieza del monitor
- Siempre apague el monitor y desenchufe el cable de alimentación antes de limpiarlo.
- Utilice un paño suave y sin pelusa ligeramenteampLimpiar con agua o un limpiador de pantalla no abrasivo.
- No rocíe el limpiador directamente sobre la pantalla.
- Evite utilizar productos químicos agresivos, disolventes o materiales abrasivos.
2. Cuidado del panel OLED
To prolong the life of your QD-OLED panel and minimize the risk of burn-in, utilize the GIGABYTE OLED Care features available in the OSD menu. These features include pixel shift, static image detection, and pixel refresh cycles. Regular use of these functions is recommended.
Solución de problemas
Si tiene problemas con su monitor, consulte los siguientes problemas y soluciones comunes:
| Problema | Posible solución |
|---|---|
| No hay imagen en la pantalla | Ensure the power cable is securely connected and the monitor is powered on. Verify the video input cable (HDMI, DP, USB-C) is properly connected to both the monitor and the source device. Select the correct input source via the OSD menu. |
| Parpadeo o distorsión de la imagen | Check video cable connections. Ensure the graphics card drivers are up to date. Try a different video cable or port. Disable or adjust FreeSync Premium Pro settings in the OSD if experiencing issues. |
| Los colores parecen incorrectos | Adjust color settings (brightness, contrast, color temperature) in the OSD menu. Ensure HDR is correctly configured on your source device and monitor. |
| Burn-in or image retention | Utilize the GIGABYTE OLED Care features in the OSD menu, such as Pixel Refresh or Static Image Detection, to mitigate these issues. Avoid displaying static images for extended periods. |
| KVM not switching devices | Ensure the USB Upstream cable is connected from the primary device to the monitor. Verify all video inputs are correctly connected. Check KVM settings in the OSD menu. |
Presupuesto
| Característica | Detalle |
|---|---|
| Marca | GIGABYTE |
| Número de modelo | MO34WQC2-SA |
| Tamaño de pantalla | 34 pulgadas |
| Resolución | Resolución WQHD 3440 x 1440 |
| Relación de aspecto | 21:9 |
| Tipo de pantalla | OLED QD |
| Frecuencia de actualización | 240 Hz |
| Tiempo de respuesta | 0.03 Milliseconds (GtG) |
| Relación de contraste | 1,500,000:1 |
| Gama de colores | 99% DCI-P3 |
| Compatibilidad con HDR | VESA DisplayHDR True Black 400 |
| Sincronización adaptativa | AMD FreeSync Premium Pro |
| Conectividad | 2x HDMI 2.1, 1x DisplayPort 1.4, 1x USB Type-C (DP Alt Mode), 2x USB 3.2 (Downstream), 1x USB 3.2 (Upstream), Headphone Jack |
| Ajustes | Altura, inclinación |
| Montaje VESA | 100x100 mm |
| Dimensiones (An x Pr x Al) | 31.96" x 9.65" x 23.42" (con soporte) |
| Peso | 21.7 libras |
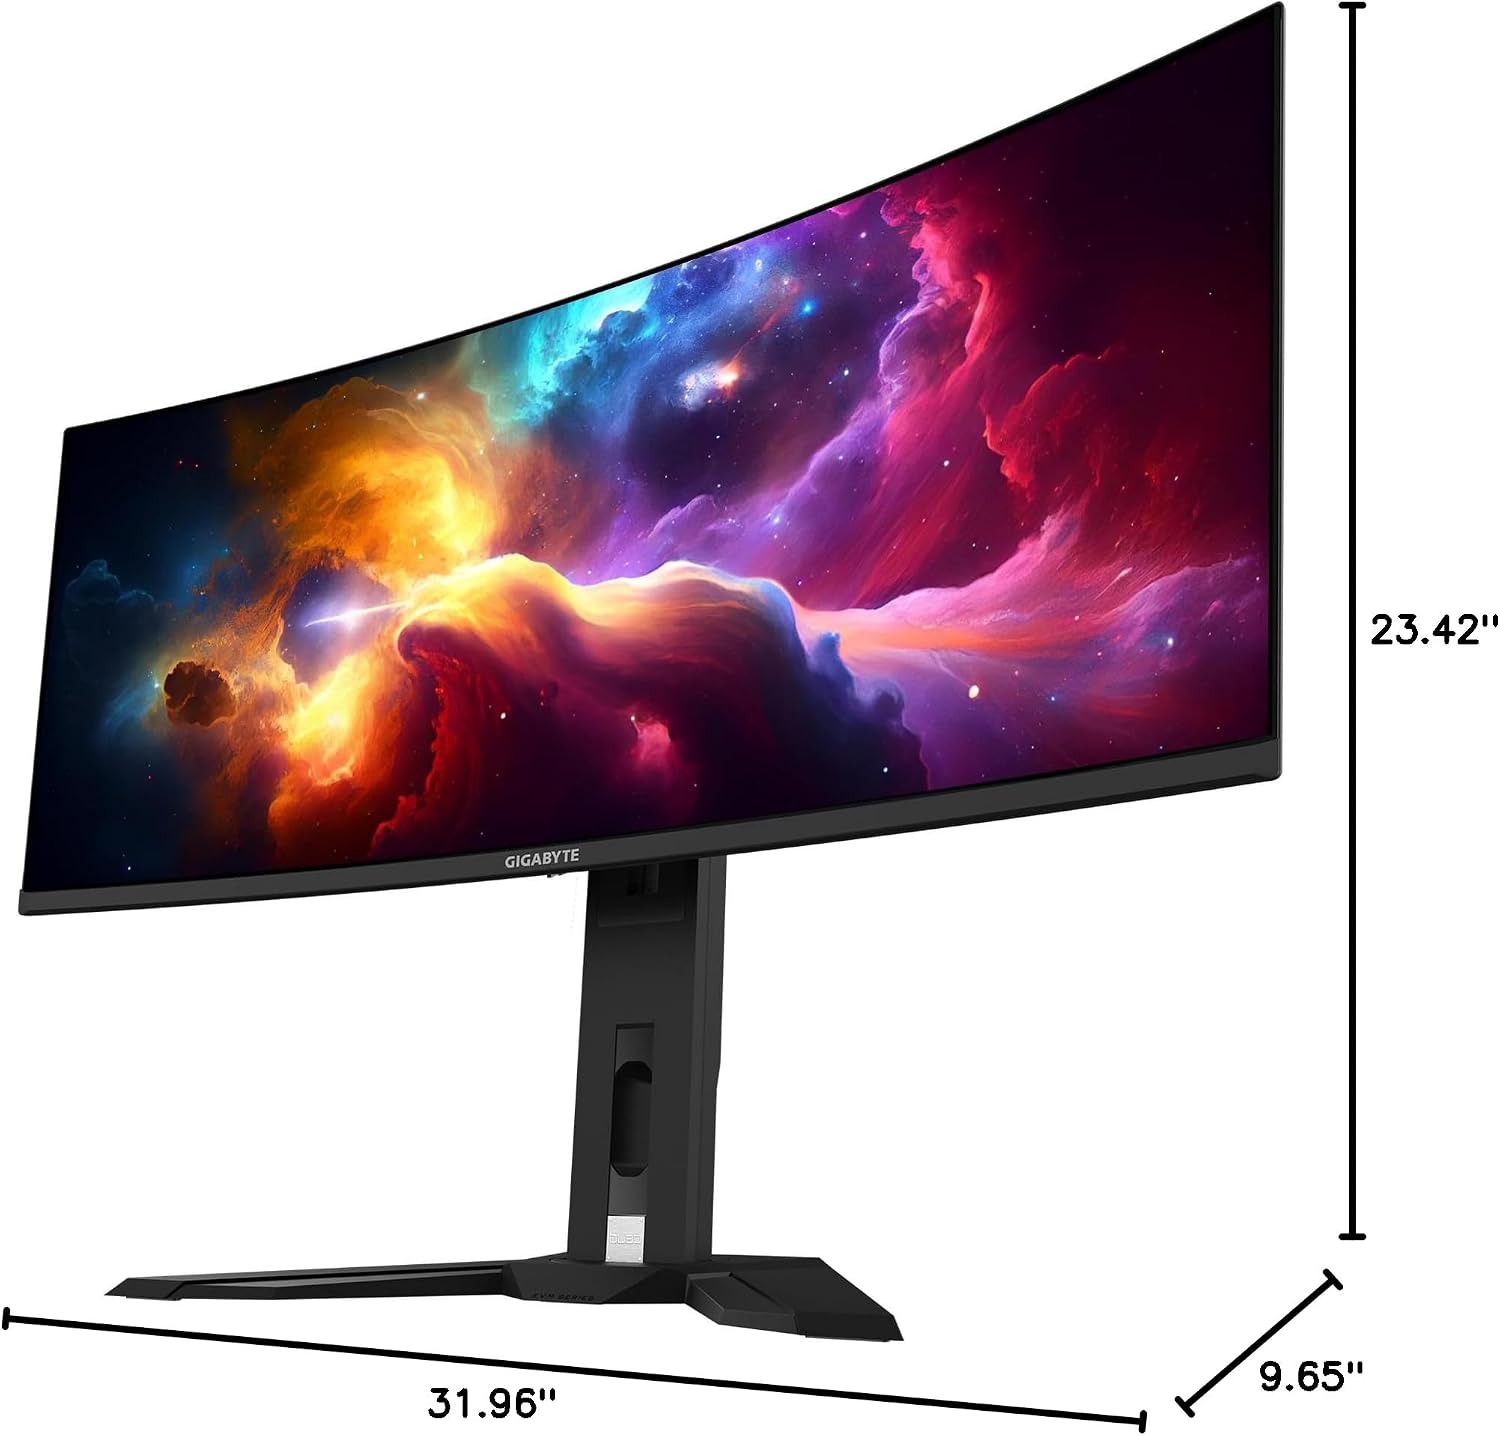
This image provides a diagram of the GIGABYTE MO34WQC2 monitor's dimensions, showing a width of 31.96 inches, a depth of 9.65 inches, and a height of 23.42 inches (including the stand).
Garantía y soporte
Información de garantía
Your GIGABYTE MO34WQC2 monitor comes with an extended 3-year manufacturer warranty. This warranty includes coverage for panel burn-in, supported by the AI-based GIGABYTE OLED Care protection. Please note that warranty terms may vary by region.
Atención al cliente
For technical assistance, warranty claims, or further inquiries, please visit the official GIGABYTE support website or contact their customer service department. Refer to the product packaging or GIGABYTE's official website for specific contact details and support resources in your region.