
1. Producto terminadoview
The Nilight 3500 lbs ATV Winch is a 12V DC heavy-duty electric winch designed for towing and recovery operations. It features a 1.44kw/1.93HP pure copper permanent magnet motor, providing a rated single line pull of 3,500 lbs. This winch is equipped with a synthetic rope, offering a lighter and stronger alternative to traditional steel cables. Its robust construction ensures reliable performance in various outdoor conditions.
The winch is suitable for a wide range of small vehicles including ATVs, UTVs, trailers, cars, trucks, Jeeps, and other off-road applications.
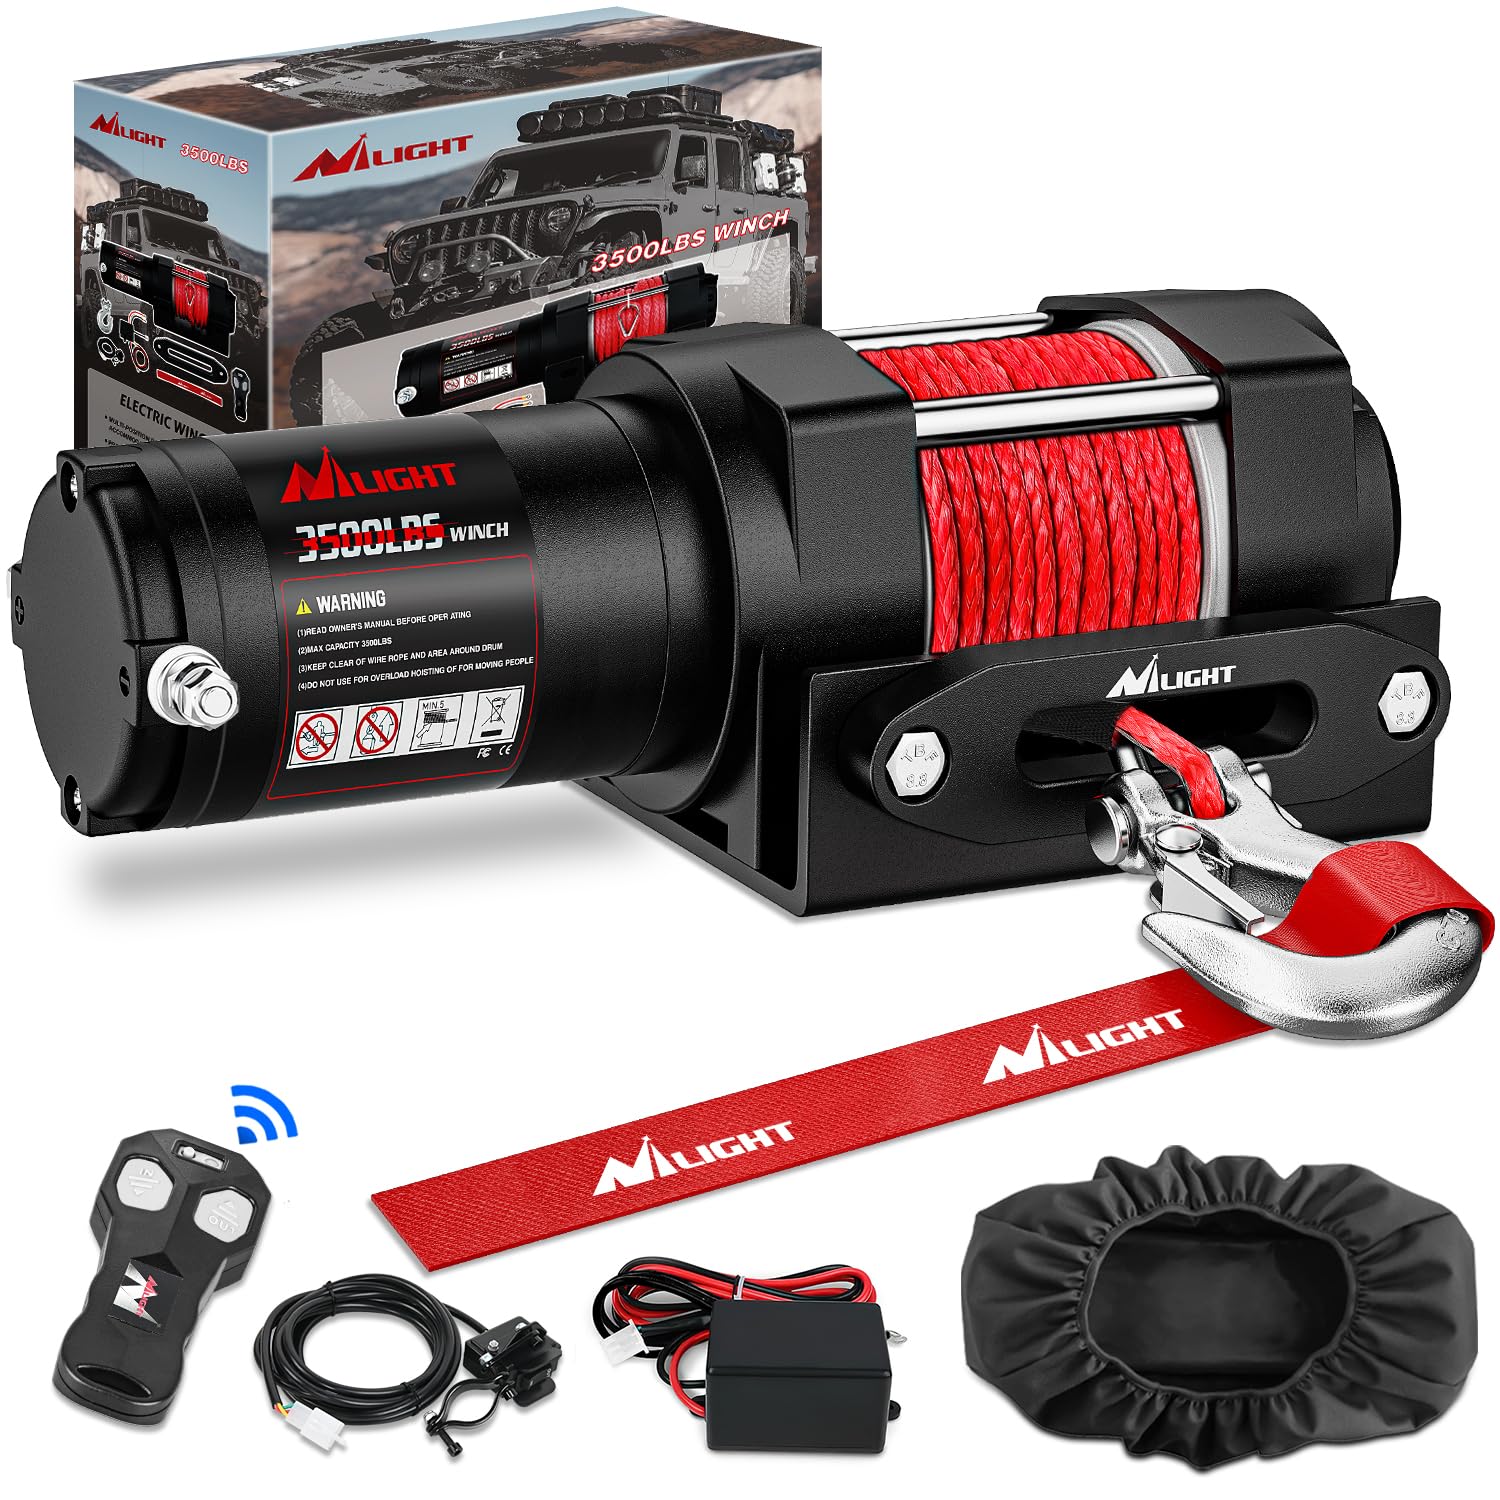
Image 1.1: Nilight 3500 lbs ATV Winch with synthetic rope and fairlead.

Image 1.2: The Nilight 3500 lbs Electric Winch is designed for various off-road and daily towing needs, including ATVs, UTVs, trucks, and boats.
2. Contenido del paquete
Verifique que todos los artículos enumerados a continuación estén incluidos en su paquete:
- 1x 3500 lbs Electric Winch with Synthetic Rope
- 1x Universal Mounting Plate (6.3” x 4.7” L x W)
- 1x control remoto inalámbrico
- 1x Wired Remote Switch (10 FT)
- 1x Winch Cover
- 1x Caja de control
- 1x Aluminum Fairlead
- 1x 1/4 U Hook (Clevis Hook)
- Pernos y herrajes de montaje
- 1x Manual de operaciones
- 1x Brand Strap

Image 2.1: Visual representation of all components included in the Nilight 3500 lbs ATV Winch package.
3. Especificaciones
| Característica | Especificación |
|---|---|
| Tracción nominal de línea | 3,500 libras (1588 kg) |
| Motor | 12V DC, 1.44kw / 1.93HP Permanent Magnet |
| Relación de reducción de engranajes | 153:1 |
| Tren de engranajes | Individualtage Planetario |
| Acción de frenado | Automatic (Two-way braking in the drum) |
| Synthetic Rope Size | 3/16” x 39.4' (5mm x 12m) |
| Fairlead | Pasacables Hawse de aluminio |
| Winch Body Dimensions (L x W x H) | 12.6'' x 4'' x 4.1'' (320 mm x 102 mm x 104 mm) |
| Fairlead Mounting Pattern | 4 1/2" (124 mm) |
| Mounting Plate 2-Hole Pattern | 3.15" (80 mm) / 3.10" (76 mm) |
| Alcance remoto inalámbrico | 82 pies |
| Longitud del cable del control remoto con cable | 10 pies |
| Peso del artículo | 16.52 libras |

Image 3.1: Detailed dimensions of the winch, mounting plate, and fairlead. Please confirm these dimensions are suitable for your installation.
Winch Line Pull Capacity
| Line Pull (lbs/kgs) | Line Speed (FT/min, M/min) | Motor Current (Amps) | Pull by layer (lbs/kgs) |
|---|---|---|---|
| 0 | 9.5 (2.9) | 11 | 1/3500 (1590) |
| 500 (227) | 9.2 (2.8) | 30 | 2/2640 (1198) |
| 1000 (454) | 8.5 (2.6) | 40 | 3/2320 (1052) |
| 1500 (681) | 7.9 (2.4) | 60 | 4/2040 (925) |
| 2000 (909) | 7.2 (2.2) | 70 | - |
| 2500 (1136) | 6.6 (2.0) | 80 | - |
| 3000 (1363) | 5.2 (1.6) | 95 | - |
| 3500 (1590) | 4.6 (1.4) | 180 | - |
Nota: It is recommended that you begin any line pull with a minimum of 5 wraps and a maximum of 2 layers of rope on the drum.
4. Precauciones de seguridad
- Utilice siempre guantes y protección para los ojos cuando opere el cabrestante.
- Nunca exceda la capacidad nominal de tracción del cabrestante.
- Ensure the vehicle is securely anchored before winching.
- Mantenga las manos y la ropa alejadas del cable del cabrestante, el gancho y el guíacabos durante la operación.
- No opere el cabrestante si la cuerda está deshilachada, retorcida o dañada.
- Avoid prolonged continuous winching to prevent motor overheating. Allow the motor to cool down between pulls.
- Never engage or disengage the clutch while the winch drum is turning or under load.
- Always ensure at least 5 wraps of rope remain on the drum when extending the rope.
- Disconnect the winch from the power source when not in use or during maintenance.
5. Configuración e instalación
Montaje del cabrestante
The winch comes with a universal mounting plate. This plate may require modification to fit your specific ATV/UTV or vehicle. Ensure the mounting surface is strong enough to support the winch's maximum pulling force.
- Position the mounting plate on your vehicle's desired location.
- Mark and drill any necessary holes if the universal plate does not align with existing mounting points.
- Secure the mounting plate using appropriate bolts and hardware.
- Attach the winch to the mounting plate using the provided mounting bolts.
- Instale el cable guía de aluminio en la parte delantera de la placa de montaje, asegurándose de que la cuerda pueda pasar libremente.

Image 5.1: Assembled dimensions of the winch with its mounting plate and fairlead.
Cableado del cabrestante
All wires and connections are color-coded for ease of installation. A minimum 665 CCA battery is recommended for optimal performance.
- Conectar el long red wire from the control box to the positive (+) terminal of your vehicle's 12V battery.
- Conectar el long black wire from the control box to the negative (-) terminal of your vehicle's 12V battery.
- Conectar el short red wire from the control box to the positive (+) terminal of the winch motor.
- Conectar el short black wire from the control box to the negative (-) terminal of the winch motor.
- For the wired remote control, connect its thin red wire to the battery or the ATV's key switch for power.
Video 5.1: This video demonstrates the wiring process for the Nilight 12V 3500LBS ATV UTV Electric Winch, showing how to connect the control box and remote switches to the winch and battery.

Image 5.2: Diagram illustrating the quick assembly and wiring connections for the winch system.
6. Instrucciones de funcionamiento
Funcionamiento del embrague
The winch features an integrated clutch knob for engaging and disengaging the drum.
- Comprometer: Turn the clutch knob to the "ENGAGE" position. The winch is now ready for powered operation, and the automatic brake will function when the winch stops.
- Freespool: Turn the clutch knob to the "FREESPOOL" position. This allows you to manually pull out the winch rope quickly for deployment or collection.
Warning: Never engage or disengage the clutch handle while the drum is turning or under load.

Imagen 6.1: Primer plano view of the clutch knob, showing the 'Freespool' and 'Engage' positions for manual and powered operation.
Operación por control remoto
The winch can be operated using either the wireless remote control or the wired remote switch.
- Control remoto inalámbrico: To activate, press the on/off button for 3-5 seconds until the LED lights up. The wireless remote has an operating range of up to 82 feet.
- Interruptor remoto con cable: Connect the wired remote to the control box. This provides a direct, reliable control method with a 10-foot cable.
Video 6.2: This video demonstrates the operation of the 12V 3500LBS ATV UTV Electric Winch, including the use of its remote controls for pulling and releasing the synthetic rope.

Image 6.3: Illustration of the two operating modes: wired remote switch and wireless remote control, highlighting their connections and range.

Image 6.4: An ATV being recovered using the wireless remote control, demonstrating its 82-foot operating range.
7. Mantenimiento
- Inspección regular: Periodically inspect the winch rope for signs of wear, fraying, or damage. Replace the rope if any damage is found.
- Sistema de organización de cables: Ensure the synthetic rope is spooled evenly on the drum. Uneven spooling can cause damage to the rope and winch mechanism.
- Conexiones eléctricas: Check all electrical connections for corrosion or looseness. Clean and tighten as necessary to ensure proper power flow.
- Lubricación: Consult a qualified technician for internal lubrication of gears and motor if needed. Do not attempt to disassemble the winch without proper knowledge.
- Limpieza: Keep the winch clean from mud, dirt, and debris. Use a damp paño para limpiar el exterior.
- Almacenamiento: When not in use, cover the winch with the provided winch cover to protect it from elements.
8. Solución de problemas
- El cabrestante no funciona:
- Verifique que las conexiones de la batería estén bien apretadas y no presenten corrosión.
- Ensure the battery is fully charged and has sufficient CCA (Cold Cranking Amps).
- Verifique que todas las conexiones del cableado sean correctas y seguras.
- Test both wired and wireless remotes to rule out a faulty remote.
- El cabrestante funciona de forma lenta o débil:
- Compruebe si el volumen de la batería es bajotage.
- Asegúrese de que la carga esté dentro de la capacidad nominal del cabrestante.
- Inspect the rope for binding or uneven spooling on the drum.
- Check for excessive friction in the fairlead or hook.
- El control remoto no responde:
- For wireless remote, ensure it is activated (LED lit) and within range.
- Check batteries in the wireless remote, if applicable.
- For wired remote, check its connection to the control box and power source.
- Sobrecalentamiento del motor:
- Reduce the load or use a snatch block to decrease strain.
- Allow the motor to cool down between heavy pulls.
- Asegure una ventilación adecuada alrededor del motor.
9. Garantía y soporte
For warranty information or technical support, please refer to the contact details provided in your product packaging or visit the official Nilight webSitio. Conserve su recibo de compra como comprobante de compra para cualquier reclamación de garantía.