
Introducción
This manual provides detailed instructions for the installation, operation, and maintenance of your Aigo Q2507 Mini-Tower PC Case. Please read this manual thoroughly before beginning any installation to ensure proper assembly and safe usage. This PC case is designed to house standard desktop components, supporting M-ATX and ITX motherboards.
Información de seguridad
- Desconecte siempre la fuente de alimentación del tomacorriente de pared antes de instalar o quitar cualquier componente para evitar descargas eléctricas.
- Use una pulsera antiestática para evitar daños por descarga electrostática (ESD) en componentes sensibles.
- Manipule los componentes con cuidado. Evite tocar directamente los pines o las placas de circuitos.
- Ensure all cables are routed properly and do not obstruct airflow or moving parts.
- Mantenga el estuche alejado de fuentes de calor, luz solar directa y humedad.
- No intente modificar la estructura de la carcasa, ya que esto puede anular la garantía y representar riesgos de seguridad.
Contenido del paquete
Por favor verifique que todos los artículos estén presentes en su paquete:
- Aigo Q2507 Mini-Tower PC Case
- Accessory kit (screws, standoffs, cable ties)
- Manual de usuario (este documento)
Configuración
1. Preparación del caso
Before installation, remove both side panels of the case. Typically, these are secured with thumbscrews at the rear of the case.

Imagen: En ángulo view of the Aigo Q2507 Mini-Tower PC Case, showing the front panel and the side panel removed, revealing the internal structure.
2. Instalación de la placa base
- Install the necessary motherboard standoffs onto the motherboard tray. The Q2507 supports M-ATX and ITX motherboards.
- Coloque con cuidado la placa base sobre los separadores, alineando los orificios de los tornillos.
- Fije la placa base con los tornillos incluidos. No los apriete demasiado.

Imagen: interna view of the Aigo Q2507 PC Case, highlighting the motherboard tray area with pre-drilled holes for standoffs.
3. Instalación de la unidad de almacenamiento
The case supports 1 x SSD and 1 x HDD.
- Locate the drive bays. SSDs typically mount on the motherboard tray or dedicated brackets, while HDDs use a cage.
- Secure your SSD(s) and HDD(s) using the appropriate screws from the accessory kit.

Imagen: interna view of the Aigo Q2507 PC Case, showing the designated areas for installing storage drives (SSD and HDD).
4. Expansion Card Installation (VGA)
The case features 4 expansion slots.
- Retire las cubiertas de las ranuras necesarias de la parte trasera de la carcasa.
- Insert your graphics card (VGA) or other expansion cards into the corresponding PCIe slots on your motherboard.
- Secure the card(s) with screws. The maximum VGA length supported is 250 mm.

Imagen: Parte trasera interna view of the Aigo Q2507 PC Case, showing the four expansion slots and the rear fan mount.
5. Instalación del ventilador de refrigeración
The case supports one 120 mm fan on the side and one 80 mm fan on the rear.
- Mount the fans to their designated positions using fan screws.
- Conecte los cables de alimentación del ventilador a la placa base o fuente de alimentación.

Image: Angled front-side view of the Aigo Q2507 PC Case, with an internal fan visible through the side panel vent.
6. Conexiones del panel frontal
Connect the front panel cables (USB 2.0, Audio, Microphone, Power button, Reset button, Power LED, HDD LED) to the corresponding headers on your motherboard. Refer to your motherboard manual for header locations.
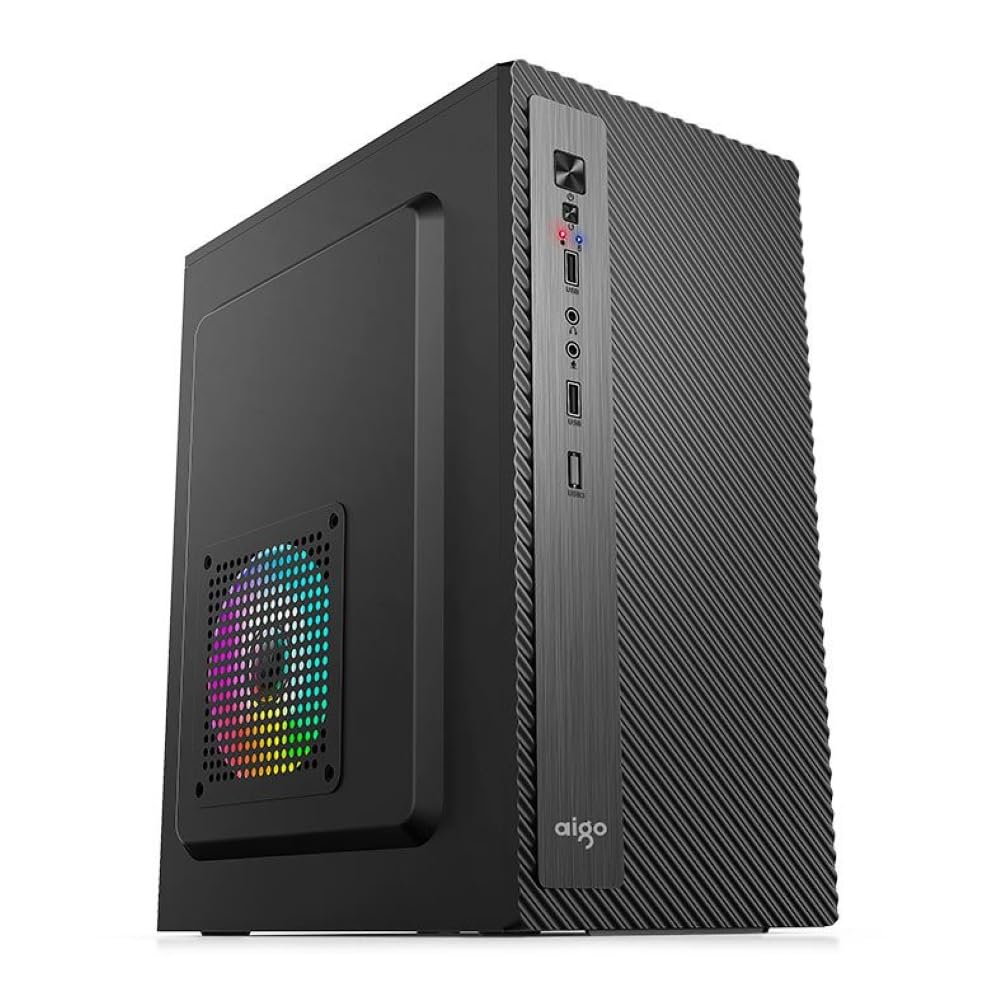
Imagen: Primer plano frontal view of the Aigo Q2507 PC Case, showing the front I/O panel with USB 2.0 ports, audio jacks, and power/reset buttons.
7. Gestión de cables
Route all cables neatly behind the motherboard tray or through designated cutouts to improve airflow and aesthetics. Use cable ties if necessary.
8. Cierre del caso
Una vez que todos los componentes estén instalados y los cables organizados, vuelva a colocar los paneles laterales y fíjelos con los tornillos de mariposa.
Operante
After completing the setup, connect your monitor, keyboard, mouse, and power cable to your assembled PC. Press the power button on the front panel to start your system. Ensure all peripherals are functioning correctly.
Mantenimiento
- Limpieza: Regularly clean dust from the case interior and fan filters using compressed air or a soft brush. Dust buildup can impede airflow and lead to overheating.
- Flujo de aire: Ensure the case has adequate ventilation. Do not block the air intake or exhaust vents.
- Sistema de organización de cables: Periodically check cable routing to ensure no cables are interfering with fans or obstructing airflow.
Solución de problemas
- El sistema no se enciende: Check all power connections, including the power supply to the wall, motherboard 24-pin, and CPU 8-pin connectors. Ensure front panel power switch cable is correctly connected to the motherboard.
- Calentamiento excesivo: Verify that all fans are spinning correctly and are not obstructed. Clean any dust buildup. Ensure proper thermal paste application on the CPU cooler.
- Sin pantalla: Confirm that your graphics card is properly seated in its PCIe slot and that the monitor cable is securely connected to the graphics card.
- Los puertos USB no funcionan: Check the front panel USB cable connection to the motherboard header.
Presupuesto

Image: Diagram illustrating the dimensions of the Aigo Q2507 Mini-Tower PC Case: 26.5 cm (depth) x 16.5 cm (width) x 34 cm (height).
| Característica | Especificación |
|---|---|
| Marca | aigo |
| Nombre del modelo | Q2507 |
| Tipo de caso | Mini-Torre |
| Color | Negro |
| Material | Steel Alloy, Tempered Glass (0.4mm SPCC) |
| Compatibilidad de la placa base | M-ATX, Mini ITX |
| Bahías de unidad interna | 1 x SSD, 1 x HDD (Total 2) |
| Ranuras de expansión | 4 |
| Puertos de E / S frontales | 1 x USB 2.0, Microphone, Audio |
| Método de enfriamiento | Aire |
| Fanáticos admitidos | Side: 1 x 120 mm, Rear: 1 x 80 mm (Total 2) |
| Altura máxima del enfriador de CPU | 150 milímetros |
| Longitud máxima de VGA | 250 milímetros |
| Dimensiones (L x An x Al) | 26.5 cm x 16.5 cm x 34 cm |
| Dispositivos compatibles | Standard Desktop Components |
Garantía
This Aigo Q2507 Mini-Tower PC Case comes with a Garantía de 12 meses from the date of purchase. This warranty covers manufacturing defects and material faults under normal use. It does not cover damage caused by misuse, accidents, unauthorized modifications, or improper installation. Please retain your proof of purchase for warranty claims.
Apoyo
For technical assistance, warranty claims, or further inquiries, please contact your retailer or visit the official Aigo website for support resources. When contacting support, please have your product model (Q2507) and proof of purchase readily available.
Recursos en línea: www.aigo.com (ExampEl enlace, por favor verificar oficial websitio)