
Introducción
Thank you for choosing the Bairth 6-Light Black Chandelier. This modern farmhouse light fixture is designed to provide ample illumination and enhance the aesthetic of various indoor spaces such as dining rooms, kitchens, entryways, hallways, living rooms, and bedrooms. This manual provides essential information for safe installation, operation, and maintenance of your new chandelier. Please read these instructions carefully before assembly and retain them for future reference.
Información de seguridad
- ADVERTENCIA: To avoid the risk of electrical shock, always disconnect power at the main circuit breaker or fuse box before beginning installation or performing any maintenance.
- Todas las conexiones eléctricas deben cumplir con los códigos y ordenanzas locales o el Código Eléctrico Nacional (NEC). Consulte a un electricista calificado si no está familiarizado con el cableado eléctrico.
- Utilice únicamente bombillas con casquillo E12 y un voltaje máximo de 12 V.tage of 40W per bulb. Exceeding the recommended wattagPuede provocar sobrecalentamiento y daños en el dispositivo.
- Ensure the fixture is securely mounted to a structural ceiling component capable of supporting its weight.
- No conecte este dispositivo a un sistema eléctrico sin conexión a tierra.
- Handle the fixture with care to prevent damage to the components.
- Mantenga los materiales inflamables lejos de las bombillas.
Contenido del paquete
Verifique que todos los componentes estén presentes antes de comenzar la instalación. Si alguna pieza falta o está dañada, contacte con atención al cliente.
- Chandelier Frame (with 6 E12 lamp enchufes)
- Adjustable Rods (various lengths for height customization)
- Dosel de montaje
- Herrajes de montaje (tornillos, tuercas para cables, soporte de montaje)
- Manual de usuario

Figure 1: Chandelier Components Overview
Presupuesto
| Marca | Bairth |
| Número de modelo | D3201-06-BK |
| Color | Negro |
| Material | Metal |
| Estilo | Modern Farmhouse, Industrial |
| Formulario de lámpara | Araña |
| Número de fuentes de luz | 6 |
| Base de la bombilla | E12 |
| Wat máximotage por bombilla | 40 vatios |
| Volumentage | 120 voltios |
| Rango de altura ajustable | 20.5 pulgadas a 61.8 pulgadas |
| Dimensiones (L x An x Al) | 21.3"L x 21.3"W x 61.8"H (Max Height) |
| Tipo de montaje | Ceiling Mount (Flat, Sloped, Arched compatible) |
| Uso en interiores y exteriores | Interior |

Figure 2: Product Dimensions and Adjustable Height
Configuración e instalación
Installation typically takes less than 20 minutes. However, if you lack wiring experience, it is recommended to consult a licensed electrician for safety.
Herramientas necesarias (no incluidas):
- Destornillador Phillips
- Pelacables
- Cinta aisladora
- Gafas de seguridad
- Escalera
Pasos de instalación:
- Apagar la energía: Before starting, ensure the power to the circuit at the main breaker panel is completely off to prevent electrical shock.
- Preparar el soporte de montaje: Attach the mounting bracket to the junction box in your ceiling. Ensure it is securely fastened.
- Ensamblar el marco de la lámpara: The chandelier frame may require minor assembly. Secure the arms to the central hub as instructed in the included accessory guide. Connect the internal wires of the arms to the main wires, ensuring all connections are tight.
- Determinar la altura para colgar: Select the appropriate number of adjustable rods to achieve your desired hanging height. The chandelier can be adjusted from 20.5 inches to 61.8 inches. Thread the fixture wires through the chosen rods and the canopy.
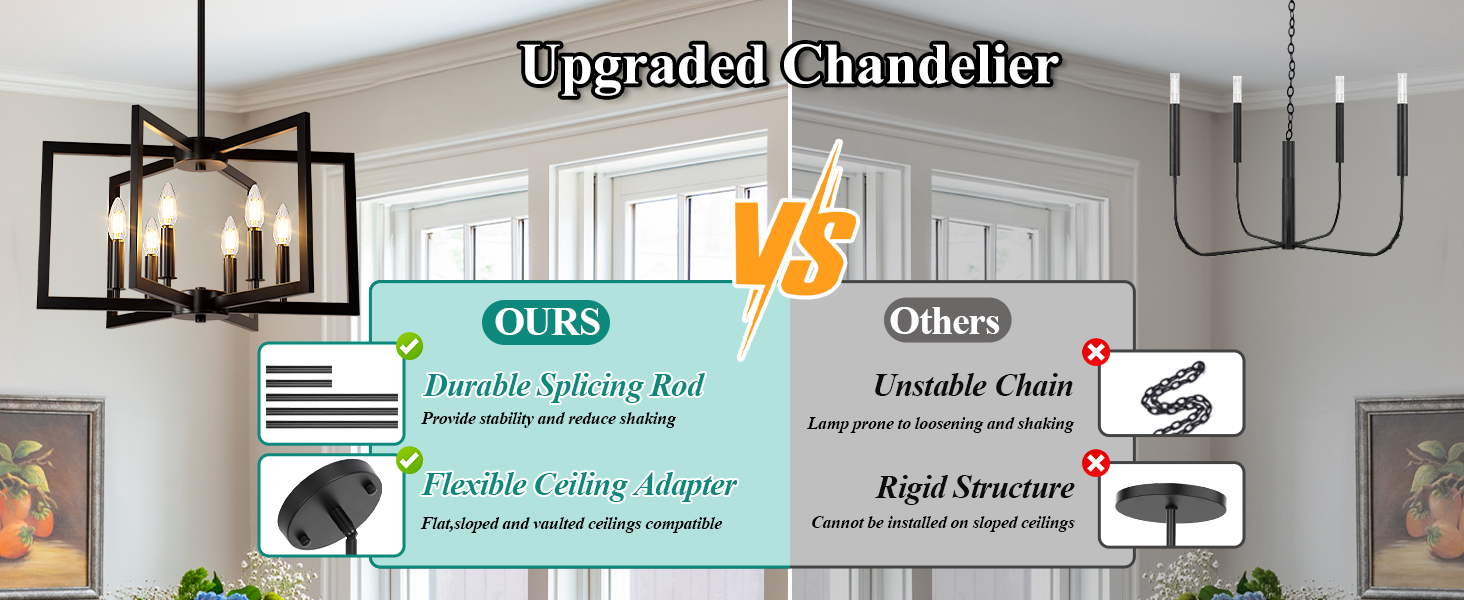
Figure 3: Customizing Chandelier Height
- Conexiones de cable: Connect the fixture wires to the house wires using wire nuts. Connect the black wire from the fixture to the black (live) wire from the ceiling, the white wire from the fixture to the white (neutral) wire from the ceiling, and the ground wire from the fixture to the ground wire from the ceiling. Secure connections with electrical tape.
- Monte Canopy: Carefully push the canopy up to the ceiling, covering the junction box, and secure it to the mounting bracket with the provided screws.
- Instalar bombillas: Screw E12 base bulbs (not included, max 40W each) into the lamp enchufes
- Restaurar energía: Una vez finalizada la instalación, restablezca la energía en el disyuntor principal.

Figure 4: Ceiling Type Compatibility
Video 1: Bairth 6 Lights Modern Geometric Chandelier Product OverviewEste vídeo ofrece una visión generalview of the chandelier, its design, and features. While not a step-by-step installation guide, it offers context for the product.
Instrucciones de funcionamiento
Once installed and powered, the chandelier operates like any standard light fixture controlled by a wall switch. For enhanced functionality, consider the following:
- Característica regulable: This chandelier is fully dimmable when used with dimmable E12 bulbs and a compatible dimmer switch (both not included). Install a dimmer switch according to its manufacturer's instructions to control light intensity.
- Selección de bombillas: The fixture supports various E12 base bulbs including LED, CFL, and Incandescent, up to 40W per socket. Choose bulbs that match your desired light color and brightness.

Figure 5: Dimmable Feature Overview

Figure 6: Daylight White vs. Warm White Bulb Effect
Mantenimiento
El mantenimiento regular garantiza la longevidad y el rendimiento óptimo de su lámpara.
- Limpieza: Always turn off the power before cleaning. Use a soft, dry cloth to wipe the fixture. Avoid using harsh chemicals, abrasive cleaners, or polishes as they may damage the finish.
- Reemplazo de bombilla: Ensure the power is off and bulbs have cooled before attempting to replace them. Unscrew the old bulb and screw in a new E12 base bulb (max 40W).
- Inspección: Revise periódicamente todas las conexiones y el hardware de montaje para asegurarse de que permanezcan seguros.
Solución de problemas
Si tiene problemas con su lámpara de araña, consulte los siguientes problemas y soluciones comunes:
| Problema | Posible causa | Solución |
|---|---|---|
| La luz no enciende | 1. La energía está apagada 2. Conexión de cableado suelta 3. Bombilla defectuosa | 1. Verifique el disyuntor/fusible. 2. Verify all wire connections are secure (ensure power is off first). 3. Replace bulb with a new, working one. |
| La luz parpadea | 1. Bombilla suelta 2. Interruptor de regulación/bombilla incompatible 3. Cableado suelto | 1. Apriete la bombilla. 2. Ensure dimmable bulbs are used with a compatible dimmer switch. 3. Check wiring connections (ensure power is off first). |
| Zumbidos de los accesorios | 1. Interruptor de regulación/bombilla incompatible 2. Componentes sueltos | 1. Ensure dimmable bulbs are used with a compatible dimmer switch. 2. Compruebe si hay piezas sueltas y apriételas. |
Si el problema persiste después de intentar estas soluciones, comuníquese con el servicio de atención al cliente.
Garantía y soporte
This Bairth chandelier comes with a Garantía limitada de 1 años from the date of purchase. This warranty covers defects in materials and workmanship under normal use. If your lamp has any defects or stops working within this period, we will troubleshoot or send a replacement.
For warranty claims, technical assistance, or any questions regarding your product, please contact the seller, BrightHome USA, through your Amazon order details page. Please have your model number (D3201-06-BK) and purchase date available when contacting support.