
1. Introducción
This manual provides instructions for the installation, operation, and maintenance of your ADATA Legend 860 PCIe Gen4 x4 M.2 2280 Solid State Drive (SSD). The Legend 860 is designed to offer high-speed storage performance for compatible desktop computers, laptops, and Sony PlayStation 5 consoles.

Imagen 1.1: Frente view of the ADATA Legend 860 M.2 SSD, showing the ADATA logo and model name on the heat spreader.
2. Contenido del paquete
Verifique que su paquete contenga los siguientes elementos:
- ADATA Legend 860 PCIe Gen4 x4 M.2 2280 SSD (Solid State Drive NVMe)

Image 2.1: Retail packaging for the ADATA Legend 860 SSD, displaying the product and its capacity.
3. Configuración e instalación
Before installation, ensure your system is powered off and disconnected from the power source. It is recommended to wear an anti-static wrist strap to prevent electrostatic discharge (ESD) damage.
3.1. Desktop/Laptop Installation
- Localice la ranura M.2: Identify an available M.2 slot on your motherboard. The Legend 860 is a 2280 form factor SSD, requiring a compatible M.2 2280 slot.
- Insertar SSD: Gently insert the ADATA Legend 860 SSD into the M.2 slot at a 30-degree angle. Ensure the gold contacts are fully seated.
- SSD seguro: Press the SSD down until it is parallel with the motherboard. Secure it with the M.2 screw provided with your motherboard or system.
- Cerrar sistema: Reassemble your computer and reconnect the power.

Image 3.1: The ADATA Legend 860 SSD correctly installed in an M.2 slot on a computer motherboard.
3.2. PlayStation 5 (PS5) Installation
The ADATA Legend 860 is compatible with the PlayStation 5 console for storage expansion. Refer to the official PlayStation 5 user guide for detailed instructions on how to open the console and access the M.2 expansion slot. Ensure the SSD meets all PS5 requirements, including physical dimensions and performance specifications.
- Prepare PS5: Power off your PS5 console and disconnect all cables. Allow it to cool down.
- Quitar la cubierta: Carefully remove the PS5 console cover to expose the expansion slot.
- Acceso a la ranura M.2: Unscrew and remove the expansion slot cover.
- Insertar SSD: Insert the ADATA Legend 860 SSD into the expansion slot. Align the notch on the SSD with the ridge on the expansion slot.
- SSD seguro: Secure the SSD with the screw and spacer provided with your PS5 console.
- Volver a montar: Replace the expansion slot cover and the PS5 console cover. Reconnect all cables and power on the console.
- Formatear SSD: Follow the on-screen prompts on your PS5 to format the newly installed SSD.
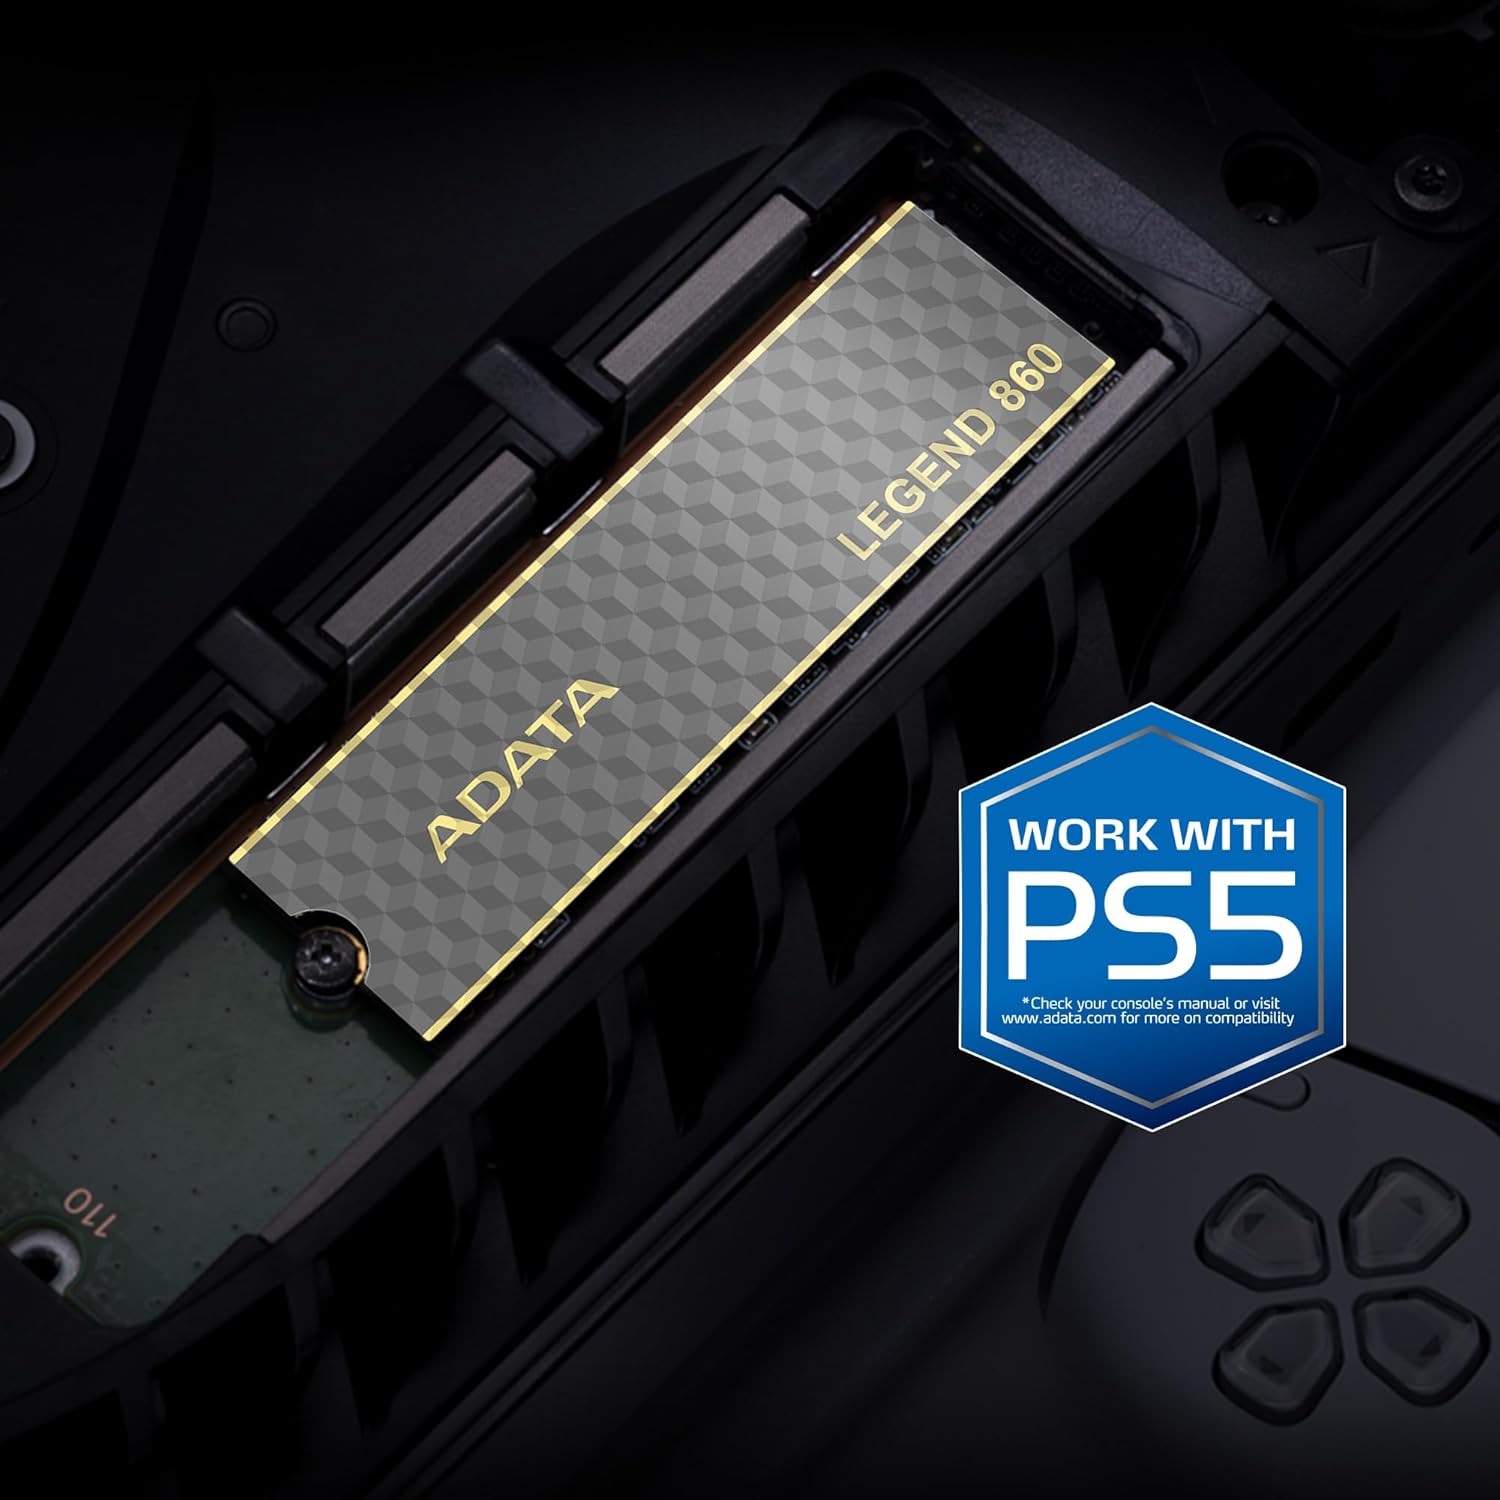
Image 3.2: The ADATA Legend 860 SSD installed within the M.2 expansion slot of a PlayStation 5 console.
4. Funcionamiento del SSD
After successful installation, your operating system (Windows, macOS, Linux) or PlayStation 5 console should detect the new storage device. You may need to initialize and format the SSD before it can be used for data storage.
4.1. Initializing and Formatting (Windows)
- Abrir Administración de discos: Haga clic derecho en el botón Inicio y seleccione "Administración de discos".
- Inicializar disco: Locate your new SSD (it may appear as "Disk 1" or similar and be marked as "Unallocated"). Right-click on the disk number and select "Initialize Disk." Choose GPT (GUID Partition Table) for modern systems.
- Crear nuevo volumen simple: Right-click on the "Unallocated" space on your new SSD and select "New Simple Volume." Follow the wizard to assign a drive letter and format the drive (NTFS is recommended for Windows).
4.2. Consideraciones de rendimiento
The ADATA Legend 860 utilizes PCIe Gen4 x4 interface for high-speed data transfer. Actual performance may vary depending on your system's hardware, software, and usage patterns. Ensure your motherboard supports PCIe Gen4 for optimal speeds. The SSD also features SLC caching and Host Memory Buffer (HMB) for improved responsiveness.
5. Mantenimiento
To ensure the longevity and optimal performance of your ADATA Legend 860 SSD, consider the following maintenance practices:
- Actualizaciones de firmware: Consulte periódicamente la información oficial de ADATA webSitio para actualizaciones de firmware para su SSD. Las actualizaciones de firmware pueden mejorar el rendimiento, la estabilidad y la compatibilidad.
- Comando TRIM: Ensure your operating system has TRIM enabled. TRIM helps maintain the performance of SSDs over time by allowing the operating system to inform the SSD which data blocks are no longer in use and can be wiped.
- Evite la capacidad máxima: While SSDs perform well even when nearly full, maintaining some free space (e.g., 10-15%) can help sustain optimal performance and extend lifespan.
- Copia de seguridad de datos: Realice copias de seguridad periódicas de sus datos importantes en otro dispositivo de almacenamiento. Si bien las unidades SSD son fiables, ningún dispositivo de almacenamiento es inmune a fallos.
- LDPC Data Protection: The Legend 860 incorporates Low Density Parity Check (LDPC) error correction, which enhances data integrity and transmission accuracy.
6. Solución de problemas
If you encounter issues with your ADATA Legend 860 SSD, refer to the following common troubleshooting steps:
- SSD no detectado:
- Asegúrese de que el SSD esté colocado correctamente en la ranura M.2.
- Verifique la configuración BIOS/UEFI de su placa base para confirmar que la ranura M.2 esté habilitada y configurada correctamente (por ejemplo, modo PCIe).
- Verify that your motherboard supports M.2 NVMe SSDs.
- For PS5, ensure the console cover is properly reattached and the SSD is secured.
- Rendimiento lento:
- Confirm your system's M.2 slot supports PCIe Gen4 speeds. If it's a Gen3 slot, the SSD will operate at Gen3 speeds.
- Ensure your operating system is up-to-date and TRIM is enabled.
- Check for background processes that might be consuming disk I/O.
- Ensure the SSD is not excessively full.
- Corrupción/errores de datos:
- Run a disk check utility (e.g., CHKDSK on Windows).
- Actualizar el firmware del SSD.
- Ensure proper system cooling to prevent overheating, which can affect SSD stability.
7. Especificaciones
| Característica | Especificación |
|---|---|
| Nombre del modelo | LEYENDA 860 |
| Número de modelo | SLEG-860-2000GCS |
| Capacidad de almacenamiento digital | 2000 GB (2 TB) |
| Interfaz del disco duro | PCIe Gen4 x4 |
| Factor de forma | M.2 2280 |
| Velocidad de lectura (máx.) | Hasta 6000 MB/s |
| Velocidad de escritura (máx.) | Hasta 5000 MB/s |
| Memoria flash NAND | Memoria NAND 3D |
| Corrección de errores | LDPC (Low Density Parity Check) |
| Características | SLC Caching, Host Memory Buffer (HMB), Shock Resistant |
| Dispositivos compatibles | Desktop PCs, Laptops, Sony PlayStation 5 |
| Dimensiones (largo x ancho x profundidad) | 5.51" x 1.57" x 0.31" (140 mm x 40 mm x 7.9 mm aprox.) |
| Peso del artículo | 11 gramos |
8. Garantía y soporte
ADATA Technology Co., Ltd. provides a limited warranty for its products. For specific warranty terms, conditions, and duration applicable to your ADATA Legend 860 SSD, please refer to the warranty information included with your product packaging or visit the official ADATA websitio.
For technical support, driver downloads, firmware updates, or further assistance, please visit the official ADATA support websitio:
ADATA Official Support Websitio
When contacting support, please have your product model number (SLEG-860-2000GCS) and proof of purchase readily available.