
Introducción
This instruction manual provides essential information for the proper setup and operation of your GODIYMODULES 15-48V Phantom Power Electret Condenser Microphone Amplifier Board. This board is designed to amplify electret microphones, enabling their use with 15-48V phantom power sources for various audio applications.
Características
- Designed for 15-48V phantom power operation.
- Compatible with universal and single-point electret microphones.
- Suitable for applications such as karaoke, recording, and conference speech.
- Optimized for low noise performance when paired with a low-noise electret microphone.
Presupuesto
| Parámetro | Valor |
|---|---|
| Tipo de micrófono | Micrófono electret |
| Fuente de alimentación | 15-48V Phantom Power |
| Impedancia de salida | 250 ohmios |
| Nivel de presión sonora (SPL) | 125 dB |
| Relación señal-ruido (SNR) | 60 dB |
| Corriente de trabajo | Aproximadamente 3.2 mA |
| Tamaño del tablero | 45mm x 15.82mm (excluding cannon head part) |
| Peso del artículo | 1.06 onzas |
| Dimensiones del paquete | 3.94 x 1.97 x 0.79 pulgadas |
Contenido del paquete
- 1 x Electret Condenser Microphone Amptablero más duradero
Configuración y conexión
Este amplifier board requires an electret microphone and a phantom power source (15-48V) for operation. The board converts the phantom power into the necessary bias voltage for the electret microphone and amplifies its signal.
- Connect the Electret Microphone: Solder or connect your electret microphone to the designated 'MIC +' and 'MIC -' pads on the amplifier board. Ensure correct polarity.
- Connect to Phantom Power Source: The output pins of the amplifier board are designed to connect to an XLR input that provides 15-48V phantom power. This connection will supply power to the board and the microphone, and carry the ampseñal de audio amplificada.
- Conectar al equipo de audio: The XLR output from your phantom power source (or directly from the board if integrated) should then be connected to your mixer, audio interface, or other recording/sound equipment.
Importante: The overall noise performance of the system is significantly influenced by the quality of the electret microphone used. For optimal results, it is recommended to use a low-noise electret microphone.
Operación
Once properly connected, the amplifier board operates automatically when phantom power is supplied. It boosts the low-level signal from the electret microphone to a line-level signal suitable for professional audio equipment.
- Asegúrese de que todas las conexiones estén seguras antes de aplicar energía.
- Activate the phantom power on your mixer or audio interface.
- Monitor audio levels on your connected equipment to prevent clipping or distortion. Adjust gain settings on your mixer/interface as needed.
Mantenimiento
El amplifier board requires minimal maintenance. Keep the board clean and free from dust and moisture. Avoid exposing it to extreme temperatures or direct sunlight. Do not attempt to disassemble the board beyond necessary connections, as this may void any potential warranty.
Solución de problemas
- Sin salida de sonido:
- Verify that phantom power (15-48V) is active on your connected audio equipment.
- Check all cable connections for proper seating and continuity.
- Ensure the electret microphone is correctly wired to the board with correct polarity.
- Test with a different electret microphone or cable if available.
- Ruido/zumbido excesivo:
- Ensure proper grounding of all audio equipment.
- Use shielded cables for all connections.
- Verify that the electret microphone itself is low-noise.
- Check for nearby electronic devices that might cause interference.
- Low Output Level:
- Confirm that the phantom power voltage está dentro del rango de 15-48 V.
- Adjust the gain settings on your mixer or audio interface.
Ayudas visuales
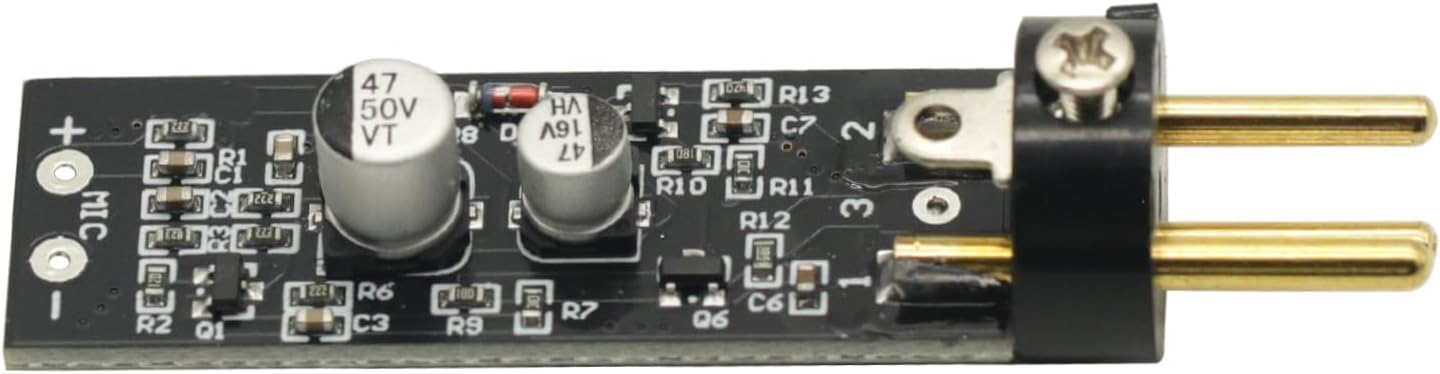

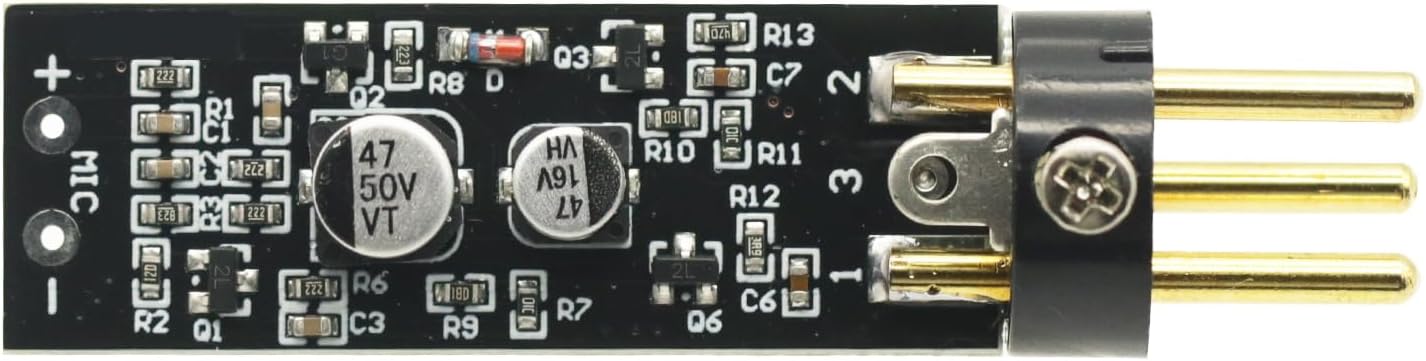


Vídeo del producto
Vídeo 1: Este vídeo ofrece una visión generalview of the Electret Microphone Amplifier Boards, showing their packaging and physical appearance. It demonstrates the compact size and how the electret microphone capsule connects to the board.
Garantía y soporte
Para obtener información sobre la garantía o asistencia técnica, consulte las políticas del vendedor en la plataforma donde adquirió el producto. Conserve su recibo de compra como comprobante.