
1. Introducción
This manual provides detailed instructions for the setup, operation, and maintenance of your ECHTPower Wireless Switch Controller. Please read this manual thoroughly before using the product to ensure proper functionality and to maximize your gaming experience. This controller is designed for use with Nintendo Switch, PC, iOS, and Android devices.

Image 1.1: ECHTPower Wireless Switch Controller in purple. This image displays the front view of the controller, highlighting its ergonomic design and button layout.
2. Producto terminadoview
2.1 Contenido del paquete
- Controlador de interruptor inalámbrico ECHTPower
- Cable de carga USB-C
- Manual de usuario (este documento)
2.2 Diseño del controlador
Familiarícese con los botones y las funciones de su controlador:

Imagen 2.1: Frente view of the ECHTPower Wireless Switch Controller. This image shows the left and right analog sticks, D-pad, A/B/X/Y buttons, Home button, Capture button, Plus/Minus buttons, and shoulder buttons.
- Joystick analógico izquierdo: For movement and camera control. Features Hall Effect technology for precision.
- Joystick analógico derecho: For camera control and aiming. Features Hall Effect technology for precision.
- Almohadilla direccional: Entrada direccional.
- Botones A/B/X/Y: Botones de acción.
- Botones L/R: Botones de hombro.
- Desencadenantes ZL/ZR: Disparadores analógicos.
- Botón de inicio: Regresa a la pantalla de inicio del sistema.
- Botón CAPTURAR: Takes screenshots or records video clips.
- Botones +/-: Funciones de inicio/selección.
- Botón M: Macro/Customization button (refer to advanced settings for programming).
- Indicadores LED: Número de jugador y estado de carga.

Imagen 2.2: Primer plano view of the Hall Effect joystick. This image highlights the advanced sensor technology used in the analog sticks for enhanced durability and drift-free performance.
The controller features Hall Effect joysticks, which utilize electromagnetic induction for precise, drift-free control and extended lifespan compared to traditional potentiometers.
3. Configuración y conexión
3.1 Carga del controlador
Before first use, fully charge the controller. Connect the supplied USB-C cable to the controller's charging port and the other end to a USB power source (e.g., console, PC, USB wall adapter). The LED indicators will show charging status and turn off when fully charged.
3.2 Conexión a Nintendo Switch
- Desde el menú INICIO, seleccione “Controladores” > “Cambiar agarre/orden”.
- On the next screen, press and hold the SYNC button on the top of the ECHTPower controller for a few seconds until the player LEDs begin to flash.
- Una vez emparejados, los LED del reproductor correspondientes al número de controlador permanecerán encendidos.
Note: The SYNC button is usually a small, recessed button on the top edge of the controller.
3.3 Conexión a PC (Windows)
The controller supports both wired and wireless connections to PC.
3.3.1 conexiones cableadas
- Conecte el controlador a su PC mediante el cable USB-C.
- La PC debería detectar e instalar automáticamente los controladores necesarios.
- The controller will be recognized as an XInput device.
3.3.2 Conexión inalámbrica (Bluetooth)
- Asegúrese de que su PC tenga Bluetooth habilitado.
- Go to "Settings" > "Devices" > "Bluetooth & other devices" and select "Add Bluetooth or other device".
- Choose "Bluetooth".
- Press and hold the SYNC button on the controller until the LEDs flash rapidly.
- Select the "Pro Controller" or similar device name from the list on your PC.
- Once paired, the controller LEDs will stop flashing and remain lit.
3.4 Conexión a dispositivos iOS/Android

Image 3.1: The ECHTPower Wireless Switch Controller shown alongside various devices, including a tablet, smartphone, and laptop, illustrating its multi-device compatibility.
- Habilite Bluetooth en su dispositivo iOS o Android.
- Vaya a la configuración de Bluetooth y busque nuevos dispositivos.
- Press and hold the SYNC button on the controller until the LEDs flash rapidly.
- Select the "Pro Controller" or similar device name from the list on your mobile device.
- Once paired, the controller LEDs will stop flashing and remain lit.
Compatibility may vary with specific games and applications on mobile platforms.
4. Instrucciones de funcionamiento
4.1 Controles básicos
The controller functions similarly to standard gaming controllers. Refer to the in-game instructions for specific button mappings.
- Joysticks analógicos: Used for movement, camera control, and menu navigation.
- Almohadilla direccional: Se utiliza para entrada direccional, a menudo para navegación de menú o acciones específicas del juego.
- Botones A/B/X/Y: Primary action buttons, typically for jumping, attacking, interacting, etc.
- Botones L/R/ZL/ZR: Used for various in-game actions such as aiming, shooting, or special abilities.
- Botón de inicio: Returns to the console's home screen or main menu.
- Botón CAPTURAR: Captures screenshots or video clips (Nintendo Switch specific).
- Botones +/-: Often used for pausing games, opening menus, or selecting options.
4.2 Advanced Features (Hall Effect Joysticks)
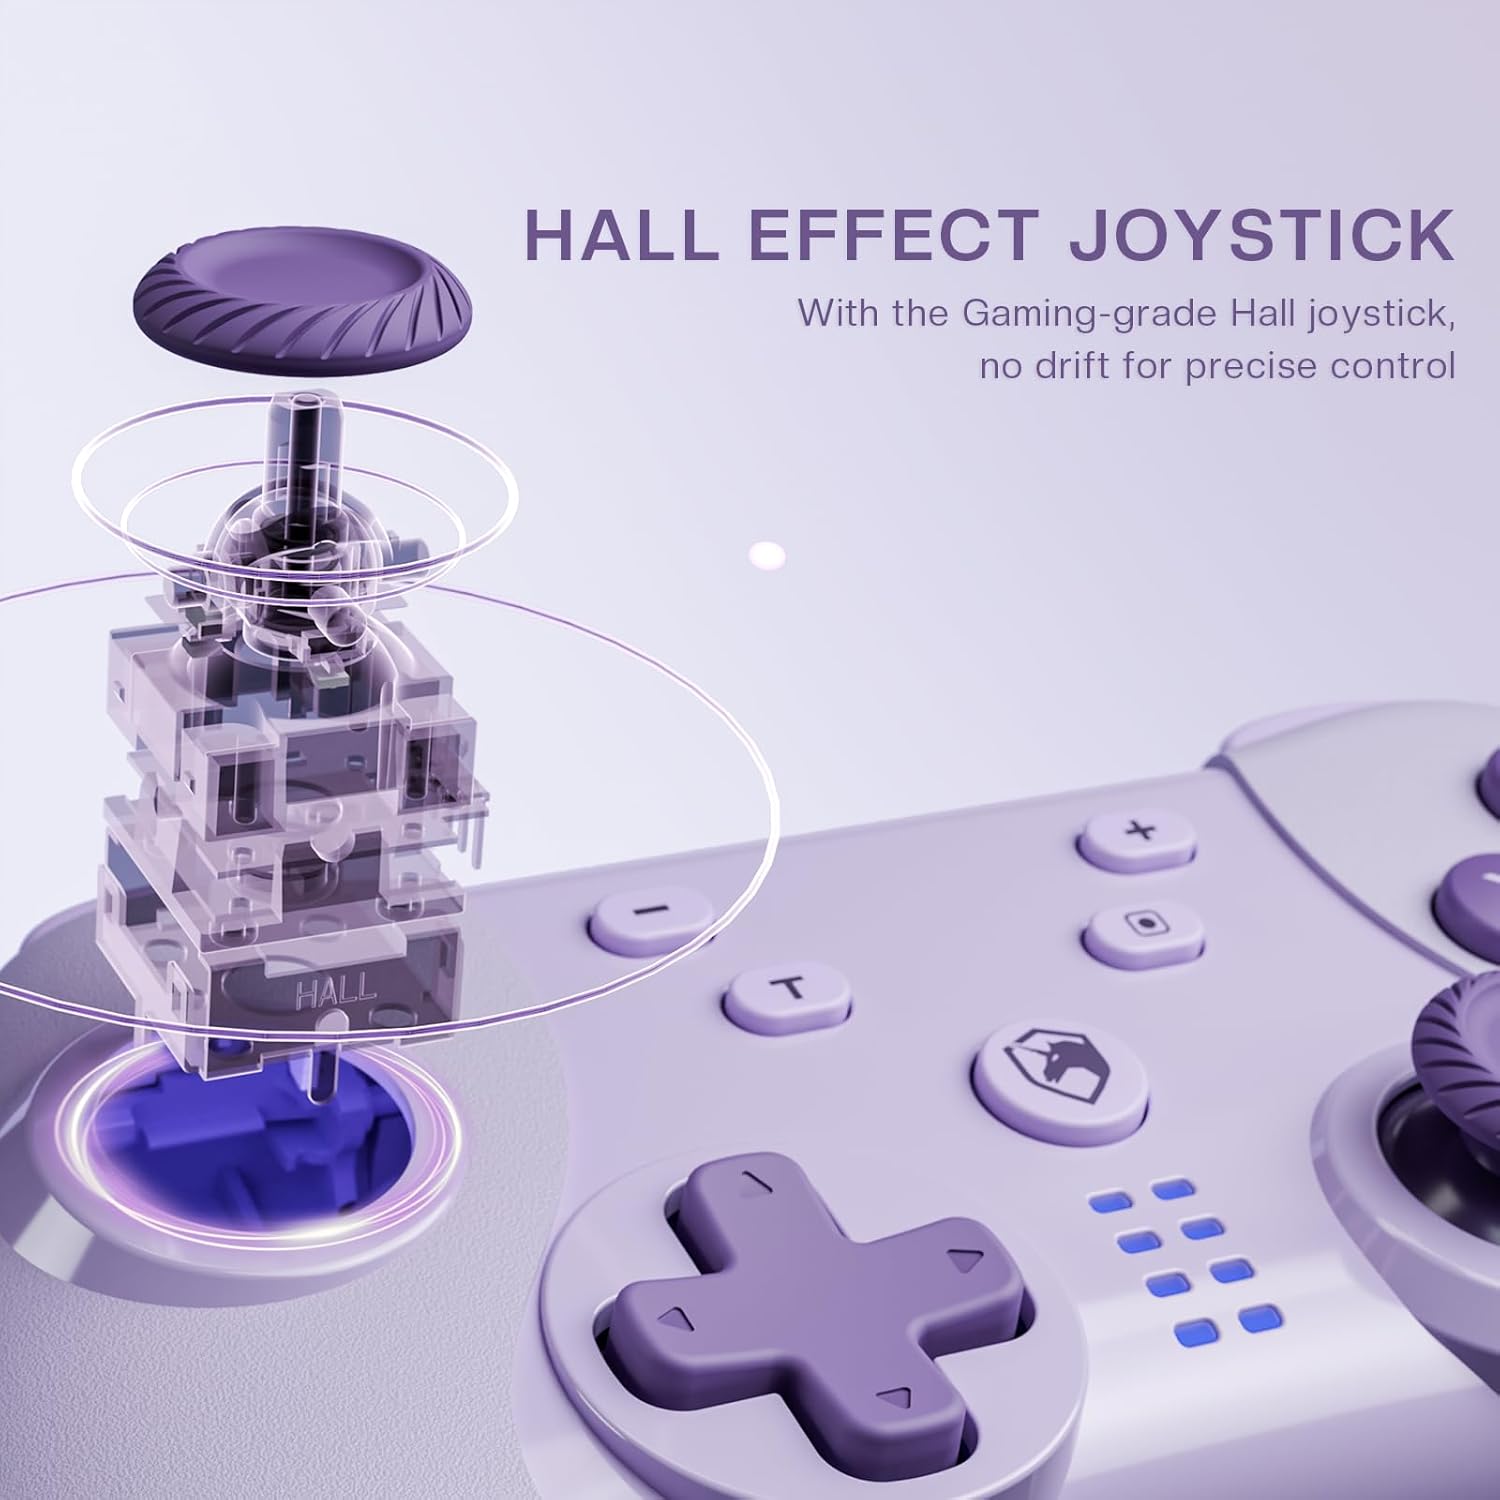
Image 4.1: Diagram illustrating the internal mechanism of a Hall Effect joystick. This image demonstrates how magnetic fields are used for position detection, contributing to drift-free and precise control.
The Hall Effect joysticks provide enhanced precision and durability. This technology uses magnetic fields instead of physical contact, virtually eliminating stick drift and extending the lifespan of the joysticks. No special operation is required; simply enjoy the improved responsiveness and accuracy.
4.3 Macro Function (M Button)
The 'M' button can be programmed for macro functions. Refer to the ECHTPower official website or advanced user guides for detailed instructions on how to program and utilize macro functions for specific gaming scenarios.
5. Mantenimiento
- Limpieza: Utilice un paño suave y seco para limpiar el mando. No utilice productos químicos agresivos ni materiales abrasivos.
- Almacenamiento: Guarde el controlador en un lugar fresco y seco, alejado de la luz solar directa y de temperaturas extremas.
- Cuidado de la batería: Para prolongar la vida útil de la batería, evite descargar completamente el mando con frecuencia. Cárguelo regularmente, incluso si no lo usa durante periodos prolongados.
- Evite las gotas: Proteja el controlador de caídas e impactos que puedan dañar los componentes internos.
6. Solución de problemas
| Problema | Posible causa | Solución |
|---|---|---|
| El controlador no se enciende. | Batería baja. | Cargue el controlador mediante el cable USB-C. |
| No se puede conectar al dispositivo. | Not in pairing mode; Bluetooth interference; device's Bluetooth off. | Ensure controller is in pairing mode (flashing LEDs). Check device's Bluetooth settings. Try restarting both controller and device. |
| Retraso de entrada o desconexión. | Distance from device; low battery; wireless interference. | Move closer to the device. Charge the controller. Reduce other wireless devices nearby. |
| Desplazamiento del joystick. | Rare with Hall Effect, but possible calibration issue or extreme wear. | Try recalibrating the joysticks through your device's settings (e.g., Nintendo Switch system settings). If issue persists, contact support. |
7. Especificaciones
- Modelo: Controlador de interruptor inalámbrico
- Conectividad: Bluetooth inalámbrico, cable USB-C
- Compatibilidad: Nintendo Switch, PC (Windows), iOS, Android
- Joystick Technology: Efecto Hall
- Fuente de energía: Batería recargable incorporada
- Puerto de carga: USB-C
- ASIN: B0DNN1BP4F
8. Garantía y soporte
ECHTPower products come with a standard manufacturer's warranty. For specific warranty terms and conditions, please refer to the warranty card included with your product or visit the official ECHTPower websitio.
If you encounter any issues or have questions not covered in this manual, please contact ECHTPower customer support:
- Websitio: Tienda oficial de ECHTPower en Amazon
- Correo electrónico: Consulte el embalaje del producto o la información oficial. webSitio para correo electrónico de contacto.