
1. Introducción
This manual provides essential instructions for the safe and effective use, installation, and maintenance of your Linkifly XT1 Vacuum Cleaner Replacement Battery. Please read this manual thoroughly before installing or using the battery to ensure optimal performance and longevity.
2. Información de seguridad
- No desmonte, abra ni triture el paquete de baterías.
- No exponga la batería al calor o al fuego. Evite el almacenamiento bajo la luz solar directa.
- No cortocircuite un paquete de baterías. No guarde los paquetes de baterías al azar en una caja o cajón donde puedan provocar un cortocircuito entre sí o ser provocados por materiales conductores.
- No someta los paquetes de baterías a golpes mecánicos.
- En caso de fuga de una batería, evite el contacto del líquido con la piel o los ojos. En caso de contacto, lave la zona afectada con abundante agua y consulte a un médico.
- Mantenga la batería limpia y seca.
- No utilice ningún cargador que no sea el específicamente provisto para su uso con el equipo.
- Observe las marcas más (+) y menos (-) en la batería y el equipo y asegúrese de usarlas correctamente.
- Mantenga las pilas fuera del alcance de los niños.
3. Contenido del paquete
Verifique que todos los artículos estén presentes y en buenas condiciones al abrir el paquete.
- 1 x Linkifly XT1 Vacuum Cleaner Replacement Battery
4. Configuración e instalación
Follow these steps to safely replace the battery in your compatible vacuum cleaner.
- Apagado: Ensure your vacuum cleaner is completely turned off and unplugged from any power source before beginning the battery replacement process.
- Localice el compartimento de la batería: Identify the battery compartment on your vacuum cleaner. This is typically located on the main body or handle of the device. Refer to your vacuum cleaner's original manual if you are unsure.
- Retire la batería vieja: Depending on your vacuum model, you may need to press a release button or unlatch a cover to access the battery. Carefully remove the old battery pack.
- Insertar batería nueva: Align the Linkifly XT1 replacement battery with the battery slot. Ensure the connectors are properly aligned and gently push the battery into place until it clicks or locks securely. Do not force the battery.
- Compartimento seguro: Close the battery compartment cover or latch it securely.
- Carga inicial: After installation, it is recommended to fully charge the new battery before its first use. Connect your vacuum cleaner to its charger and allow it to charge until the indicator light shows a full charge.

Image: The Linkifly XT1 Replacement Battery, highlighting its connection interface for proper installation.
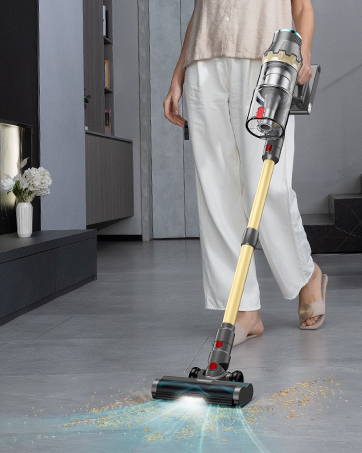
Image: A person operating a Linkifly stick vacuum cleaner, demonstrating the type of device this battery is designed for.
5. Instrucciones de funcionamiento
The XT1 replacement battery operates in conjunction with your vacuum cleaner's existing charging system. Once installed, the battery will power your vacuum as designed by the original manufacturer.
- Cargando: Always use the original charger provided with your vacuum cleaner. Connect the charger to the vacuum and a power outlet. The charging indicator on your vacuum will show the charging status.
- Estreno: For optimal performance, fully charge the battery before its initial use.
- Descargar: Avoid completely draining the battery frequently. Recharge the battery when the vacuum's power indicator shows low battery.
6. Mantenimiento
Proper maintenance ensures the longevity and performance of your XT1 replacement battery.
- Carga regular: If the vacuum is not used for an extended period, charge the battery at least once every 3 months to prevent deep discharge, which can reduce battery life.
- Almacenamiento: Guarde la batería en un lugar fresco y seco, alejado de la luz solar directa y de temperaturas extremas. Para un almacenamiento prolongado, asegúrese de que la batería esté parcialmente cargada (alrededor del 50%).
- Limpieza: Mantenga los contactos de la batería limpios y sin polvo ni residuos. Utilice un paño seco para limpiarlos si es necesario.
- Desecho: No tire la batería con la basura doméstica. Siga las normativas locales para la correcta eliminación de baterías de iones de litio.
7. Solución de problemas
If you encounter issues with your XT1 replacement battery, refer to the following common problems and solutions.
| Problema | Posible causa | Solución |
|---|---|---|
| La batería no se carga | Charger not connected properly; faulty charger; battery not seated correctly; vacuum cleaner issue. | Ensure charger is securely connected to both vacuum and power outlet. Verify the battery is correctly installed. Test the charger with another device if possible. Consult your vacuum cleaner's manual for charging troubleshooting. |
| Corto tiempo de funcionamiento | Battery not fully charged; battery degradation over time; vacuum cleaner operating in high-power mode. | Ensure the battery is fully charged before use. If the battery is old, its capacity may naturally decrease. Use the vacuum in standard mode for longer run times. |
| La aspiradora no se enciende | Battery not charged; battery not installed correctly; vacuum cleaner fault. | Charge the battery. Re-install the battery, ensuring it is securely seated. If the issue persists, the problem might be with the vacuum cleaner itself, not the battery. |
If these solutions do not resolve the issue, please contact Linkifly customer support.
8. Especificaciones
- Modelo: XT1
- Marca: Linkif
- Composición de la celda de la batería: Iones de litio
- Peso del artículo: 6.4 onzas
- Dimensiones del paquete: 7.68 x 3.66 x 1.69 pulgadas
- ASIN: B0DR2TVS6C
- Fecha de primera disponibilidad: 20 de diciembre de 2024
9. Garantía y soporte
Linkifly is committed to providing high-quality products and excellent customer service.
- Garantía: This product comes with a 12-Month Normal Warranty from the date of purchase.
- Garantía de devolución de dinero: Enjoy a 30-Day Money Back Guarantee.
- Atención al cliente: Linkifly offers 24/7 Customer Support.
- Satisfacción del cliente: We aim for 100% Customer Satisfaction.
For warranty claims, technical assistance, or any questions regarding your XT1 replacement battery, please contact Linkifly customer service through the retailer's platform or the official Linkifly websitio.
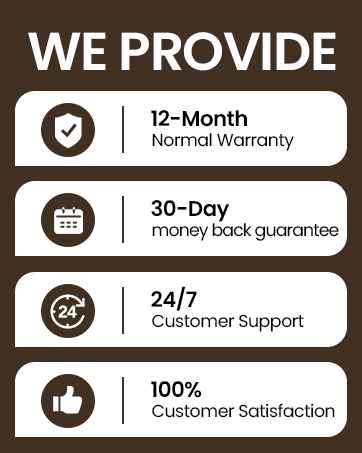
Imagen: Más alláview of Linkifly's customer service commitments, including warranty and satisfaction guarantees.