
1. Introducción
Thank you for choosing the RATIO R-SR1400S 1400W Circular Saw. This manual provides essential information for the safe and effective operation, maintenance, and troubleshooting of your new tool. Please read these instructions carefully before use and keep them for future reference.
2. Instrucciones de seguridad
Observe siempre las precauciones básicas de seguridad para reducir el riesgo de incendio, descarga eléctrica y lesiones personales. El incumplimiento de estas instrucciones puede provocar lesiones graves.
Seguridad general
- Seguridad en el área de trabajo: Mantenga su área de trabajo limpia y bien iluminada. Las áreas desordenadas u oscuras pueden provocar accidentes. No opere herramientas eléctricas en atmósferas explosivas, como en presencia de líquidos, gases o polvo inflamables.
- Seguridad eléctrica: Los enchufes de las herramientas eléctricas deben ser compatibles con la toma de corriente. Nunca modifique el enchufe de ninguna manera. Evite el contacto del cuerpo con superficies conectadas a tierra. No exponga las herramientas eléctricas a la lluvia ni a la humedad.
- Seguridad personal: Always wear eye protection, hearing protection, and a dust mask when operating the saw. Dress properly; avoid loose clothing or jewelry. Stay alert and use common sense.
Seguridad específica para sierras circulares
- Prevención de contragolpes: Always hold the saw firmly with both hands. Ensure the blade is clear of the workpiece before starting. Avoid cutting small pieces that cannot be securely clamppublicado por
- Protector de la hoja: Ensure the lower guard operates freely and closes instantly. Never jam or tie back the lower guard.
- Selección de cuchillas: Use only blades recommended for your saw and the material being cut. Ensure the blade is sharp and correctly installed.
- Depth and Bevel Adjustment: Securely tighten all depth and bevel adjustment levers before making a cut.
- Extracción de polvo: Connect a dust extraction device when possible to minimize dust exposure.
3. Producto terminadoview y componentes
Familiarize yourself with the parts of your RATIO R-SR1400S Circular Saw before operation.
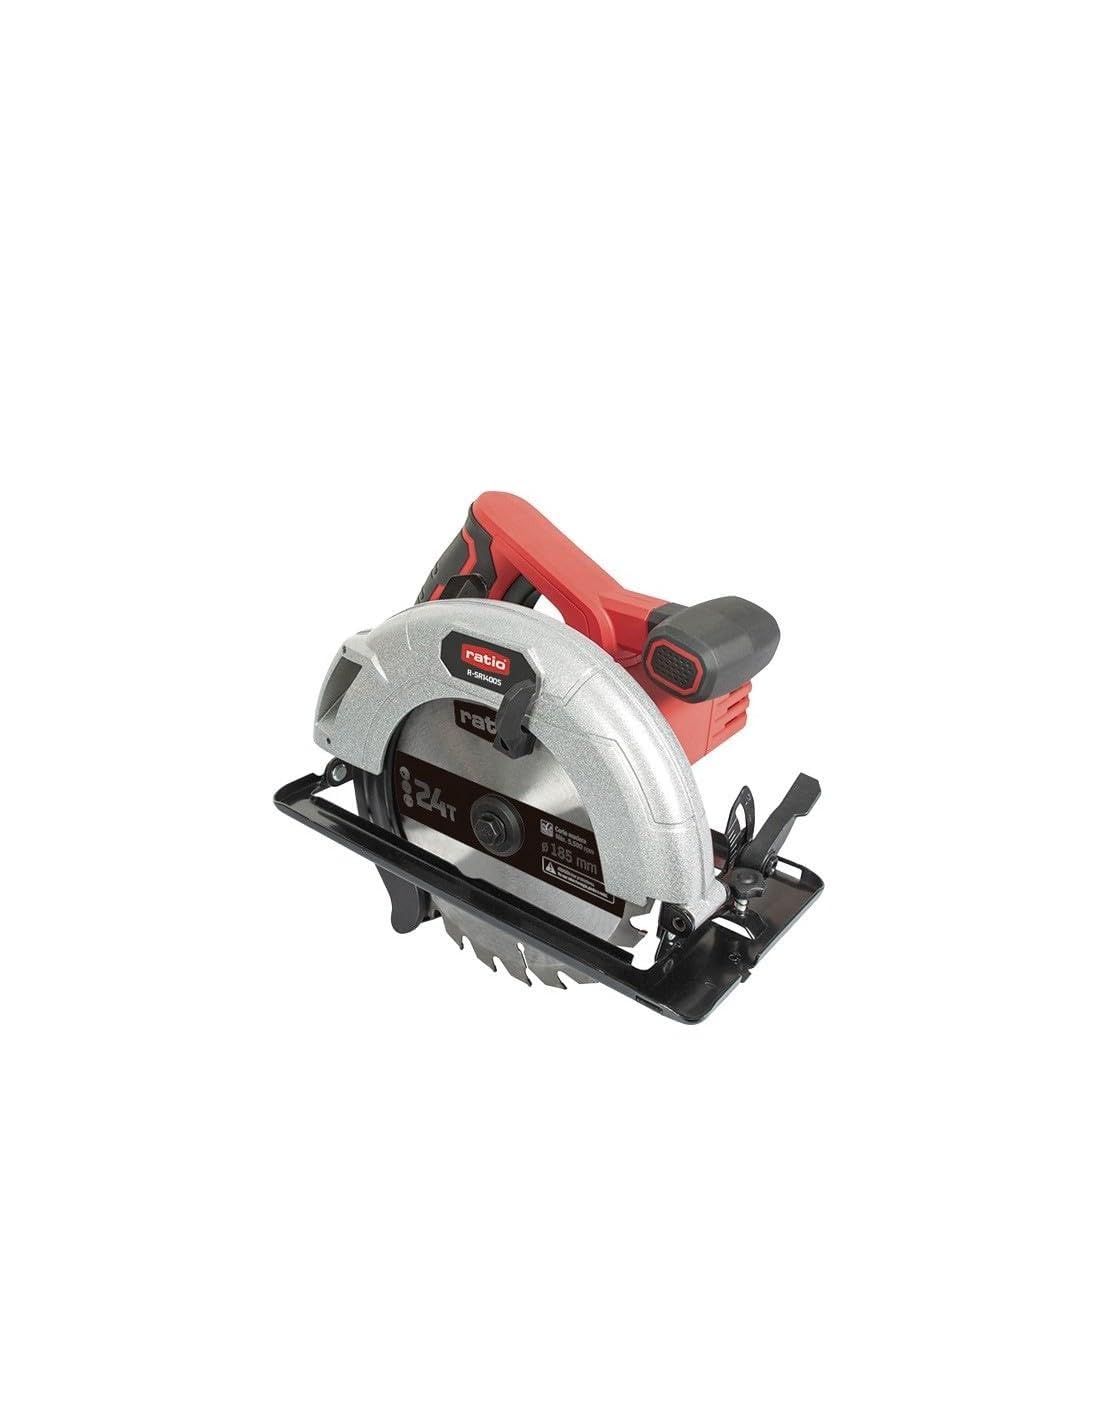
Figure 1: RATIO R-SR1400S Circular Saw. This image shows the complete circular saw with its main components, including the motor housing, handle, blade guard, and cutting blade.
- Carcasa del motor: Contiene el motor de 1400W.
- Mango principal: Ergonomically designed with a rubberized grip for comfort and control.
- Interruptor de bloqueo de seguridad: Previene el arranque accidental.
- Interruptor de gatillo: Activa la sierra.
- Protección de la hoja superior: Made of aluminum for durability and protection.
- Protección de la hoja inferior: Made of steel, automatically retracts during cutting.
- Placa base: Steel construction for stability during cuts.
- Palanca de ajuste de profundidad: For setting the cutting depth.
- Palanca de ajuste de bisel: Para ajustar el ángulo de corte (0-45 grados).
- Sistema de extracción de polvo: Allows connection to a vacuum cleaner for dust management.
- Cable de energía: 3 meters long for extended reach.

Figure 2: Included Saw Blade. This image displays the 185mm diameter, 24-tooth saw blade designed for wood cutting, with a maximum speed of 5,500 RPM.
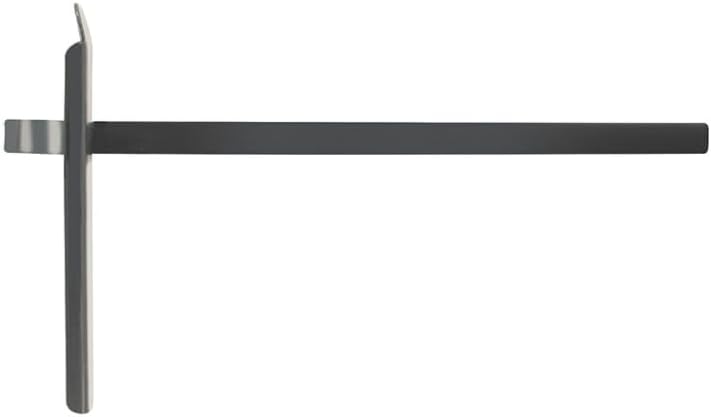
Figure 3: Rip Fence Guide. This accessory is used to guide the saw parallel to the edge of the workpiece for straight and accurate rip cuts.
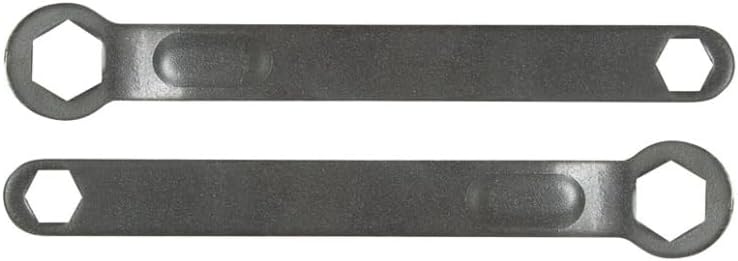
Figure 4: Blade Changing Wrenches. These wrenches are provided for safely loosening and tightening the blade arbor nut during blade installation and removal.
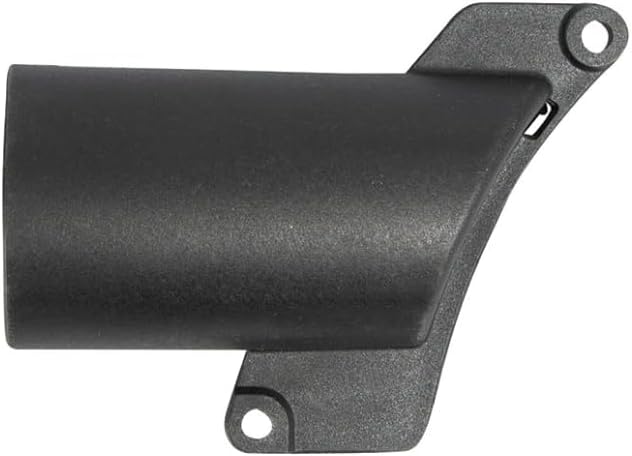
Figure 5: Dust Extraction Port. This component allows for the connection of a dust collection system to minimize sawdust in the work area.
4. Configuración
Instalación de la cuchilla
- Desconectar la energía: Desenchufe siempre la sierra de la fuente de alimentación antes de realizar cualquier ajuste o mantenimiento.
- Retraer la protección inferior: Levante la palanca de protección de la hoja inferior para retraer la protección.
- Afloje la tuerca del eje: Utilice la llave proporcionada para aflojar la tuerca del eje.
- Quitar la cuchilla vieja: Retire con cuidado la cuchilla vieja, prestando atención a la dirección de rotación.
- Instalar nueva cuchilla: Place the new blade onto the arbor, ensuring the teeth point in the direction of the arrow on the saw and the blade guard.
- Apriete la tuerca del árbol: Securely tighten the arbor nut with the wrench. Do not overtighten.
- Comprobar guardia: Ensure the lower guard moves freely and springs back to cover the blade.
Ajuste de la profundidad de corte
The cutting depth should be set so that the blade extends approximately 3-6 mm (1/8"-1/4") below the workpiece. This minimizes kickback and provides a cleaner cut.
- Afloje la palanca de ajuste de profundidad.
- Raise or lower the base plate to the desired depth.
- Apriete firmemente la palanca de ajuste de profundidad.
Ajuste del ángulo de bisel
La sierra puede realizar cortes biselados de 0° a 45°.
- Afloje la palanca de ajuste de bisel.
- Tilt the base plate to the desired angle, aligning with the scale.
- Apriete firmemente la palanca de ajuste de bisel.
Attaching the Rip Fence Guide
The rip fence guide (Figure 3) helps make straight cuts parallel to the edge of the workpiece.
- Slide the rip fence into the slots on the front of the base plate.
- Ajuste la guía al ancho de corte deseado.
- Apriete el tornillo de bloqueo para fijar la guía en su lugar.
5. Instrucciones de funcionamiento
Arranque y parada de la sierra
- Para comenzar: Press the safety lock switch, then squeeze the trigger switch.
- Para detener: Release the trigger switch. The blade will stop rotating.
Hacer un corte
- Pieza de trabajo segura: Siempre limpioamp Sujete firmemente la pieza de trabajo para evitar que se mueva durante el corte.
- Posición de la sierra: Place the front of the base plate on the workpiece, ensuring the blade is clear of the material.
- Iniciar sierra: Encienda la sierra y deje que la hoja alcance la velocidad máxima antes de cortar el material.
- Tasa de alimentación: Aplique una presión constante y uniforme para avanzar la sierra a través del material. No fuerce la sierra.
- Corte completo: Continue the cut until the saw passes completely through the workpiece.
- Liberar disparador: Release the trigger and allow the blade to stop before lifting the saw from the workpiece.
6. Mantenimiento
El mantenimiento regular garantiza la longevidad y el funcionamiento seguro de su sierra circular.
Limpieza
- Desconectar la energía: Desenchufe siempre la herramienta antes de limpiarla.
- Quitar el polvo: Use a soft brush or compressed air to clean dust and debris from the motor vents and blade guard area.
- Limpiar superficies: Limpie las superficies externas con adamp paño. No utilice productos químicos ni disolventes agresivos.
Cuidado de la cuchilla
- Inspeccionar la cuchilla: Regularly inspect the blade for sharpness, cracks, or missing teeth. Replace damaged blades immediately.
- Hoja limpia: Remove resin and pitch buildup from the blade using a suitable blade cleaner.
Inspección general
- Compruebe que todos los tornillos y sujetadores estén bien apretados.
- Inspect the power cord for damage. If damaged, have it replaced by a qualified technician.
7. Solución de problemas
Esta sección aborda problemas comunes que podrías encontrar.
| Problema | Posible causa | Solución |
|---|---|---|
| La sierra no arranca | Sin suministro de energía Bloqueo de seguridad no activado Cable de alimentación dañado | Verifique la toma de corriente y el disyuntor Asegúrese de que el bloqueo de seguridad esté presionado antes del gatillo. Inspect cord; contact service if damaged |
| La cuchilla se atasca o humea | Hoja desafilada o sucia Profundidad de corte incorrecta Forzando la sierra Pieza de trabajo no asegurada | Replace or clean blade Ajustar la profundidad de corte Reducir la velocidad de avance Asegure firmemente la pieza de trabajo |
| cortes imprecisos | Loose adjustments Cuchilla desgastada técnica inadecuada | Tighten depth/bevel levers Reemplazar la cuchilla Use a guide and maintain steady feed |
| Vibración excesiva | Hoja suelta Hoja dañada Mandril doblado | Ensure blade is securely tightened Reemplazar la cuchilla Comuníquese con el centro de servicio |
8. Especificaciones
| Característica | Especificación |
|---|---|
| Modelo | R-SR1400S |
| Fuerza | 1400 W |
| Velocidad sin carga | 5,500 rpm |
| Diámetro de la hoja | 185 milímetros |
| Diámetro interior de la hoja | 20 milímetros |
| Capacidad máxima de corte (90°) | 63 milímetros |
| Capacidad máxima de corte (45°) | 42 milímetros |
| Bevel Cut Range | 0° - 45° |
| Peso | 5 kg (approx. 4.34 kg product weight) |
| Longitud del cable | 3 metros |
9. Garantía y soporte
RATIO products are manufactured to high-quality standards. For warranty information, please refer to the warranty card included with your purchase or contact your local RATIO dealer. For technical support or service, please contact the retailer where the product was purchased or visit the official RATIO webSitio para ubicaciones de centros de servicio.