1. Introducción
This manual provides essential instructions for the assembly, operation, and maintenance of your Cazeboo Vecchio Manual Retractable Awning. Please read this manual thoroughly before installation and use to ensure proper function and longevity of your awning. This awning is designed to provide shade and UV protection for outdoor spaces such as terraces and gardens.
2. Instrucciones de seguridad
- Always follow local building codes and regulations for installation.
- Ensure the mounting surface is structurally sound and can support the weight of the awning.
- Do not operate the awning in strong winds, heavy rain, or severe weather conditions. Retract the awning completely to prevent damage.
- Mantenga a los niños y a las mascotas alejados del toldo durante su funcionamiento.
- No cuelgue objetos del marco ni de la tela del toldo.
- Inspeccione el toldo periódicamente para detectar cualquier signo de desgaste o daño. No lo utilice si está dañado.
- Use appropriate safety gear during installation, including gloves and eye protection.
3. Contenido del paquete
Verifique que todos los componentes estén presentes antes de comenzar el ensamblaje:
- Polyester awning fabric (Taupe, L. 395 cm x L. 300 cm, 320 g/m²)
- Winding roller for fabric (Ø 7cm x L. 386cm)
- 2 large arms (section 56 x 31 cm)
- 2 small arms (section 51 x 25 cm)
- Kit de montaje en pared
- Manivela
4. Configuración e instalación
Siga estos pasos para una correcta instalación:
- Step 1: Choose Location: Select a suitable wall for installation, ensuring it is strong enough to support the awning's weight and operational forces. Consider sun exposure and the desired shade area.
- Step 2: Mark Mounting Points: Use the provided wall mounting kit to accurately mark the drilling points for the awning brackets. Ensure the marked points are level and correctly spaced according to the awning's width.
- Step 3: Drill Holes and Install Brackets: Drill holes at the marked points. Securely fasten the wall mounting brackets using appropriate hardware suitable for your specific wall type (e.g., concrete, brick, wood).
- Step 4: Mount the Awning: Carefully lift the awning assembly and attach it to the installed wall brackets. Ensure it is securely seated and locked into place according to the bracket design.
- Step 5: Attach Crank Handle: Connect the crank handle to the designated mechanism on the awning. The crank can be positioned on either the right or left side based on your preference and accessibility.
- Step 6: Test Operation: Slowly extend and retract the awning using the crank handle to ensure smooth operation, proper alignment, and secure attachment.

This diagram illustrates the key dimensions of the awning (395 cm width, 300 cm projection), its adjustable tilt angle (30°-100°), and highlights features such as UV50+ protection, water repellency, and color fastness. It also provides a visual overview del proceso de instalación.
5. Instrucciones de funcionamiento
The Cazeboo Vecchio awning is operated manually using the provided crank handle.
5.1 Extensión del toldo
To extend the awning, use the crank handle to slowly turn the mechanism in the appropriate direction. The awning fabric will unroll, and the arms will extend outwards. Continue turning until the awning reaches the desired extension. Do not force the awning past its maximum extension.

This image demonstrates how the awning extends and retracts, showing the movement of the fabric and arms. The manual crank mechanism allows for smooth operation.
5.2 Retracción del toldo
To retract the awning, turn the crank handle in the opposite direction. The arms will fold, and the fabric will roll back onto the roller. Ensure the awning is fully retracted when not in use or during adverse weather conditions.
This image shows the Cazeboo Vecchio awning fully retracted against the wall, demonstrating its compact profile Cuando no esté en uso.
5.3 Ajuste del ángulo de inclinación
The awning's tilt angle can be adjusted from 30° to 100° to optimize shade throughout the day. This adjustment allows you to adapt the awning's position to the sun's angle, providing optimal shade as needed. Refer to the installation diagram for the specific adjustment mechanism.
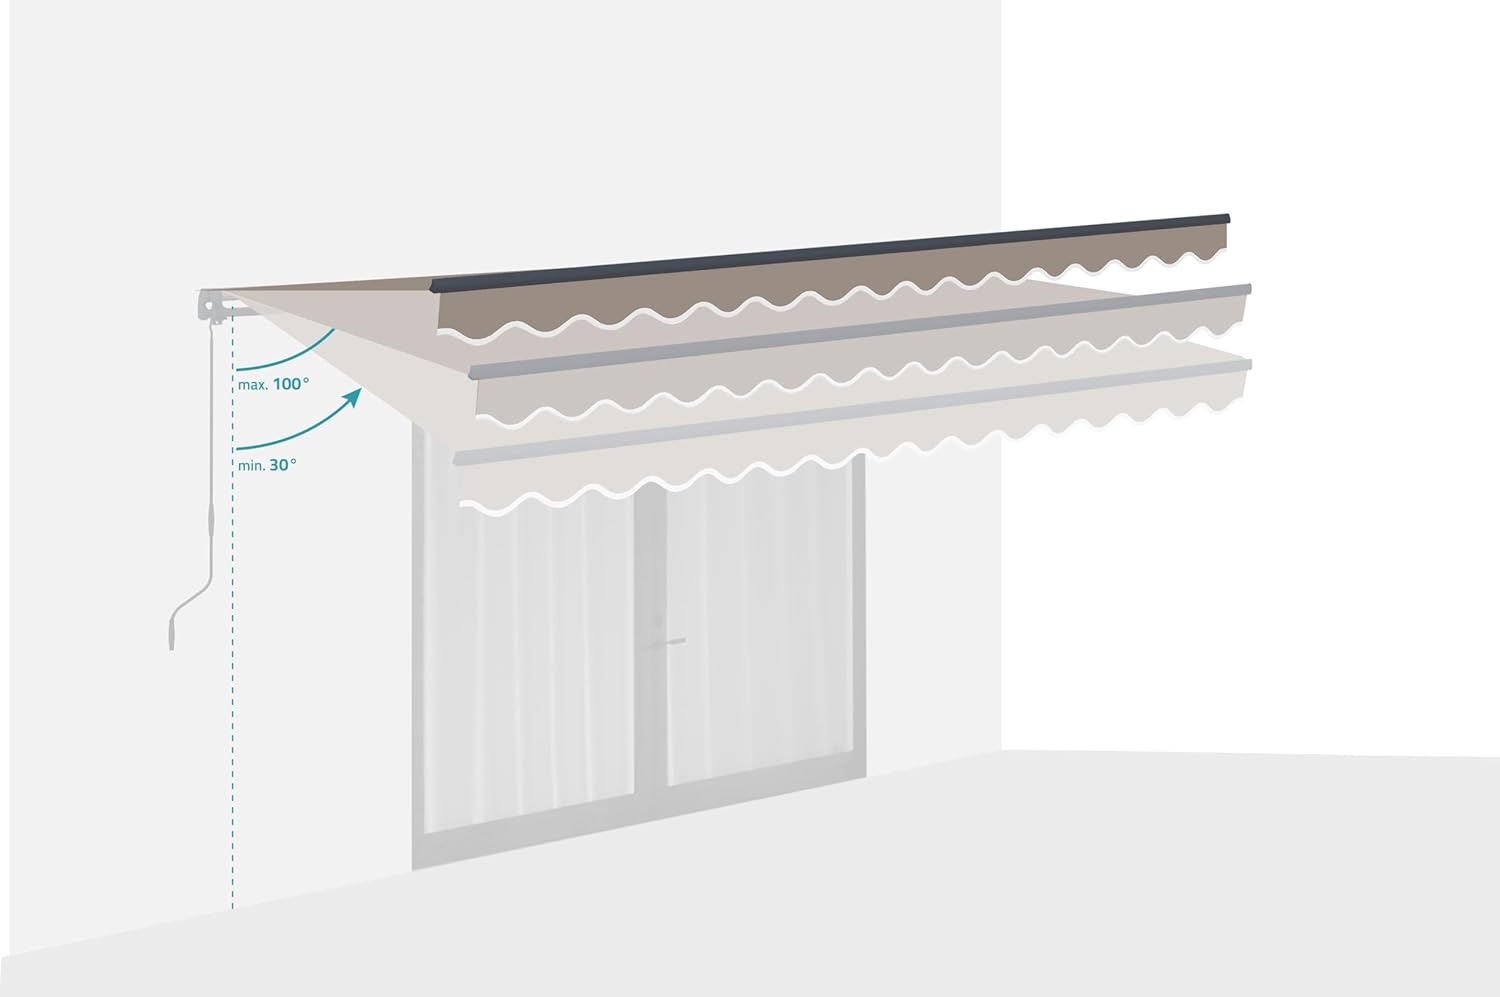
This diagram illustrates the range of tilt angle adjustment for the awning, from a minimum of 30 degrees to a maximum of 100 degrees, allowing users to optimize shade throughout the day.

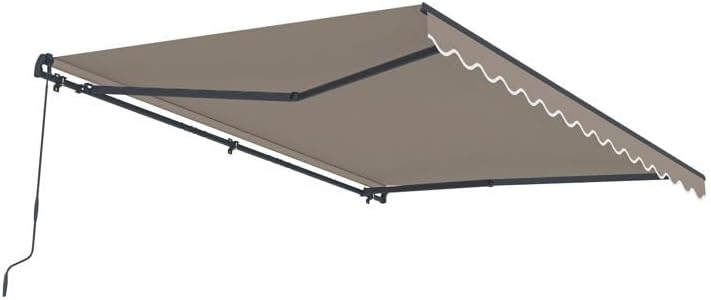
un frente view of the Cazeboo Vecchio awning fully extended, showcasing its taupe fabric and anthracite grey frame, providing ample shade.
6. Mantenimiento
Un mantenimiento adecuado prolongará la vida útil y la apariencia de su toldo.
- Limpieza de la tela: Clean the polyester fabric periodically with mild soap and water. Use a soft brush or cloth to gently scrub. Rinse thoroughly with clean water and allow the fabric to air dry completely before retracting the awning. Do not use harsh chemicals, bleach, or abrasive cleaners, as these can damage the fabric's UV and water-repellent properties.
- Limpieza del marco: Limpie el marco de aluminio con publicidad.amp cloth to remove dirt and dust. Avoid abrasive materials that could scratch the powder coating.
- Cuidado estacional: This awning is designed for spring and summer use. It is recommended to retract the awning during autumn and winter months or periods of non-use to protect it from harsh weather conditions.
- Precauciones climáticas: Always retract the awning during strong winds, heavy rain, hail, or snow to prevent damage to the fabric, frame, and mounting structure.
- Inspección: Regularly check all bolts, screws, and moving parts for tightness and wear. Tighten any loose fasteners. Inspect the fabric for tears or excessive wear.
7. Solución de problemas
Consulte la siguiente tabla para conocer problemas comunes y sus soluciones:
| Problema | Posible causa | Solución |
|---|---|---|
| El toldo no se extiende ni se retrae con suavidad | Obstruction in path; crank mechanism not engaged; damaged arms | Check for and remove obstructions. Ensure crank is fully engaged. Inspect arms for damage or misalignment. |
| Awning fabric sags or wrinkles | Awning not fully extended/tensioned; fabric damage | Ensure awning is fully extended and properly tensioned. Inspect fabric for tears or stretching. |
| El toldo hace ruidos inusuales durante el funcionamiento | Loose components; lack of lubrication; worn parts | Inspect all moving parts and fasteners for tightness. Lubricate moving joints if necessary. |
| Agua acumulada en la tela | Insufficient tilt angle; fabric sagging | Adjust the tilt angle to a steeper position to allow for proper water runoff. Ensure fabric is taut. |
8. Especificaciones
| Modelo | Viejo |
| Número de modelo | STW-000316 |
| Marca | Cazeboo |
| Dimensions (Width x Projection) | 395 cm x 300 cm |
| Covered Surface Area | Aproximadamente 12 m² |
| Material de la tela | 100% poliéster |
| Densidad de la tela | 320 g/m² |
| Color de la tela | Gris pardo |
| Material del marco | Aluminio recubierto de polvo |
| Color del marco | Gris antracita |
| Protección UV | UV50+ |
| Hidrófugo | Sí |
| Ajuste del ángulo de inclinación | 30° a 100° |
| Operación | Manual (manivela) |
| Asamblea | Requerido |
9. Información de garantía
Warranty information for the Cazeboo Vecchio Manual Retractable Awning is not provided within this manual. Please refer to your purchase documentation or contact Cazeboo customer service for details regarding warranty coverage.
10. Información de soporte
For technical assistance, replacement parts, or further inquiries regarding your Cazeboo Vecchio Manual Retractable Awning, please contact Cazeboo customer support. Contact details can typically be found on the manufacturer's official websitio o su recibo de compra.