1. Introducción
This manual provides detailed instructions for the installation, operation, and maintenance of the RAB Lighting B17 LED Bollard Light. This outdoor luminaire features field-adjustable wattage and selectable color temperature (CCT), designed for various outdoor applications.
Las características principales incluyen:
- Energy-efficient LED with a 50,000-hour lifespan.
- agua ajustabletage: 24W, 19W o 14W.
- Selectable CCT: 3000K (Warm White), 4000K (Neutral White), or 5000K (Cool White).
- 0-10V dimming capability.
- Listado por UL para lugares húmedos.
- Durable metal construction with a glass shade.
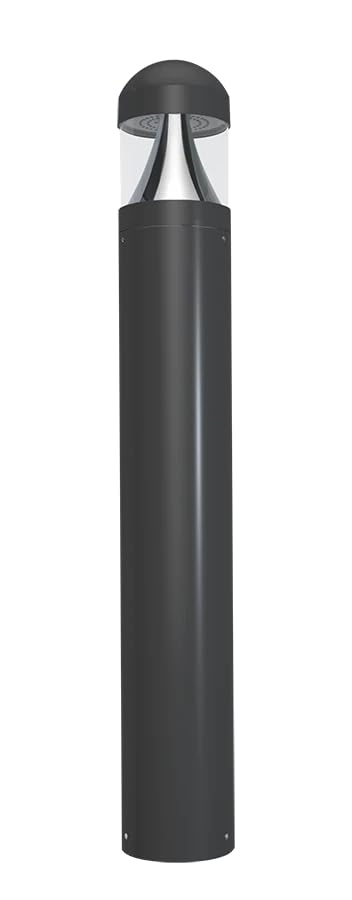
Figure 1: RAB Lighting B17 LED Bollard Light (Model B17D shown).
2. Información de seguridad
ADVERTENCIA: Riesgo de descarga eléctrica. Desconecte la alimentación antes de realizar la instalación o el mantenimiento. La instalación debe ser realizada por un electricista cualificado, de acuerdo con todos los códigos eléctricos nacionales y locales aplicables.
- Asegúrese de que el volumen de suministrotage es correcto para el accesorio.
- Do not handle live components.
- Utilice equipo de protección personal (EPP) adecuado.
- This fixture is suitable for wet locations. Ensure all connections are properly sealed to prevent water ingress.
- No modifique el dispositivo. Cualquier modificación podría anular la garantía y crear riesgos de seguridad.
3. Contenido del paquete
Verifique que todos los componentes estén presentes antes de comenzar la instalación:
- B17 LED Bollard Light Fixture
- On-Off Switch (Included Components)
- Installation Hardware (e.g., mounting bolts, gaskets) - (Assumed, not explicitly listed but typical for such products)
- Manual de instrucciones (este documento)
4. Configuración e instalación
Follow these steps for proper installation of the B17 LED Bollard Light:
- Prepare el sitio de instalación: Ensure the mounting surface is stable and level. Run electrical conduit and wiring to the desired location according to local codes.
- Desconectar la energía: Apague la energía en el disyuntor antes de comenzar cualquier trabajo eléctrico.
- Mount the Bollard: Secure the bollard base to the mounting surface using appropriate hardware. Ensure a watertight seal if required by local codes.
- Realice conexiones eléctricas: Connect the fixture's wires to the supply wires. Follow standard wiring practices:
- Black to Line (L)
- Blanco a Neutro (N)
- Green/Ground to Ground (G)
- Purple to Dimming (+) (for 0-10V dimming)
- Gray to Dimming (-) (for 0-10V dimming)
- Seleccione Wattage y CCT: Before closing the fixture, adjust the wattage and CCT switches located inside the fixture head. Refer to Section 5 for details.
- Secure the Fixture Head: Attach the fixture head to the bollard body, ensuring all seals are properly seated to maintain the wet location rating.
- Restaurar energía: Encienda el disyuntor y pruebe la luz.

Figure 2: The B17 Bollard Light is UL Listed and rated for wet locations, ensuring durability in outdoor environments.
5. Instrucciones de funcionamiento
5.1. Field-Adjustable Wattage
The B17 bollard light allows you to select the desired wattage output to optimize brightness and energy consumption. A switch located inside the fixture head enables selection between 24W, 19W, and 14W.
- 24W: Brillo máximo.
- 19W: Medium brightness, reduced energy use.
- 14W: Lower brightness, maximum energy savings.
Para ajustar: Disconnect power. Open the fixture head. Locate the wattage selection switch and move it to the desired setting. Close the fixture head and restore power.
5.2. Temperatura de color seleccionable (CCT)
The fixture offers three color temperature options to suit different aesthetic preferences and applications. A separate switch inside the fixture head allows selection between 3000K, 4000K, and 5000K.
- 3000K: Warm White, ideal for creating a cozy and inviting atmosphere.
- 4000K: Neutral White, suitable for general illumination and task lighting.
- 5000K: Cool White, provides bright, crisp light, often used for security or modern aesthetics.
Para ajustar: Disconnect power. Open the fixture head. Locate the CCT selection switch and move it to the desired setting. Close the fixture head and restore power.

Figure 3: Visual representation of adjustable wattage and selectable CCT settings.
5.3. 0-10V Dimming
The B17 bollard light is compatible with 0-10V dimming systems. Connect the purple and gray dimming wires to a compatible 0-10V dimmer control. This allows for smooth adjustment of light output from 100% down to 10% (or lower, depending on dimmer specifications).
Ensure the dimmer is rated for LED loads and is compatible with 0-10V dimming protocols.
6. Mantenimiento
The B17 LED Bollard Light is designed for minimal maintenance due to its long LED lifespan of 50,000 hours.
- Limpieza: Limpie periódicamente el exterior del aparato con un paño suave y seco.amp cloth to remove dirt and debris. Do not use abrasive cleaners or solvents. Ensure power is off before cleaning.
- Inspección: Annually inspect the fixture for any signs of damage, loose connections, or wear. Ensure all seals remain intact to maintain weather resistance.
- Reemplazo de LED: LEDs are integrated and not user-replaceable. The long lifespan minimizes the need for replacement.

Figure 4: The B17 LED Bollard Light offers a long 50,000-hour operational lifespan.
7. Solución de problemas
| Problema | Posible causa | Solución |
|---|---|---|
| La luz no se enciende. | No hay suministro de energía. Conexión de cableado suelta. Wat incorrectotage/CCT setting. | Verifique el disyuntor. Asegúrese de que haya energía. Verifique que todas las conexiones de cables estén seguras (primero apague el dispositivo). Confirmar quétage/CCT switches are set correctly. |
| La luz parpadea o se atenúa inesperadamente. | Regulador de intensidad incompatible. Loose dimming wire connection. Volumentage fluctuaciones. | Ensure 0-10V dimmer is compatible with LED loads. Check purple and gray dimming wire connections. Consulte a un electricista para comprobar la estabilidad del suministro eléctrico. |
| La salida de luz es demasiado baja/alta. | Wat incorrectotage ajuste. | Ajustar el wattage selection switch inside the fixture head (power off first). |
| No se desea un color claro. | Configuración de CCT incorrecta. | Adjust the CCT selection switch inside the fixture head (power off first). |
8. Especificaciones
| Característica | Detalle |
|---|---|
| Nombre del modelo | B17 |
| Marca | Iluminación RAB |
| Quétage | Field-Adjustable: 24W / 19W / 14W |
| Temperatura de color (CCT) | Selectable: 3000K / 4000K / 5000K |
| Atenuación | 0-10V regulable |
| Esperanza de vida | 50,000 horas |
| Material | Metal body, Glass shade |
| Clasificación ambiental | UL Listed for Wet Locations |
| Componentes incluidos | Interruptor encendido / apagado |
| Código Postal | 192552028424 |
| ASIN | B0DY2FPPNS |
9. Garantía y soporte
For warranty information and technical support, please contact RAB Lighting directly. Refer to the official RAB Lighting websitio o su documentación de compra para conocer los términos de garantía específicos y los detalles de contacto.
RAB Lighting Contact: www.rablighting.com