
1. Introducción
This manual provides detailed instructions for the installation, operation, and maintenance of your GIGABYTE B550M DS3H AC R2 motherboard. This micro-ATX motherboard is designed to support AMD Ryzen 5000, 4000, and 3000 series CPUs on the AM4 socket, offering a robust platform for various computing needs. Please read this manual thoroughly before beginning installation to ensure proper setup and functionality.
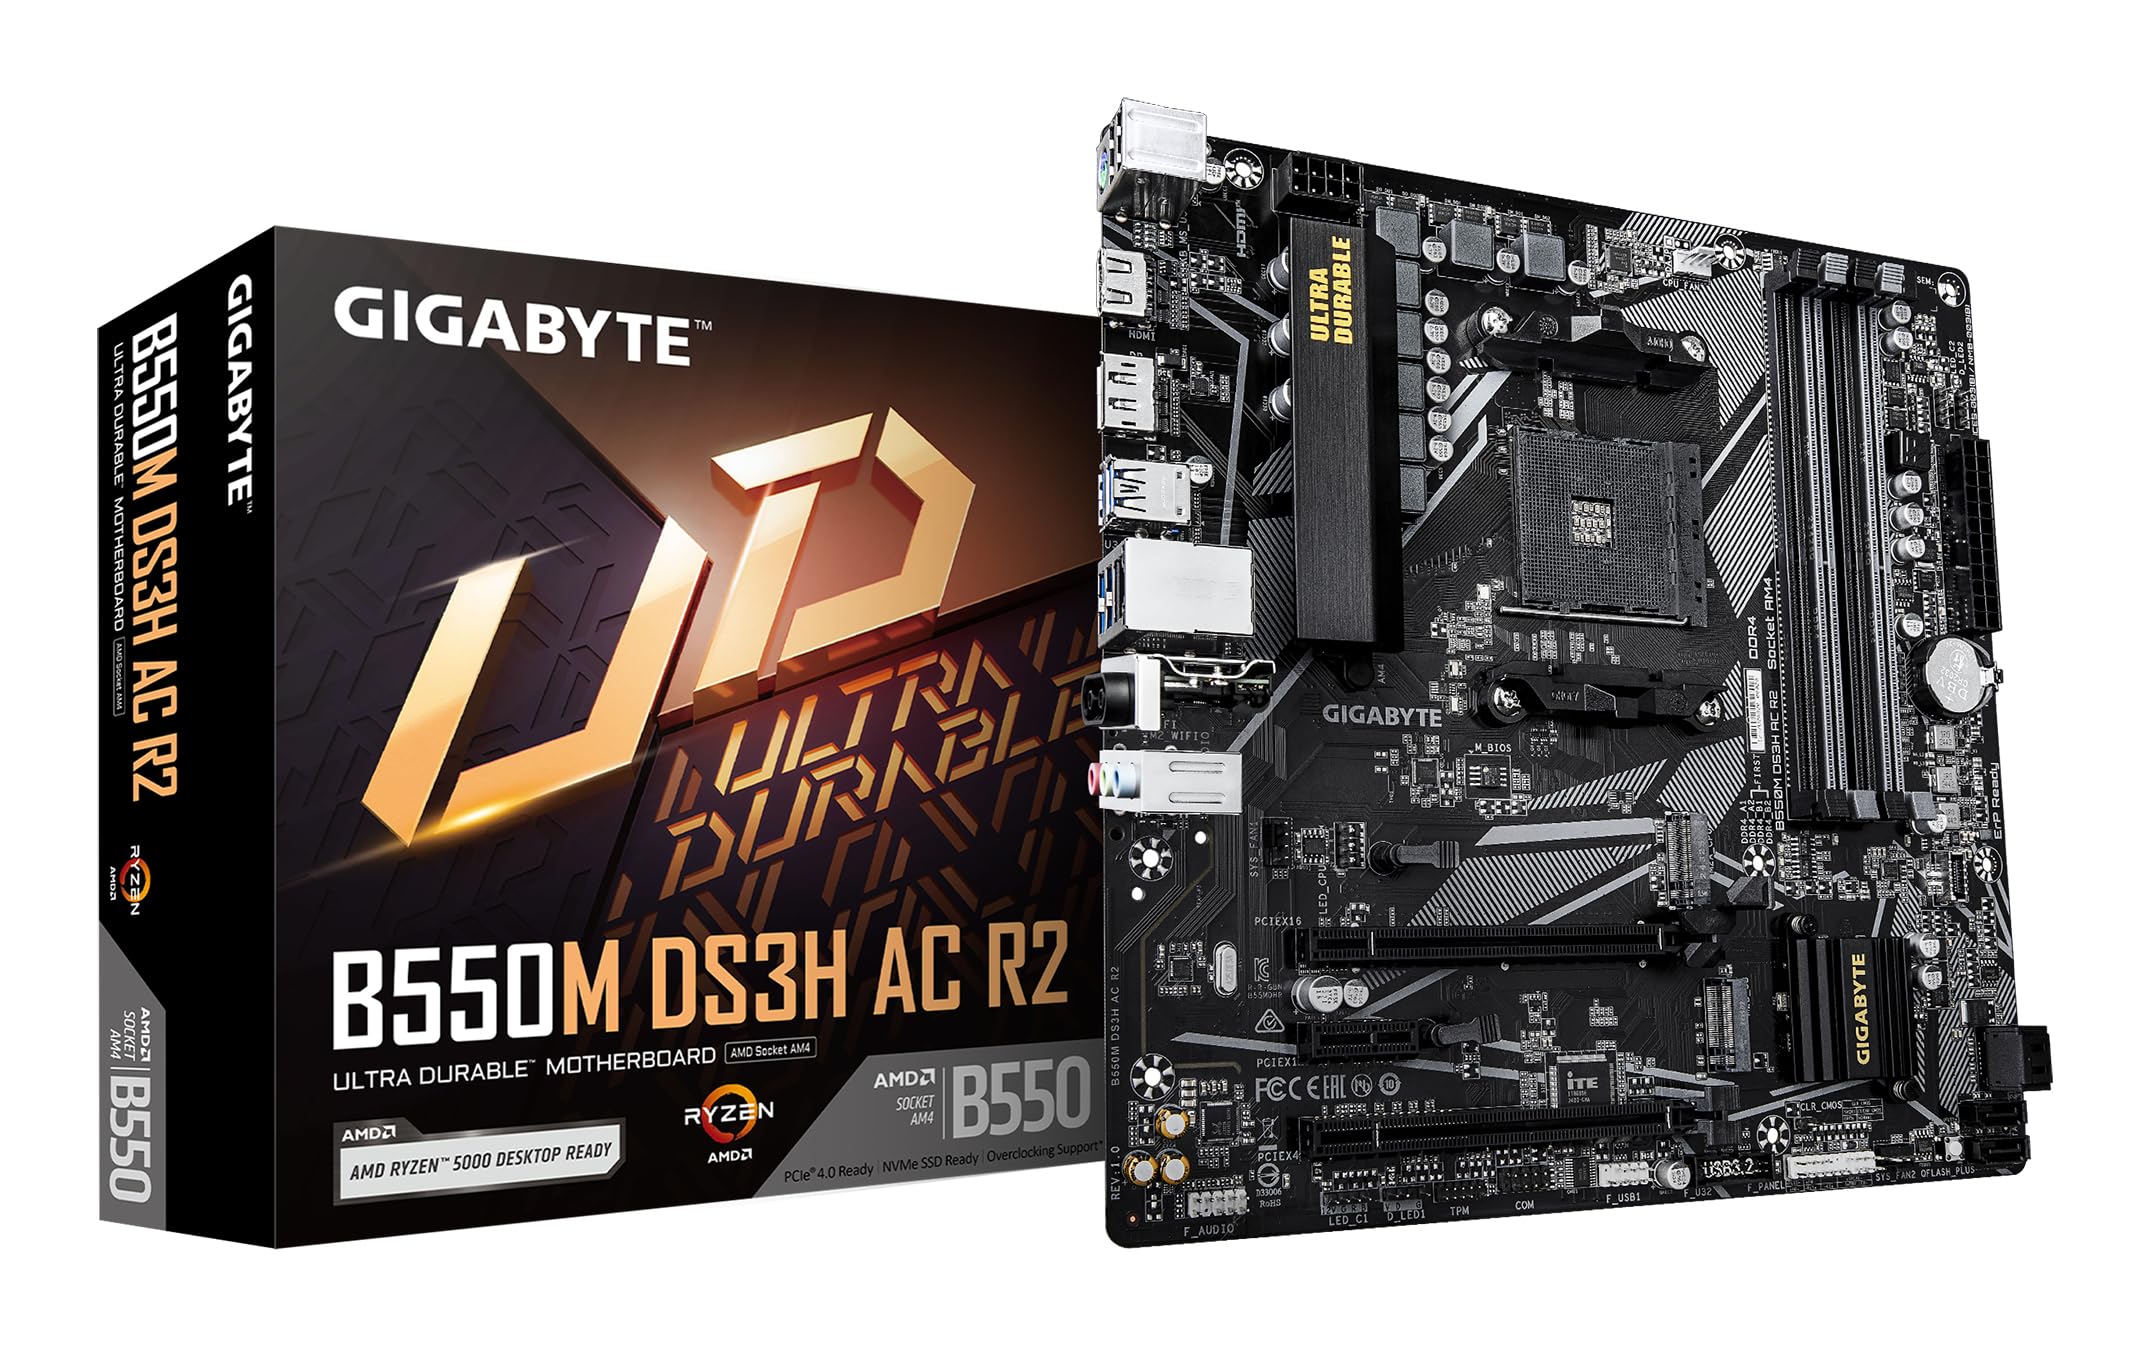
Figura 1.1: De arriba hacia abajo view of the GIGABYTE B550M DS3H AC R2 Motherboard, showcasing its layout including the CPU socket, DIMM slots, and various connectors.
2. Características principales
- Conjunto de chips AMD B550: Supports AMD Ryzen 5000, 4000, and 3000 series CPUs with AM4 socket.
- High-Speed DDR4 Memory: Dual-channel support for up to 4733MHz (O.C.) across 4 DIMM slots.
- Opciones de almacenamiento avanzadas: Includes one PCIe 4.0 M.2 slot and one PCIe 3.0 M.2 slot, alongside PCIe slots for graphics and expansion.
- Conectividad integrada: Features Wi-Fi 5, Bluetooth 5.0, and 1GbE LAN for reliable network connections.
- Flexible Display Outputs: Equipped with HDMI and DisplayPort for multi-monitor configurations.
- Sistema de refrigeración inteligente: Smart Fan 6 with multiple temperature sensors ensures efficient thermal management.
- Q-Flash Plus: Allows BIOS updates without the need for CPU, memory, or graphics card installation.
3. Configuración e instalación
3.1 Instalación de la CPU
- Asegúrese de que la palanca del zócalo de la CPU esté en la posición abierta.
- Carefully align the triangular mark on the AMD Ryzen CPU with the mark on the AM4 socket.
- Coloque con cuidado la CPU en el zócalo sin forzarla.
- Baje la palanca para asegurar la CPU en su lugar.
- Instale el enfriador de la CPU de acuerdo con las instrucciones del fabricante.
3.2 Instalación de memoria (RAM)
- Abra los clips en ambos extremos de las ranuras DIMM.
- Alinee la muesca del módulo de memoria DDR4 con la clave en la ranura DIMM.
- Insert the memory module firmly until the clips snap into place. For dual-channel operation, refer to the motherboard manual for recommended slot configurations.
3.3 Instalación del dispositivo de almacenamiento
This motherboard supports both M.2 NVMe SSDs and SATA drives.
- SSD M.2: Locate the M.2 slots (one PCIe 4.0, one PCIe 3.0). Insert the M.2 SSD at an angle and secure it with the provided screw.
- Unidades SATA: Connect SATA data cables from your SSDs/HDDs to the SATA ports on the motherboard. Connect power cables from your power supply to the drives.
3.4 Instalación de la tarjeta de expansión
Install your graphics card or other PCIe expansion cards into the appropriate PCIe slots. Ensure they are seated firmly and secured with the case screw.
3.5 Conexiones de energía
- Conecte el conector de alimentación principal ATX de 24 pines de su fuente de alimentación a la placa base.
- Conecte el conector de alimentación de CPU ATX 12V de 8 pines a la placa base.
3.6 Panel de E/S traseroview

Figure 3.1: The rear I/O panel of the GIGABYTE B550M DS3H AC R2 motherboard, showing various ports including USB, HDMI, DisplayPort, LAN, and audio jacks.
The rear I/O panel provides connectivity for external devices. It includes USB 2.0, USB 3.2 Gen 1, HDMI, DisplayPort, 1GbE LAN, Wi-Fi antenna connectors, and audio jacks. Refer to the detailed diagram in the physical manual for specific port identification.
4. Instrucciones de funcionamiento
4.1 Configuración del BIOS
The BIOS (Basic Input/Output System) is firmware that initializes hardware during the booting process. To enter BIOS Setup, press the DEL key during the Power-On Self-Test (POST). Here you can configure system settings, boot order, and monitor hardware status.
4.2 Q-Flash Plus
Q-Flash Plus te permite actualizar la BIOS sin instalar la CPU, la memoria ni la tarjeta gráfica. Simplemente descarga la BIOS más reciente. file de GIGABYTE webSitio web, cámbiale el nombre a GIGABYTE.bin, guárdalo en una memoria USB e insértalo en el puerto USB Q-Flash Plus designado. Pulsa el botón Q-Flash Plus para iniciar la actualización.
4.3 Instalación del controlador
After installing your operating system, install the necessary drivers for the motherboard chipset, audio, LAN, Wi-Fi, and other integrated components. These drivers are typically provided on a support DVD or can be downloaded from the official GIGABYTE websitio.
5. Mantenimiento
5.1 Limpieza
Regularly clean your computer's interior to prevent dust buildup, which can lead to overheating and reduced performance. Use compressed air to remove dust from components, especially heatsinks and fans. Ensure the system is powered off and unplugged before cleaning.
5.2 Actualizaciones del BIOS
Revise periódicamente el GIGABYTE website for BIOS updates. Updates can improve system stability, add support for new hardware, or fix known issues. Follow the instructions provided by GIGABYTE carefully when performing a BIOS update.
5.3 Ventilador inteligente 6
Utilize the Smart Fan 6 utility in the BIOS or GIGABYTE's software to monitor system temperatures and adjust fan speeds. Proper fan configuration helps maintain optimal operating temperatures and extends component lifespan.
6. Solución de problemas
- El sistema no arranca: Check all power connections (24-pin ATX, 8-pin CPU), ensure RAM modules are properly seated, and verify the CPU is correctly installed. Try clearing the CMOS.
- Sin salida de pantalla: Confirm the graphics card is fully seated in its PCIe slot and connected to power (if required). Ensure your monitor cable is connected to the graphics card, not the motherboard's integrated graphics ports (unless using an APU).
- Problemas periféricos: If USB devices or other peripherals are not working, ensure drivers are installed and check BIOS settings for port enablement.
- Inestabilidad/fallos del sistema: This can be caused by outdated drivers, overheating, or faulty hardware. Update drivers, monitor temperatures, and test components individually if possible.
- Error de actualización del BIOS: If a BIOS update fails, use the Q-Flash Plus feature to recover the BIOS.
7. Especificaciones
| Característica | Especificación |
|---|---|
| Marca | GIGABYTE |
| Nombre del modelo | B550M DS3H CA R2 |
| Zócalo de CPU | Zócalo AM4 |
| Procesadores compatibles | AMD Ryzen serie 3000, AMD Ryzen serie 4000, AMD Ryzen serie 5000 |
| Tipo de chipset | Procesador AMD B550 |
| Tecnología de memoria RAM | DDR4 |
| Velocidad del reloj de memoria | Up to 4733 MHz (O.C.) |
| Ranuras de memoria disponibles | 4 |
| Tamaño máximo de la memoria RAM | 128 GB |
| Interfaz de tarjeta gráfica | PCI Express 4.0 |
| Total PCIe Ports | 1 (PCIe 4.0 x16 for GPU) + other PCIe slots |
| Ranuras M.2 | 1 PCIe 4.0 M.2, 1 PCIe 3.0 M.2 |
| Total SATA Ports | 4 |
| Conectividad inalámbrica | Wi-Fi 5, Bluetooth 5.0 |
| Red local | LAN de 1 GbE |
| Puertos USB totales | 6 (E/S traseras) + encabezados internos |
| Salidas de pantalla | 1 HDMI, 1 DisplayPort |
| Factor de forma | Micro ATX |
| Dimensiones del artículo L x W x H | 24.4L x 24.4W x 3.5H Centímetros |
| Peso del artículo | 980 gramos |
8. Información de garantía
The GIGABYTE B550M DS3H AC R2 motherboard comes with a 3-YEAR Manufacturer Warranty. Please retain your proof of purchase for warranty claims. For detailed terms and conditions, refer to the official GIGABYTE warranty policy available on their websitio.
9. Soporte y contacto
Para obtener asistencia técnica, descargas de controladores, actualizaciones de BIOS y más información sobre el producto, visite el sitio web oficial de GIGABYTE. website. You can also contact GIGABYTE customer service for assistance.
Información de contacto del fabricante:
GIGABYTE Technology (India) Pvt. Ltd.
Unit No. 807 & 808, 8th Floor, Naman Midtown B-Wing,
Elphinstone Road, Mumbai – 400013, India
For the most up-to-date contact details and support resources, please refer to the GIGABYTE official websitio: www.gigabyte.com