1. Introducción
The Generic STM32 Nucleo-64 Development Board is a versatile and cost-effective platform designed for users to explore new concepts and develop prototypes. It supports various STM32 microcontroller families, offering flexibility in performance, power consumption, and functionality. This board features Arduino connectivity support and an ST Morpho socket, enhancing its expandability within the STM32 Nucleo open development ecosystem. It also accommodates a range of professional shields and is based on an open-source design, facilitating rapid prototyping.
2. Características principales
- microcontroladores: STM32F303RET6, ARM Cortex-M4 core with DSP and FPU, 512 Kbytes Flash, 72 MHz CPU, MPU, CCM, 12-bit ADC 5 MSPS, PGA, comparators.
- On-board Debugger/Programmer: Integrated ST-LINK/V2-1 with SWD connector for debugging and programming.
- Fuente de alimentación: Can be powered directly from a USB connection.
- Interfaz de usuario: Features three LEDs and two push-buttons for user interaction and status indication.
- IDE Support: Compatible with a wide selection of Integrated Development Environments (IDEs), including IAR, ARM Keil, and various GCC-based IDEs.
- Aplicaciones: Suitable for embedded development, educational institutions, robotics, Internet of Things (IoT) projects, human-machine interfaces, and electronic laboratory automation.
- Conectividad: Supports Arduino Uno V3 and ST Morpho extension headers for expanded functionality.
3. Disposición y componentes de la placa
Understanding the layout of the Nucleo-64 board is crucial for proper setup and operation. Below are images illustrating the top and bottom views of the board, highlighting key components and connectors.
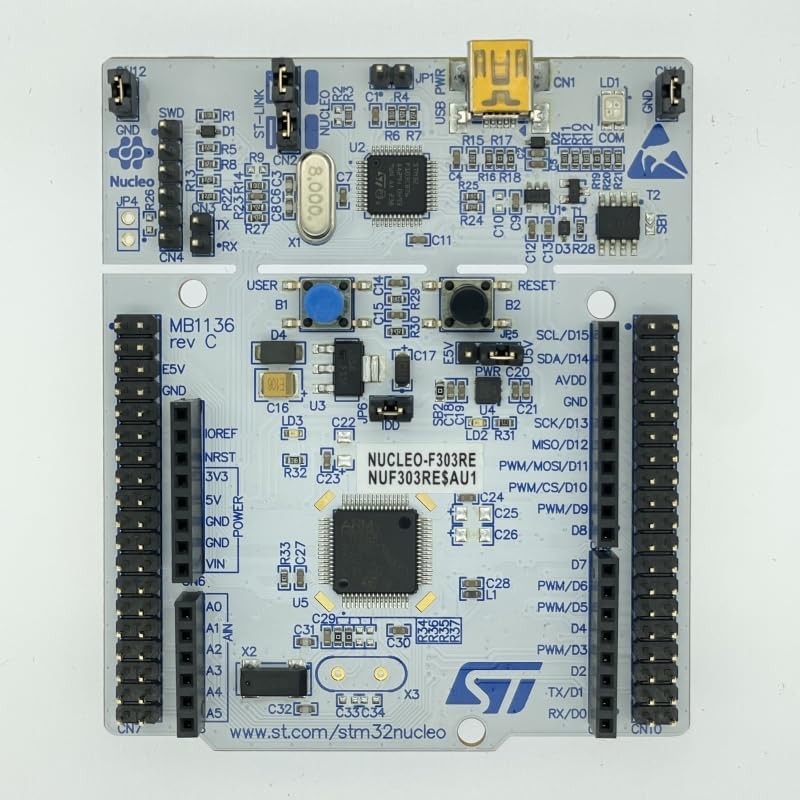
Figura 3.1: Arriba View of STM32 Nucleo-64 Development Board. This image displays the main components on the top side of the board, including the microcontroller, USB port for power and debugging, and the various pin headers for expansion.

Figura 3.2: Abajo View of STM32 Nucleo-64 Development Board. This image shows the underside of the board, including solder bridges for configuration and identification markings such as MB1136-F303RE-C05 and A230500148.
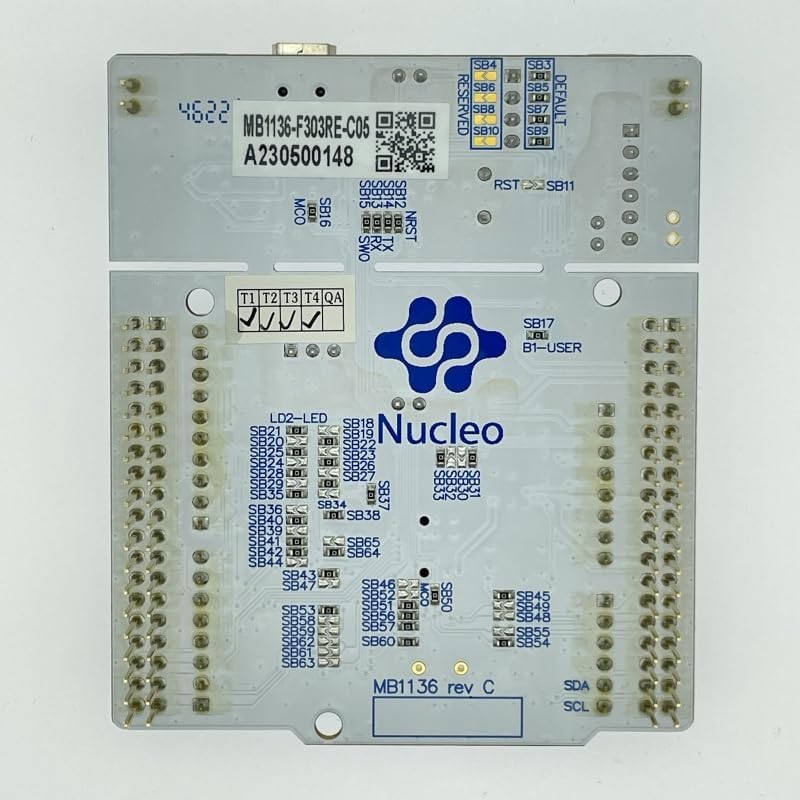
Figura 3.3: Angulado View of STM32 Nucleo-64 Development Board. This perspective provides a better understanding of the board's three-dimensional structure and the accessibility of its various connectors.
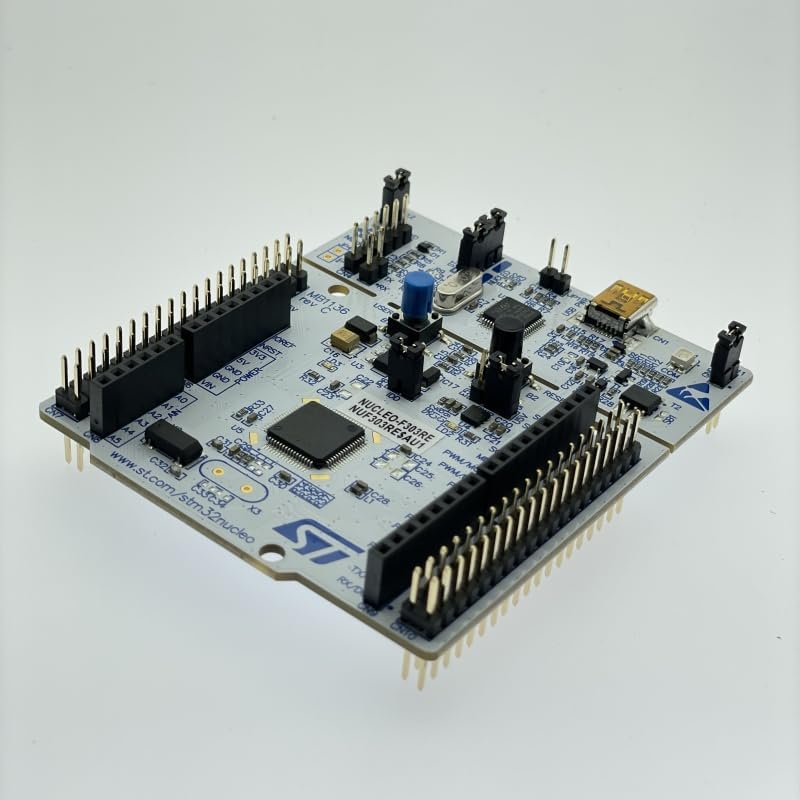
Figure 3.4: Product Packaging Details. This image shows the product box, detailing the model number NUCLEO-F303RE, manufacturing information, and regulatory compliance marks such as RoHS, CE, and FCC.
4. Instrucciones de configuración
- Conectarse a la PC: Connect the Nucleo-64 board to your computer using a standard USB cable (Type-A to Mini-B, typically). The board will be powered via USB.
- Instalación del controlador: Your operating system may automatically install necessary drivers. If not, download and install the ST-LINK drivers from the official STMicroelectronics websitio.
- Configuración IDE: Install your preferred Integrated Development Environment (IDE) such as STM32CubeIDE, Keil MDK-ARM, IAR Embedded Workbench, or a GCC-based IDE.
- Firmware Exampellos: Download the STM32CubeF3 firmware package, which contains examples and libraries for the STM32F303RET6 microcontroller.
- Primer Programa: abrir un example project in your chosen IDE, build it, and upload it to the Nucleo board using the integrated ST-LINK debugger.
5. Funcionamiento de la Junta
Once set up, the Nucleo-64 board can be used for various embedded development tasks. Here are general operating guidelines:
- Encendido: The board powers on automatically when connected to a USB port. The power LED (LD3) should illuminate.
- Programación: Use your IDE to compile and flash your code to the STM32F303RET6 microcontroller. The ST-LINK/V2-1 debugger handles the programming process.
- Depuración: The ST-LINK also provides debugging capabilities, allowing you to step through code, set breakpoints, and inspect variables.
- User LEDs and Buttons: Utilize the on-board user LEDs (LD2) and push-buttons (B1, B2) for basic input/output and testing your applications.
- Expansión: Connect Arduino shields or custom circuitry to the Arduino Uno V3 and ST Morpho headers to extend the board's functionality.
- Comunicación en serie: The ST-LINK provides a virtual COM port over USB, enabling serial communication with your PC for data logging or command input.
6. Mantenimiento
The STM32 Nucleo-64 board is designed for durability, but proper care ensures its longevity and reliable operation:
- Manejo: Always handle the board by its edges to avoid touching sensitive components, especially the microcontroller.
- Almacenamiento: Store the board in an anti-static bag when not in use to protect it from electrostatic discharge (ESD).
- Limpieza: Si es necesario, limpie suavemente la placa con un cepillo suave y seco o aire comprimido. Evite el uso de líquidos o materiales abrasivos.
- Fuente de alimentación: Ensure a stable 5V power supply when connecting via USB. Avoid using uncertified or damaged USB cables.
- Ambiente: Utilice la placa en un entorno limpio y seco, lejos de temperaturas extremas, humedad y luz solar directa.
7. Solución de problemas
If you encounter issues with your Nucleo-64 board, consider the following troubleshooting steps:
- La placa no se enciende:
- Verify the USB cable connection to both the board and your computer.
- Pruebe con un puerto o cable USB diferente.
- Ensure your computer's USB port provides sufficient power.
- ST-LINK Not Recognized:
- Reinstall the ST-LINK drivers from the official STMicroelectronics websitio.
- Consulte el Administrador de dispositivos (Windows) o
lsusb(Linux) to see if the device is detected. - Ensure no other software is conflicting with the ST-LINK.
- Program Upload Fails:
- Check your IDE's output for error messages.
- Ensure the correct target microcontroller (STM32F303RET6) is selected in your project settings.
- Verify that the board is properly powered and connected.
- Try resetting the board using the reset button.
- Application Not Running:
- Check your code for logical errors.
- Use the debugger to step through your code and identify the issue.
- Ensure all necessary peripherals are correctly initialized.
8. Especificaciones técnicas
| Característica | Detalle |
|---|---|
| Microcontroladores | STM32F303RET6 (ARM Cortex-M4F) |
| Velocidad de la CPU | 72 MHz |
| Memoria Flash | 512 KB |
| RAM | DDR (Internal SRAM, typically 64KB for F303RE) |
| Depurador/Programador | ST-LINK/V2-1 integrado con conector SWD |
| Conectividad | USB, Arduino Uno V3, ST Morpho headers |
| Compatibilidad con sistemas operativos | Linux (and other OS for IDEs) |
| Comunicación inalámbrica | Bluetooth (likely via external module/shield) |
| Dimensiones (LxAnxAl) | 4 x 3 x 1 pulgadas |
| Peso del artículo | 0.705 onzas |
| Número de modelo | NUCLEO-F303RE |
9. Garantía y soporte
For warranty information and technical support, please refer to the documentation provided by the manufacturer or contact the vendor from whom the product was purchased. Specific warranty terms and support channels are typically outlined in the product packaging or on the manufacturer's official websitio.
For additional resources and community support, visit the official STMicroelectronics websitiowww.st.com/stm32nucleo) for the STM32 Nucleo ecosystem.