1. Introducción
The NOVABOT N1000 is a revolutionary robot lawn mower designed for precision and autonomous lawn care. Utilizing advanced RTK-GPS, TOF sensors, and Vision enhancement, it offers wire-free operation, AI-assisted mapping, virtual boundary creation, and multi-zone management. This manual provides detailed instructions for setting up, operating, and maintaining your NOVABOT N1000 to ensure a flawlessly trimmed lawn.

Figure 1: NOVABOT N1000 Robot Lawn Mower
2. ¿Qué hay en la caja?
Upon unboxing your NOVABOT N1000, verify that all components are present. The package includes the main robot unit, charging station, RTK receiver, power adapter, user manual, and various accessories for installation and maintenance.
Video 1: NOVABOT Robot Lawn Mower Unboxing and Components Overview (Duración: 5:16)
- NOVABOT N1000 Robot Unit
- Charging Station (Base)
- RTK Receiver with Cable
- Adaptador de corriente/cable de carga
- Manual de usuario
- Ground Stakes for Charging Station and RTK Receiver
- Cuchillas y tornillos de repuesto
- Canopy (for charging station protection)
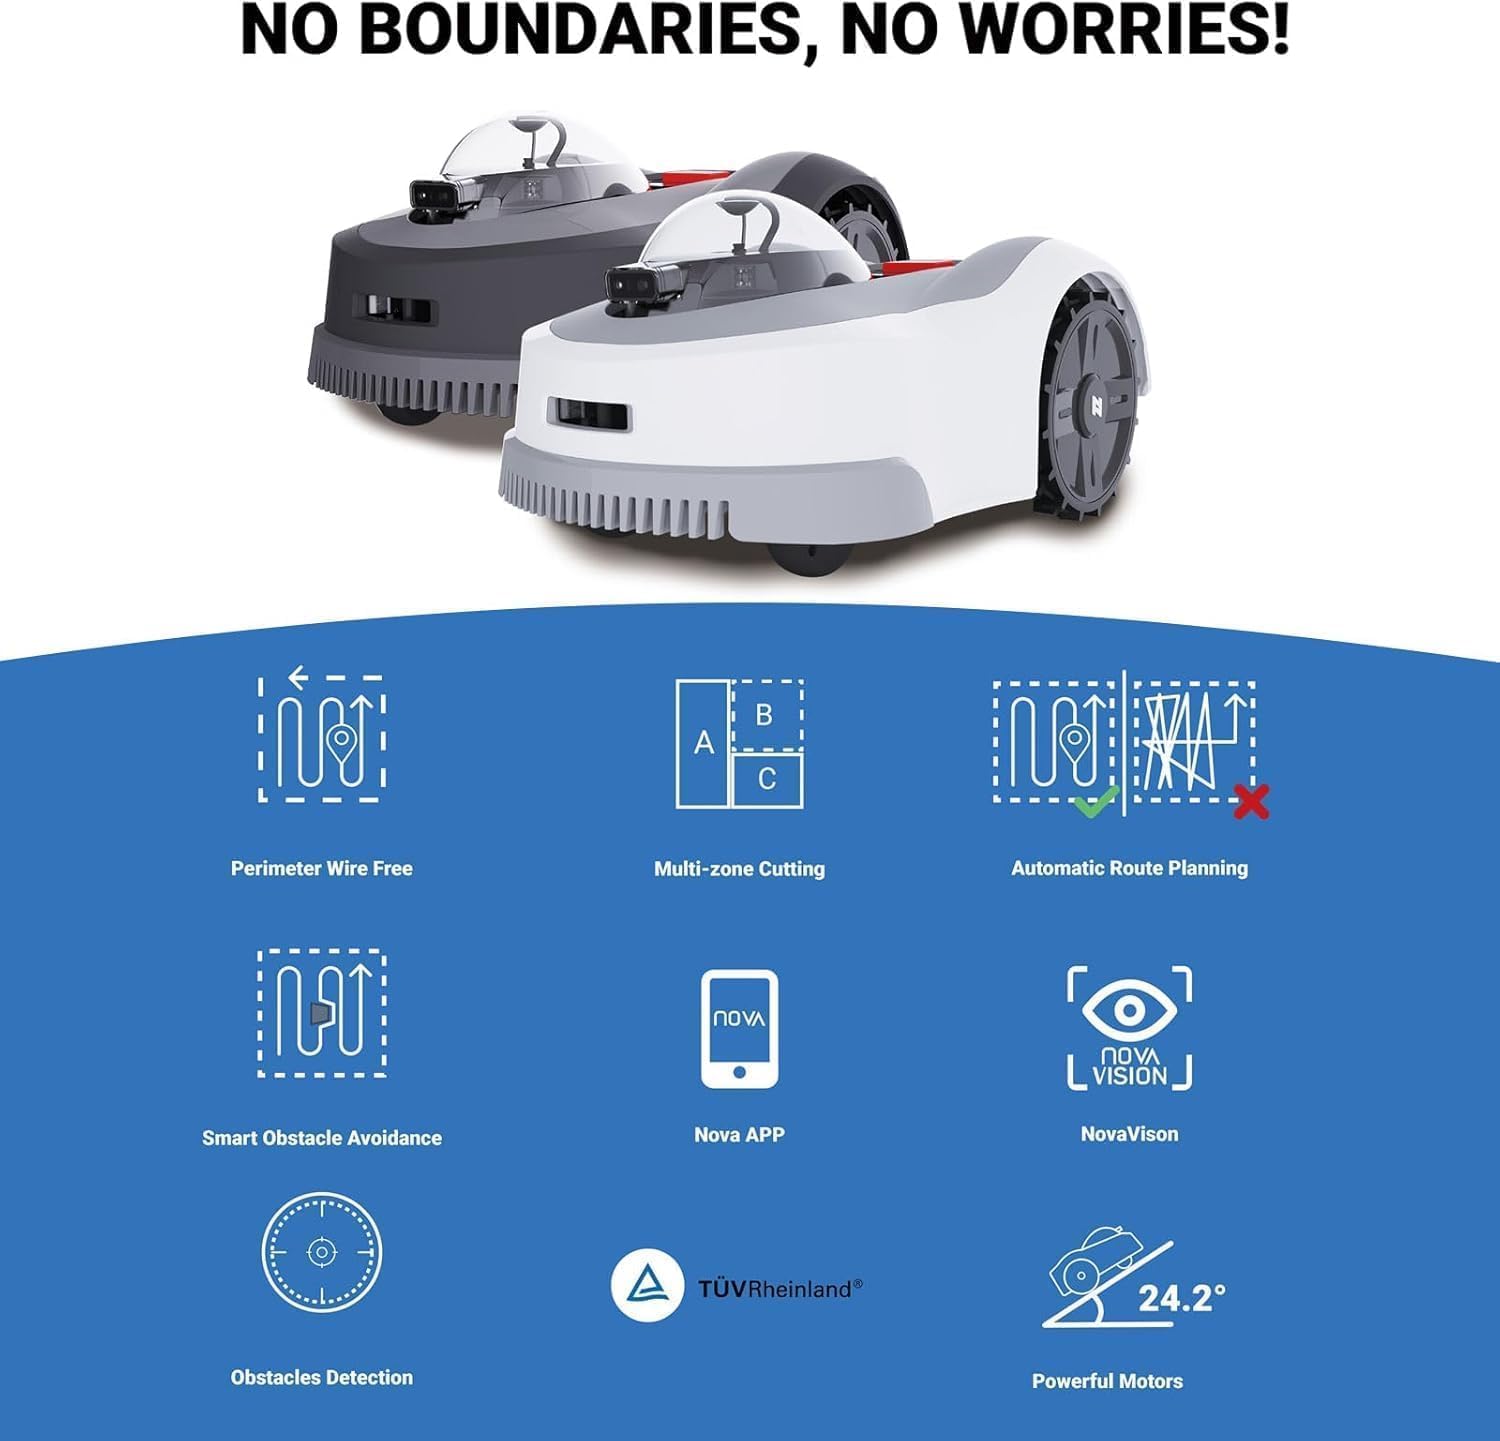
Figure 2: Key Features and Components Overview
3. Configuración
3.1 Ubicación de la estación de carga
Select a suitable location for the charging station. It should be on a flat, level surface with access to a power outlet and clear line of sight to the sky for optimal RTK signal reception. Avoid placing it near large metal objects or dense foliage that could interfere with signals.
3.2 RTK Receiver Installation
Install the RTK receiver in an elevated position with an unobstructed view of the sky. Connect it to the charging station using the provided cable. This receiver is crucial for the mower's centimeter-level positioning accuracy.

Figure 3: RTK + TOF + Vision Technology for Wire-Free Operation
3.3 Carga inicial
Place the NOVABOT N1000 onto the charging station. Ensure it makes proper contact with the charging pins. Allow the robot to fully charge before its first operation. The app will indicate the charging status.
3.4 App Connection & Mapping
Download the NOVABOT app on your smartphone. Follow the in-app instructions to connect to your robot. Use the app to create a virtual boundary for your lawn by walking the perimeter with the robot or by manually drawing it on the map. Define any no-go zones or multi-zone areas as needed.

Figure 4: Creating Virtual Boundaries via App

Figure 5: Multi-Zone & No-Go Zone Management
4. Instrucciones de funcionamiento
4.1 Starting a Mowing Session
Once the setup is complete and boundaries are defined, you can initiate a mowing session through the NOVABOT app. Schedule mowing times, directions, and heights according to your preferences. The robot will automatically follow the planned route.

Figure 6: Control From App
4.2 Smart Obstacle Avoidance
The NOVABOT N1000 uses a high-definition camera and TOF sensor for precise obstacle avoidance. It can detect and navigate around various objects such as fences, walls, pets, trees, and vehicles, ensuring safe and efficient mowing.

Figure 7: Identifying Various Types of Obstacles

Figure 8: Smart Obstacle Avoidance in action
4.3 Función de recarga automática
When the battery runs low, the NOVABOT N1000 will automatically return to its charging station. Once fully charged, it will resume mowing from where it left off, ensuring complete lawn coverage.

Figure 9: Powerful Battery and Auto-Recharge
4.4 Watchdog Mode
Activate the 'Guard Dog' or 'Watchdog Mode' via the app. In this mode, the robot will patrol your yard when you're away, deterring intruders and providing alerts for unusual movement.

Figure 10: Watchdog Mode for Security
5. Mantenimiento
5.1 Limpieza
The NOVABOT N1000 has an IPX5 waterproof body, making it easy to clean. Use a garden hose to spray off grass clippings and debris from the underside and wheels. Ensure the charging pile (IPX4) is not directly sprayed.

Figure 11: Easy to Clean and Maintain
5.2 Reemplazo de cuchilla
Regularly inspect the blades for wear and tear. Replace dull or damaged blades using the provided replacement set and screws to ensure optimal cutting performance. Refer to the user manual for detailed instructions on blade replacement.
6. Solución de problemas
If you encounter any issues with your NOVABOT N1000, refer to the following common troubleshooting tips:
- El robot no se carga: Asegúrese de que la estación de carga esté encendida y el robot esté correctamente acoplado. Limpie los contactos de carga tanto del robot como de la estación.
- Mower not following boundary: Verify that the virtual boundary is correctly set in the app and the RTK signal is strong. Check for any obstructions blocking the RTK receiver's view.
- Frequent stops/errors: Clean the sensors (camera, TOF) on the robot. Check for excessive grass buildup under the mowing deck.
- Alarma antirrobo: If the robot is lifted or moved unusually, an alarm will sound, and it will self-lock. Unlock it by entering your PIN code in the app.
For further assistance, please contact NOVABOT customer support.

Figure 12: Need Help? Contact Support
7. Especificaciones
| Característica | Especificación |
|---|---|
| Marca | Robot novedoso |
| Número de modelo | N1000 |
| Fuente de poder | Funciona con pilas |
| Material | ASA |
| Color | Plata |
| Área de corte de césped | Up to 0.75 Acres (3000㎡) |
| Peso del artículo | 28 libras |
| Ancho de corte | 8.6 pulgadas |
| Altura de corte | 0.8"-3.5" |
| Modo de operación | Automático |
| Dimensiones del producto | 25.86" de profundidad x 18.38" de ancho x 12.52" de alto |
| Waterproof Rating (Robot) | IPX5 |
| Waterproof Rating (Charging Pile) | IPX4 |
| Nivel de ruido | Por debajo de 67dB |
| Capacidad máxima de pendiente | 45% (24°) |
8. Garantía y soporte
NOVABOT products are designed for high quality performance and durability. This product is TÜV certified, ensuring quality, security, and sustainability. For warranty information and technical support, please refer to the official NOVABOT website or contact their customer service team directly. Contact details can typically be found in the product packaging or on the official brand websitio.

Figure 13: TÜV Rheinland Certified