1. Introducción
Welcome to your Phenyx Pro PTU-4200-8H 8-Channel UHF Wireless Microphone System. This manual provides detailed instructions for the proper setup, operation, and maintenance of your new wireless microphone system to ensure optimal performance and longevity. Please read this manual thoroughly before using the product.
2. Instrucciones de seguridad importantes
- Lea atentamente estas instrucciones antes de utilizar el producto.
- Conserve estas instrucciones para futuras consultas.
- Preste atención a todas las advertencias en el producto y en las instrucciones de funcionamiento.
- Siga todas las instrucciones.
- No utilice este aparato cerca del agua.
- Limpiar únicamente con un paño seco.
- No obstruya las aberturas de ventilación. Instale el producto según las instrucciones del fabricante.
- No lo instale cerca de fuentes de calor como radiadores, rejillas de calefacción, estufas u otros aparatos (incluidos ampificadores) que producen calor.
- No anule la función de seguridad del enchufe polarizado o con conexión a tierra. Un enchufe polarizado tiene dos clavijas, una más ancha que la otra. Un enchufe con conexión a tierra tiene dos clavijas y una tercera clavija de conexión a tierra. La clavija ancha o la tercera clavija se proporcionan para su seguridad. Si el enchufe proporcionado no encaja en su tomacorriente, consulte a un electricista para que reemplace el tomacorriente obsoleto.
- Proteja el cable de alimentación para que no sea pisado ni aplastado, especialmente en los enchufes, receptáculos y en el punto donde sale del aparato.
- Utilice únicamente accesorios especificados por el fabricante.
- Desenchufe este aparato durante tormentas eléctricas o cuando no lo utilice durante períodos prolongados.
- Encargue todas las tareas de mantenimiento a personal técnico cualificado. Se requiere realizar el mantenimiento cuando el aparato haya sufrido algún daño, como por ejemplo si el cable de alimentación o el enchufe están dañados, si se ha derramado líquido o han caído objetos en el interior del aparato, si el aparato ha estado expuesto a la lluvia o la humedad, si no funciona con normalidad o si se ha caído.
3. Contenido del paquete
The Phenyx Pro PTU-4200-8H system includes the following components:
- 1 receptor UHF
- 8 micrófonos de mano
- 1 x adaptador de corriente
- 1 cable de audio de 1/4''
- 1 adaptador de 6.35 mm a 3.5 mm
- 16 pilas AA
- 1 x Manual de usuario
- 8 x Anti-Rolling Rings (various colors)
- 8 x Handheld Mic Windscreens
- 4 x Antenas
- 4 x pies de goma
- 2 x Short Metal Brackets for Rack Mounting (Note: Rack mounting requires the ANTK-FR4A BNC antenna kit, sold separately)
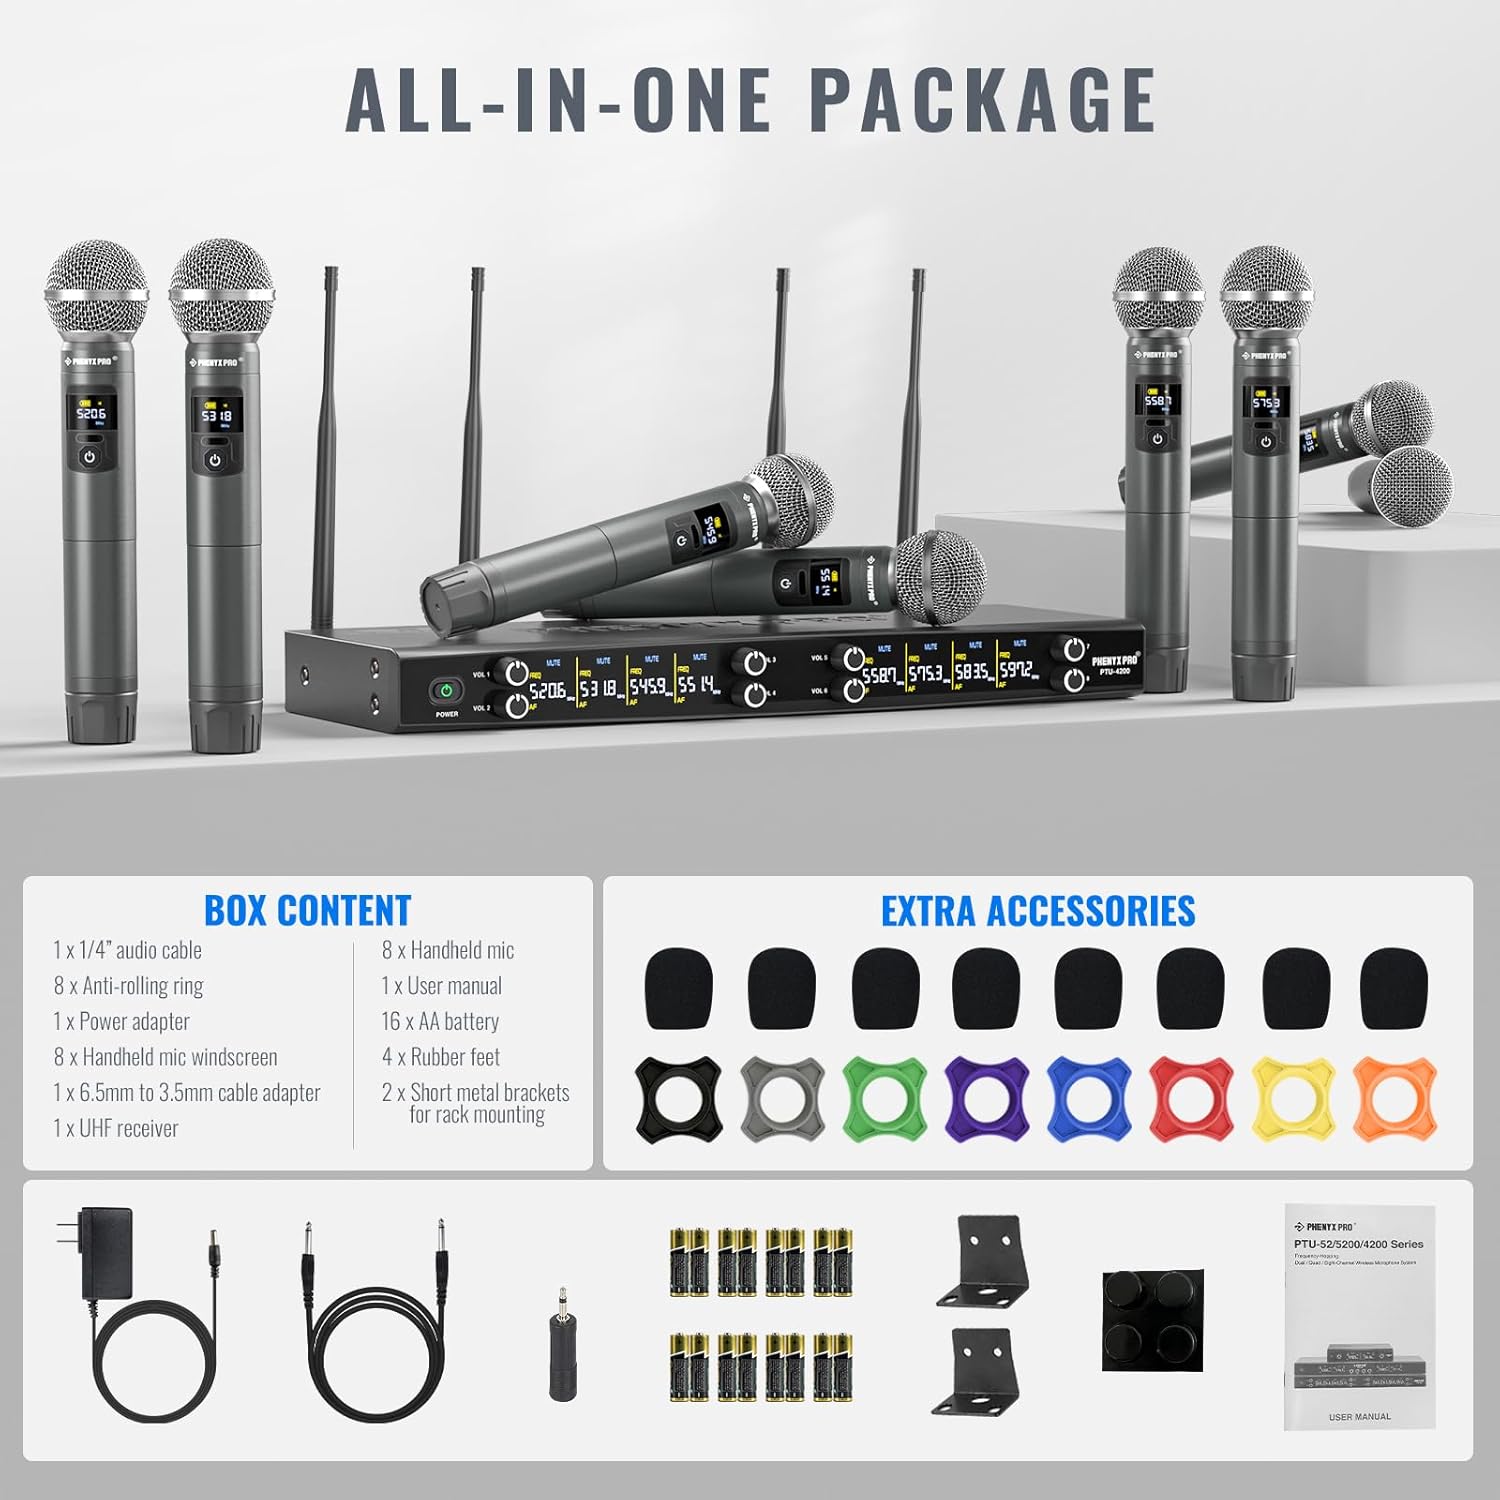
Image: All components included in the Phenyx Pro PTU-4200-8H package, including the receiver, eight microphones, power adapter, cables, batteries, anti-rolling rings, windscreens, antennas, rubber feet, and rack-mount brackets.
4. Producto terminadoview
The Phenyx Pro PTU-4200-8H is an 8-channel UHF wireless microphone system designed for versatile audio applications. It features a robust metal receiver and eight dynamic handheld microphones, offering reliable performance and clear sound.
Receptor inalámbrico UHF 4.1
The receiver unit is the central hub of your wireless system, managing signals from all eight microphones. It features individual volume controls, XLR outputs for each channel, and a mixed 1/4'' output for flexible connectivity.
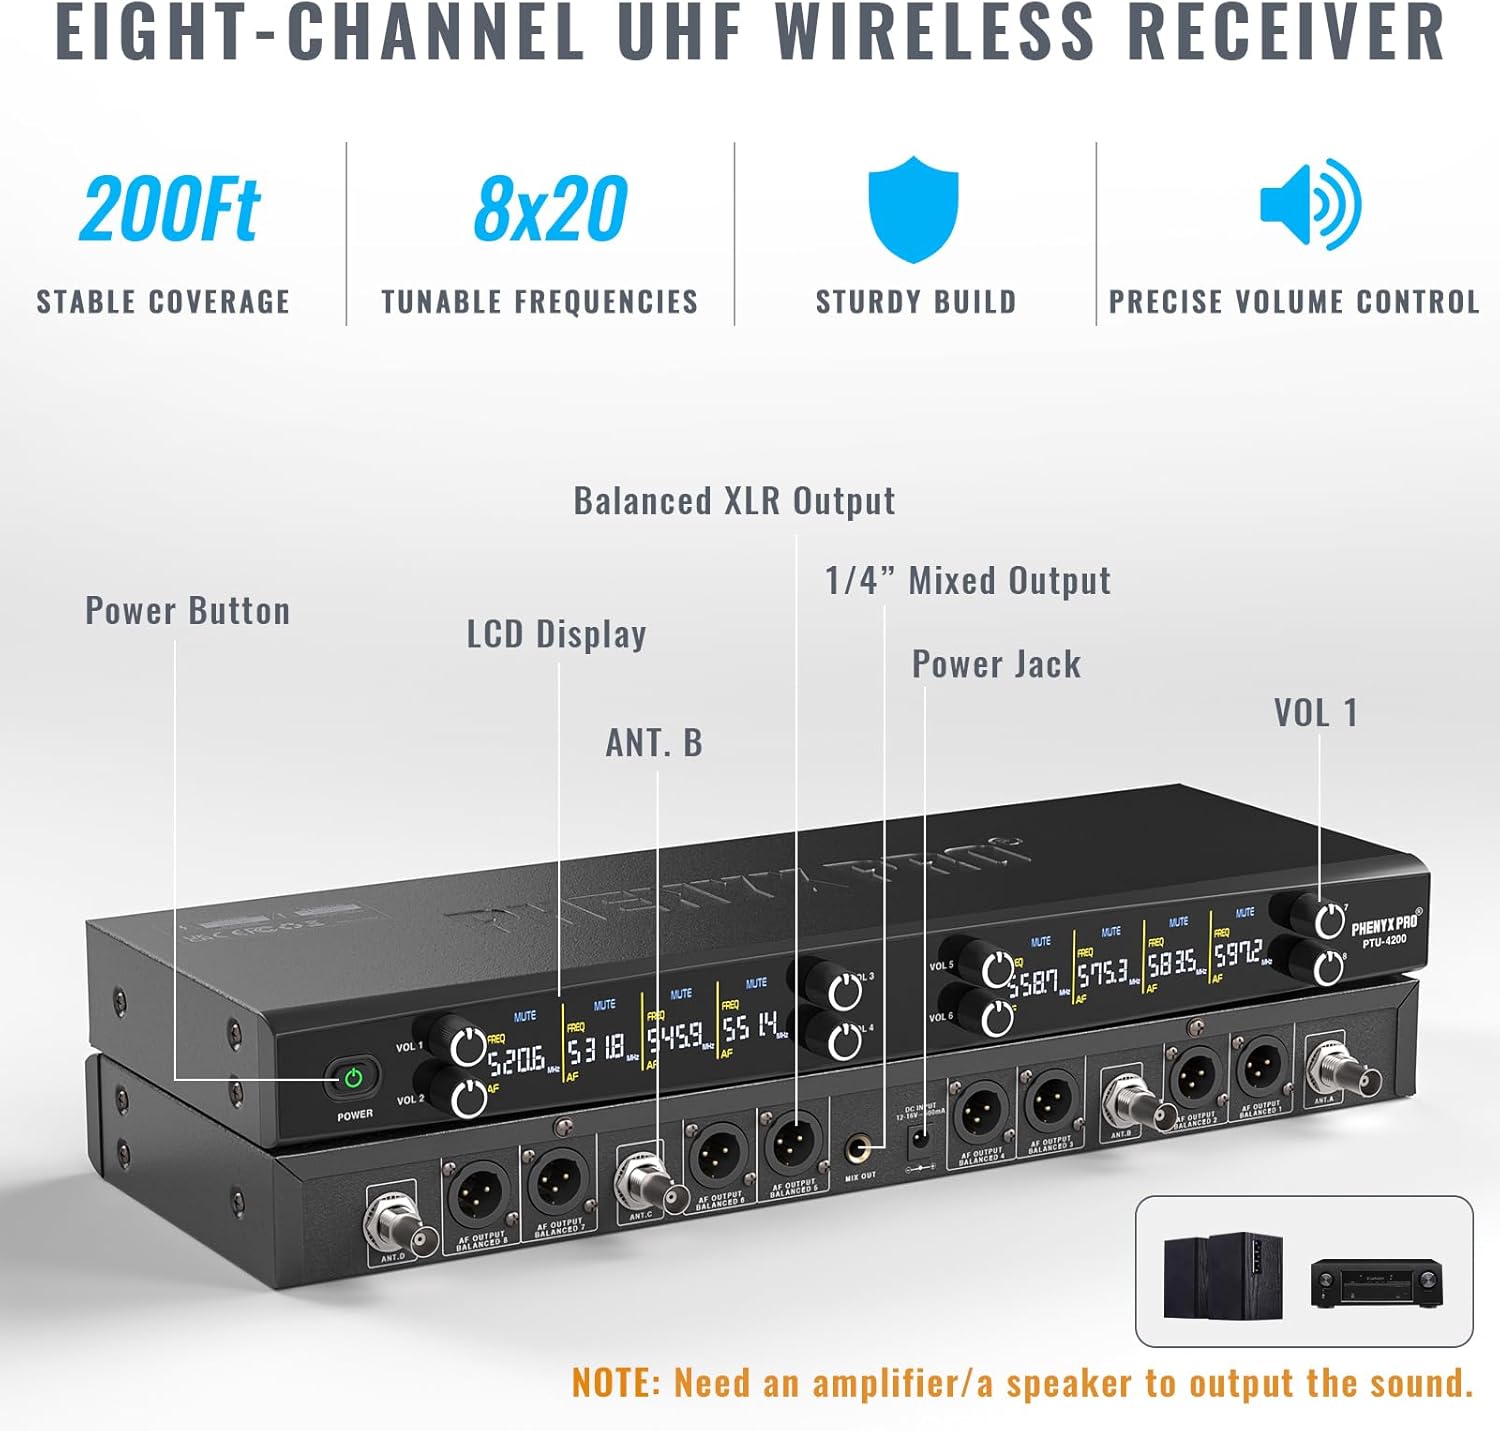
Imagen: delantera y trasera view of the 8-channel UHF wireless receiver, highlighting the power button, LCD display, antenna ports, individual volume controls, XLR outputs, 1/4'' mixed output, and power jack.
4.2 UHF Handheld Transmitters (Microphones)
Each handheld microphone is a dynamic unit with a cardioid capsule, designed for clear vocal reproduction and excellent off-axis rejection. They feature an informative display, physical battery indicator, and multi-functional buttons for power, mute, frequency selection, and remote volume adjustment.

Imagen: Un detalle view of a single UHF handheld microphone, showing its informative display, physical battery indicator, ON/MUTE/OFF button, and controls for frequency and volume adjustment.
4.3 Sistema terminadoview
The complete system provides stable coverage up to 200ft in open space, with 8x20 tunable frequency groups in the 500MHz band to minimize interference. The sturdy metal construction ensures durability for various applications.
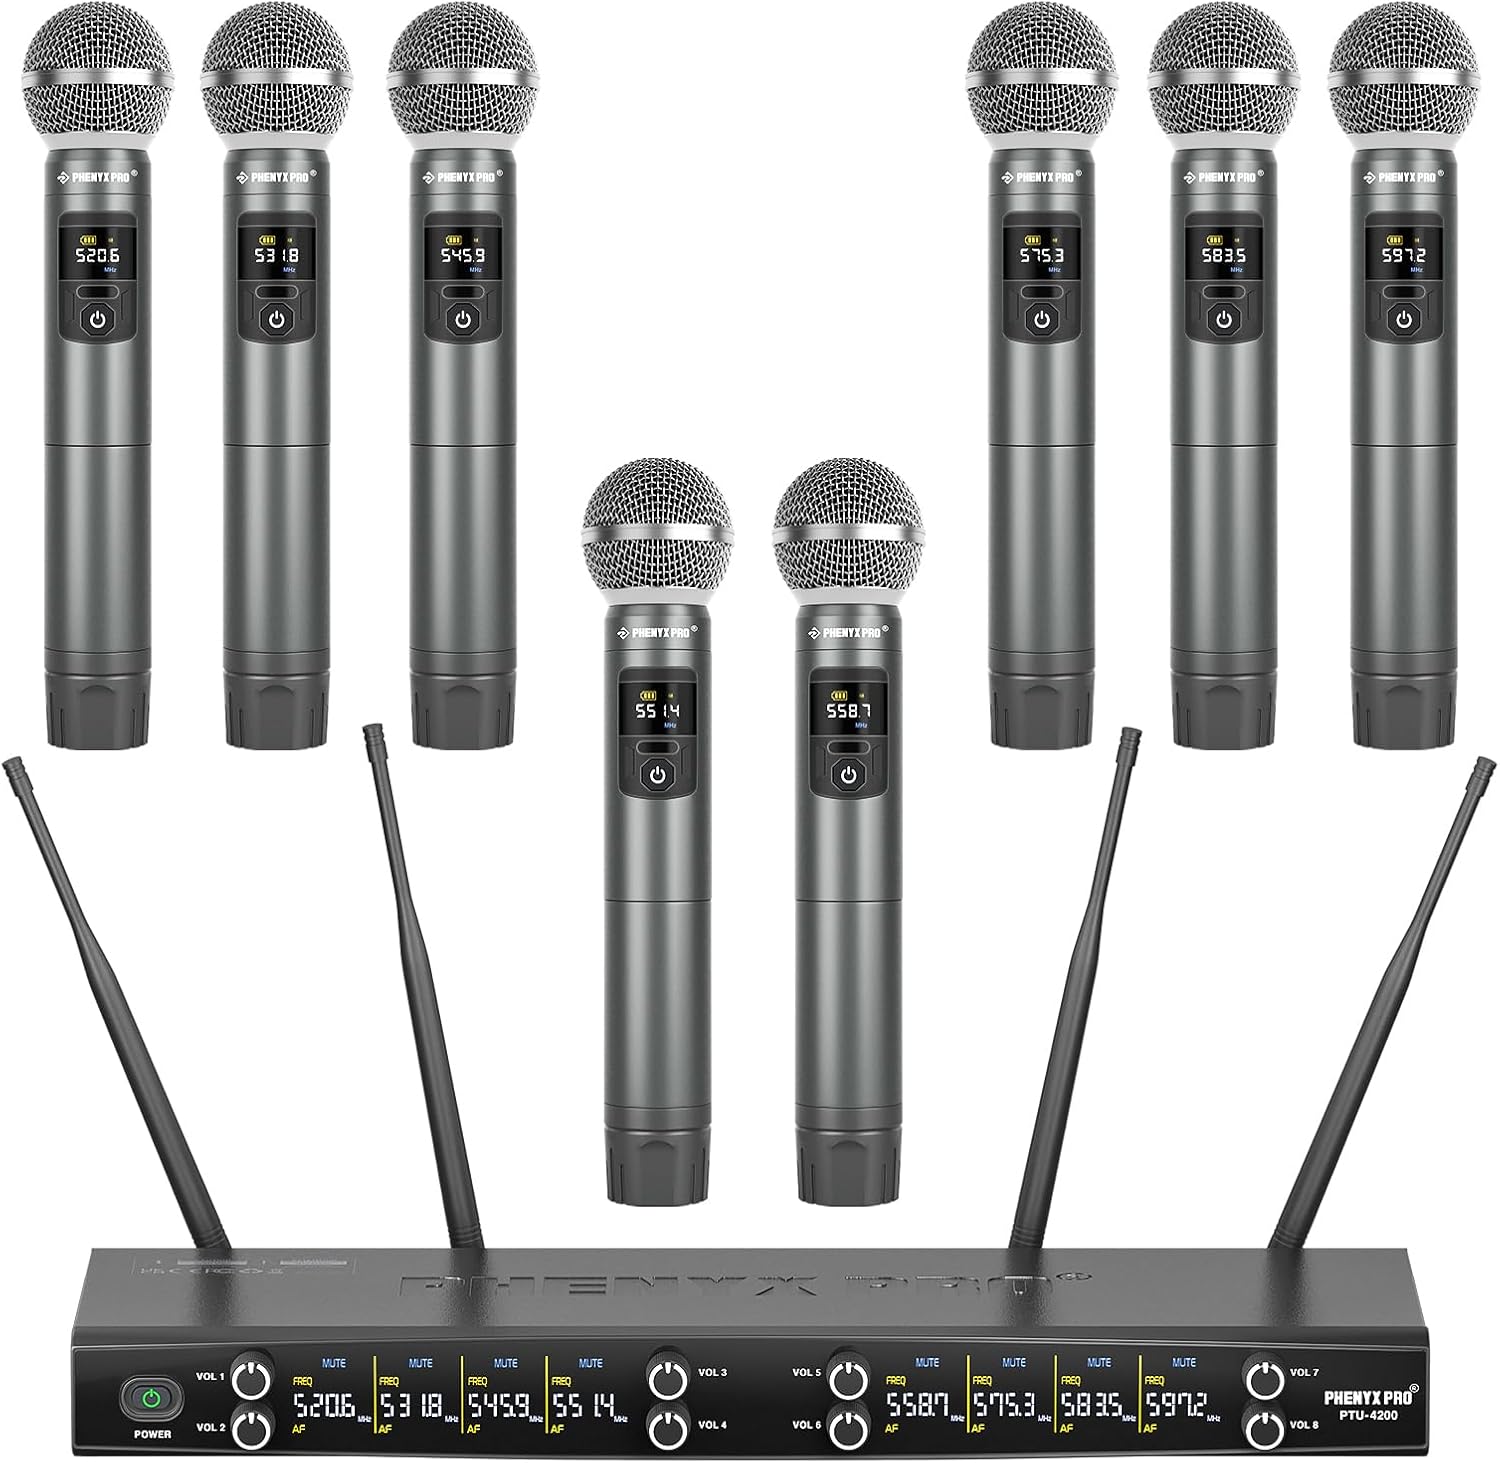
Imagen: Una vista aérea view of the entire Phenyx Pro PTU-4200-8H system, showcasing the receiver unit with its antennas and all eight handheld microphones.
5. Guía de configuración
Siga estos pasos para la configuración inicial de su sistema de micrófono inalámbrico:
- Conecte la electricidad: Connect the AC adapter to a wall outlet and then to the receiver's power jack.
- Instale las baterías: Open the battery compartment of each handheld microphone and insert two AA batteries, ensuring correct polarity.
- Encendido y emparejamiento: Power on the receiver and all handheld transmitters. The system utilizes frequency hopping technology and should automatically connect within seconds. The receiver and microphones will display their paired channel and frequency.
- Conectar al sistema de audio: Connect the receiver to your external audio devices (mixer, speaker, power amplifier) using the 8 XLR outputs for individual channels or the 1/4'' mixed output. Ensure your external device is powered off before making connections.
- Instalación de antena: Screw the four antennas onto the corresponding ports on the rear of the receiver. Position them for optimal signal reception.
- Optional Rack Mounting: If rack mounting, attach the included short metal brackets to the receiver. Note that an ANTK-FR4A BNC antenna kit (sold separately) is required for front-mounting antennas in a rack setup.
Note: This system does not support Bluetooth connection.
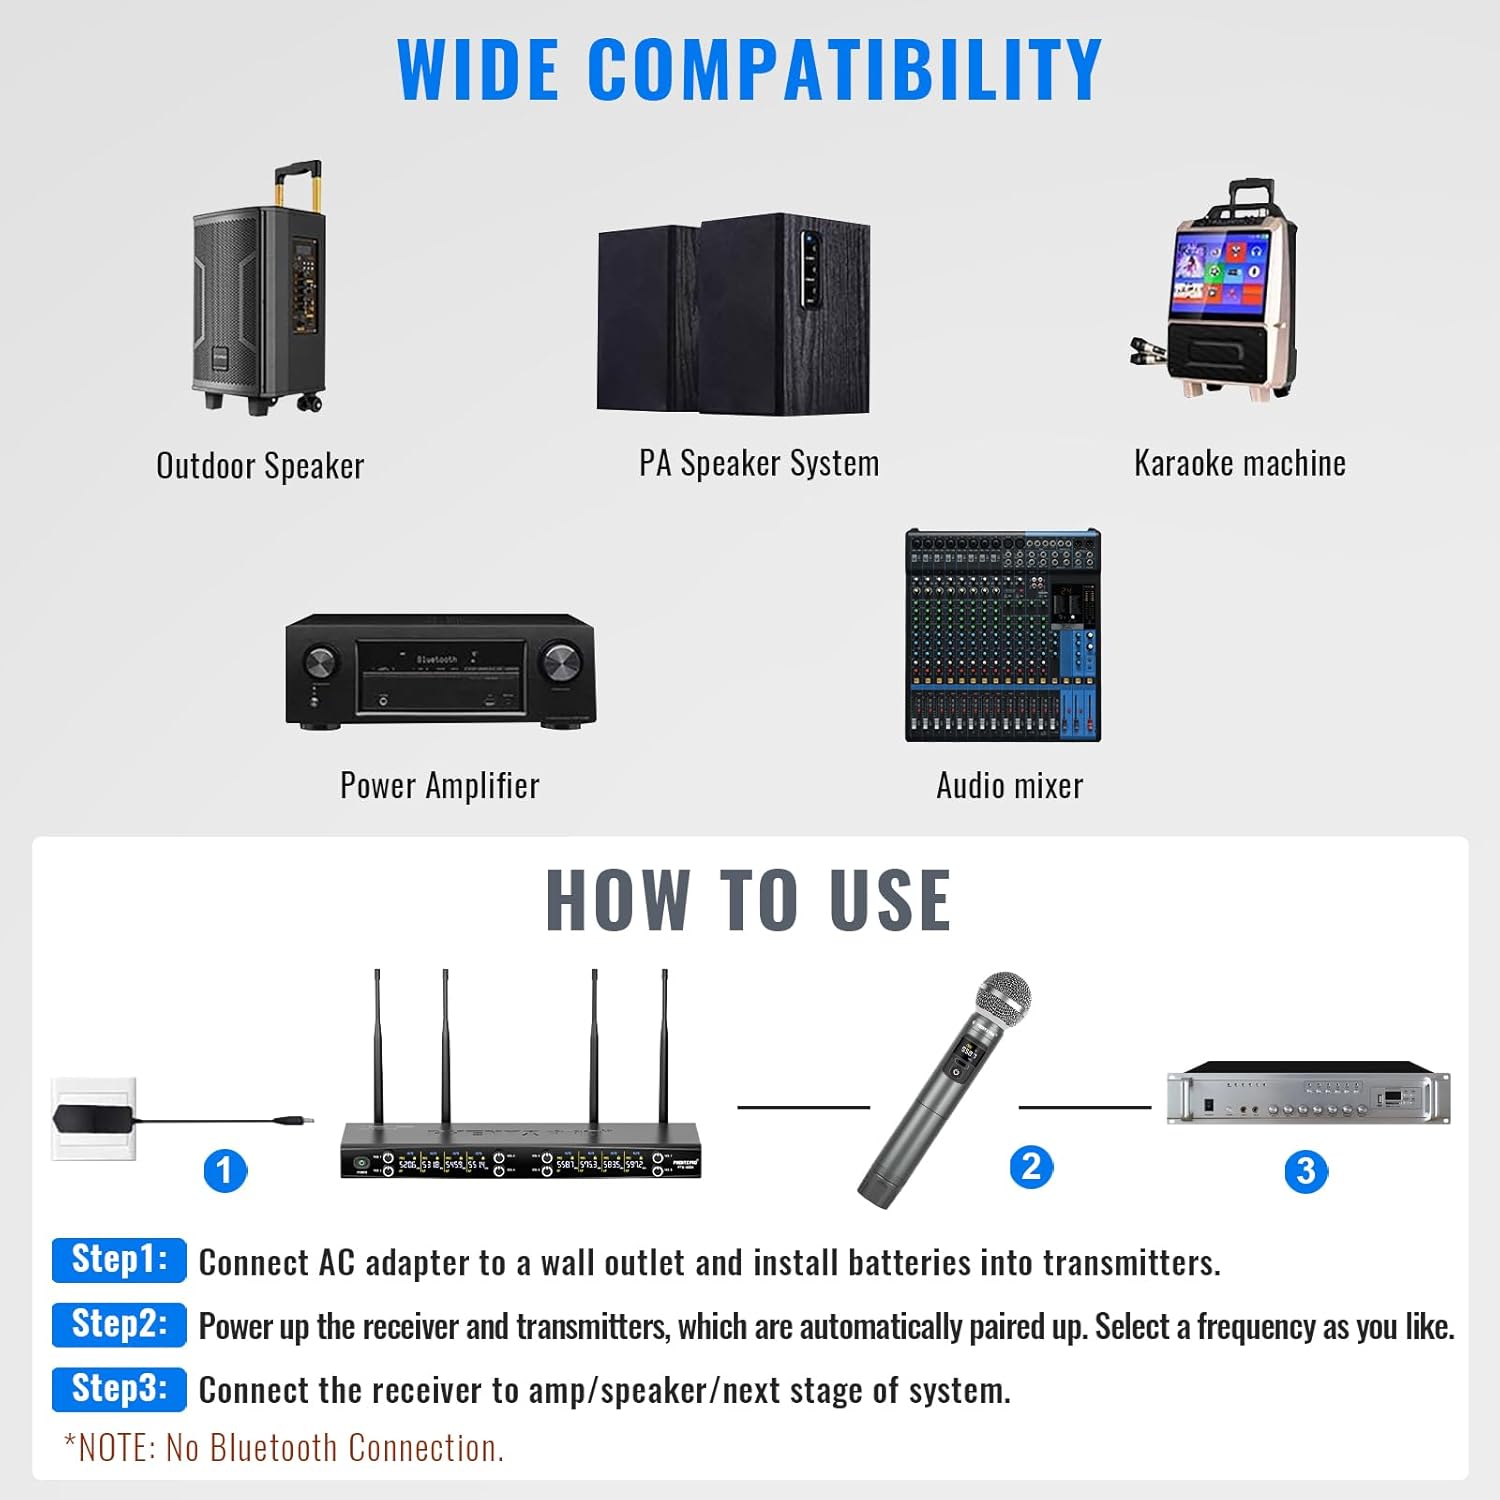
Image: A simplified diagram illustrating the three main setup steps: connecting the AC adapter and installing batteries, powering on and automatic pairing, and connecting the receiver to an amplificador/altavoz.
5.1 Amplia compatibilidad
The PTU-4200-8H system is compatible with a variety of audio equipment, making it suitable for diverse setups:
- Altavoces para exteriores
- PA Speaker Systems
- Máquinas de karaoke
- Fuerza Ampsalvavidas
- Mezcladores de audio

Image: Visual representation of devices compatible with the wireless microphone system, including outdoor speakers, PA systems, karaoke machines, power amplifiers, and audio mixers.
6. Instrucciones de funcionamiento
6.1 Encendido y apagado
To power on a handheld microphone, press and hold the power button until the display illuminates. To power off, press and hold the power button again until the display turns off. The receiver has a dedicated power button on its front panel.
6.2 Selección de frecuencia
The system offers 8x20 tunable frequency groups. If you experience interference, you can change the frequency of a microphone. Tap the 'SET' button on the microphone to instantly select a new frequency. The receiver will automatically synchronize.

Image: A visual guide demonstrating how to tap the SET button for instant frequency selection and press the VOL buttons for remote volume adjustment on the handheld transmitters.
6.3 Ajuste del volumen
Each channel on the receiver has an independent volume knob for precise control. Additionally, you can remotely adjust the volume of each microphone by pressing the 'VOL' buttons on the handheld transmitter.
6.4 Función de silencio
A short press of the power button on the handheld microphone will mute the microphone. Press it again to unmute. The receiver's display will indicate the mute status.
6.5 Range and Performance Tips
- Maintain a clear line of sight between the microphones and the receiver for optimal range (up to 200ft).
- Avoid placing the receiver near large metal objects or other wireless devices that could cause interference.
- Ensure antennas are fully extended and positioned vertically for best reception.
7. Mantenimiento
7.1 Limpieza
Wipe the receiver and microphones with a soft, dry cloth. Do not use liquid cleaners or abrasive materials. For microphone grilles, gently remove any debris with a soft brush.
7.2 Reemplazo de batería
Replace AA batteries in the handheld microphones when the battery indicator shows low power. Always use fresh, high-quality AA batteries for best performance. Remove batteries if the microphones will not be used for an extended period.
7.3 Almacenamiento
Store the system in a cool, dry place away from direct sunlight and extreme temperatures. Consider using a protective case for transport and long-term storage.

Image: Accessories designed for convenience, including anti-rolling rings for color-coding and protection, mic windscreens to minimize popping, and AA batteries for up to 8 hours of continuous use.
8. Solución de problemas
This section addresses common issues you might encounter with your Phenyx Pro wireless microphone system.
| Problema | Posible causa | Solución |
|---|---|---|
| No hay sonido o la salida es baja | Microphone muted; low microphone battery; receiver volume too low; incorrect cable connection; external amplifier/speaker off or volume low. | Check microphone mute status; replace batteries; increase receiver channel volume; verify all audio cables are securely connected; ensure external audio equipment is powered on and volume is adequate. |
| Cutoffs, static, or interference | Environmental RF interference; microphone too far from receiver; obstacles blocking signal; frequency conflict. | Relocate receiver for better line of sight; ensure antennas are properly positioned; change microphone frequency (tap SET button); avoid placing receiver near other wireless devices or large metal objects. Consider upgrading to a True Diversity system for challenging environments. |
| El micrófono no se empareja | Microphone or receiver not powered on; frequency mismatch. | Ensure both receiver and microphone are powered on. The system should auto-pair. If not, manually select a frequency on the microphone. |
| Audio feedback (squealing) | Microphone too close to speakers; microphone gain too high; speaker volume too high. | Move microphone further from speakers; reduce individual channel gain on the receiver; lower overall speaker volume. |
8.1 Extending Operating Range
To extend the operating range beyond the standard 200ft, we recommend using the Phenyx Pro PAS-225X antenna distribution system. This system enhances signal strength and coverage, allowing for greater distance and more reliable performance.

Image: The Phenyx Pro PAS-225X antenna distribution system, which can be used to extend the operating range of your wireless microphone system.
8.2 Conexión a una computadora
If you wish to use the wireless system with a computer, first connect the system to a mixer (e.g., Phenyx Pro PTX-15), and then connect the mixer to your computer via its USB port. Select the mixer as the audio input device on your computer for audio processing.

Image: A Phenyx Pro PTX-15 audio mixer, demonstrating how it can be used as an intermediary to connect the wireless microphone system to a computer.
9. Especificaciones
| Característica | Detalle |
|---|---|
| Número de modelo | PTU-4200-8H |
| Número de canales | 8 |
| Banda de frecuencia | UHF (500MHz band, 8x20 tunable frequencies) |
| Rango de operación | Hasta 200 pies (línea de visión) |
| Tipo de micrófono | Dynamic, Handheld |
| Fuente de alimentación del micrófono | 2 x AA Batteries per microphone (16 AA batteries included) |
| Salidas de audio del receptor | 8 x XLR, 1 x 1/4'' Mixed Output |
| Material | Metal (Receptor y Micrófonos) |
| Peso del artículo | 11.97 libras (5.44 kilogramos) |
| Dimensiones del paquete | 21 x 12 x 5.75 pulgadas |
| Código Postal | 810164760357 |
| Usos recomendados | Singing, Karaoke, Live Performances, Church Services, Outdoor Events |
10. Garantía y soporte
10.1 Información de garantía
Phenyx Pro products are crafted with premium components and precision engineering, ensuring trusted quality and lasting reliability. For specific warranty details, please refer to the warranty card included with your product or visit the official Phenyx Pro webSitio. Conserve su comprobante de compra para reclamaciones de garantía.
10.2 Atención al cliente
If you encounter any issues or have questions regarding your Phenyx Pro PTU-4200-8H system, please contact Phenyx Pro customer support. Contact information can typically be found on the official Phenyx Pro website or in the product packaging. Our team is dedicated to providing assistance and ensuring your satisfaction.


