1. Introducción
1.1 producto másview
This manual provides comprehensive instructions for the safe and effective installation, operation, and maintenance of your new refrigerator ice maker assembly. This component is designed to replace original ice maker units in compatible Kenmore and Whirlpool refrigerators, ensuring your appliance continues to produce ice efficiently.
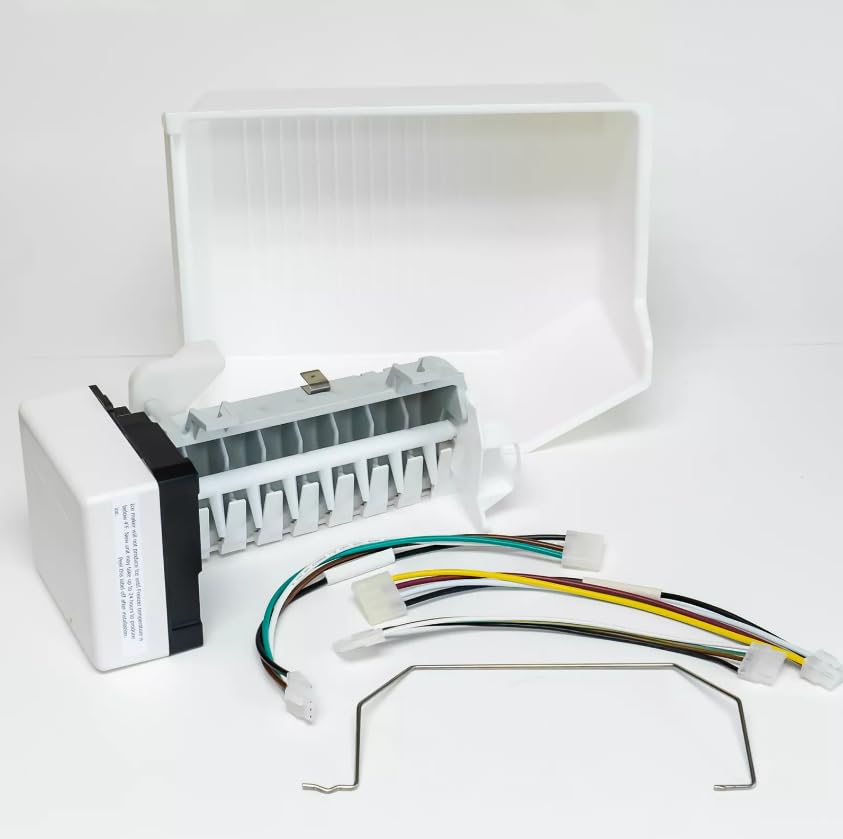
Imagen 1.1: Frente view of the Refrigerator Ice Maker Assembly.
1.2 Compatibilidad
This ice maker assembly is a replacement part compatible with a wide range of Kenmore and Whirlpool refrigerator models. Please verify your refrigerator's model number against the compatibility list provided with your purchase or on the product packaging to ensure proper fit and function. This assembly replaces various part numbers including, but not limited to, 10661999100, 1064650043714, 10661989107, 10670187000, 10660834101, 10650043714, 10639437990, 10662144201, 1069659723, 1069450211, 10648267893, and 1069651711.
1.3 ¿Qué hay en la caja?
- Ensamblaje de la máquina de hielo
- Hardware de montaje (tornillos, soportes)
- Wiring harnesses (may vary by model)
- Bail arm (ice level sensor)

Image 1.2: Included bail arm, which acts as an ice level sensor.
2. Información de seguridad
WARNING: Before beginning any repair or installation, always disconnect power to the refrigerator to prevent electric shock or injury.
- Wear appropriate personal protective equipment, such as gloves, to protect hands from sharp edges or components.
- Asegúrese de que el área de trabajo esté bien iluminada y libre de obstrucciones.
- Si no está seguro acerca de algún paso, consulte con un técnico de electrodomésticos calificado.
- Mantenga a los niños y las mascotas alejados del área de trabajo durante la instalación.
- Deseche las piezas viejas de forma adecuada según las normativas locales.
3. Instrucciones de instalación
3.1 Herramientas necesarias
- Destornillador Phillips
- Destornillador de punta plana (opcional, para hacer palanca)
- Nut driver or socket set (if applicable for mounting bolts)
3.2 Preparación
- Desconecte el refrigerador de la toma eléctrica.
- Cierre el suministro de agua al refrigerador.
- Empty the freezer compartment, especially the ice bucket, to provide clear access to the ice maker.
3.3 Removal of Old Ice Maker
- Locate the existing ice maker in the freezer compartment. It is typically mounted on the left wall or ceiling.
- Disconnect the wiring harness. This usually involves pressing a tab and pulling the connector apart.
- Remove the mounting screws or bolts that secure the ice maker to the freezer wall. There are typically 2-3 screws.
- Carefully slide or pull the old ice maker assembly out of its mounting brackets.
- Inspect the water fill tube for any ice blockages or debris. Clear if necessary.
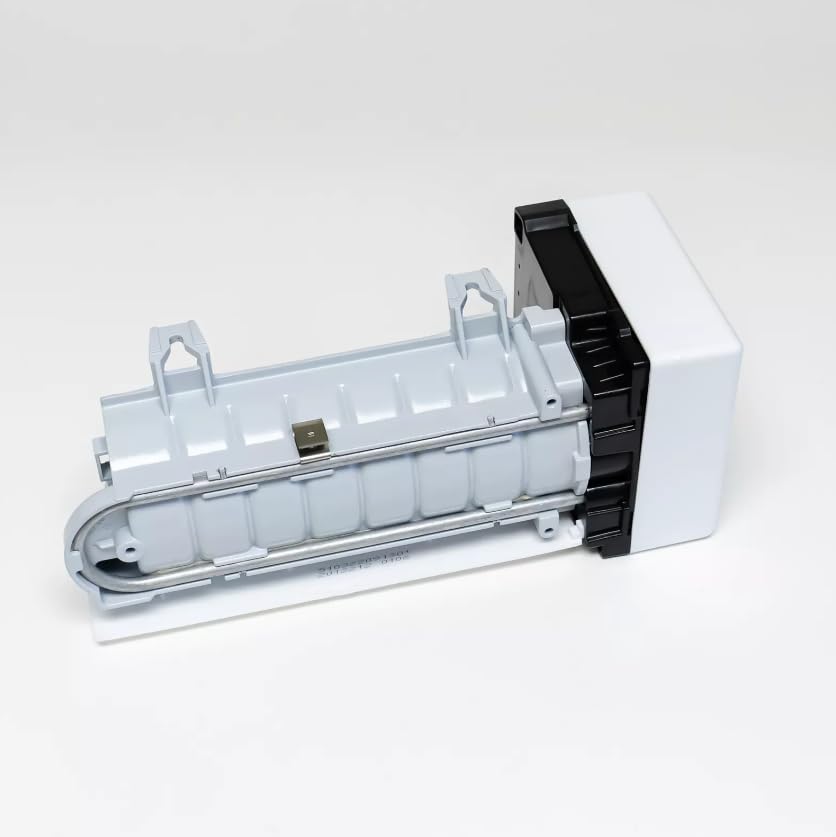
Imagen 3.1: Espalda view of the ice maker assembly, highlighting the electrical connection point.
3.4 Installation of New Ice Maker
- Align the new ice maker assembly with the mounting brackets in the freezer.
- Slide the ice maker into place, ensuring it is securely seated.
- Insert and tighten the mounting screws or bolts to secure the ice maker. Do not overtighten.
- Connect the new wiring harness to the refrigerator's electrical connector. Ensure it clicks into place.
- If your new ice maker came with a separate bail arm, install it into the designated slot. This arm controls ice production.
- Ensure the water fill tube is properly aligned with the ice maker's water inlet.
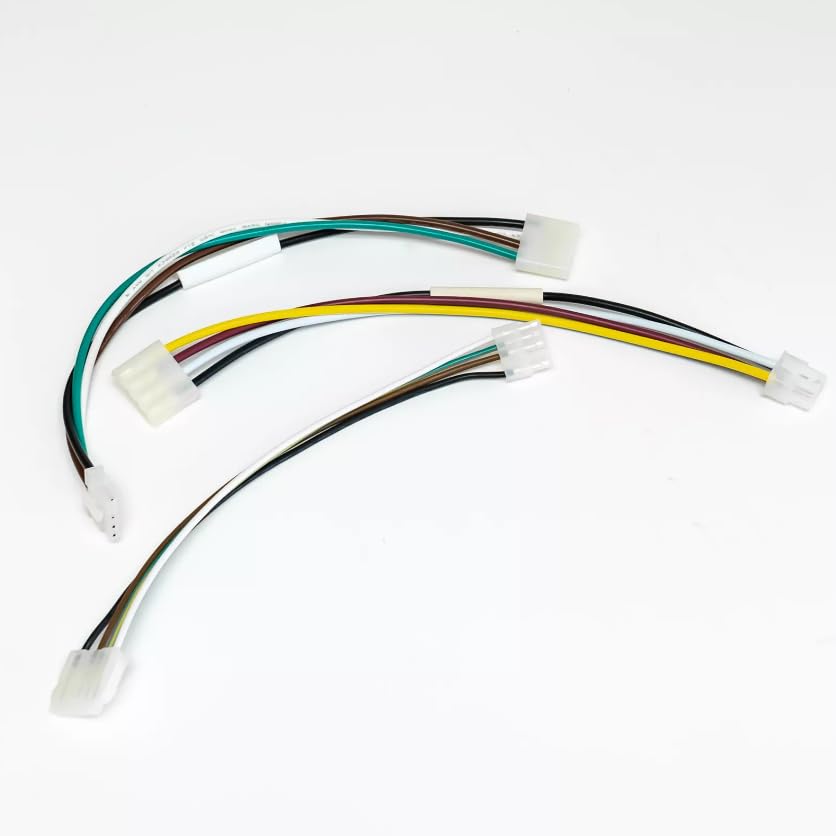
Image 3.2: Various wiring harnesses that may be included for compatibility.
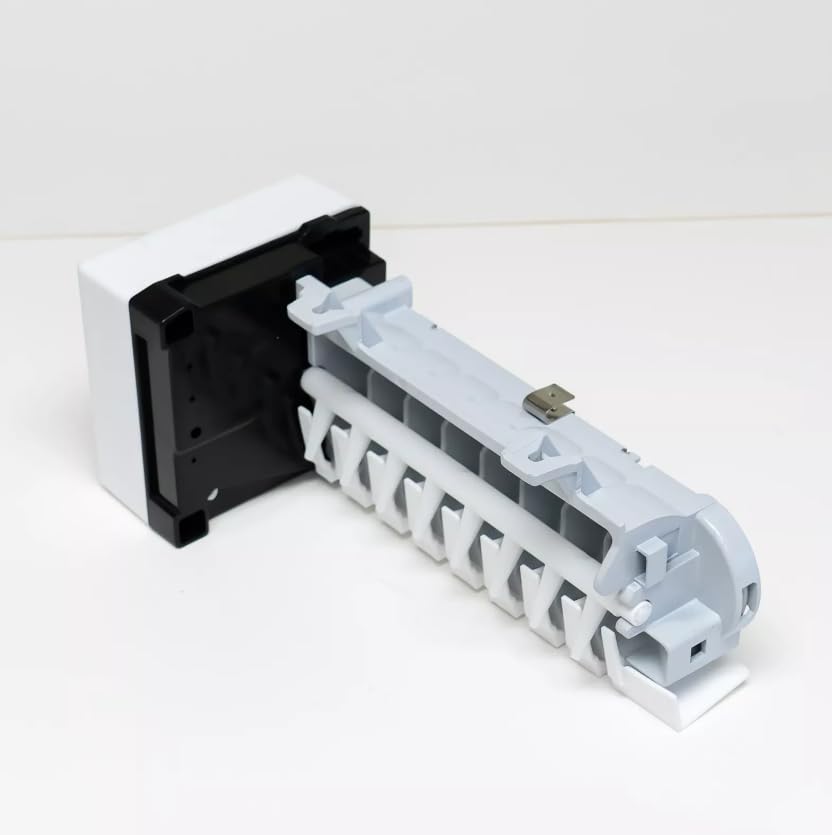
Imagen 3.3: Lateral view of the ice maker assembly, showing the ice ejector mechanism.
4. Operación
4.1 Primer uso
- Once the ice maker is installed, turn on the water supply to the refrigerator.
- Vuelva a enchufar el refrigerador a la toma eléctrica.
- The ice maker will typically perform a self-test cycle. You may hear some sounds as it fills with water and begins the freezing process.
- Discard the first few batches of ice (approximately 24 hours of production) to flush out any air or impurities from the water line and new components.
4.2 Operación normal
The ice maker will automatically produce ice as needed, sensing the ice level in the ice bucket via the bail arm. When the ice bucket is full, the bail arm will rise, signaling the ice maker to pause production. When ice is removed, the arm will lower, and production will resume.
- Ensure the bail arm is not obstructed by ice or other items in the freezer.
- Maintain a freezer temperature between 0°F and 5°F (-18°C and -15°C) for optimal ice production.
5. Mantenimiento
5.1 Limpieza
- Periodically clean the ice bucket with mild soap and warm water. Rinse thoroughly and dry completely before returning it to the freezer.
- If mineral deposits build up on the ice maker components, gently wipe them with a cloth dampened with a vinegar and water solution. Avoid harsh chemicals.
- Ensure the water filter (if your refrigerator has one) is replaced regularly according to the manufacturer's recommendations to maintain water quality and ice taste.
5.2 Controles periódicos
- Check the water line connection for leaks periodically.
- Ensure the bail arm moves freely and is not frozen in place.
- Escuche ruidos inusuales durante el funcionamiento, que podrían indicar un problema.
6. Solución de problemas
Consulte la siguiente tabla para conocer los problemas más comunes y sus posibles soluciones.
| Problema | Posible causa | Solución |
|---|---|---|
| La máquina de hielo no produce hielo | Refrigerator not plugged in; water supply off; bail arm in 'off' position; clogged water filter; freezer temperature too high; faulty water inlet valve. | Check power and water supply. Lower bail arm. Replace water filter. Adjust freezer temperature. Inspect water inlet valve for issues. |
| Los cubitos de hielo son pequeños o huecos. | Baja presión de agua; filtro de agua obstruido; línea de agua parcialmente congelada. | Check water pressure. Replace water filter. Thaw water line if frozen. |
| La máquina de hielo hace ruidos inusuales | Normal operation sounds; loose components; motor issue. | Some sounds are normal. Ensure all components are securely mounted. If persistent or loud, consult a technician. |
| El hielo tiene mal sabor o olor. | Old ice; uncleaned ice bucket; food odors in freezer; old water filter. | Discard old ice. Clean ice bucket. Store food in sealed containers. Replace water filter. |
7. Especificaciones
| Característica | Detalle |
|---|---|
| Número de modelo | 10670187000 |
| Marca | Generic (Compatible with Kenmore/Whirlpool) |
| Tipo | Ensamblaje de la máquina de hielo del refrigerador |
| Fabricante | genérico |
| Primero disponible | 7 de mayo de 2025 |
8. Garantía y soporte
For warranty information and customer support, please refer to the documentation provided with your purchase or contact the seller directly. Specific warranty terms may vary depending on the retailer and date of purchase.