1. Introducción y producto terminadoview
This manual provides detailed instructions for the installation, operation, and maintenance of your WALI Vertical Dual Monitor Wall Mount, Model 012ARMV-49. This mount is designed to support two monitors in a stacked configuration, optimizing desk space and providing ergonomic viewángulos de ing.
The mount supports displays from 17 to 49 inches, with a maximum weight capacity of 44 lbs (20 kg) per arm. It is compatible with VESA 75x75mm and 100x100mm mounting patterns. Key features include flexible tilt, swivel, and height adjustments, along with 360-degree rotation for versatile screen positioning.
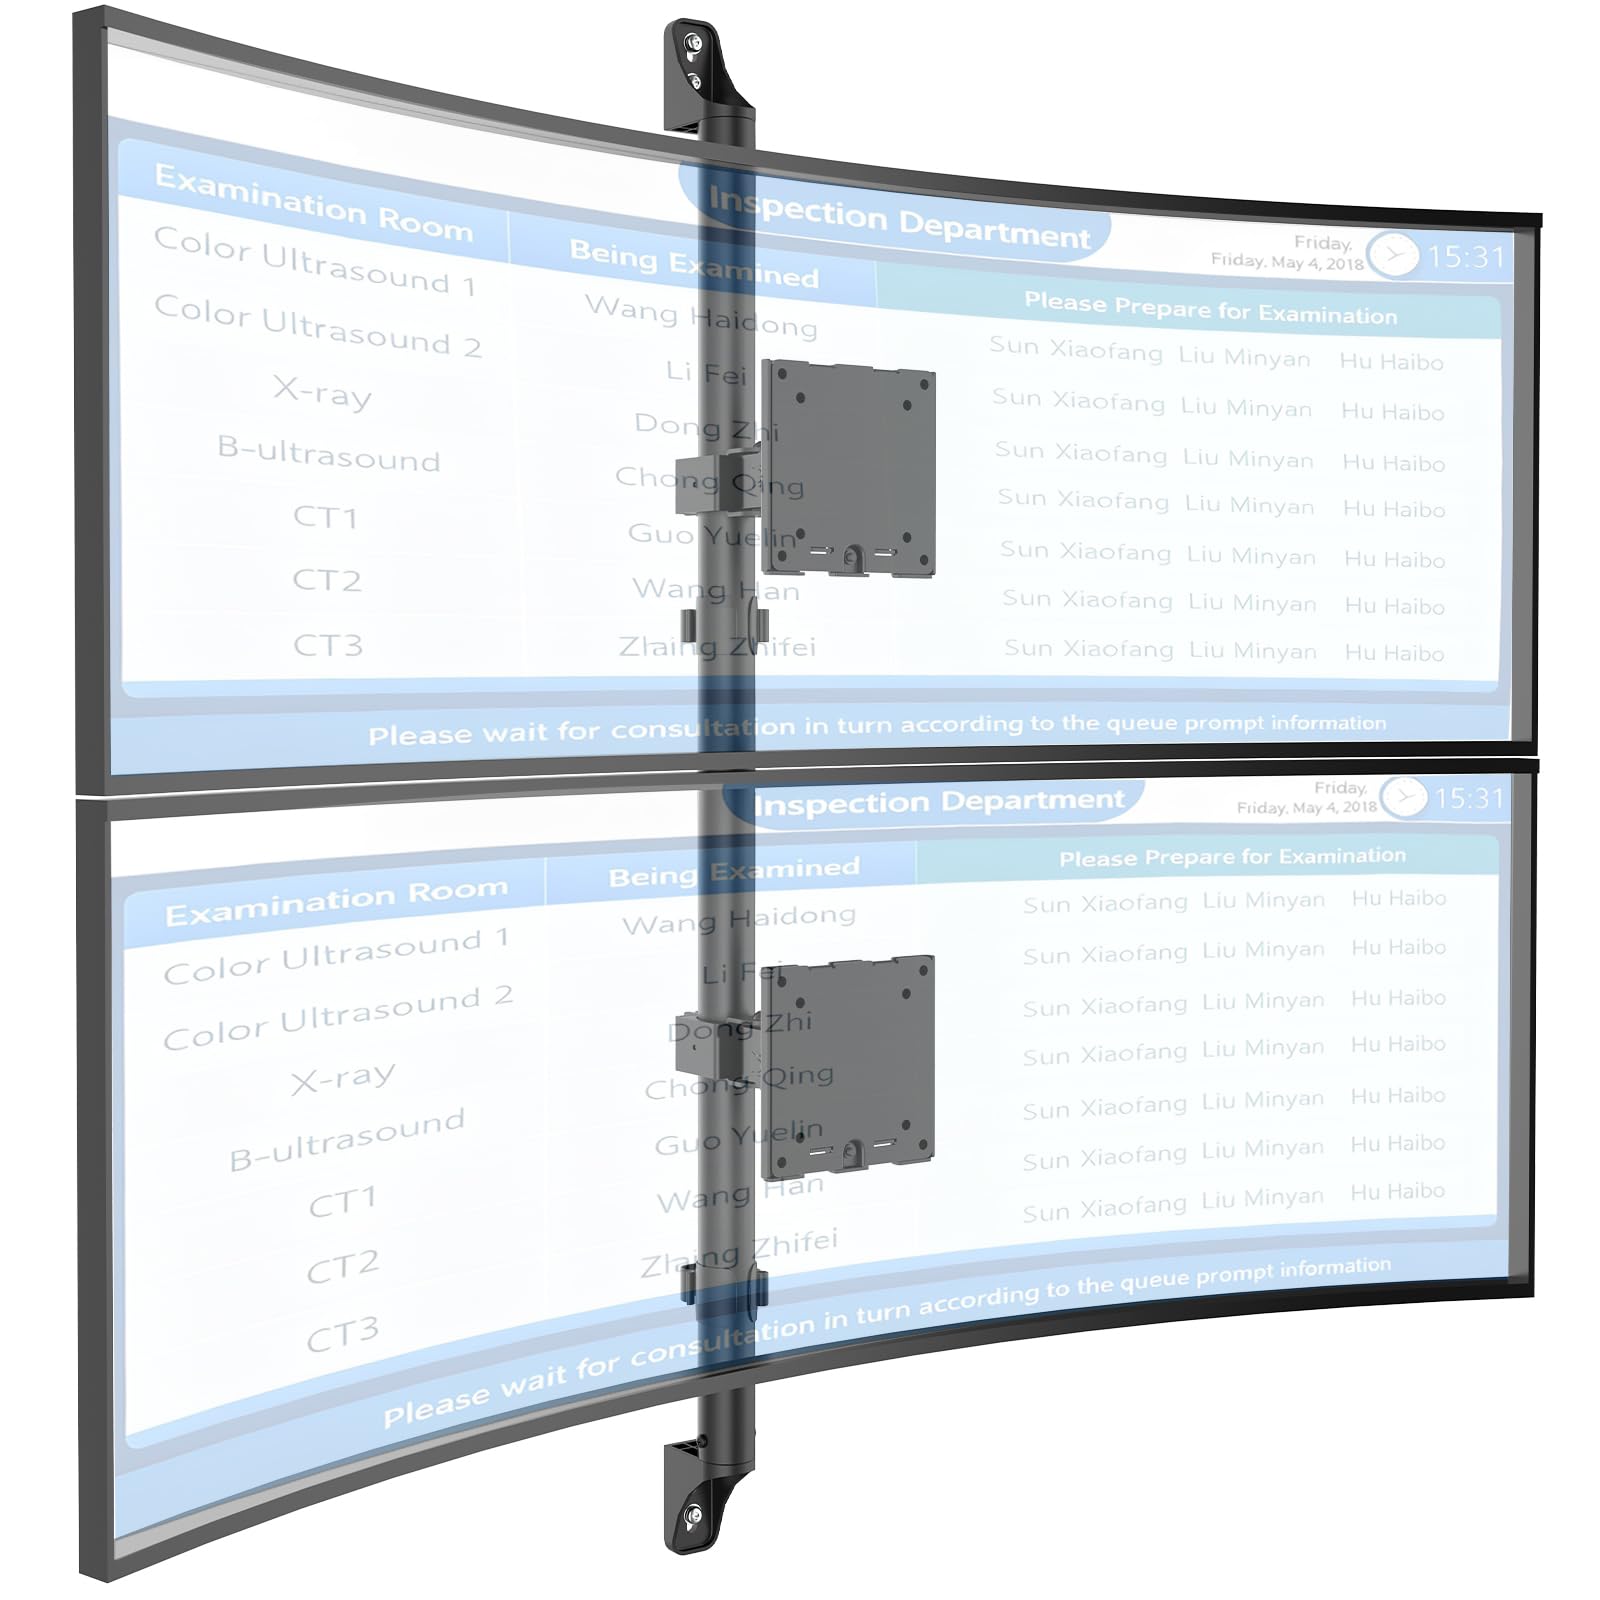
Figure 1: WALI Vertical Dual Monitor Wall Mount with two curved monitors.
2. Información de seguridad
Please read and understand all instructions before installation and use. Failure to do so may result in personal injury or property damage. Keep this manual for future reference.
- Capacidad de peso: Do not exceed the maximum weight capacity of 44 lbs (20 kg) per monitor. Exceeding this limit can result in serious injury or product failure.
- Tamaño del monitor: Asegúrese de que sus monitores estén dentro del rango de tamaño admitido de 17 a 49 pulgadas.
- Compatibilidad VESA: Verify your monitor's VESA mounting pattern (75x75mm or 100x100mm) before installation.
- Tipo de pared: This mount is designed for installation on concrete/brick walls or wooden studs. Do not install on drywall alone.
- Instalación profesional: Si no está seguro sobre el proceso de instalación o el tipo de pared, consulte con un profesional calificado.
- Partes móviles: Mantenga las manos y los dedos alejados de las partes móviles durante el ajuste para evitar pillarse los dedos.
- Niños: Mantenga las piezas pequeñas y los materiales de embalaje fuera del alcance de los niños, ya que pueden suponer un peligro de asfixia.
3. Contenido del paquete
Verify that all components are present and undamaged. If any parts are missing or damaged, contact WALI customer support.
- 1 x WALI Vertical Dual Monitor Wall Mount (Black)
- Mounting Hardware Kit (includes screws, washers, wall anchors for masonry, and self-tapping screws for wood)
- Manual de usuario
4. Especificaciones
| Característica | Especificación |
|---|---|
| Tipo de montaje | Montaje en pared |
| Tipo de movimiento | Articulando |
| Marca | WALI |
| Material | Dual aerospace-grade aluminum mounting brackets, High-strength steel pole |
| Color | Negro |
| Dispositivos compatibles | Monitor, Televisión |
| Ángulo de inclinación máximo | 20 grados |
| Minimum Supported Screen Size | 17 pulgadas |
| Maximum Supported Screen Size | 49 pulgadas |
| Número de modelo | 012ARMV-49 |
| Compatibilidad VESA | 75 x 75 mm, 100 x 100 mm |
| Capacidad de peso | 44 libras (20 kg) por brazo |
5. Configuración e instalación
Follow these steps carefully to install your WALI Vertical Dual Monitor Wall Mount.
5.1 Preparación de la pared
- Identificar el tipo de pared: This mount is suitable for wooden studs, solid concrete walls, and brick walls.
- Localizar montantes (para paredes de madera): Use a stud finder to locate the center of a wooden stud. Mark the drilling locations.
- Marcar ubicaciones de perforación: Hold the wall plate against the wall at your desired height and mark the screw holes. Ensure it is level.

Figure 2: Wall compatibility for installation.
5.2 Fijación de la placa de pared
- Perforar agujeros piloto: Drill pilot holes at the marked locations. The size of the drill bit will depend on your wall type and the provided hardware.
- Placa de pared segura: Attach the wall plate to the wall using the appropriate screws and anchors for your wall type. Ensure it is firmly secured.

Figure 3: Securing the wall mount plate.
5.3 Attaching VESA Plates to Monitors
- Remove Original Stand: Carefully remove the original stand from your monitors.
- Adjunte la placa VESA: Align the VESA plate with the mounting holes on the back of your monitor. Use the provided screws to secure the plate. Ensure the plate is oriented correctly for vertical stacking.
5.4 Mounting Monitors to the Arm
- Slide Arm onto Wall Base: Carefully slide the monitor arm assembly onto the secured wall base.
- Attach Monitors: With assistance, carefully lift each monitor and slide its VESA plate onto the corresponding arm bracket. Ensure it clicks securely into place.
- Secure Monitors: Use the safety screws or clips to prevent accidental dislodgement of the monitors from the arms.

Figure 4: Monitor arm assembly and attachment points.
5.5 Gestión de cables
- Cables de ruta: Utilize the integrated cable management system to route monitor cables neatly along the arm and down the wall pole.
- Cables seguros: Use the provided clips or ties to secure the cables, preventing clutter and ensuring a clean setup.

Figura 5: Sistema integrado de gestión de cables.
6. Instrucciones de funcionamiento (Ajustes)
The WALI Vertical Dual Monitor Wall Mount offers various adjustments for optimal viewing comodidad.
- Ajuste de altura: The monitors can be adjusted vertically along the main pole. Loosen the adjustment screws on the arm brackets, slide the monitors to the desired height, and then re-tighten the screws. The maximum height adjustment is 28.74 inches.
- Ajuste de inclinación: Tilt the monitors up to +50 degrees or down to -20 degrees to reduce glare and find your preferred viewángulo de ing.
- Ajuste giratorio: Swivel the monitors up to +/-90 degrees horizontally for collaborative work or to adjust the viewdirección de avance.
- Rotación: Gire los monitores 360 grados para cambiar entre orientaciones horizontal y vertical.

Figure 6: Tilt, Swivel, and Rotation adjustments.

Figure 7: Full motion adjustment range and dimensions.
7. Mantenimiento
El mantenimiento regular garantiza la longevidad y el funcionamiento seguro de su soporte para monitor.
- Limpieza: Limpie el soporte con un paño suave.amp Paño. Evite limpiadores abrasivos o disolventes.
- Verifique la estanqueidad: Revise periódicamente todos los tornillos y conexiones para asegurarse de que estén bien apretados y seguros. Vuelva a apretarlos si es necesario.
- Inspeccionar si hay daños: Regularly inspect the mount for any signs of wear, damage, or corrosion. Discontinue use and contact support if any issues are found.
8. Solución de problemas
If you encounter issues with your WALI Vertical Dual Monitor Wall Mount, refer to the following common problems and solutions:
- El monitor se hunde o no mantiene la posición:
- Ensure the monitor weight is within the 44 lbs (20 kg) per arm limit.
- Tighten the tension adjustment screws on the arm joints using the included tool.
- El monte se siente inestable:
- Verify that the wall plate is securely fastened to the wall with appropriate anchors for your wall type.
- Check that all connections between the arm and the VESA plates are tight.
- Difficulty Adjusting Monitor Position:
- Loosen the tension adjustment screws slightly if the movement is too stiff.
- Ensure no cables are obstructing the movement of the arms.
9. Garantía y soporte
Your WALI Vertical Dual Monitor Wall Mount comes with a Garantía de 10 años, cubriendo defectos de materiales y mano de obra bajo uso normal.
For technical assistance, missing parts, or warranty claims, please contact WALI customer support. Our experienced and friendly US-based customer support team is available to assist you 7 days a week.
Información del contacto: Refer to the WALI websitio o embalaje del producto para obtener los datos de contacto más actualizados.