
1. Producto terminadoview
This manual provides detailed instructions for the installation, operation, and maintenance of your Saunyoto 10.88" Head Up Display. Designed specifically for Tesla Model 3 (2017-2023) and Model Y (2020-2024), this display enhances your driving experience by providing essential vehicle information and smart connectivity features directly in your line of sight.
- Pantalla HD de 10.88": Features a 1920x535 resolution IPS 2.5D touchscreen with 1000nit brightness for clear visibility.
- CarPlay/Android Auto inalámbrico: Seamless 60 FPS connectivity with split/full-screen options and voice assistant support.
- No AC Blockage: Innovative design ensures no obstruction of AC vents, maintaining optimal cabin climate.
- Monitoreo 12 en 1: Syncs real-time data including speed, tire pressure, and gear, with dual-color blind-spot alerts.
- Optional Front Camera: Provides additional warnings for enhanced driving safety.
2. Especificaciones técnicas
| Característica | Detalle |
|---|---|
| Dimensiones del producto | 10.4 x 0.6 x 3.5 pulgadas |
| Peso del artículo | 3.52 libras |
| Número de modelo del artículo | CM7715 |
| Tamaño de pantalla | 10.88 pulgadas |
| Tipo de pantalla | LCD, IPS 2.5D Touchscreen |
| Resolución | 1920x535 |
| Brillo | 1000nit |
| Tecnología de conectividad | Bluetooth, wifi |
| Compatibilidad | Tesla Model 3 (2017-2023), Tesla Model Y (2020-2024) |
3. Guía de instalación
Follow these steps carefully to install your Saunyoto Head Up Display. Installation typically takes approximately 50 minutes and requires no permanent modifications to your vehicle.
3.1 Preparación
- Ensure your vehicle is powered off and the parking brake is engaged.
- Gather necessary tools: plastic pry tool, screwdriver (provided).
3.2 Removing Vehicle Panels
- Remove the right meter side panel: Carefully use a pry tool to detach the right meter side panel.

Image: A hand using a pry tool to remove the right meter side panel of the Tesla dashboard.
- Remove the front right seat A-pillar baffle: Gently detach the A-pillar baffle near the front passenger seat.

Image: A hand removing the A-pillar baffle on the passenger side of the Tesla.
- Remove the front right seat threshold trim strip: Use a pry tool to carefully remove the trim strip along the front right seat threshold.
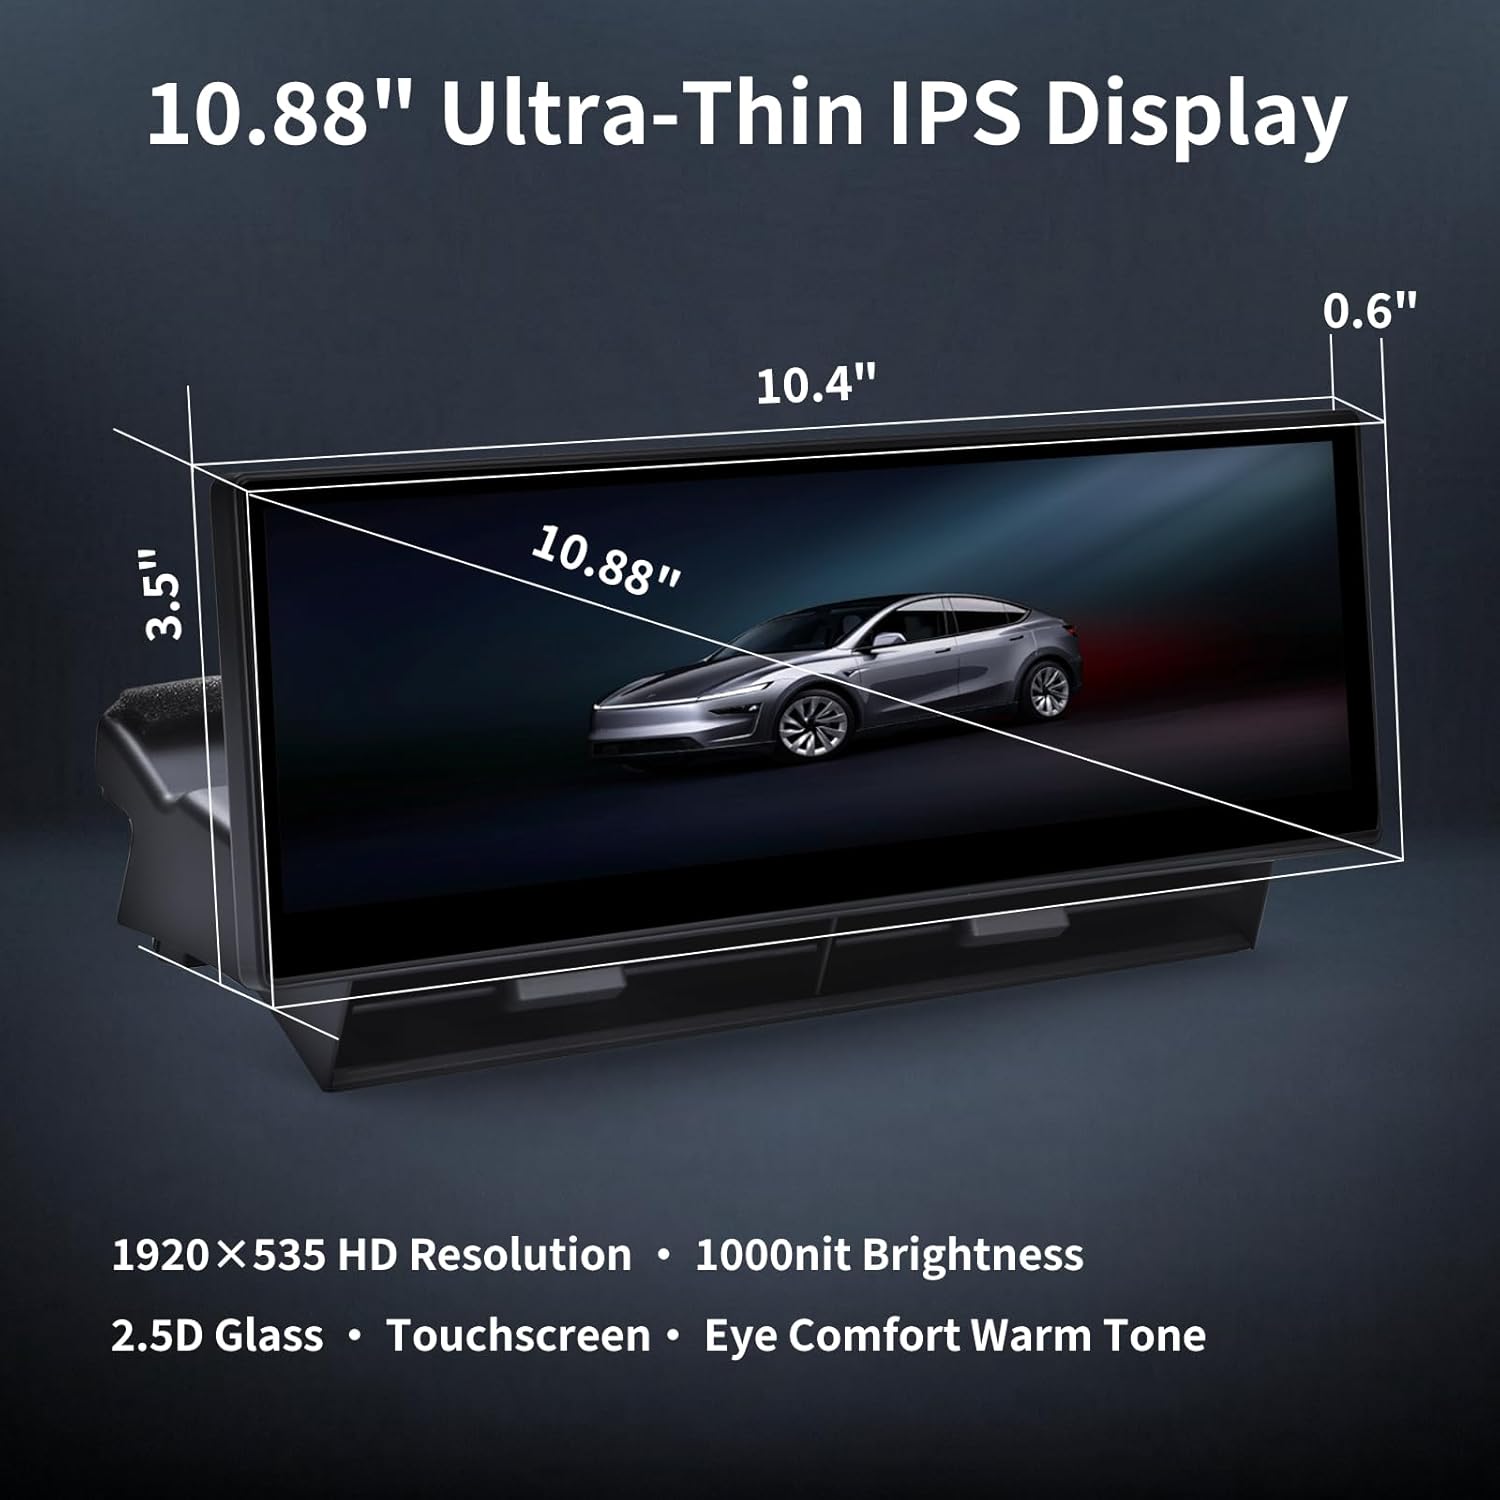
Image: A person removing the threshold trim strip on the passenger side.
- Remove retaining buckle: Locate and remove the retaining buckle in the footwell area.
- Remove the left gauge side panel: Repeat the process for the left side of the dashboard.
- Lift the dashboard trim panel: Carefully lift the dashboard trim panel vertically from both left and right sides to expose wiring.
3.3 conexiones de cableado
- Find the original vehicle protocol cable interface (blue A): Locate the blue protocol interface.
Video: Demonstrates locating the original vehicle protocol cable interface (blue A) in the Tesla.
- Plug the matching blue protocol cable (A1) into the original vehicle matching protocol interface (Blue A): Connect the provided cable.
- Unplug the original car power port (B): Disconnect the vehicle's power port.
- Connect the female head to B1 and the male head to B2: After unplugging the original power interface B of the vehicle, connect the female terminal to B1 and the male terminal to B2.
- Insert the cable into the hole: Thread the cables through the designated holes in the dashboard trim. For front camera installation, ensure the yellow video input cable passes through the correct hole.
Video: Illustrates the installation of the display unit onto the dashboard.
- Conecte el cable de alimentación: Securely connect the power cables.
- Connect front camera video input cable: In yellow, the video input cable of the camera is connected to the extension cable of the front camera.
- Fix power cable connection with tape: Use tape to secure the power cable connections.
- Arrange and secure cables: Extend the front camera extension cable to the front and fix it.
3.4 Installing the Display Unit
- Instalar el host: Carefully place the display unit into its designated position on the dashboard.
Video: Illustrates the installation of the display unit onto the dashboard.
- Install the cover plate and the instrument panel: Reattach the dashboard trim panel and other removed components.
3.5 Front Camera Installation (Optional)
If you have opted for the front camera, follow these additional steps:
- Disassemble the front trunk: Remove the necessary panels in the front trunk area to route the camera cable.
- Install the cable assembly for the camera: Route the camera cable from the front bumper area to the dashboard.
Video: Demonstrates the installation of the front camera cable assembly.
- Install camera: Mount the front camera in the designated location, typically near the front license plate.
4. Instrucciones de funcionamiento
Your Saunyoto Head Up Display is designed for intuitive operation. Most functions can be accessed via the touchscreen or integrated steering wheel controls.
4.1 Funciones básicas
- Encendido/apagado: The display powers on automatically with the vehicle and off when the vehicle is shut down.
- Ajuste de brillo: Adjust screen brightness via the settings menu or automatic light sensor.
- Temas de interfaz de usuario: Select from multiple UI themes (classic, simple, sports) to personalize your display.
- Visualización del modelo de coche: Choose from various Tesla 3D car models to match your vehicle.
Video: Demonstrates various function settings of the display, including UI themes and car model selection.
4.2 Conectividad inteligente
- CarPlay/Android Auto inalámbrico: Conecte su teléfono inteligente de forma inalámbrica para navegación, música, llamadas y más.
- AirPlay/Miracast/HiCar: Cast videos and content directly from your phone to the display.
Video: Shows the display supporting wireless Apple CarPlay, Android Auto, and AirPlay.
4.3 Driving Safety Features
- Advertencia de punto ciego: Receive dual-color alerts for objects in your blind spots.
- Cámara frontal View: Automatically displays the front camera view when the vehicle starts or at low speeds for enhanced awareness.
- Real-time Data Sync: Monitor speed, tire pressure, gear, and other critical vehicle data.
Video: Highlights driving safety features, including blind spot warning and front camera view.
4.4 HVAC Control
- Ventilaciones de aire ajustables: The display's integrated air vents can be adjusted 360° to control airflow direction without blocking the original Tesla HVAC system.
Video: Demonstrates how to control air conditioning direction using the display's adjustable vents.
5. Características principales
The Saunyoto Head Up Display offers a range of features designed to enhance convenience and safety:
- Eye Comfort Warm Tone Screen: Reduce la fatiga visual durante el uso prolongado.
- Split/Full-Screen Ready: Allows for simultaneous display of navigation and music, or full-screen video casting.
- Vehicle-grade Linux System: Ensures fast performance and ultra-low power consumption.
- Patented Dual-Duct AC Outlets: Provides 20% better airflow compared to blocked HUDs, improving cooling and defogging.
- Actualizaciones de OTA: Supports Over-The-Air software updates for continuous improvement and new features.
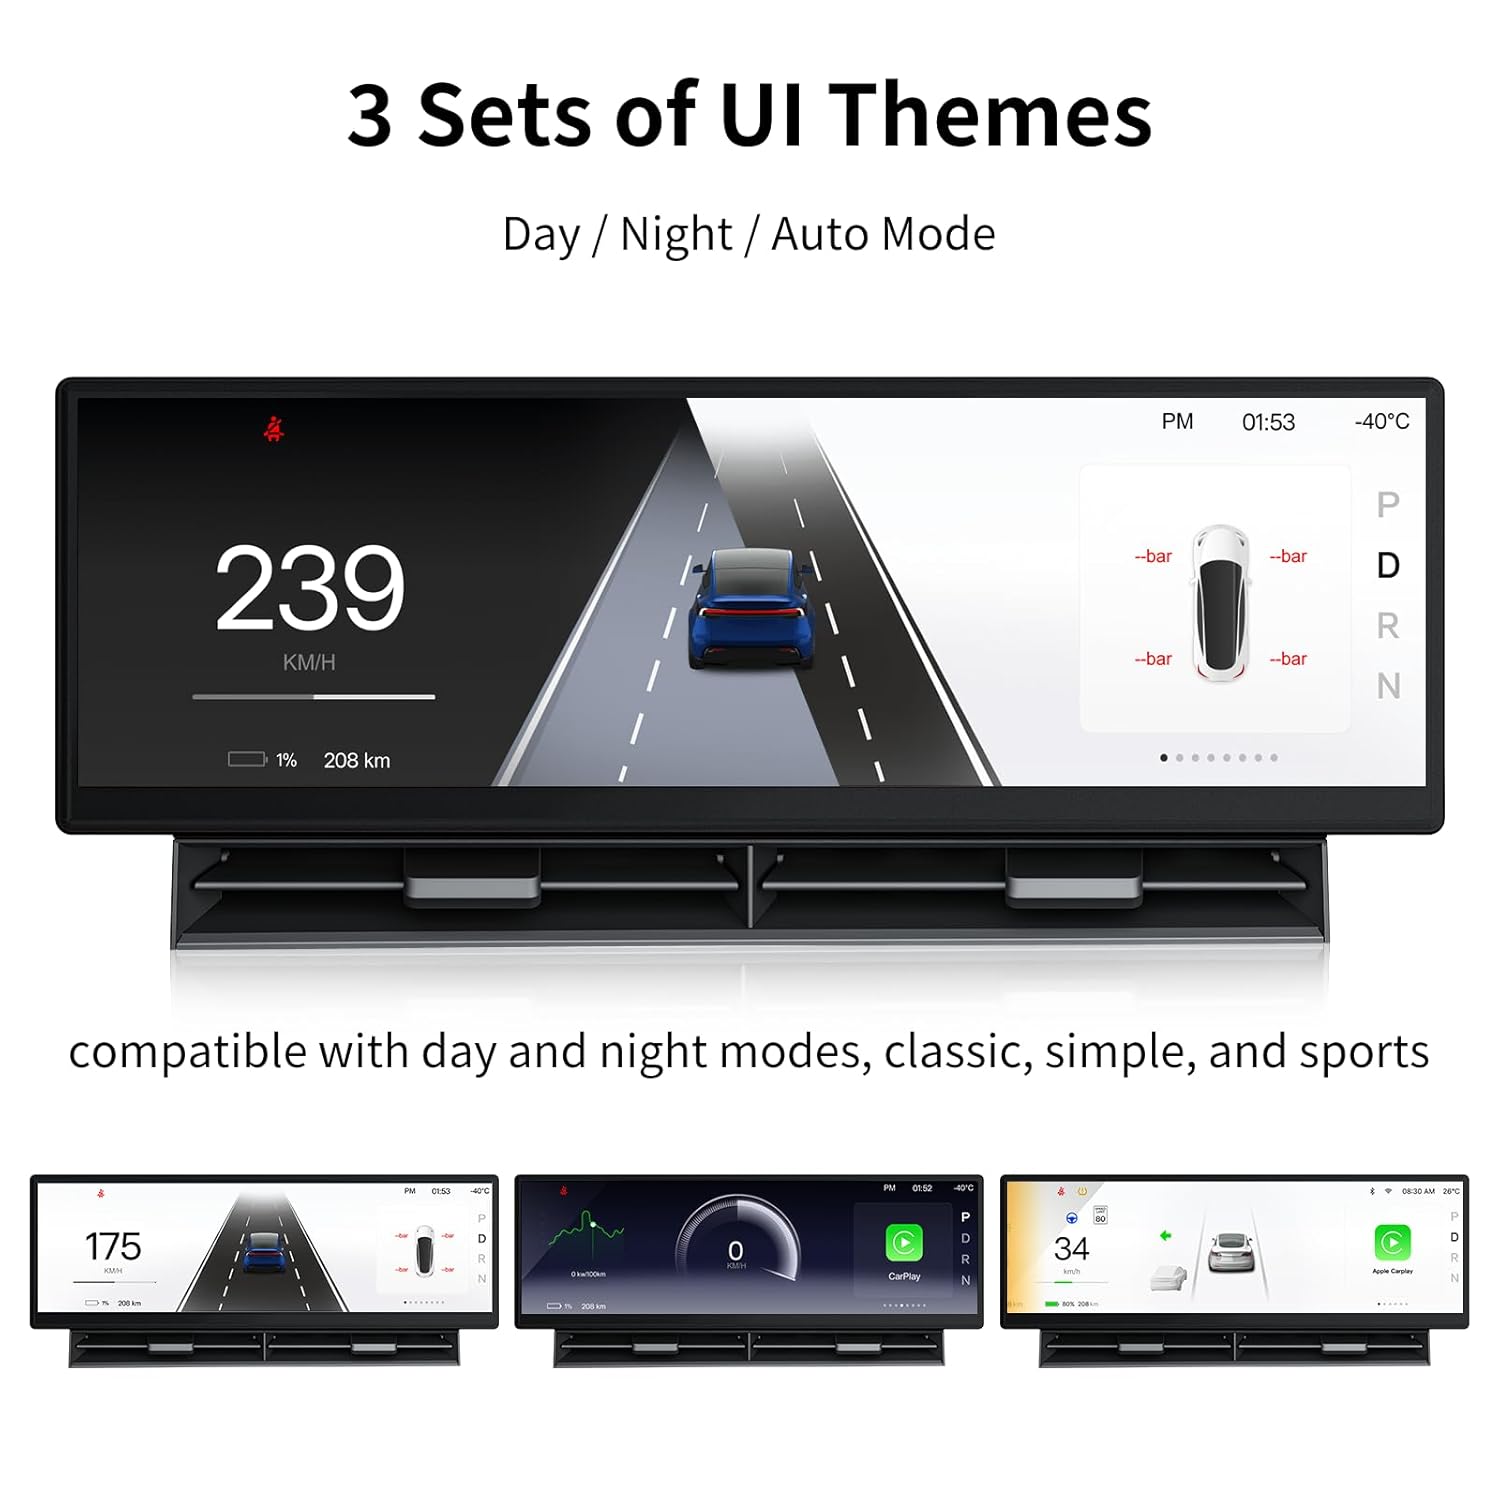
Image: Shows three different UI themes (Day/Night/Auto Mode) available on the display, including classic, simple, and sports styles.
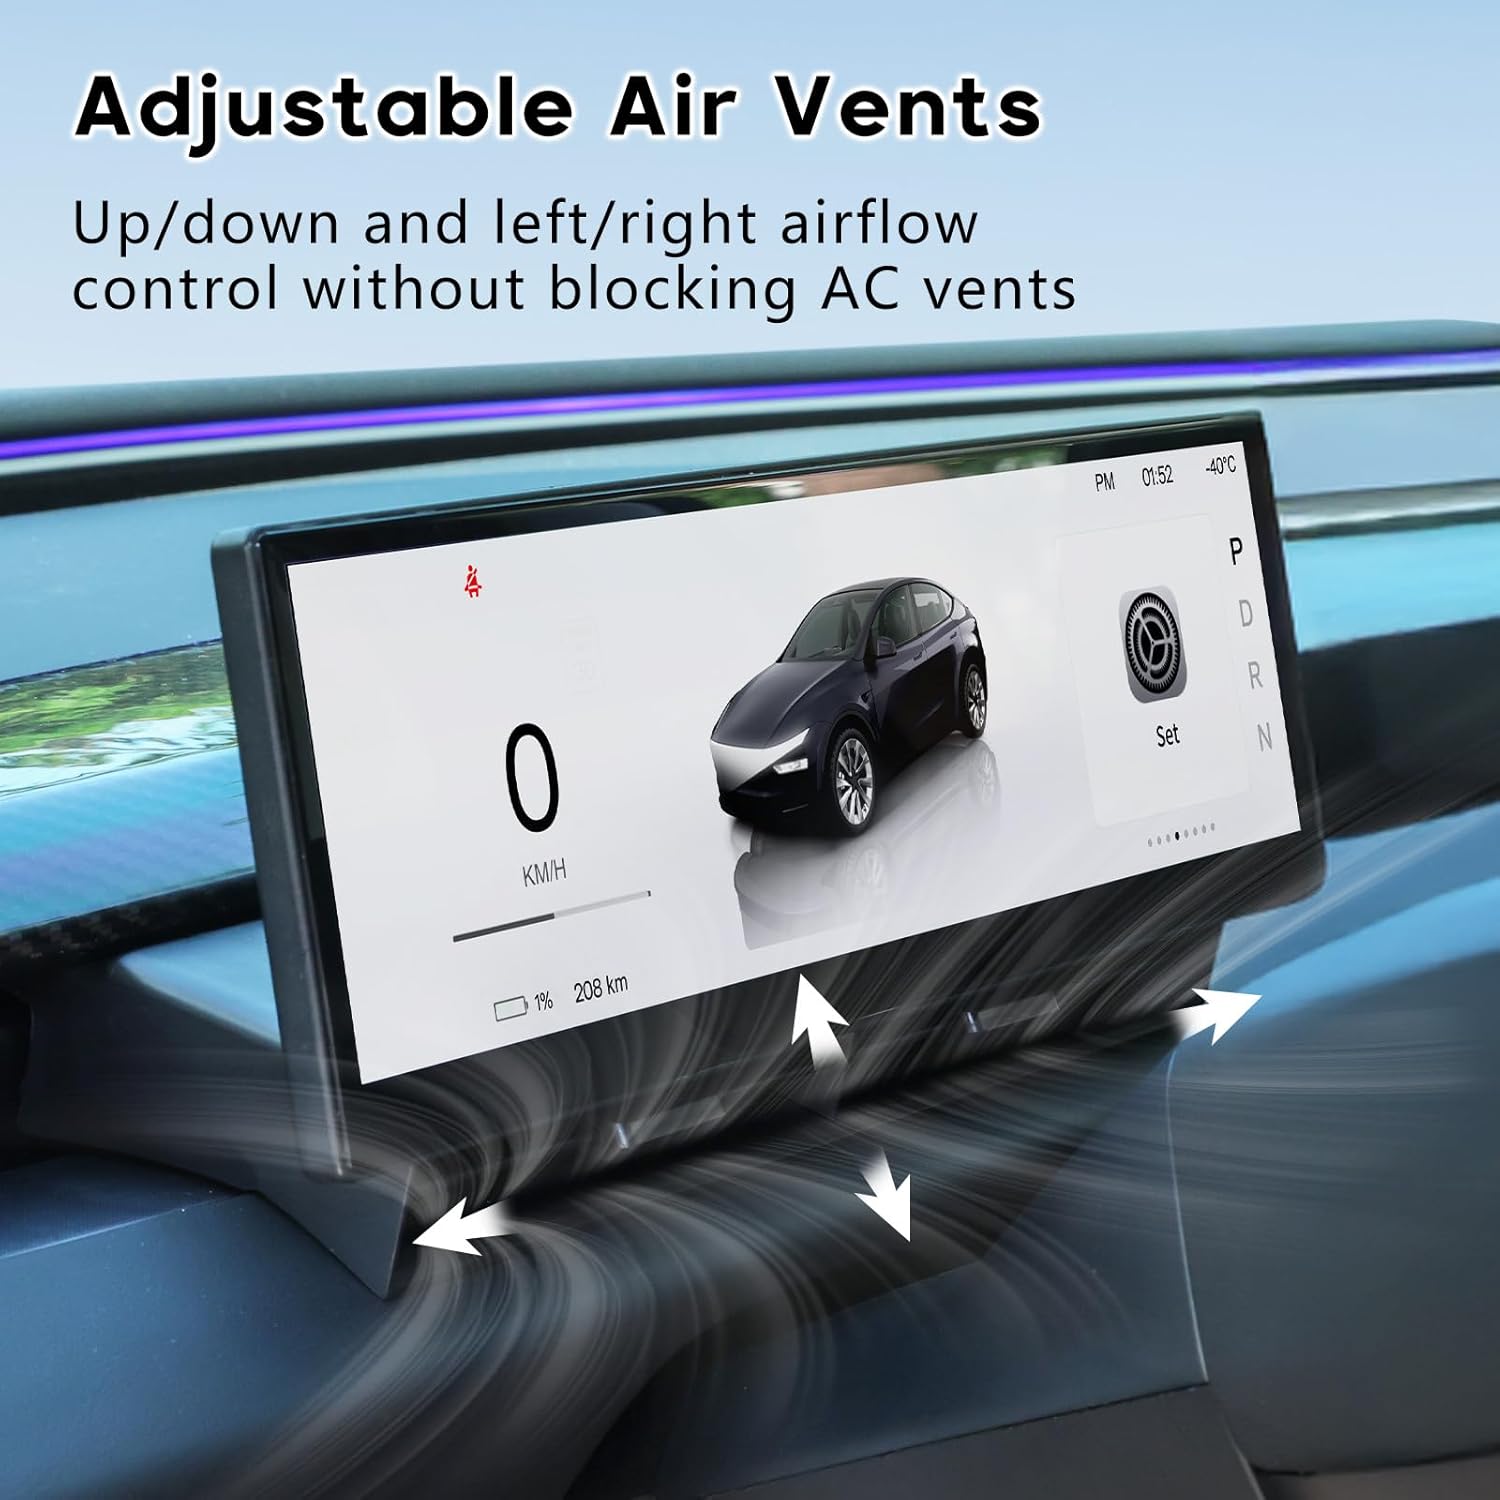
Image: Illustrates the adjustable air vents on the display, allowing up/down and left/right airflow control without blocking AC vents.

Image: Depicts the front camera providing real-time views and the dual-color warnings for blind spot alerts.
6. Mantenimiento
To ensure the longevity and optimal performance of your Saunyoto Head Up Display, follow these maintenance guidelines:
- Limpieza: Use a soft, lint-free cloth to gently wipe the screen. Avoid abrasive cleaners or solvents that could damage the display surface.
- Actualizaciones de software: Regularly check for and install OTA (Over-The-Air) software updates to ensure you have the latest features and performance enhancements.
- Sistema de organización de cables: Periodically inspect all connected cables to ensure they are securely fastened and not pinched or damaged.
7. Solución de problemas
If you encounter any issues with your display, refer to the following common troubleshooting steps:
- La pantalla no se enciende:
- Verifique todas las conexiones eléctricas para asegurarse de que estén bien enchufadas.
- Verifique que el vehículo esté encendido.
- Sin señal/pantalla negra:
- Ensure all video input cables are correctly connected.
- Restart the vehicle to reset the display.
- Problemas de conectividad de CarPlay/Android Auto:
- Ensure Bluetooth and Wi-Fi are enabled on your smartphone and the display.
- Forget the device on both your phone and the display, then attempt to reconnect.
- Check for any software updates for the display or your phone's operating system.
- Inaccurate Data Display:
- Verify that the display's protocol cable is correctly connected to the vehicle's system.
- Realice un reinicio del sistema si el problema persiste.
For further assistance, please contact Saunyoto customer support.
8. Garantía y soporte
Your Saunyoto Head Up Display comes with a Garantía de 12 meses Desde la fecha de compra. Esta garantía cubre defectos de fabricación y asegura un rendimiento confiable.
For any questions, technical support, or warranty claims, please contact our Equipo de soporte 24/7. Step-by-step videos and guides are also available to assist you with installation and operation.
Contact information can be found on the official Saunyoto websitio o a través de su plataforma de compra.