Introducción
This user manual provides comprehensive instructions for the Chieftec AS-02B-TG-OP Midi Tower PC Case. It covers essential information regarding product features, installation procedures, operational guidelines, maintenance tips, and technical specifications. Please read this manual thoroughly before installing or operating your PC case to ensure proper functionality and longevity.
Producto terminadoview
The Chieftec AS-02B-TG-OP is a Midi Tower PC case designed for optimal cooling and a modern aesthetic. It features a sleek brushed front panel, a tempered glass side panel, and a pre-installed 120mm PWM fan for efficient heat dissipation.
Características principales:
- Sleek brushed front panel design.
- Tempered glass side panel for component visibility.
- Optimized interior layout for efficient cooling.
- Pre-installed 120mm PWM fan at the rear.
- Support for various motherboard form factors (ATX, micro ATX, Mini-ITX).
- Multiple expansion bays for storage devices.
- Front I/O panel with USB 2.0, USB Type-C, and audio ports.
Identificación de componentes:

Figura 1: Delantero izquierdo view of the Chieftec AS-02B-TG-OP PC case, showcasing the brushed front panel and the tempered glass side panel.

Figura 2: Frente directo view of the Chieftec AS-02B-TG-OP PC case, highlighting the brushed finish of the front panel.

Figura 3: Front-right angle view of the Chieftec AS-02B-TG-OP PC case, showing the subtle design elements.
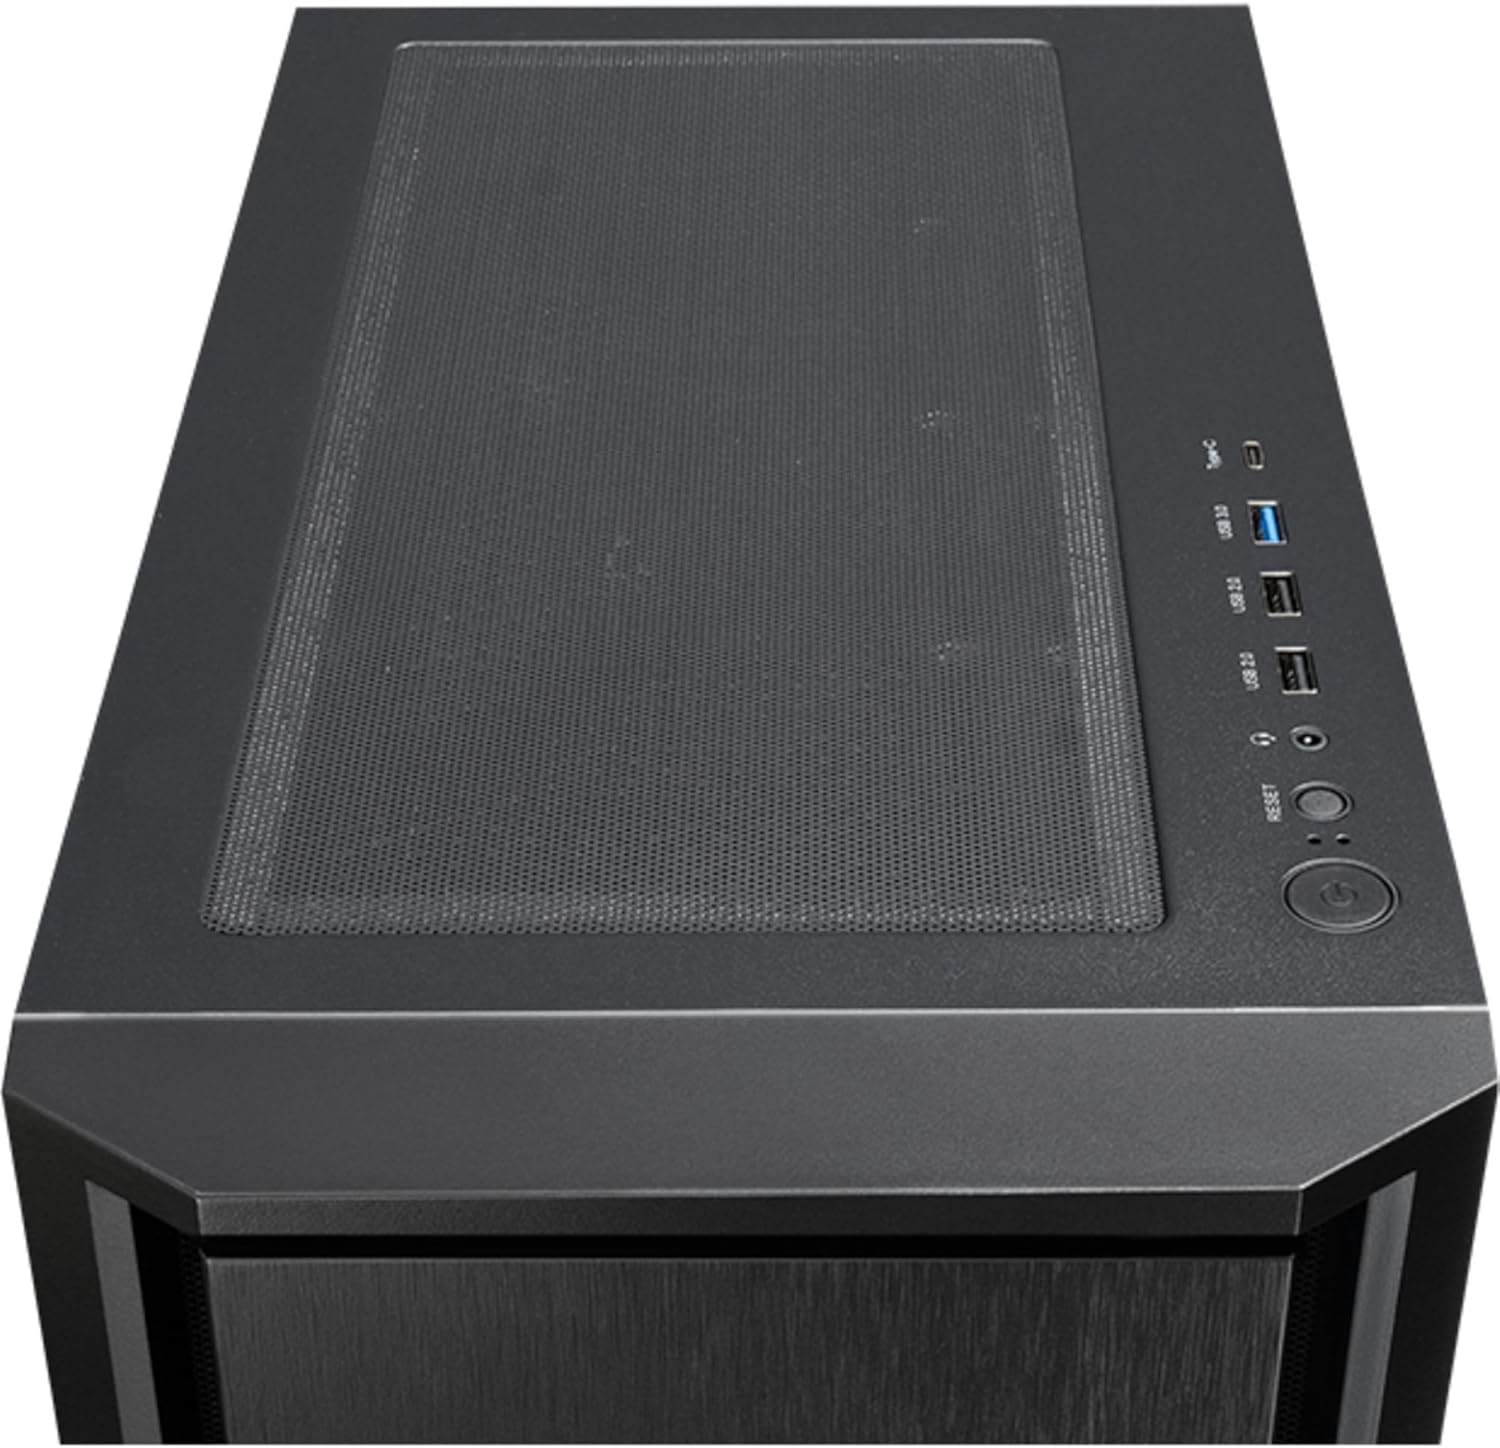
Figura 4: Arriba view of the Chieftec AS-02B-TG-OP PC case, showing the top ventilation and the front I/O panel with USB ports and audio jacks.

Figura 5: Trasero view of the Chieftec AS-02B-TG-OP PC case, detailing the expansion slots, rear fan mount, and PSU opening.

Figura 6: Abajo view of the Chieftec AS-02B-TG-OP PC case, showing the case feet and bottom dust filter area.
Configuración e instalación
This section guides you through the process of installing components into your Chieftec AS-02B-TG-OP PC case.
1. Preparing the Case:
- Coloque el estuche sobre una superficie plana y estable.
- Carefully remove the tempered glass side panel by unscrewing the thumb screws at the rear.
- Remove the opposite side panel to access the cable management area.
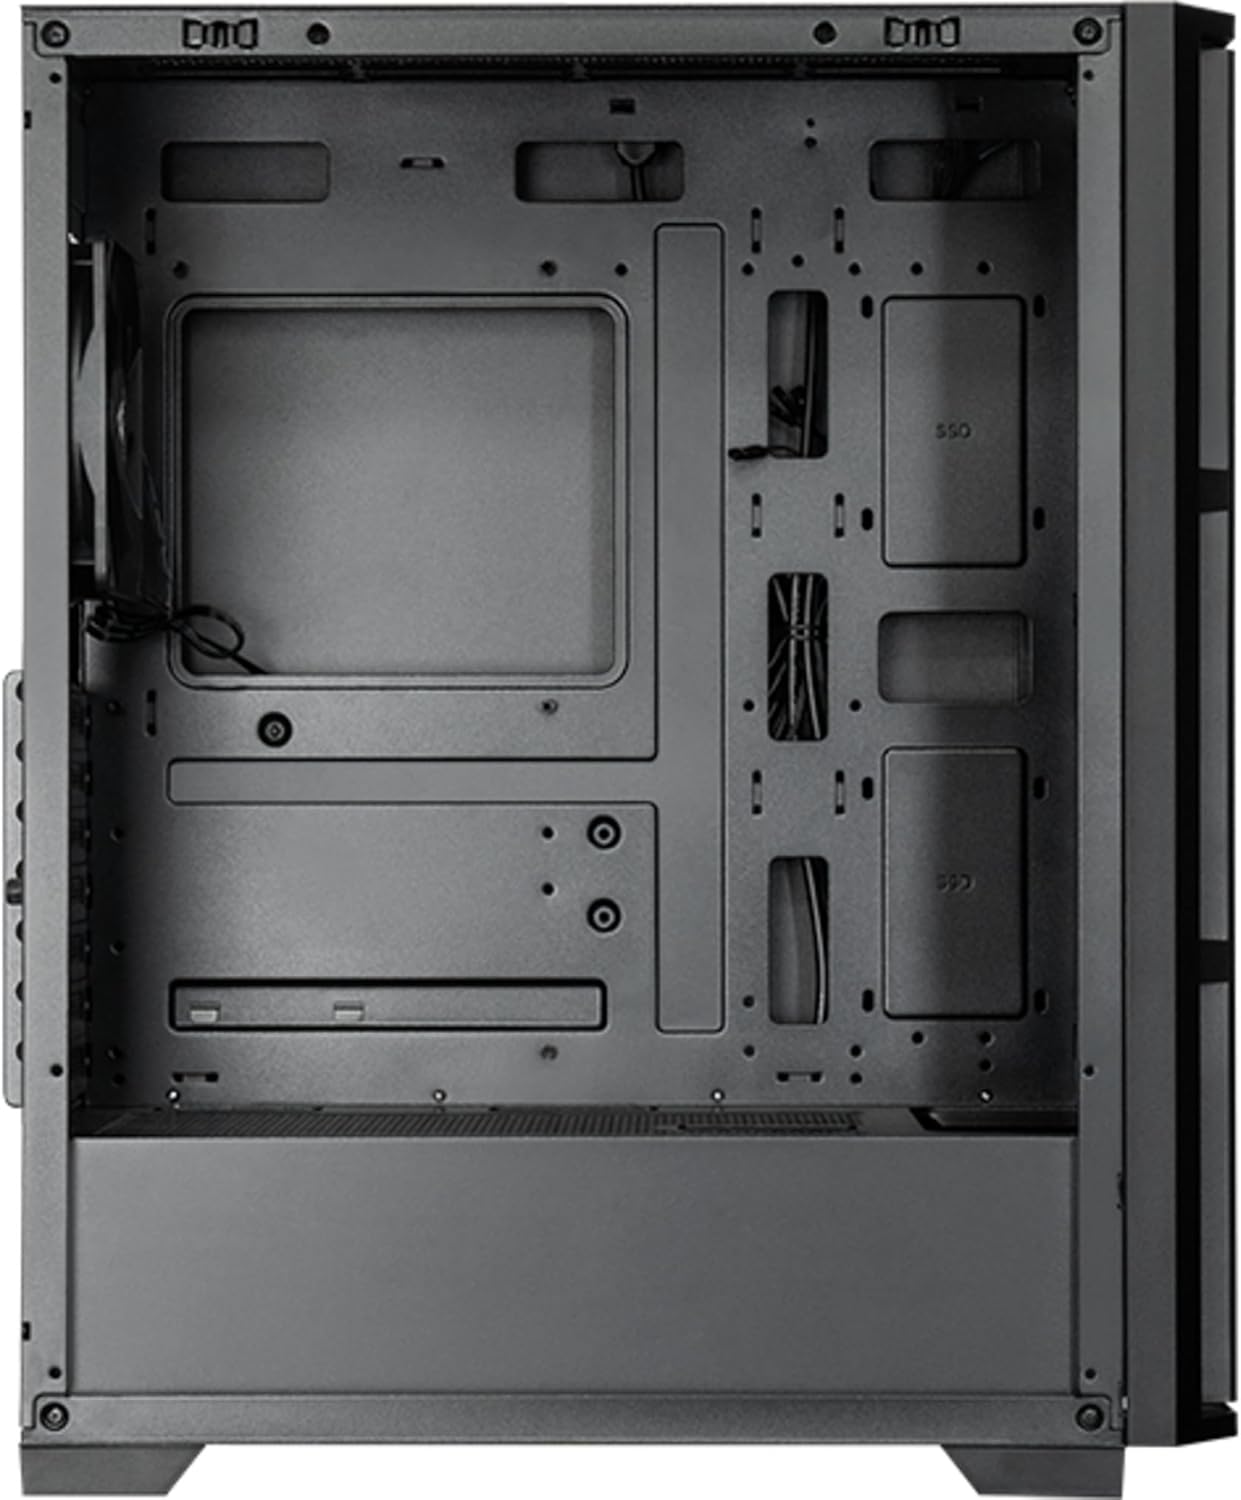
Figura 7: Interior view of the main compartment, showing the motherboard tray and fan mounting points.
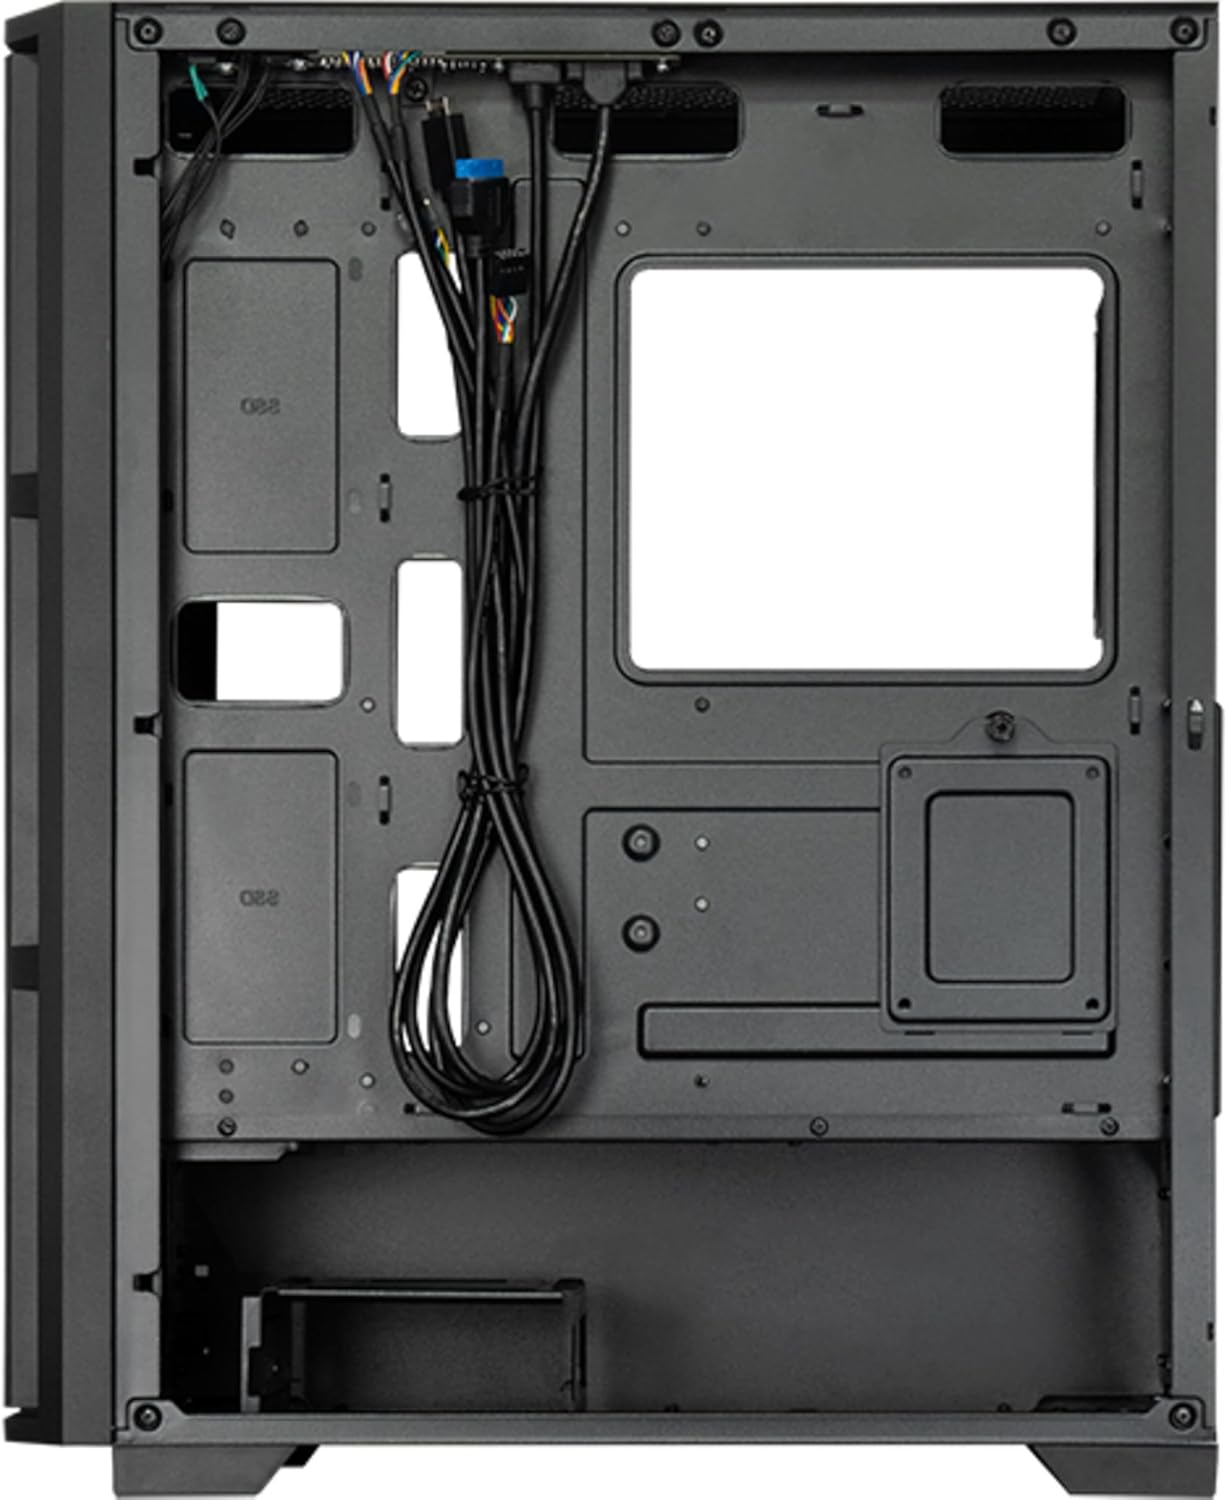
Figura 8: Interior view from the backside, illustrating the cable management routes and drive mounting locations.
2. Instalación de la placa base:
- Instale el protector de E/S en la abertura trasera de la carcasa.
- Align your ATX, micro ATX, or Mini-ITX motherboard with the standoffs inside the case.
- Asegure la placa base utilizando los tornillos provistos.
3. Power Supply Unit (PSU) Installation:
- The PSU is not included. Install your ATX power supply into the dedicated compartment at the bottom rear of the case.
- Asegure la fuente de alimentación con tornillos desde la parte trasera de la carcasa.
4. Storage Drive Installation:
- Install 3.5" HDDs into the drive cages located at the bottom.
- Install 2.5" SSDs/HDDs into the dedicated mounting points behind the motherboard tray.
- Secure all drives with appropriate screws.
5. Graphics Card and Expansion Cards:
- Retire las cubiertas de las ranuras de expansión necesarias en la parte trasera de la carcasa.
- Insert your graphics card or other expansion cards into the PCIe slots on the motherboard.
- Asegure las tarjetas con tornillos.
6. Gestión de cables:
- Route all power and data cables through the cutouts and tie-down points behind the motherboard tray.
- Connect the front panel I/O cables (USB, audio, power switch, reset switch, LED indicators) to the corresponding headers on your motherboard.
- Ensure cables do not obstruct airflow.
7. Instalación del ventilador y del sistema de refrigeración:
- The case includes one pre-installed 120mm PWM fan at the rear.
- Additional fans can be installed at the front (up to 3x 120mm/140mm) and top (up to 2x 120mm/140mm).
- Radiators up to 360mm can be installed at the front and up to 280mm at the top.
- Connect fan power cables to the motherboard fan headers.
Instrucciones de funcionamiento
Once all components are installed and secured, and the side panels are reattached, your PC is ready for operation.
Encendido:
- Conecte el cable de alimentación de la fuente de alimentación a una toma de pared.
- Press the power button located on the top I/O panel of the case.
- The system should boot up, and any installed lighting will illuminate.
Front I/O Panel Usage:
- Puertos USB 2.0 (x2): For connecting peripherals such as keyboards, mice, and USB drives.
- Puerto USB tipo C (x1): Para conectar dispositivos USB-C modernos.
- Conectores de audio (auriculares/micrófono): Para conectar auriculares, altavoces o micrófonos.
- Botón de reinicio: Para reiniciar el ordenador.
Mantenimiento
El mantenimiento regular ayuda a garantizar un rendimiento óptimo y extiende la vida útil de los componentes de su PC.
Limpieza:
- Exterior: Utilice un paño suave y seco.amp Paño para limpiar las superficies exteriores. Evite los limpiadores abrasivos.
- Filtros de polvo: The case features dust filters (e.g., on the top and bottom). Regularly remove and clean these filters with compressed air or by rinsing with water (ensure they are completely dry before reinstallation).
- Interior: Periodically use compressed air to remove dust buildup from fans, heatsinks, and other internal components. Ensure the system is powered off and unplugged before cleaning the interior.
Flujo de aire:
- Ensure adequate space around the case for proper airflow.
- Evite bloquear las aberturas de ventilación.
Solución de problemas
Esta sección aborda problemas comunes que podrías encontrar.
Sin energía:
- Compruebe si el cable de alimentación está conectado de forma segura tanto a la fuente de alimentación como a la toma de pared.
- Ensure the power switch on the PSU itself is in the "ON" position.
- Verifique que el cable del interruptor de encendido del panel frontal esté conectado correctamente al encabezado de la placa base.
Los ventiladores no giran:
- Check if fan power cables are securely connected to the motherboard fan headers or a fan controller.
- Ensure fan speed settings in BIOS/UEFI or operating system are not set to zero RPM.
El USB/audio del panel frontal no funciona:
- Verify that the USB and audio cables from the front panel are correctly connected to the corresponding headers on the motherboard.
- Check motherboard drivers for USB and audio functionality.
Presupuesto
| Característica | Detalle |
|---|---|
| Nombre del modelo | AS-02B-TG-OP |
| Marca | Jefe Tecnico |
| Factor de forma | Torre Midi |
| Color del producto | Negro |
| Factores de forma de placa base compatibles | ATX, micro ATX, Mini-ITX |
| Dimensiones (An x Pr x Al) | 215 mm x 390 mm x 485 mm (8.46" x 15.35" x 19.09") |
| Peso del artículo | 5.3 kg (aproximadamente 11.68 libras) |
| 3.5" Expansion Bays | 2 |
| 2.5" Expansion Bays | 2 |
| 5.25" Expansion Bays | 0 |
| Ranuras de expansión | 7 |
| Ventana lateral | Yes (Tempered Glass) |
| Iluminación | Yes (Multi-color) |
| Altura máxima del enfriador de CPU | 16.5 centímetros |
| Puertos de E / S frontales | 2x USB 2.0, 1x USB Type-C, Audio In/Out |
| Ventiladores preinstalados | 1x 120mm PWM (Rear) |
| Supported Front Fans (Max) | 3 x 120 mm o 3 x 140 mm |
| Supported Top Fans (Max) | 2 x 120 mm o 2 x 140 mm |
| Supported Front Radiators | 120 mm, 140 mm, 240 mm, 280 mm, 360 mm |
| Supported Top Radiators | 120 mm, 140 mm, 240 mm, 280 mm |
| Fuente de alimentación incluida | No |
Información de garantía
The Chieftec AS-02B-TG-OP PC case comes with a Garantía del fabricante de 2 años from the date of purchase. This warranty covers defects in materials and workmanship under normal use. It does not cover damage caused by misuse, accident, modification, unauthorized repair, or improper installation.
Conserve su comprobante de compra para reclamos de garantía.
Apoyo
For technical assistance, troubleshooting beyond this manual, or warranty inquiries, please contact Chieftec customer support.
- Websitio: Refer to the official Chieftec webSitio para recursos de soporte e información de contacto.
- Correo electrónico/Teléfono: Specific contact details can typically be found on the product packaging or the official Chieftec support page.
When contacting support, please have your product model (AS-02B-TG-OP) and proof of purchase readily available.