
1. Introducción
This manual provides detailed instructions for the installation, operation, and maintenance of your ANNKE H1200 12MP Security Camera System. Please read this manual thoroughly before using the product to ensure proper setup and functionality. Keep this manual for future reference.
2. ¿Qué hay en la caja?
Verifique que todos los componentes estén presentes en su paquete:
- 1 x H1200 12MP Bullet PoE Kit (NVR)
- 2 x 8MP Dual Lens PoE Camera
- 2 x 100ft PoE Cat5 Cable
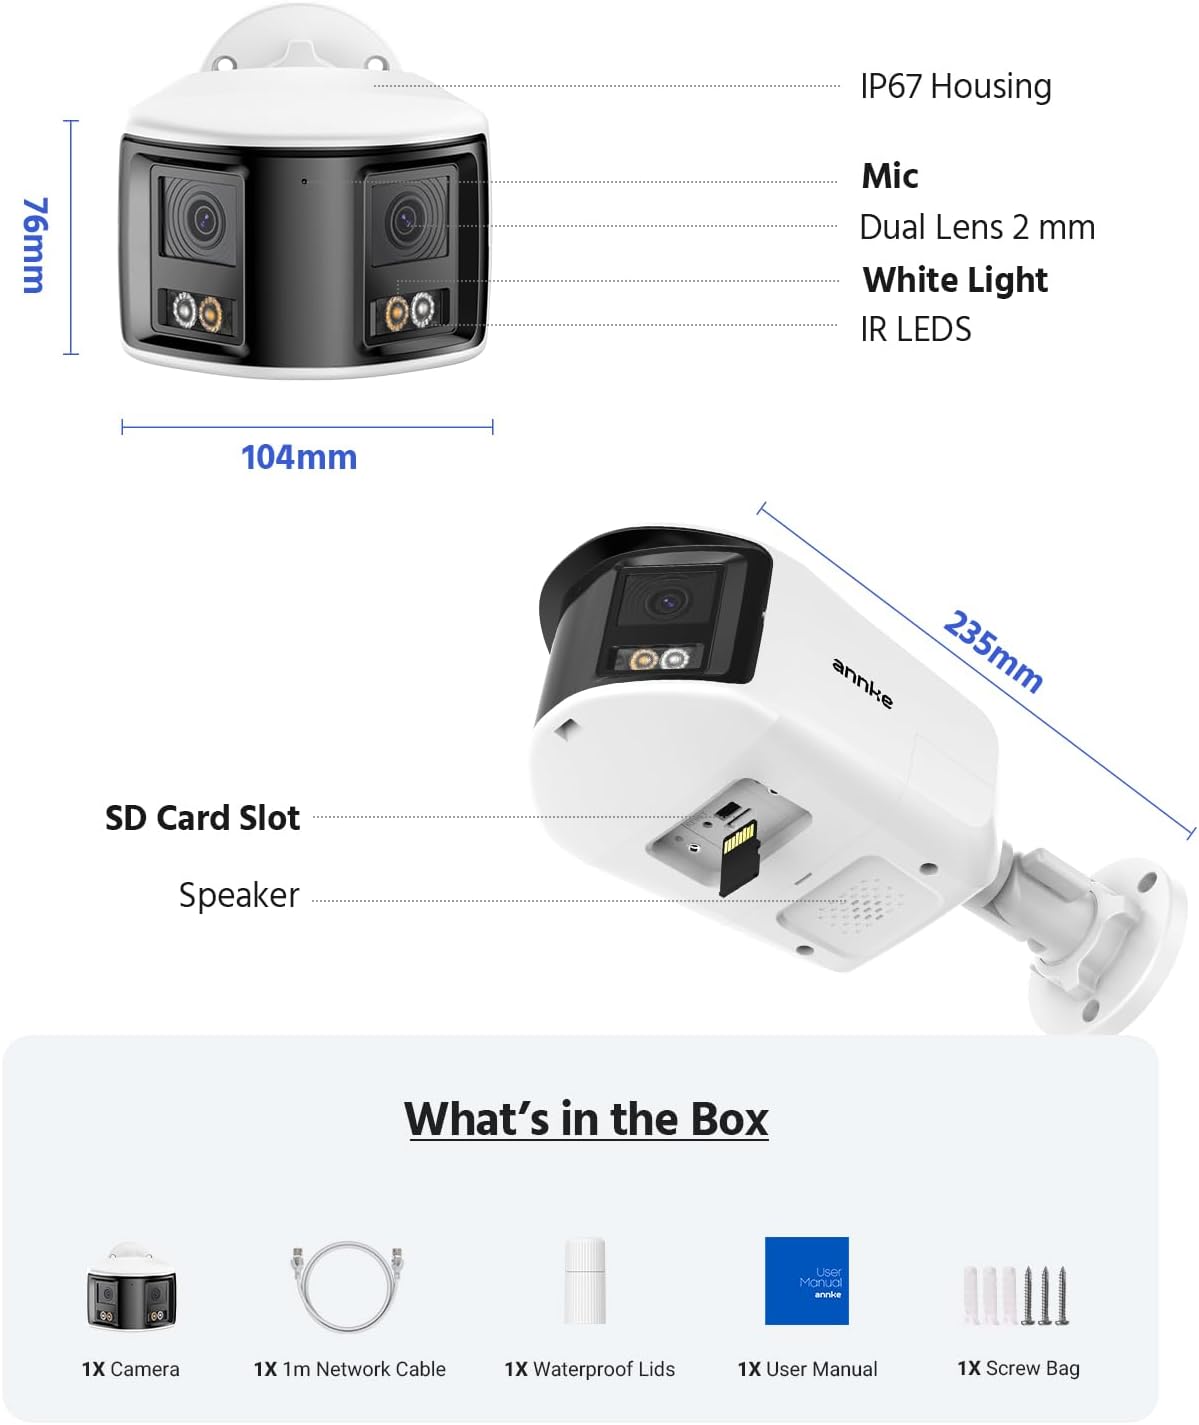
Figure 2.1: Package Contents. This image displays the NVR, two dual-lens cameras, two 100ft PoE cables, a user manual, and a screw bag.
3. Características del producto
3.1. 12MP UHD Clarity
Experience superior image quality with 12-megapixel Ultra High Definition resolution, providing clear and detailed surveillance footage para mayor seguridad.

Figure 3.1: 12MP UHD Clarity. This image demonstrates the high resolution, showing a wide shot of a backyard with a child and a magnified inset highlighting the detail.
3.2. Intelligent Motion Detection
The system features advanced motion detection capable of distinguishing between humans and vehicles, reducing false alarms and providing more relevant alerts via push notifications, email, or buzzer.

Figure 3.2: Intelligent Motion Detection. This image shows the system identifying a human and a vehicle, with options for push notifications, email alerts, and a buzzer.
3.3. Fácil acceso remoto
Monitor your property from anywhere, anytime, using various devices such as smartphones, tablets, and computers. The system supports remote viewing for convenient surveillance.

Figure 3.3: Easy Remote Access. This collage demonstrates viewing live camera feeds on a tablet, laptop, and smartphone, emphasizing accessibility from any location.
3.4. Three Night Vision Modes
The cameras offer three distinct night vision modes: Full Color Mode for vivid nighttime images, IR Night Mode for traditional black and white infrared viewing, and Motion Detected Color Mode which activates color vision upon detecting movement.

Figure 3.4: Three Night Vision Modes. This image displays examples of Full Color, IR, and Motion Detected Color night vision, with a camera unit at the bottom.
3.5. 180 Ultra-Wide ViewEn
Equipped with dual lenses, the cameras provide a 180-degree ultra-wide viewing angle, eliminating blind spots and offering comprehensive coverage of your surveillance area.
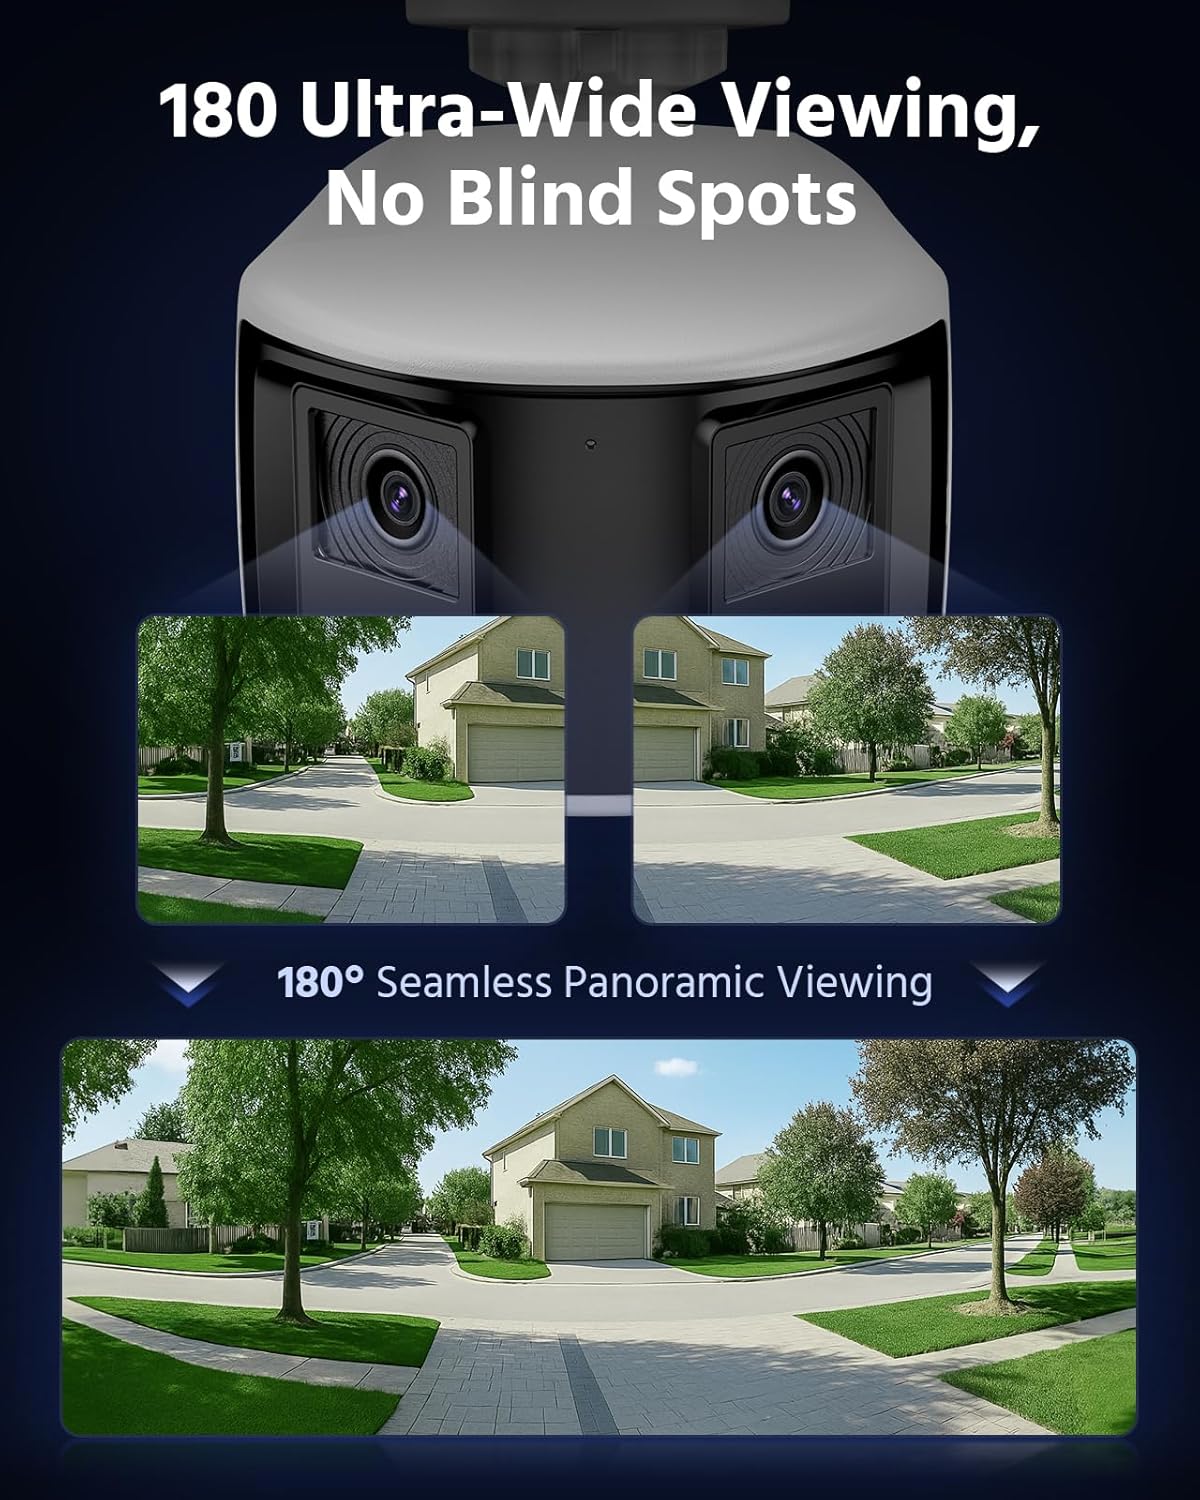
Figure 3.5: 180 Ultra-Wide Viewing. This image illustrates how the dual lenses combine to create a seamless 180-degree panoramic view, covering a wide area without blind spots.
3.6. 4K Ultra HD Visual
The system delivers 4K Ultra HD visuals at 4096x1860 resolution at 20 frames per second, featuring an F1.6 aperture and Dual-Light Color technology for exceptional detail and color reproduction.
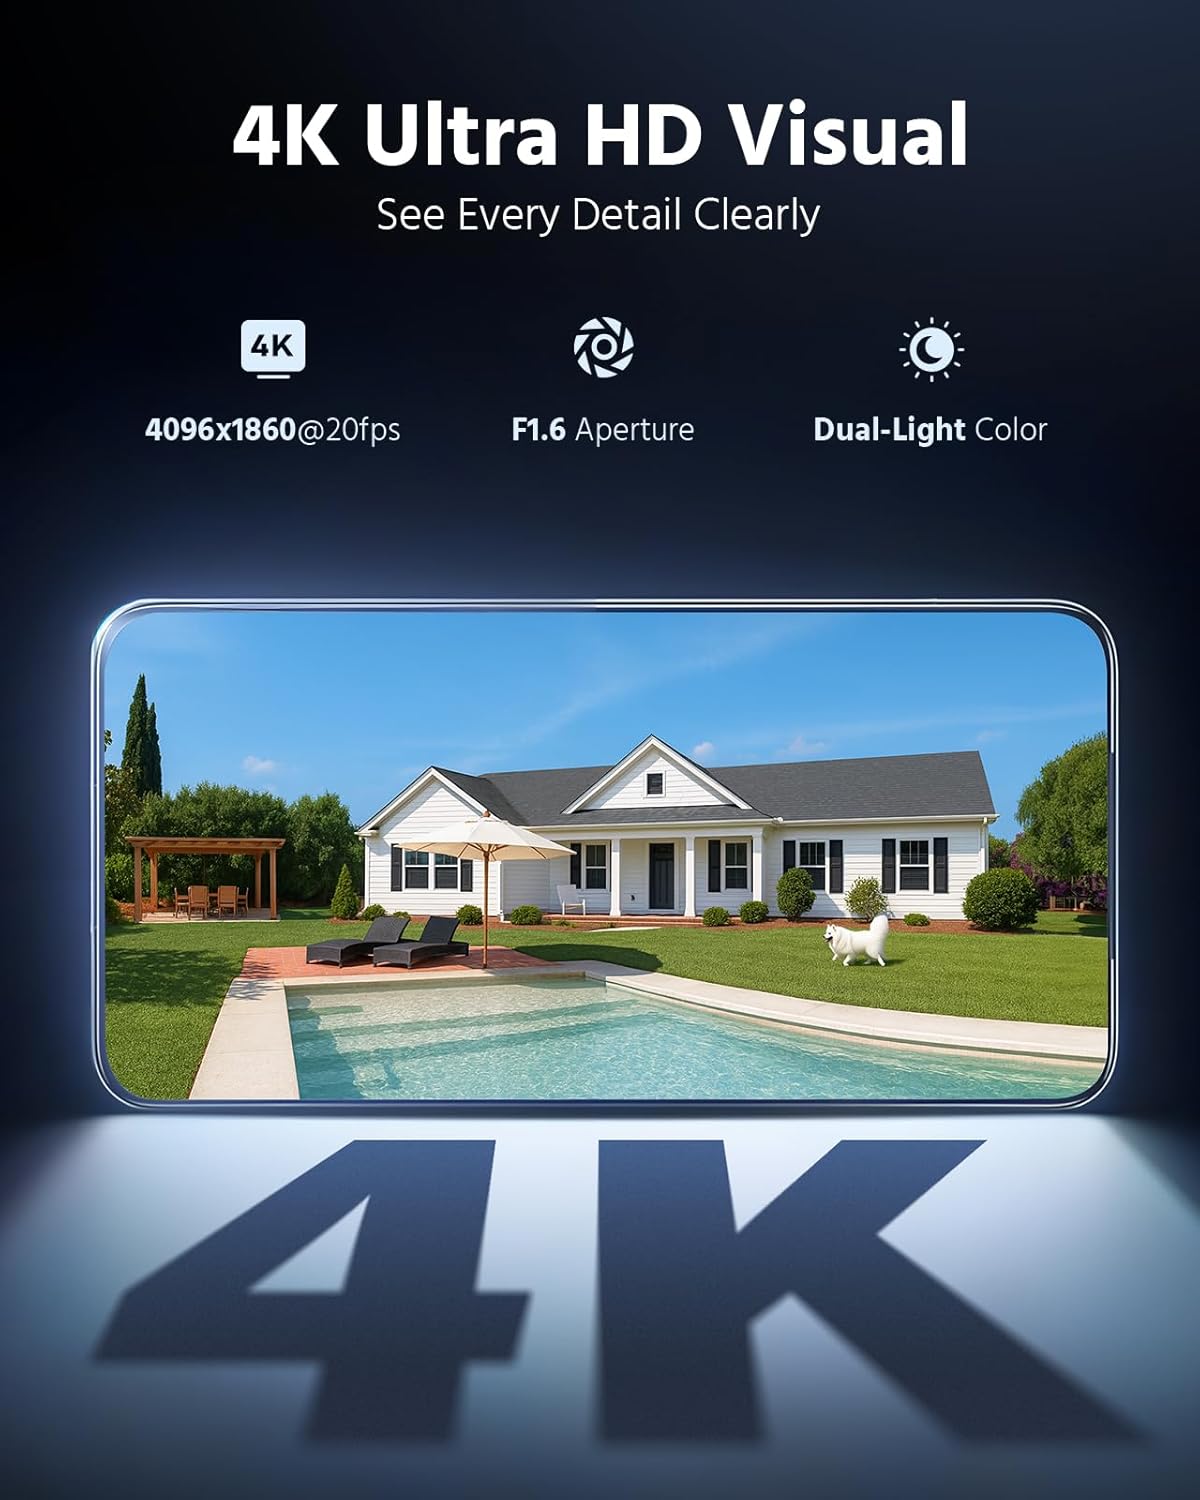
Figure 3.6: 4K Ultra HD Visual. This image showcases the high-resolution video quality, detailing an outdoor scene and listing key specifications like resolution, frame rate, aperture, and Dual-Light Color.
3.7. 3 Modes for Smart Security
The cameras offer three smart security modes: Color Mode for continuous color night vision, IR Mode for standard infrared black and white, and Smart Dual-Light Triggered Mode which switches to color upon motion detection.
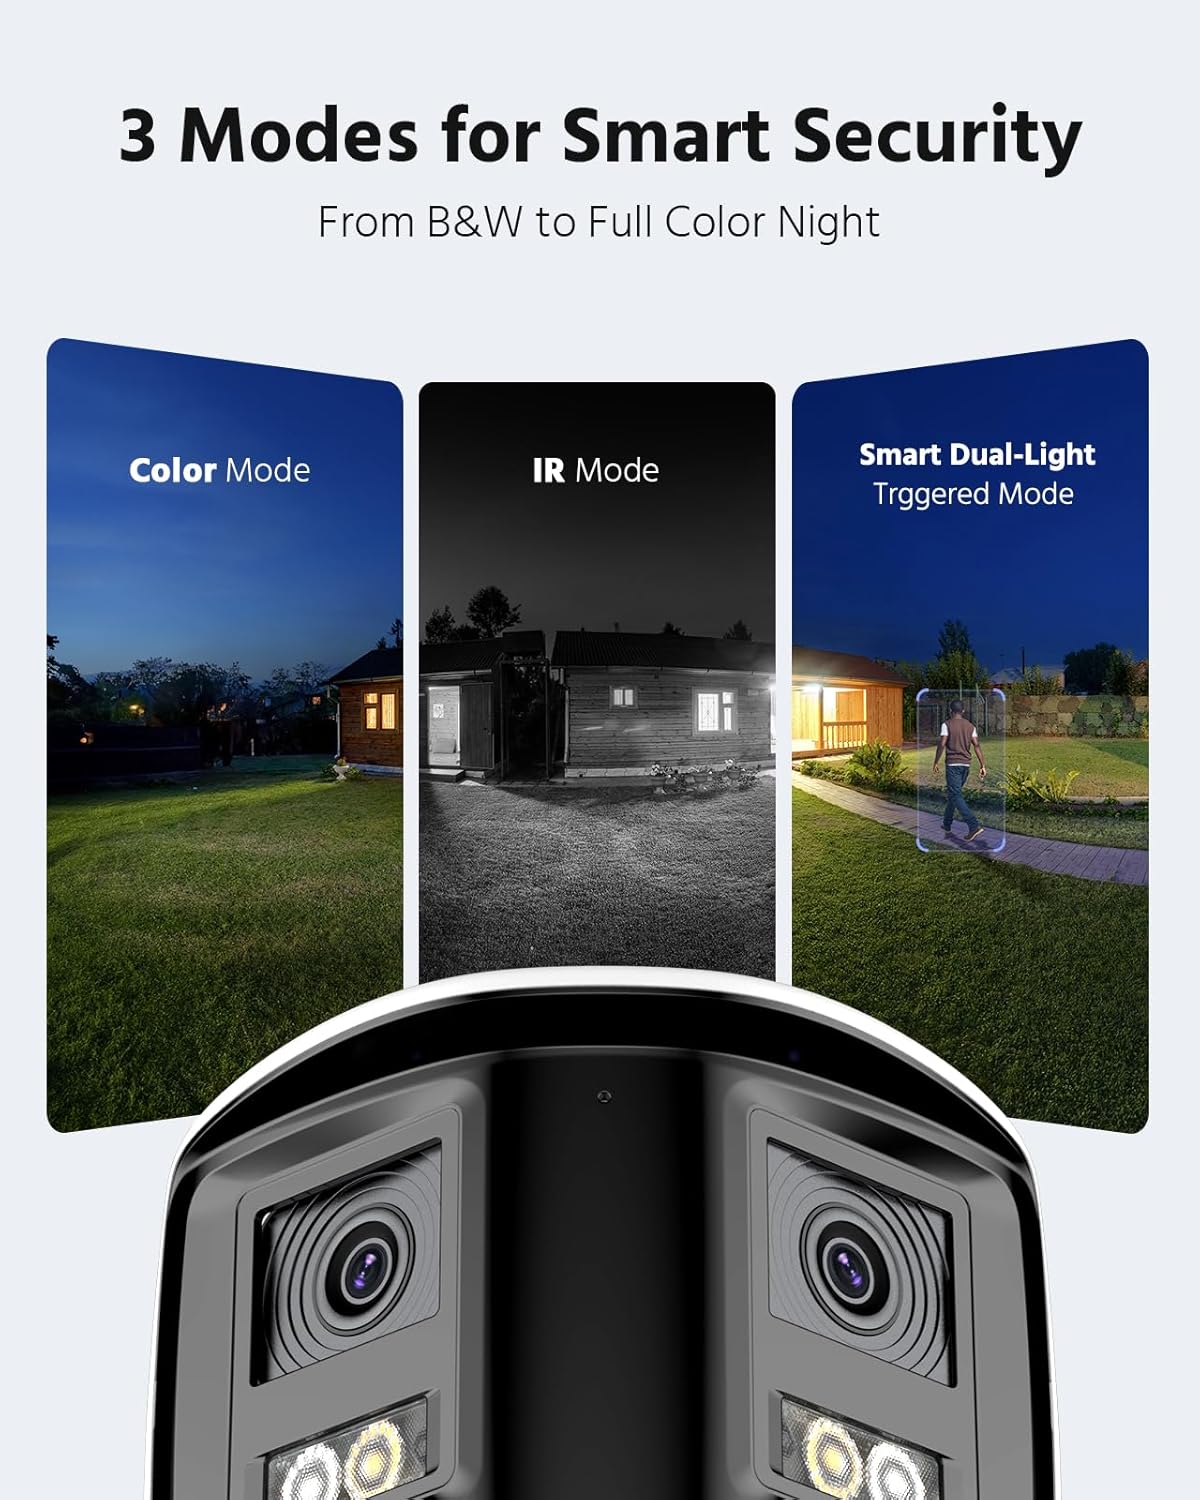
Figure 3.7: 3 Modes for Smart Security. This image illustrates the different night vision capabilities: Color Mode, IR Mode, and Smart Dual-Light Triggered Mode, with the camera unit shown below.
3.8. Camera Dimensions
The dual-lens cameras are designed with an IP67 housing for weather resistance, include a built-in microphone, dual 2mm lenses, white light illuminators, and IR LEDs. They also feature an SD card slot and a speaker.
Figure 3.8: Camera Dimensions and Features. This diagram provides the physical dimensions of the camera and highlights its key components including the IP67 housing, microphone, dual lenses, white light, IR LEDs, SD card slot, and speaker.
4. Configuración del sistema
4.1. Conexión NVR
- Conecte el NVR a una fuente de alimentación utilizando el adaptador de corriente provisto.
- Conecte el NVR a su enrutador mediante un cable Ethernet para acceder a la red.
- Connect a monitor to the NVR's HDMI or VGA port for initial setup and local viewEn.
- Conecte un mouse USB al NVR para navegar.
4.2. Instalación y conexión de la cámara
- Monte las cámaras en las ubicaciones deseadas, garantizando una óptima viewángulos y cobertura.
- Connect each PoE camera to an available PoE port on the NVR using the provided Cat5 Ethernet cables. The NVR will supply power and data to the cameras.
- Asegúrese de que todas las conexiones de cables estén seguras y protegidas de los elementos ambientales.
4.3. Configuración inicial
- Follow the on-screen prompts on the connected monitor to complete the NVR's initial setup wizard, including setting up a password and network settings.
- The NVR should automatically detect and add the connected PoE cameras. If not, refer to the NVR's specific manual for manual camera addition.
5. Operación del sistema
5.1. Vivir View
Accede al directo view on your connected monitor or through the ANNKE VISION mobile app/client software to see real-time footage from all cameras.
5.2. Reproducción
Review comida grabadatage by selecting the desired date and time. Use the timeline to navigate through recordings and identify specific events.
5.3. Configuración de detección de movimiento
Configure motion detection settings via the NVR interface or mobile app. Adjust sensitivity, define detection zones, and set up notification preferences (push, email, buzzer).
5.4. Acceso remoto
Download the ANNKE VISION app from your device's app store. Register an account and add your NVR by scanning the QR code or entering its serial number. This enables remote viewing y control.
5.5. Modos de visión nocturna
The cameras automatically switch between day and night modes. You can configure specific night vision preferences (Full Color, IR, Smart Dual-Light) through the NVR settings or camera-specific settings in the app.
6. Mantenimiento
6.1. Limpieza
Limpie periódicamente las lentes de la cámara con un paño suave y húmedo.amp Paño para garantizar una imagen nítida. No utilice productos químicos agresivos ni materiales abrasivos.
6.2. Actualizaciones de firmware
Check for and install firmware updates for both the NVR and cameras periodically. Firmware updates often include security enhancements, bug fixes, and new features. Refer to the ANNKE websitio o aplicación para obtener instrucciones de actualización.
6.3. Inspección de cables
Periodically inspect all cables for any signs of wear, damage, or loose connections. Ensure waterproof connections remain sealed.
7. Solución de problemas
7.1. No se muestra el vídeo
- Verifique las conexiones de energía tanto del NVR como de las cámaras.
- Verify Ethernet cable connections between cameras and NVR, and NVR and router.
- Ensure the monitor is correctly connected to the NVR and set to the correct input source.
- Reinicie el NVR y las cámaras.
7.2. Problemas de acceso remoto
- Asegúrese de que el NVR esté conectado a Internet.
- Verifique la conexión a Internet de su dispositivo móvil.
- Verify that the NVR is properly added to the ANNKE VISION app and is online.
- Check firewall settings on your router if you are experiencing connection blocks.
7.3. La detección de movimiento no funciona
- Review motion detection settings in the NVR or app, ensuring it is enabled and sensitivity is appropriate.
- Check the defined detection zones to ensure they cover the desired areas.
- Ensure notification settings are correctly configured.
8. Especificaciones
| Característica | Especificación |
|---|---|
| Marca | ANNKE |
| Tecnología de conectividad | Cableado |
| Resolución de captura de video | 4000x3000 (12MP) |
| Dispositivos compatibles | Cámaras |
| Velocidad de cuadros | 15 FPS |
| Modo de grabación | Continuo |
| Interfaz de hardware | Ethernet |
| Tipo de lente | Fixed, Varifocal (Dual Lens) |
| Entrada de vídeo | RJ45 (PoE) |
| Formato de señal | Digital |
| Tecnología de sensores ópticos | CMOS |
| ASIN | B0FS5YL8TZ |
9. Garantía y soporte
Para obtener información sobre la garantía, asistencia técnica o consultas de servicio, consulte el sitio web oficial de ANNKE. website or contact ANNKE customer support directly. Keep your purchase receipt as proof of purchase for warranty claims.
ANNKE oficial Websitio: www.annke.com