
1. Introducción
Gracias por la compraasing the ThermoPro TP210B Wireless Refrigerator/Freezer Thermometer. This device is designed to help you monitor the temperature of your refrigerator and freezer wirelessly, ensuring your food is stored at optimal temperatures. With a strong 500ft/150m wireless range and customizable alarms, you can easily keep track of temperature fluctuations.
2. Contenido del paquete
- 1 x unidad receptora
- 1 x unidad transmisora
- 2 pilas AAA (para el receptor)
- 1 x USB Charging Cable (for Transmitter)
- 1 x Manual de usuario
3. Características principales
- Alcance inalámbrico extendido: Up to 500ft/150m using advanced RF technology for stable connection.
- Pre-Paired for Immediate Use: No complex setup required; units are pre-paired from the factory.
- Amplio rango de medición: Accurate readings within ±0.9°F across -40°F to 158°F (-40°C to 70°C).
- Smart Temperature Alerts: Customizable high/low temperature limits with audio-visual alarms.
- Easy-to-Read Backlit Display: Shows fridge and freezer readings, Max/Min records, and low-battery status.
- Considerate Power Design: Receiver uses AAA batteries, transmitter features a rechargeable lithium battery.
- Opciones de ubicación flexibles: Receiver has hook, stand, or magnet; transmitter has clip or stand.
4. Configuración
4.1. Instalación de la batería del receptor
- Abra el compartimiento de la batería en la parte posterior de la unidad receptora.
- Inserte 2 pilas AAA, asegurándose de la polaridad correcta (+/-).
- Cierre bien el compartimento de la batería.
Note: The receiver requires 2 AAA batteries, which are included in the package.
4.2. Transmitter Charging
- Locate the charging port on the transmitter unit.
- Connect the provided USB charging cable to the transmitter and a standard USB power source (e.g., wall adapter, computer USB port).
- Allow the transmitter to charge fully before first use. The charging indicator will change when fully charged.
Note: The transmitter uses a rechargeable lithium battery designed for low-temperature environments.
4.3. Initial Pairing (Pre-Paired)
The ThermoPro TP210B units are pre-paired at the factory. Simply power on both the receiver and transmitter, and they should automatically connect. If connection issues occur, refer to the Troubleshooting section.
4.4 Colocación
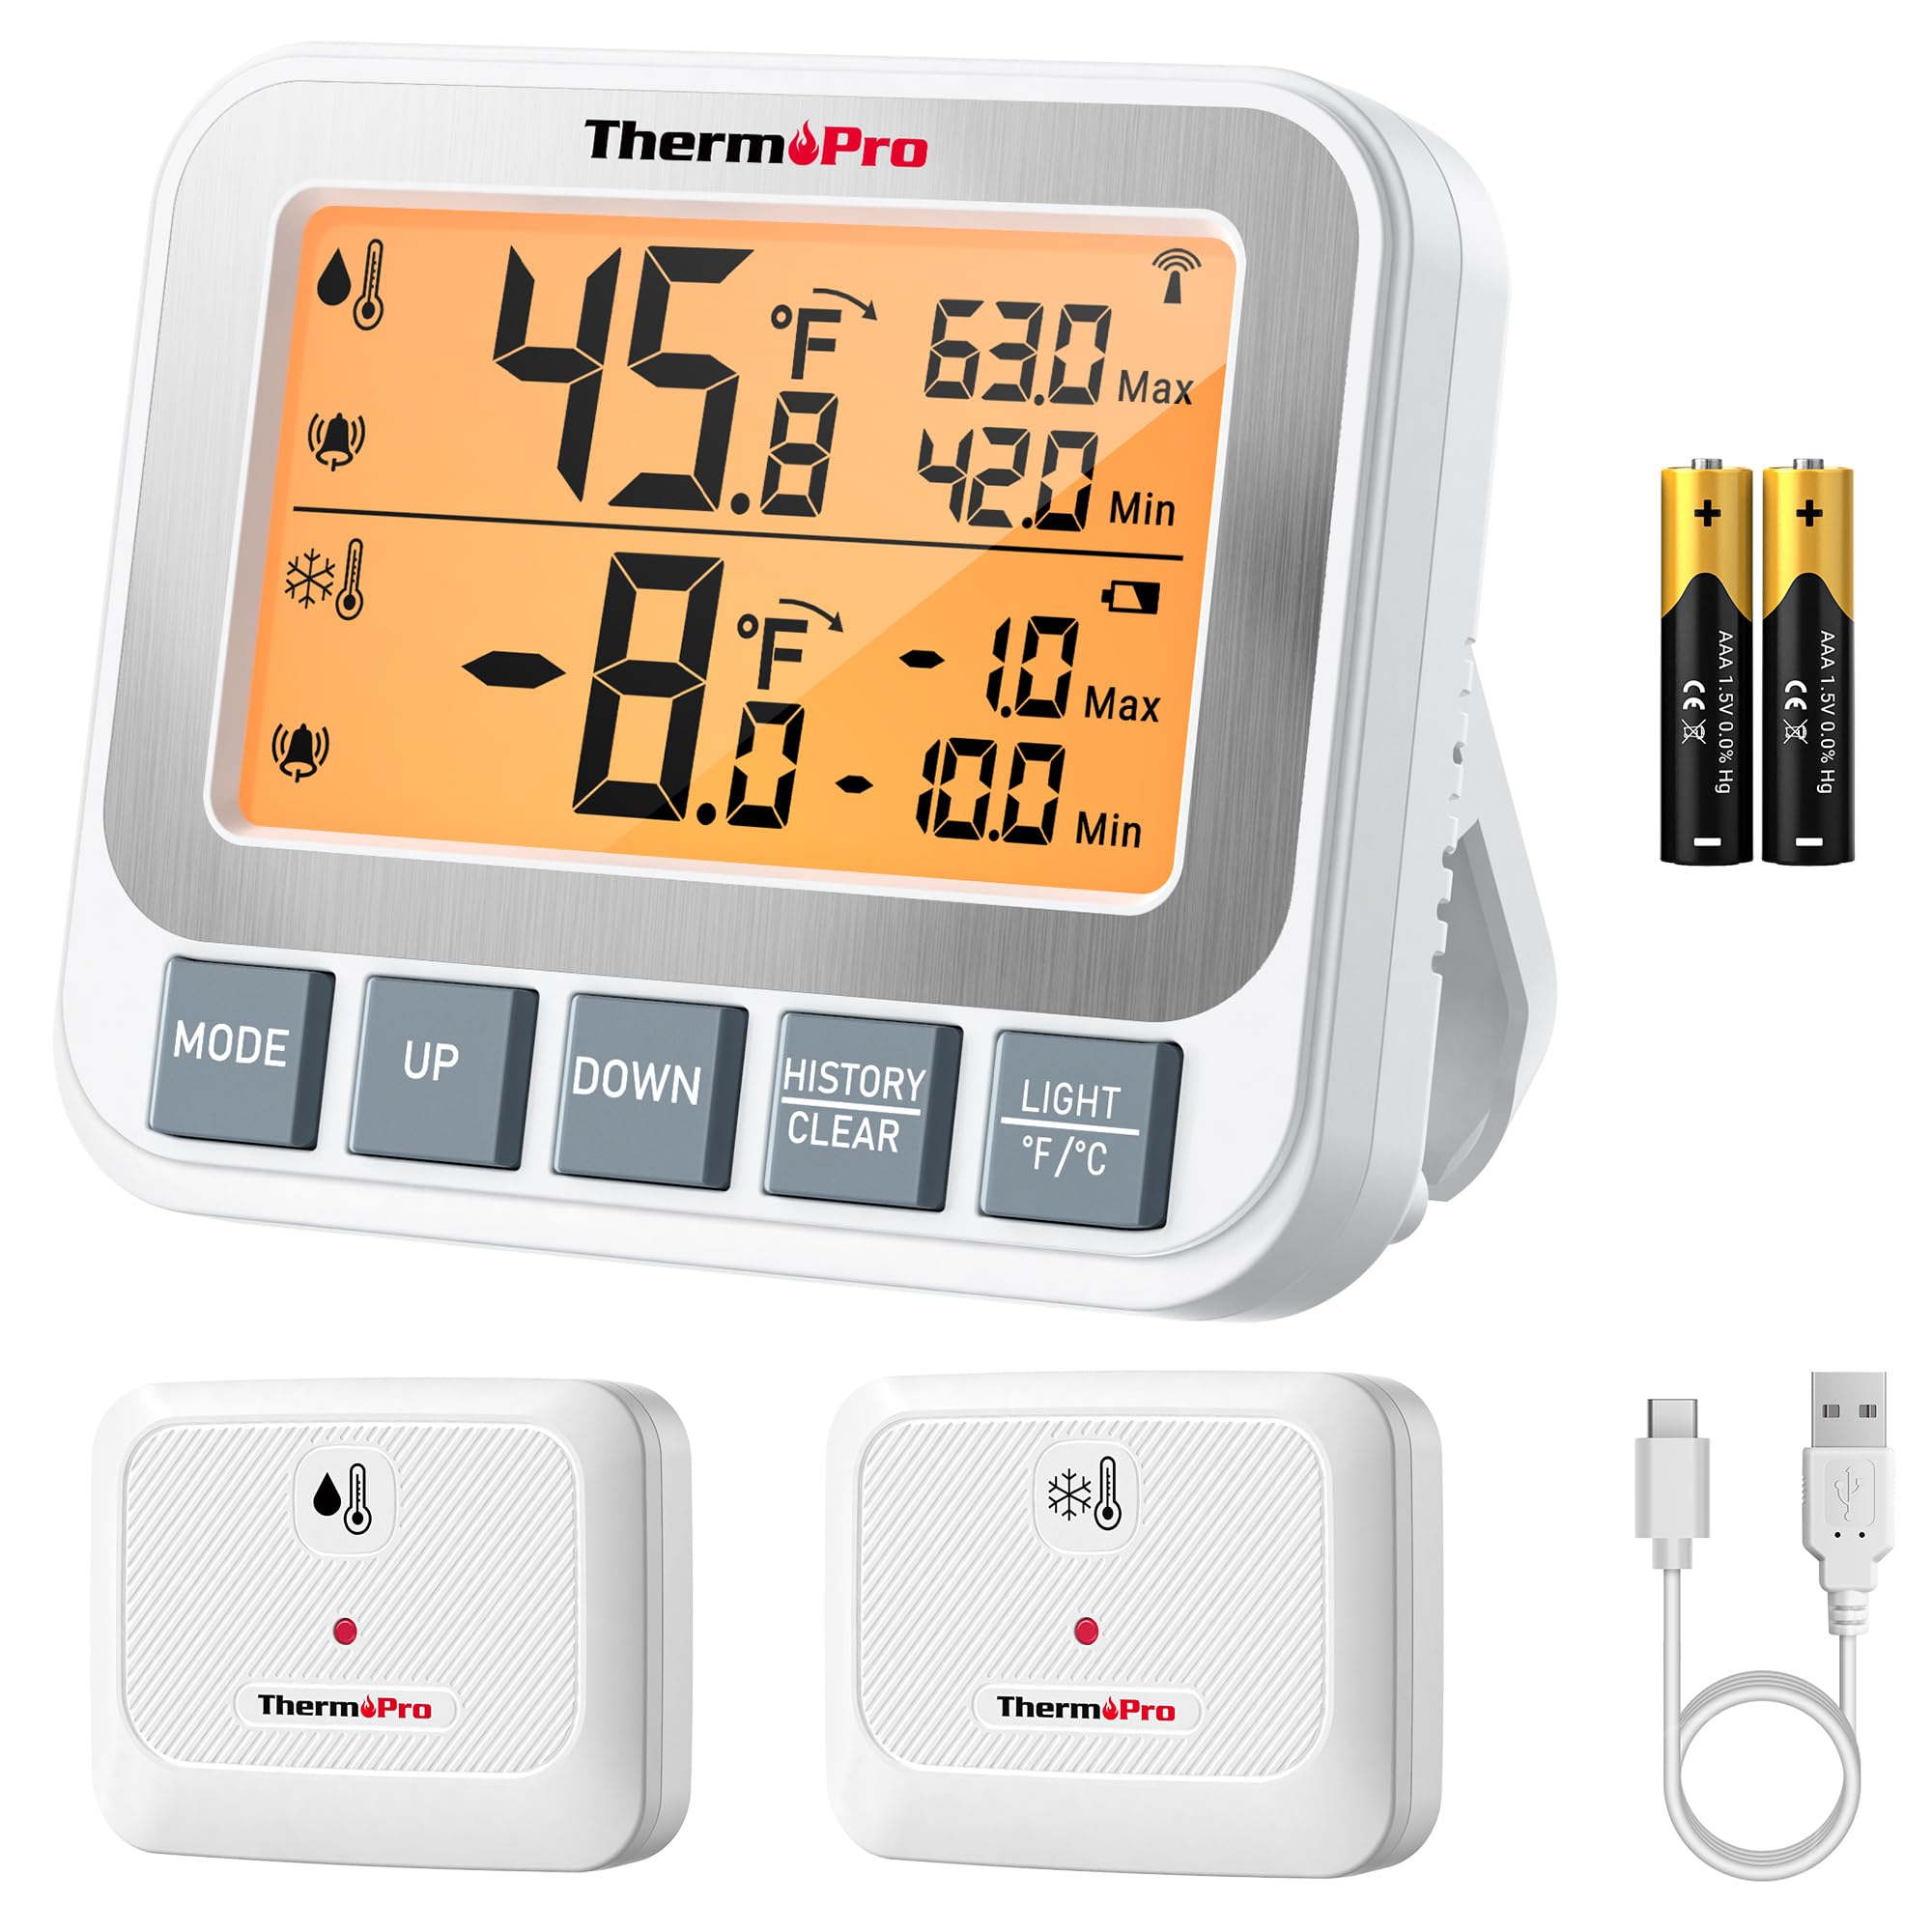
Image: ThermoPro TP210B Receiver and Transmitter. The receiver displays temperatures, while the transmitter sends data from inside the appliance.
Colocación del receptor:
- Use the integrated stand to place it on a countertop.
- Utilize the magnetic back to attach it to a metallic surface.
- Hang it using the hook on the back.
- Place the receiver in a location where you can easily view the display and hear alarms, within the 500ft/150m range of the transmitter.
Ubicación del transmisor:
- Place the transmitter inside your refrigerator or freezer.
- Use the integrated clip to attach it to a shelf or rack.
- Ensure the transmitter is not obstructed by large items that could block the wireless signal.
5. Instrucciones de funcionamiento
5.1. Encendido y apagado
- Presione el FUERZA button on both the receiver and transmitter to turn them on or off.
5.2. Lectura de temperaturas
- The receiver's backlit LCD display will show the current temperature from the transmitter.
- The display typically shows both the current temperature and the all-time Max/Min records.
5.3. Configuración de alarmas de temperatura
The TP210B allows you to set custom high and low temperature limits for alerts.
- Presione el ALERTA button on the receiver. The high limit will flash.
- Utilice el UP or ABAJO buttons to adjust the high temperature limit.
- Prensa ALERTA again to confirm the high limit and move to the low limit setting.
- Utilice el UP or ABAJO buttons to adjust the low temperature limit.
- Prensa ALERTA a third time to confirm the low limit and exit alarm setting mode.
When the temperature exceeds the set range, the receiver will emit an audio-visual alarm.
5.4. Max/Min Temperature Records
- The receiver automatically records the maximum and minimum temperatures detected since the last reset.
- Presione el MÁXIMO/MÍNIMO button to cycle through current, maximum, and minimum temperature readings.
- Para restablecer los registros Máx./Mín., mantenga presionado el botón MÁXIMO/MÍNIMO botón durante 3 segundos mientras viewing the Max/Min display.
5.5. Luz de fondo
- The receiver features a bright backlit display for easy reading in low-light conditions.
- The backlight will activate automatically when a button is pressed and will turn off after a short period of inactivity to conserve battery.
6. Mantenimiento
6.1. Limpieza
- Limpie las unidades con publicidadamp Paño. No sumergir en agua.
- No utilice limpiadores abrasivos ni disolventes.
6.2. Battery Replacement (Receiver)
- When the low battery indicator appears on the receiver display, replace the 2 AAA batteries.
- Ensure proper polarity when inserting new batteries.
6.3. Transmitter Charging
- Recharge the transmitter's lithium battery when the low battery indicator appears.
- Utilice el cable de carga USB proporcionado.
6.4. Almacenamiento
- If storing the device for an extended period, remove the AAA batteries from the receiver.
- Conservar en un lugar seco y alejado de temperaturas extremas.
7. Solución de problemas
| Problema | Posible causa | Solución |
|---|---|---|
| No temperature reading / "--" displayed | Transmitter not powered on, out of range, or low battery. |
|
| Lecturas de temperatura inexactas | Sensor obstruction, extreme environmental conditions, or sensor malfunction. |
|
| Las alarmas no suenan | Alarm limits not set correctly or alarm function disabled. |
|
| La batería del transmisor se agota rápidamente | Operating in extremely low temperatures or frequent signal transmission. |
|
8. Especificaciones
- Rango de temperatura: -40 °F a 158 °F (-40 °C a 70 °C)
- Precisión de temperatura: ± 0.9 ° F (± 0.5 ° C)
- Alcance inalámbrico: Hasta 500 pies (150 m) al aire libre
- Frecuencia de transmisión: 433 MHz
- Potencia del receptor: Baterías 2 x AAA (incluidas)
- Potencia del transmisor: Rechargeable Lithium battery (included, with USB charging cable)
- Mostrar: LCD retroiluminado
- Dimensiones (receptor): Aproximadamente 4.33 pulgadas (largo)
- Peso (Artículo): Aproximadamente 11.2 onzas
9. Garantía y soporte
ThermoPro ofrece una garantía para este producto contra defectos de materiales y mano de obra. Para obtener información detallada sobre la garantía, el registro del producto o asistencia técnica, visite el sitio web oficial de ThermoPro. websitio o comuníquese directamente con su servicio de atención al cliente.
Oficial Websitio: www.thermopro.com
Atención al cliente: Refer to the contact information provided on the ThermoPro websitio o embalaje del producto.