
1. Introducción
This instruction manual provides comprehensive guidance for the safe and effective use of your Elna eXplore 130 Mechanical Sewing Machine. Please read this manual thoroughly before operating the machine to ensure proper setup, operation, and maintenance. Retain this manual for future reference.
2. Instrucciones de seguridad importantes
Al utilizar un aparato eléctrico, siempre se deben seguir precauciones básicas de seguridad, incluidas las siguientes:
- Lea todas las instrucciones antes de usar esta máquina de coser.
- Mantenga los dedos alejados de todas las piezas móviles. Se requiere un cuidado especial alrededor de la aguja de la máquina de coser.
- Utilice siempre la placa de aguja adecuada. Una placa incorrecta puede provocar que la aguja se rompa.
- No utilice agujas dobladas.
- Apague la máquina de coser cuando realice cualquier ajuste en el área de la aguja, como enhebrar la aguja, cambiar la aguja, enhebrar la bobina o cambiar el prensatelas.
- Desenchufe siempre la máquina de coser del tomacorriente cuando retire las cubiertas, lubrique o haga cualquier otro ajuste de mantenimiento del usuario mencionado en el manual de instrucciones.
- Nunca deje caer ni inserte ningún objeto en ninguna abertura.
- No utilizar en exteriores.
- No lo utilice en lugares donde se utilicen productos en aerosol (spray) o se administre oxígeno.
- Para desconectar, gire todos los controles a la posición de apagado y luego retire el enchufe del tomacorriente.
- No desenchufe el aparato tirando del cable. Para desenchufarlo, sujete el enchufe, no el cable.
3. Producto terminadoview
The Elna eXplore 130 is a mechanical sewing machine designed for various sewing tasks, offering a selection of utility, stretch, and decorative stitches. It features a lightweight and portable design.
Características principales:
- 23 puntadas utilitarias, elásticas y decorativas incorporadas.
- One four-step buttonhole.
- Front Loading Vertical Oscillating Bobbin system.
- Free-arm sewing capability by removing the front accessory tray.
- Maximum stitch width: 5mm.
- Maximum stitch length: 4mm.
- Maximum sewing speed: 800 stitches per minute (SPM).
- LED lighting for improved visibility.
- Convenient dial system for stitch pattern, length, and width selection.
Componentes incluidos:
The following accessories are included with your Elna eXplore 130 sewing machine:
- Presser Feet: Standard Foot A, Zipper Foot E, Blind Hem Foot G, Buttonhole Foot.
- Darning plate.
- Bobbins (x3).
- Seam Ripper.
- Needle Set.
- Destornillador.
- Felt.
- Foot Controller.
- Manual de instrucciones (este documento).
Máquina Views:


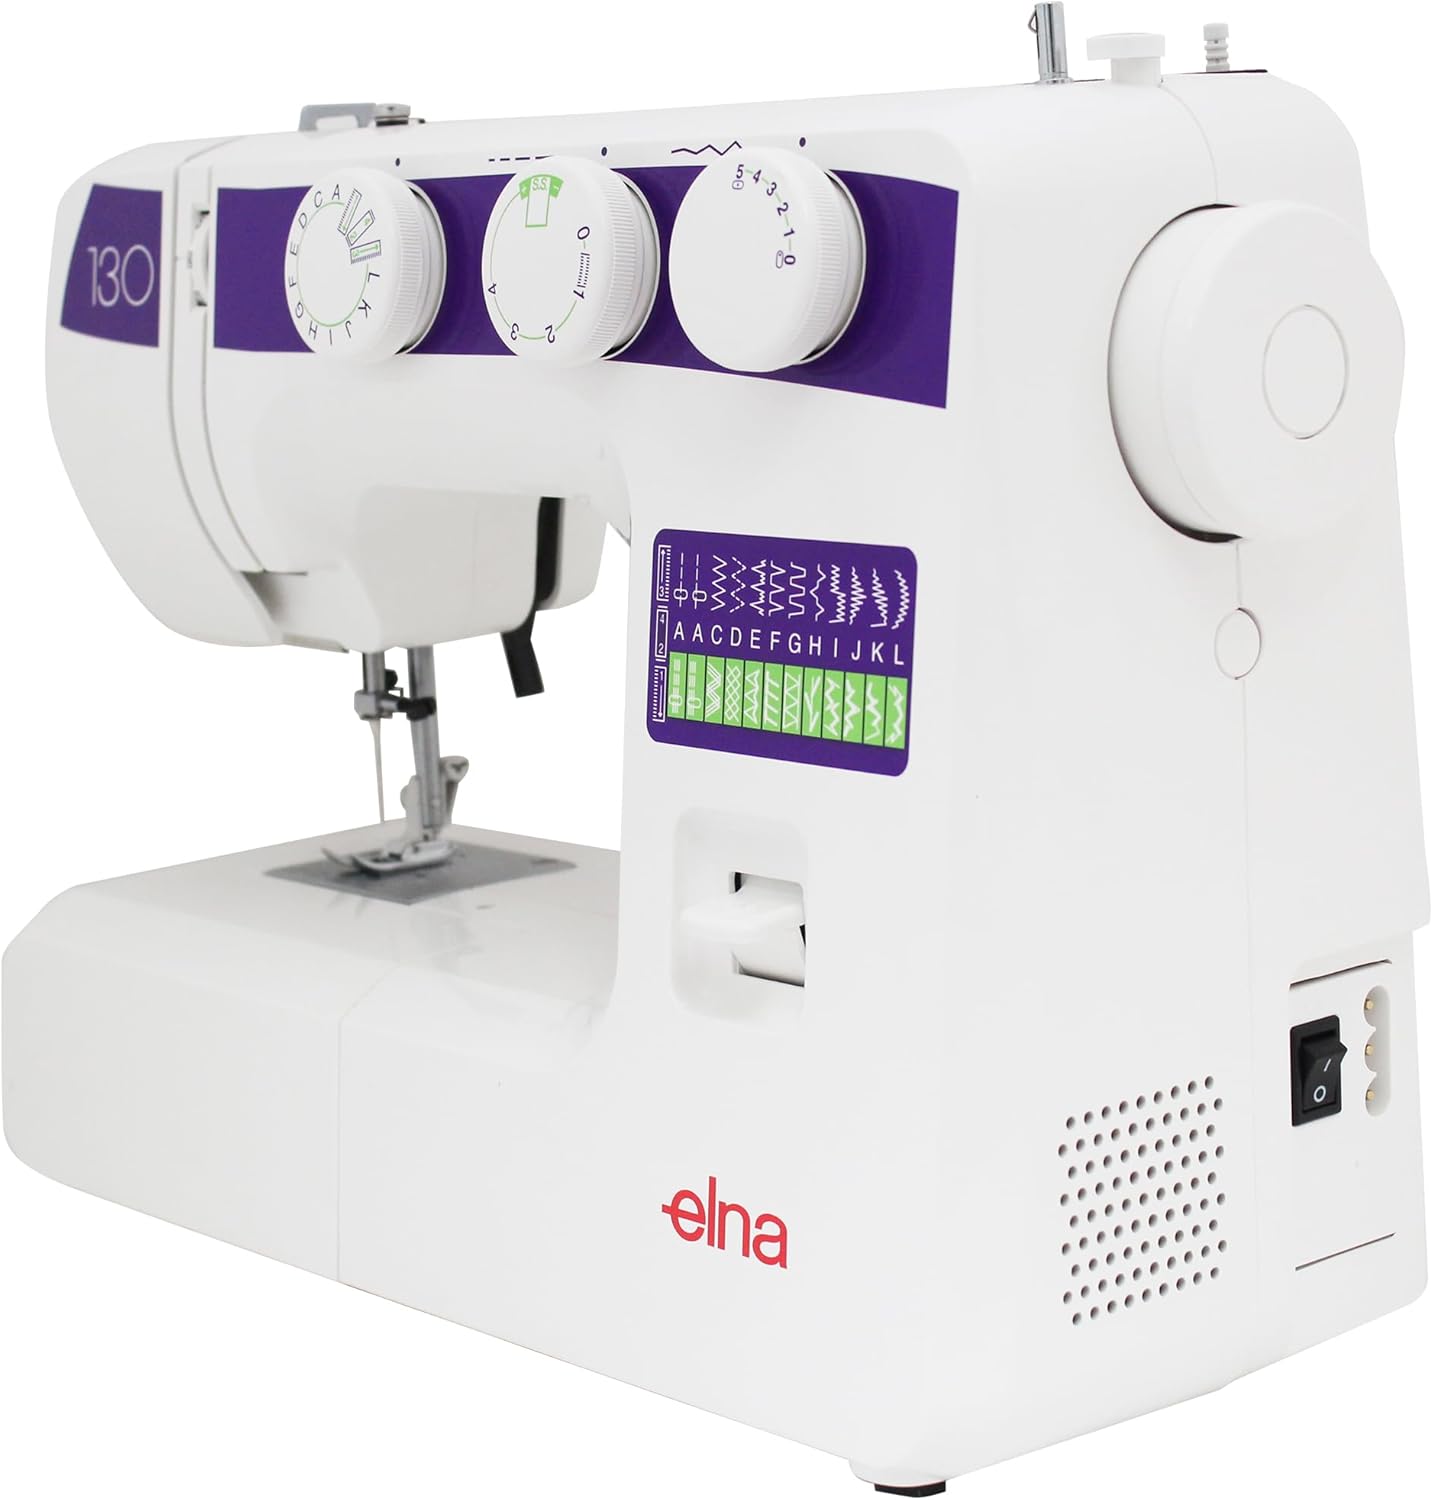


4. Configuración
4.1 Desembalaje y colocación
- Retire con cuidado la máquina de su embalaje.
- Coloque la máquina sobre una superficie plana y estable.
- Asegúrese de que haya iluminación y espacio adecuados para una operación cómoda.
4.2 Conexión de alimentación
- Conecte el enchufe del pedal a la toma de corriente de la máquina.
- Insert the power cord plug into a suitable electrical outlet.
- Ensure the power switch on the machine is in the "OFF" position before connecting.
4.3 Bobinado de la bobina
- Coloque una bobina vacía en el eje del bobinador.
- Guide the thread from the spool pin through the upper thread guide and around the bobbin winding tension disc.
- Enrolle el hilo unas cuantas veces alrededor de la bobina.
- Empuje el eje de la bobinadora hacia la derecha.
- Gently press the foot controller to start winding. Stop when the bobbin is full.
- Corte el hilo y empuje el eje del bobinador hacia la izquierda.
4.4 Inserción de la bobina
- Open the bobbin cover plate located on the free arm.
- Inserte la bobina enrollada en la caja de la bobina, asegurándose de que el hilo se desenrolle en la dirección correcta (generalmente en sentido contrario a las agujas del reloj).
- Pase el hilo a través del resorte de tensión hasta la ranura de la caja de la bobina.
- Cierre la placa de cubierta de la bobina.
4.5 Enhebrado del hilo superior
- Suba el alzador del prensatelas.
- Coloque un carrete de hilo en el portacarrete.
- Pase el hilo a través de la guía del hilo superior.
- Siga la ruta de enhebrado numerada hacia abajo a través de los discos de tensión y hacia arriba hasta la palanca tensora.
- Enhebre la palanca tensora de derecha a izquierda.
- Continúe guiando el hilo hacia abajo a través de las guías restantes hasta la aguja.
- Enhebre la aguja de adelante hacia atrás.
- Pase aproximadamente 6 pulgadas de hilo a través del ojo de la aguja.
5. Instrucciones de funcionamiento
5.1 Selección de puntadas
- Girar el Stitch Pattern Dial (leftmost dial) to select the desired stitch. Refer to the stitch pattern guide on the machine for available options.
- Ajustar el Selector de longitud de puntada (middle dial) to set the desired stitch length (0-4mm). For stretch stitches, use the preset length indicated by the green mark.
- Ajustar el Selector de ancho de puntada (rightmost dial) to set the desired stitch width (0-5mm).
5.2 Costura básica
- Coloque la tela debajo del prensatelas.
- Bajar el pie prensatela.
- Turn the handwheel towards you to bring the needle down into the fabric, then up again, pulling the bobbin thread through the needle plate hole.
- Pull both upper and bobbin threads to the back under the presser foot.
- Presione suavemente el pedal para empezar a coser. Guíe la tela con suavidad.
- To secure a seam, press the reverse lever for a few stitches at the beginning and end of your seam.
- When finished, raise the needle to its highest position, lift the presser foot, and pull the fabric away from the machine. Cut the threads using the thread cutter.
5.3 Uso del brazo libre
To use the free arm for sewing tubular items like sleeves, cuffs, or trouser hems, simply slide off the accessory storage tray located at the front of the machine. This exposes the narrow free arm.
5.4 Ojal de cuatro pasos
The Elna eXplore 130 features a four-step buttonhole function.
- Attach the Buttonhole Foot.
- Marque la posición del ojal en la tela.
- Set the Stitch Pattern Dial to the first buttonhole step (indicated by a square symbol).
- Coser el primer lado del ojal.
- Adjust the Stitch Pattern Dial to the second step for the bar tack.
- Adjust to the third step for the second side, and the fourth step for the final bar tack.
- Carefully cut open the buttonhole using a seam ripper.
6. Mantenimiento
El mantenimiento regular garantiza la longevidad y el rendimiento óptimo de su máquina de coser.
6.1 Limpieza de la máquina
- Desenchufe siempre la máquina antes de limpiarla.
- Retire la aguja, el prensatelas y la placa de la aguja.
- Use the provided brush to remove lint and dust from the bobbin case area and feed dogs.
- Limpie el exterior de la máquina con un paño suave y seco. No utilice limpiadores líquidos.
6.2 Cambio de la aguja
- Levante la aguja a su posición más alta.
- Afloje la aguja clamp tornillo.
- Retire la aguja vieja.
- Insert a new needle with the flat side facing the back, pushing it up as far as it will go.
- Apriete el cierre de la aguja.amp atornillar de forma segura.
- Change needles regularly (after 8-10 hours of sewing) or if it becomes bent or dull.
7. Solución de problemas
Esta sección aborda problemas comunes que podrías encontrar. Si tienes problemas que no se enumeran aquí, contacta con atención al cliente.
| Problema | Posible causa | Solución |
|---|---|---|
| Puntadas saltadas | Tamaño/tipo de aguja incorrecto, aguja doblada, enhebrado incorrecto. | Cambie la aguja, vuelva a enhebrar la máquina y asegúrese de que la aguja sea la correcta para la tela. |
| Thread Breaking (Upper) | Incorrect upper tension, improperly threaded, poor quality thread, bent needle. | Adjust tension, re-thread, use quality thread, change needle. |
| Thread Breaking (Bobbin) | Bobina mal enrollada, inserción incorrecta de la bobina, pelusa en la caja de la bobina. | Rewind bobbin, re-insert bobbin correctly, clean bobbin case. |
| La tela no avanza | Presser foot not lowered, feed dogs lowered, lint under needle plate. | Lower presser foot, raise feed dogs, clean under needle plate. |
| La máquina no arranca | Cable de alimentación no conectado, interruptor de encendido apagado, problema con el pedal. | Check power connections, turn on switch, inspect foot controller. |
8. Especificaciones
| Característica | Detalle |
|---|---|
| Marca | Elna |
| Número de modelo | EL130 |
| Tipo | Máquina de coser mecánica |
| Número de puntadas | 23 puntadas incorporadas |
| Tipo de ojal | Cuatro pasos |
| Tipo de bobina | Front Loading Vertical Oscillating |
| Ancho máximo de puntada | 5 milímetros |
| Longitud máxima de puntada | 4 milímetros |
| Velocidad máxima de costura | 800 GPM |
| Iluminación | CONDUJO |
| Fuente de poder | Eléctrico |
| Dimensiones del producto (Pr. x An. x Al.) | 6" de profundidad x 15.3" de ancho x 11.6" de alto |
| Peso del artículo | 13 libras |
| Material | Metal, Plástico |
| Código Postal | 732212411939 |
9. Garantía y soporte
For information regarding your product's warranty, please refer to the warranty card included with your purchase or visit the official Elna websitio.
If you require technical assistance, have questions about operation, or need to order replacement parts, please contact Elna customer support.
- Elna Official Websitio: www.elna.com
- Elna USA Store on Amazon: Visit the Elna Store