
Introducción
Thank you for choosing the RAINPOINT 4-Zone Programmable Watering Timer. This device is designed to automate your garden and lawn irrigation, providing flexible and efficient watering schedules for up to four independent zones. Please read this manual carefully to ensure proper installation, operation, and maintenance of your watering timer.
Características del producto
- 4 Individual Programmable Zones: Customize watering schedules (start time, duration, frequency) for each zone independently.
- Multiple Watering Cycle Modes: Set watering duration from 1 minute to 3 hours 59 minutes, and frequency for every 8 hours, every 12 hours, or every 1 to 7 days.
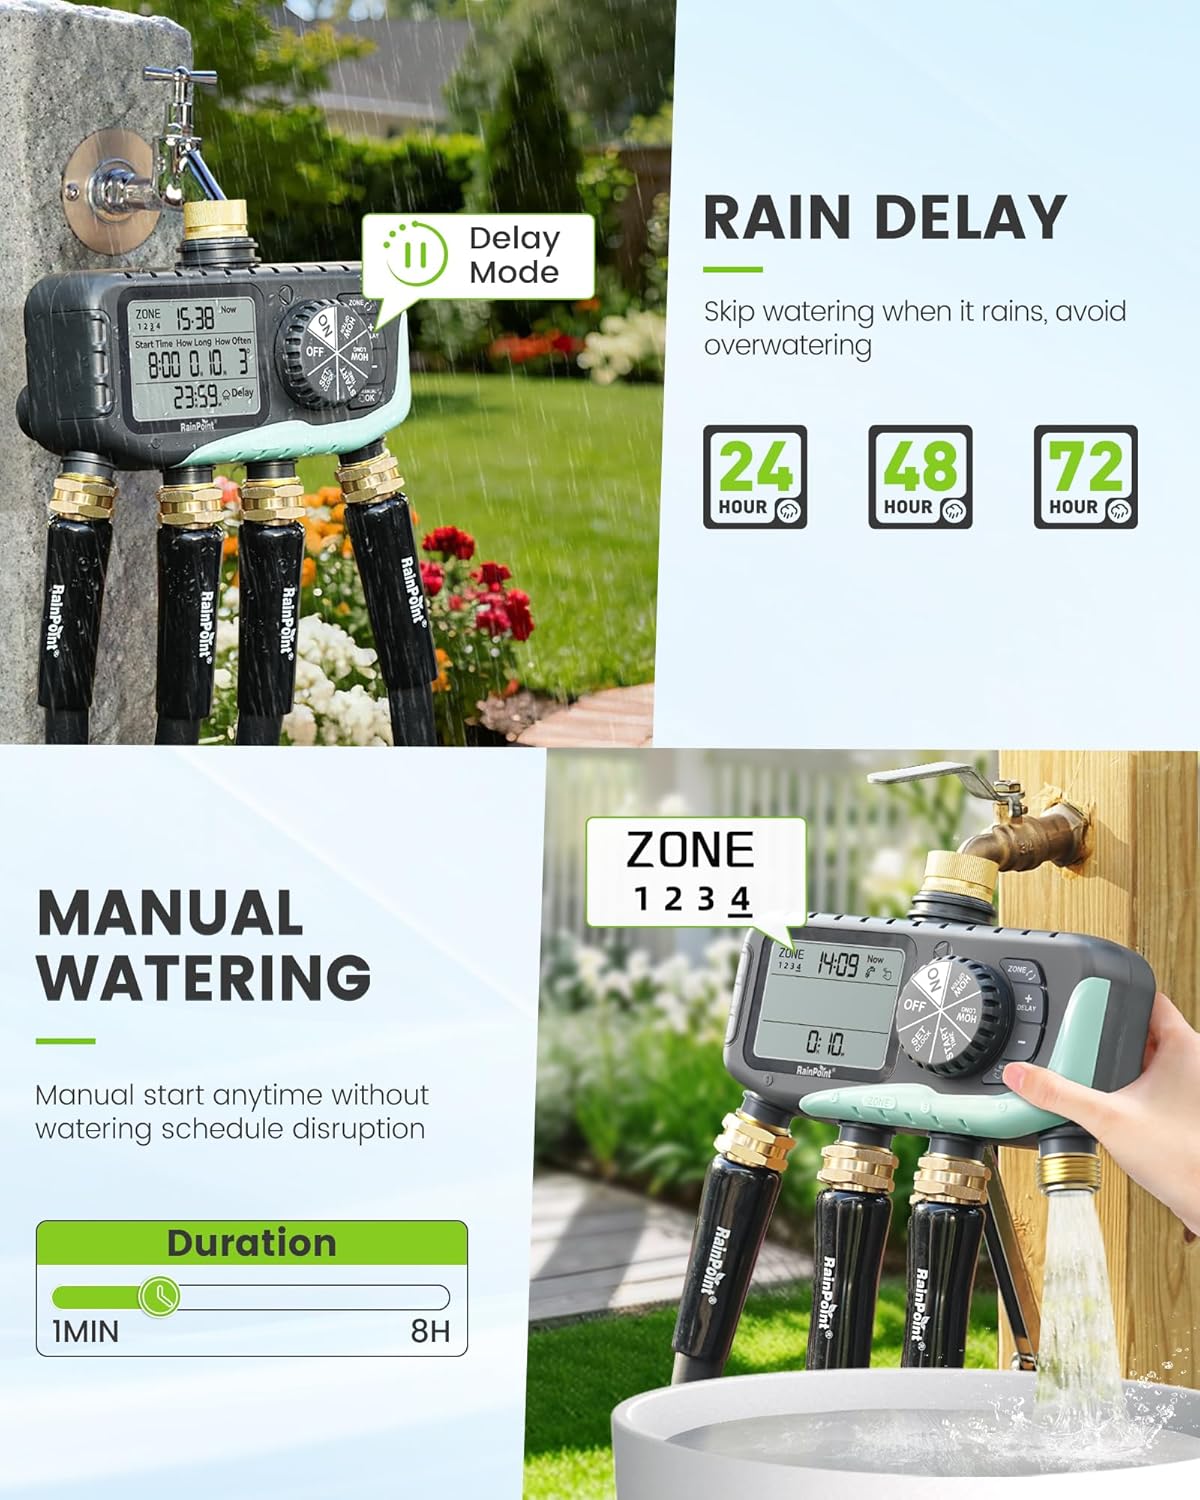
- Función de retraso por lluvia: Skip watering for 24, 48, or 72 hours to conserve water during rainy periods.
- Modo de riego manual: Initiate watering instantly for 1 minute to 8 hours without affecting programmed schedules.
- Fácil Programación: Features a large 3.4-inch LCD screen, a large dial, and clear buttons for intuitive setup.
- Construcción duradera: Equipped with solid brass inlet and outlet, leak-proof sealing rings, and an IP65 waterproof rating for outdoor use.
- Upgraded Coil Valve: Provides stronger water pressure and wider coverage compared to standard valves.
- Protección de baja potencia: Valves automatically close when battery power is low to prevent water waste.


Contenido del paquete
- RAINPOINT 4-Zone Programmable Watering Timer
- Manual de usuario
- Standard 3/4-inch faucet adapter (if applicable)
Configuración e instalación
- Instalación de la batería: Abra el compartimento de las pilas en la parte posterior del temporizador. Inserte dos (2) pilas alcalinas AA (no incluidas), asegurándose de que la polaridad sea correcta. Cierre bien el compartimento.
- Conectar al grifo: Screw the timer onto a standard 3/4-inch outdoor faucet. Ensure the connection is tight to prevent leaks. It is recommended to use a short hose between the faucet and the timer to reduce stress on the faucet connection and allow for easier positioning.
- Conecte las mangueras: Attach your garden hoses to the four independent outlets (Zone 1, Zone 2, Zone 3, Zone 4) at the bottom of the timer. Ensure each connection is secure.
- Encendido inicial: The LCD screen will light up, and the timer will be ready for programming.


Instrucciones de funcionamiento
1. Configuración de la hora actual
Rotate the dial to the 'SET CLOCK' position. Use the '+' and '-' buttons to adjust the current time. Press 'OK' to confirm and move to the next setting (e.g., AM/PM or 24-hour format). Rotate the dial away from 'SET CLOCK' to save.
2. Programming Watering Schedules (for each zone)
The timer allows individual programming for each of its four zones.
- Seleccionar Zona: Rotate the dial to 'PROGRAM'. Use the 'ZONE' button to select the desired zone (1, 2, 3, or 4) you wish to program.
- Establecer hora de inicio: Use the '+' and '-' buttons to set the desired watering start time for the selected zone. Press 'OK' to confirm.
- Establecer duración del riego: Use the '+' and '-' buttons to set how long the watering will last (from 1 minute to 3 hours 59 minutes). Press 'OK' to confirm.
- Establecer frecuencia: Use the '+' and '-' buttons to set how often the watering will occur (e.g., every 8 hours, every 12 hours, or every 1 to 7 days). Press 'OK' to confirm.
- Repeat steps a-d for each zone you wish to program. Rotate the dial to 'ON' to activate the programmed schedules.

3. Función de retraso por lluvia
Para pausar temporalmente el riego debido a la lluvia:
- Rotate the dial to 'ON'.
- Pulse el botón 'RETRASO'.
- Use the '+' or '-' buttons to select the desired delay duration (24, 48, or 72 hours).
- Press 'OK' to confirm. The timer will resume its programmed schedule after the delay period.
4. Riego manual
Para regar inmediatamente sin afectar su programación:
- Rotate the dial to 'ON'.
- Press the 'MANUAL/OK' button.
- Use the '+' or '-' buttons to set the desired manual watering duration (from 1 minute to 8 hours).
- Press 'OK' to start manual watering. The timer will automatically return to its programmed schedule after the manual watering duration ends.
5. Protección de baja potencia
When the battery level is critically low, the timer's valves will automatically close to prevent continuous water flow and waste. Replace batteries promptly when the low battery indicator appears on the screen.

Mantenimiento
- Limpieza: Limpie periódicamente el exterior del temporizador con un paño suave.amp Paño. No utilice limpiadores abrasivos ni disolventes.
- Reemplazo de batería: Replace batteries annually or when the low battery indicator appears. Always use fresh AA alkaline batteries.
- Winterización: Before the first frost, disconnect the timer from the faucet and hoses. Drain any remaining water and store the unit indoors in a dry, protected area to prevent freezing damage.
- Arandelas de control: Regularly inspect the rubber washers in the inlet and outlet connections for wear or damage. Replace if necessary to prevent leaks.
Solución de problemas
- No Water Flow or Partial Flow:
- Verifique el nivel de la batería y reemplácela si está baja.
- Asegúrese de que el grifo esté completamente abierto.
- Verify that the watering schedule is correctly programmed and activated ('ON' mode).
- Inspect hose connections for kinks or blockages.
- Check the timer's inlet filter for debris.
- Fugas de conexiones:
- Ensure all connections (faucet, hoses) are tightened securely.
- Check rubber washers for proper seating and damage; replace if worn.
- Display Fading or Not Working:
- Reemplace las baterías por otras nuevas.
- Avoid prolonged exposure to direct sunlight, which can degrade LCD screens over time. Consider shielding the display if installed in a very sunny area.
- Water Hammer (Pipes Clanging):
- This can occur when valves close rapidly. Consider installing a water hammer arrester between the faucet and the timer.
- El temporizador no responde:
- Remove batteries for a few minutes, then reinsert them to reset the device. Reprogram as needed.
Presupuesto
| Número de modelo | iob447 |
| Marca | PUNTO DE LLUVIA |
| ASIN | B0G32Z1HMB |
| Material | Plástico, latón |
| Color | Azul |
| Dimensiones del producto (L x An x Al) | 2.54 x 2.54 x 2.54 cm (approx. 1 x 1 x 1 inch); 317.51 grams |
| Tamaño de pantalla | 3.4 pulgadas |
| Número de configuraciones | 7 (refiriéndose a las opciones de programación) |
| Clasificación de impermeabilidad | IP65 |
| Fuente de poder | 2 pilas alcalinas AA (no incluidas) |
Garantía y soporte
RAINPOINT products are designed for reliability and performance. For warranty information, technical support, or any questions regarding your 4-Zone Programmable Watering Timer, please contact RAINPOINT customer service through the official website or your retailer's support channels. Please have your model number (iob447) and purchase information ready when contacting support.