
1. Introducción
Thank you for choosing the VEVOR Spiral Benchtop Jointer. This manual provides essential information for the safe operation, maintenance, and troubleshooting of your new jointer. Please read this manual thoroughly before initial use and retain it for future reference. This 6-inch benchtop jointer features a 12-blade spiral cutterhead, a 2 HP motor, and an adjustable fence, designed for precise woodworking tasks.
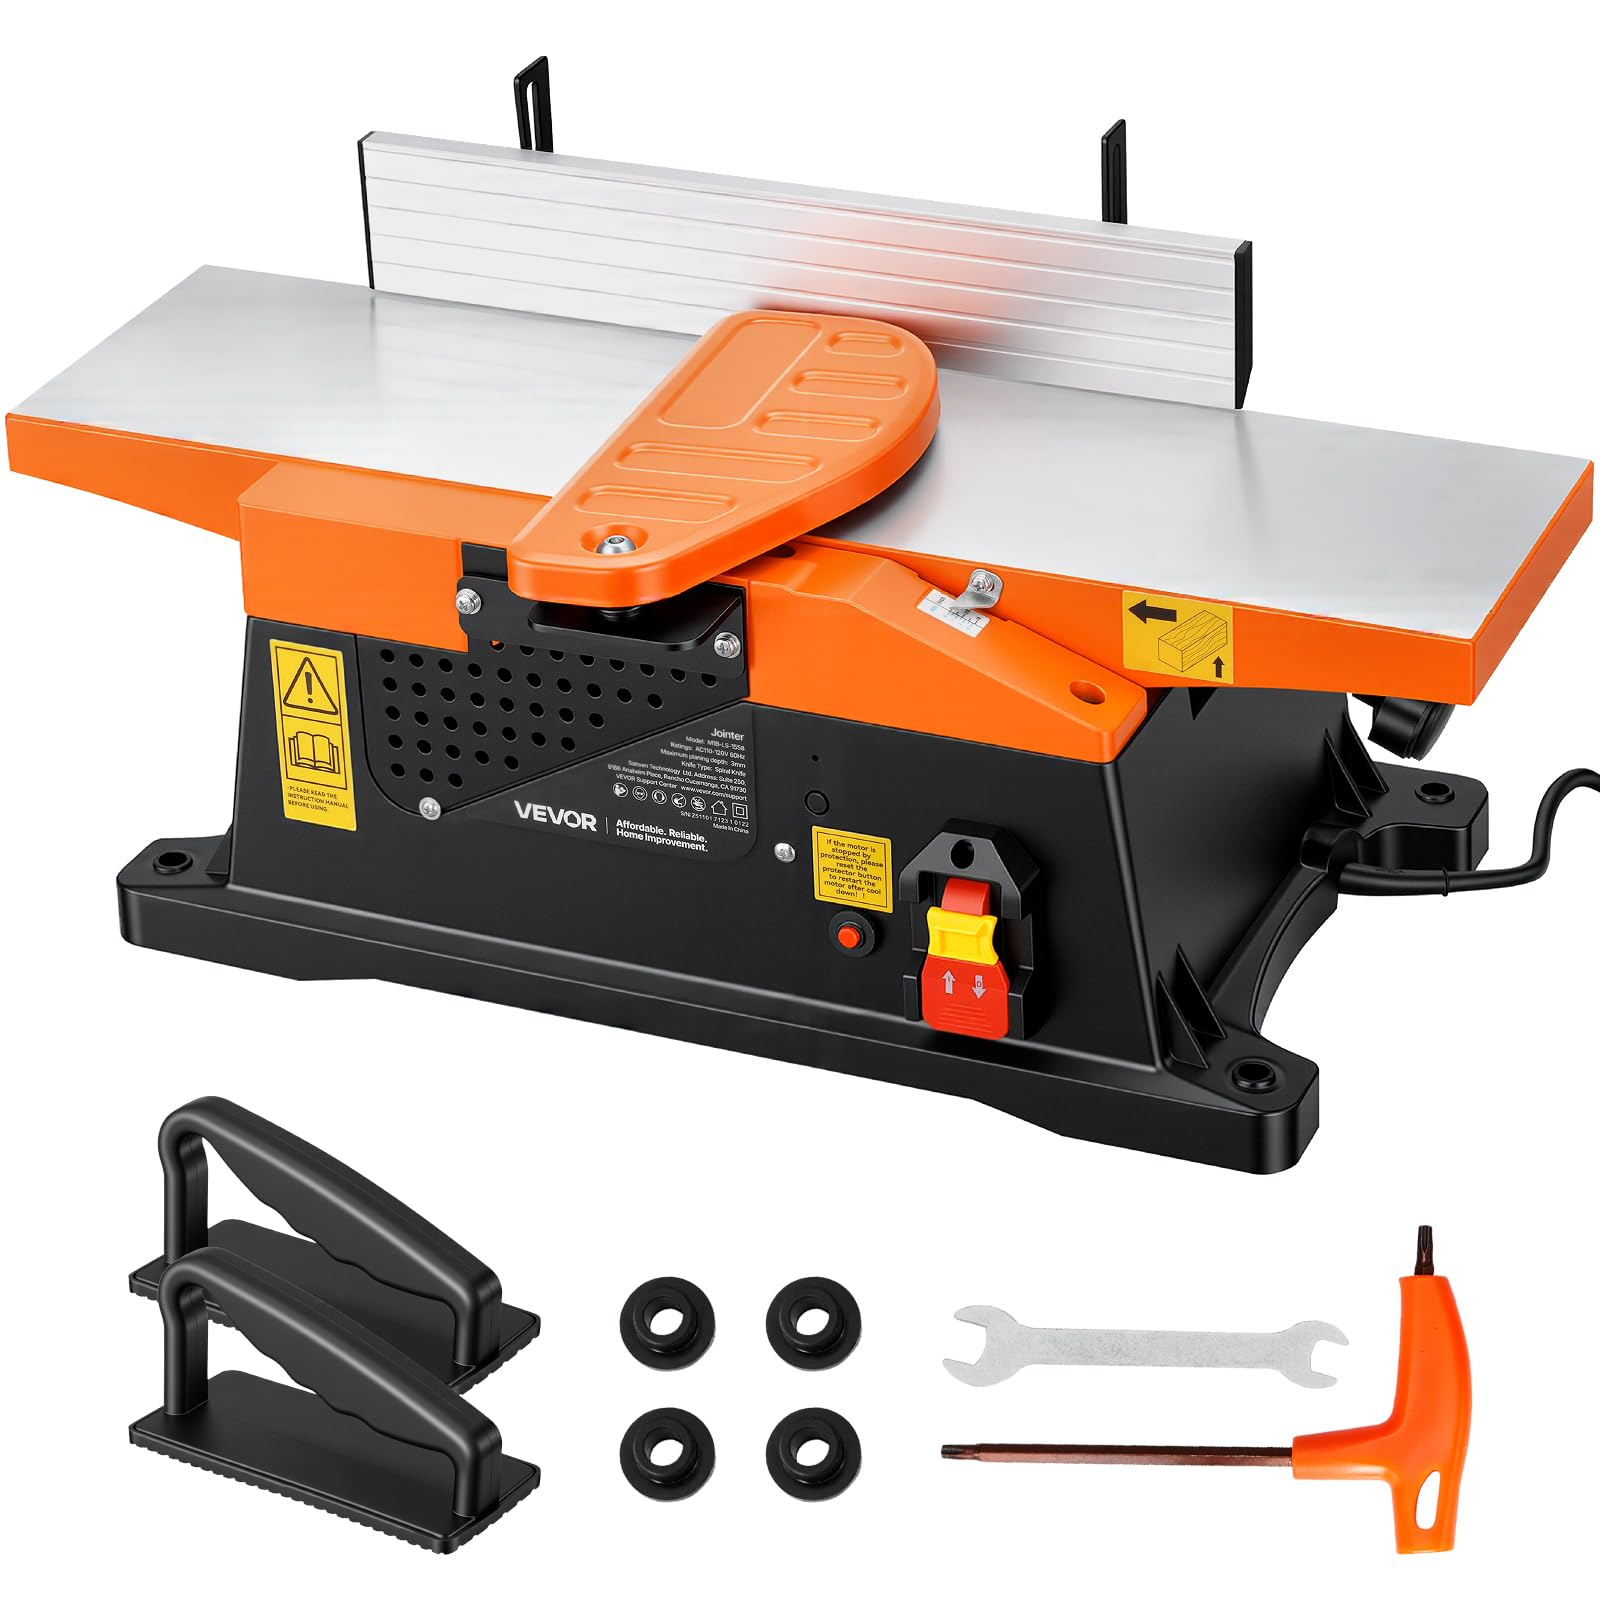
Figure 1: VEVOR Spiral Benchtop Jointer (Model M1B-LS-1558)
2. Instrucciones de seguridad
Siga siempre las precauciones de seguridad básicas para reducir el riesgo de incendio, descarga eléctrica y lesiones personales.
- Lea el manual: Comprenda todos los procedimientos operativos y advertencias de seguridad antes de usar.
- Use equipo de protección personal (EPP): Use siempre gafas de seguridad, protección auditiva y mascarilla antipolvo. Evite usar ropa suelta o joyas que puedan quedar atrapadas en las piezas móviles.
- Mantenga un área de trabajo limpia: Cluttered areas invite accidents. Ensure adequate lighting.
- Keep Children and Bystanders Away: Do not allow unauthorized persons near the jointer during operation.
- Asegure la pieza de trabajo: Always ensure the workpiece is properly supported and controlled.
- Evite forzar la herramienta: Let the jointer work at its intended speed.
- Unplug Before Adjustments or Maintenance: Always disconnect the power supply before changing blades, making adjustments, or performing maintenance.
- Use Push Blocks: Always use push blocks when jointing small or thin workpieces to keep hands away from the cutterhead.
- Verifique si hay piezas dañadas: Before each use, inspect the jointer for any damaged parts. Do not operate if damaged.
- Conexión eléctrica adecuada: Ensure the jointer is connected to a grounded outlet.
3. Contenido del paquete
Verify that all items are present and undamaged upon unpacking. If any parts are missing or damaged, contact VEVOR customer service.
- 1 x Benchtop Jointer
- 1 x Kit de accesorios
- 1 x Dust Port
- 1 x Protective Cover Set
4. Producto terminadoview
The VEVOR Spiral Benchtop Jointer is designed for flattening and straightening wood surfaces. Key components include:
- Spiral Cutterhead: Equipped with 12 razor-sharp blades for smooth cuts and reduced noise.
- Infeed/Outfeed Tables: Cast aluminum tables provide a stable surface for workpieces.
- Valla ajustable: Allows for angle adjustments up to ±45 degrees for bevel cuts.
- Perilla de ajuste de profundidad: Controls the planing depth up to 1/8 inch.
- Puerto de polvo: Connects to a dust collection system for a cleaner workspace.
- Interruptor de alimentación: On/Off control with safety features.

Figure 2: Main components of the jointer, including the cutterhead and motor assembly.
5. Configuración
Follow these steps to set up your jointer for first use.
- Desembalaje: Carefully remove the jointer and all accessories from the packaging. Inspect for any shipping damage.
- Colocación: Place the jointer on a stable, level workbench. Ensure sufficient space around the machine for safe operation and material handling. The compact design (6 x 23 inches) is ideal for small workshops.

Figure 3: Jointer positioned on a workbench, highlighting its compact dimensions.
- Instalación de vallas: Attach the adjustable fence to the jointer according to the instructions in the accessory kit. Ensure it is securely fastened and can be adjusted smoothly.
- Dust Port Connection: Connect the provided dust port to the jointer. For optimal dust collection, connect a vacuum cleaner or dust collector (not included) to the dust port. Note that some standard shop vac hoses may require an adapter for a secure fit.

Figure 4: Dust port in operation, showing sawdust being removed from the machine.
- Conexión eléctrica: Plug the jointer into a suitable grounded power outlet.
6. Instrucciones de funcionamiento
Antes de operar, asegúrese de comprender y seguir todas las precauciones de seguridad.
- Encendido: Press the ON button to start the jointer. The 2 HP motor will reach its operating speed of 12,000 RPM.
- Ajuste de la profundidad de cepillado: Use the depth adjustment knob to set the desired planing depth. The jointer can achieve cuts from 0 to 1/8 inch. For best results and to avoid overloading the motor, take shallow passes, especially with hardwoods.

Figure 5: Detail of the depth adjustment mechanism, showing settings from 0 to 1/8 inch.
- Adjusting Fence Angle: Loosen the fence locking knob and tilt the fence to the desired angle for bevel cuts. The fence can be adjusted up to ±45 degrees. Tighten the locking knob securely before operation.

Figure 6: Demonstrating the fence's ability to adjust for 90-degree and 45-degree (135-degree from table) bevel cuts.
- Material de alimentación:
- Place the workpiece flat on the infeed table, against the fence.
- Using push blocks, slowly and steadily feed the workpiece over the cutterhead.
- Maintain constant pressure against the fence and down onto the tables.
- Do not force the material. Allow the cutterhead to do the work.
- Apagado: Once jointing is complete, press the OFF button and wait for the cutterhead to stop completely before leaving the machine.
7. Mantenimiento
Regular maintenance ensures optimal performance and extends the life of your jointer. Always unplug the machine before performing any maintenance.
- Limpieza: After each use, clear all sawdust and chips from the tables, fence, and cutterhead area. Use a brush or compressed air. Ensure the dust port is clear.
- Cutterhead Blade Replacement: The spiral cutterhead features 12 individual blades. If a blade becomes dull or damaged, it can be rotated to expose a new cutting edge or replaced individually. Refer to the accessory kit instructions for detailed blade replacement procedures.

Figure 7: Detail of the spiral cutterhead, highlighting its individual blades and features.
- Encerado de mesa: Periodically apply a non-silicone paste wax to the cast aluminum tables to reduce friction and prevent rust.
- Inspección: Regularly check all nuts, bolts, and screws for tightness. Inspect the power cord for damage.
8. Solución de problemas
Consulte esta sección para conocer problemas comunes y sus soluciones.
| Problema | Posible causa | Solución |
|---|---|---|
| Jointer does not start. | No hay suministro de energía; disyuntor disparado; interruptor defectuoso. | Check power cord connection and outlet. Reset circuit breaker. Contact service if switch is faulty. |
| Rough or uneven cuts. | Dull or damaged blades; incorrect depth setting; improper feeding technique; misaligned tables. | Rotate or replace cutterhead blades. Adjust depth setting. Ensure consistent feed rate and pressure. Check table alignment. |
| Vibración o ruido excesivo. | Loose components; unbalanced cutterhead; worn bearings. | Tighten all fasteners. Inspect cutterhead for damage. Contact service if bearings are suspected. |
| Dust port clogs frequently. | Insufficient dust collection power; dust port obstruction. | Ensure dust collector is adequately powered. Clear any blockages in the dust port or hose. |
9. Especificaciones
Technical specifications for the VEVOR Spiral Benchtop Jointer M1B-LS-1558.
| Característica | Detalle |
|---|---|
| Número de modelo | M1B-LS-1558 |
| Velocidad máxima | 12,000 RPM |
| Profundidad máxima de cepillado | 1/8 de pulgada (3 mm) |
| Longitud de la mesa de trabajo | 23 pulgadas (585 mm) |
| Worktable Width | 6 pulgadas (152 mm) |
| Fence Length | 14.2 pulgadas (360 mm) |
| Fence Width | 2.5 pulgadas (63.7 mm) |
| Número de cuchillas | 12 (Spiral Cutterhead) |
| Caballo de fuerza | 2 CV |
| Peso neto (con accesorios) | 21.2 libras (9.6 kg) |
| Dimensiones del producto (L x An x Al) | 22.8 x 13 x 11.8 pulgadas (580 x 330 x 300 mm) |
| Material | Aluminio |
| Fuente de poder | AC/DC |

Figure 8: Visual representation of jointer dimensions and key specifications.
10. Garantía y soporte
For warranty information, technical support, or to order replacement parts, please contact VEVOR customer service.
Visita el VEVOR oficial website for contact details and further assistance: www.vevor.com