Introducción
This manual provides detailed instructions for the safe and proper installation, operation, and maintenance of your Perlegear Ultra Slim Full Motion TV Wall Mount, Model PGTVM65B-LF-US. Please read all instructions carefully before beginning installation and keep this manual for future reference.
Información de seguridad
ADVERTENCIA: Failure to read and follow all instructions can result in personal injury, property damage, or voiding your warranty. Do not install on drywall alone. Ensure the mounting surface can safely support the combined weight of the mount and your TV.
- Verifique que el patrón VESA y el peso de su televisor estén dentro de las especificaciones del soporte.
- Utilice un detector de vigas para localizar vigas de madera con precisión.
- For concrete or brick walls, use the provided anchors.
- Always use appropriate safety gear, including eye protection.
- Se recomiendan dos personas para la instalación.
Contenido del paquete
Please check that all components are present and undamaged before installation. If any parts are missing or defective, contact Perlegear customer support.

Figura 1: Componentes incluidos
- Conjunto de placa de pared
- Soportes de TV (2)
- Kit de hardware (varios tornillos, arandelas, espaciadores, anclajes)
- Nivel de burbuja
- Bridas para cables
- Manual de instalación
Presupuesto
| Característica | Especificación |
|---|---|
| Número de modelo | PGTVM65B-LF-EE. UU. |
| Compatibilidad de tamaño de pantalla | 42 - 90 pulgadas |
| Capacidad de carga máxima | 132 libras (60 kg) |
| Compatibilidad VESA | 200x200mm hasta 600x400mm |
| Tipo de montaje | Montaje en pared |
| Tipo de movimiento | Full Motion (Swivel, Tilt, Extend) |
| Ángulo de inclinación | +5° / -15° |
| Ángulo de giro | ±45° |
| Ajuste de nivel | ±3° |
| Extensión desde la pared | Hasta 15 pulgadas |
| Profile (Retractado) | 1.1 pulgadas |
| Material | Acero aleado |
Importante: Always confirm your TV's VESA pattern and weight before installation.

Figure 2: Universal Compatibility and VESA Patterns

Figure 3: VESA Mounting Reference Position
Configuración e instalación
Comprobaciones previas a la instalación
- Check Wall Type: This mount is suitable for wood studs (16" to 24" spacing), solid concrete, and brick walls. NO lo instale únicamente sobre paneles de yeso.
- Check TV Weight and VESA: Ensure your TV weighs no more than 132 lbs and has a VESA pattern between 200x200mm and 600x400mm.
- Check Cable Access: Verify that the mount will not block any ports or cable connections on the back of your TV.

Figure 4: Compatible Wall Types and Stud Spacing
Pasos de instalación
Follow these steps carefully for a secure installation. Refer to the included drilling template for precise hole placement.
- Fijar los soportes del televisor: Secure the TV brackets to the back of your TV using the appropriate screws, washers, and spacers from the hardware kit. Ensure the brackets are centered and level.
- Marcar ubicaciones de perforación: Position the wall plate assembly on the wall at your desired height. Use the integrated bubble level to ensure it is perfectly horizontal. Mark the drilling points through the holes on the wall plate.
- Perforar agujeros piloto:
- Para Montantes de madera: Drill pilot holes using a 7/32" (5.5mm) drill bit.
- Para Paredes de hormigón macizo/ladrillo: Drill pilot holes using a 3/8" (10mm) masonry drill bit. Insert wall anchors into these holes.
- Placa de pared de montaje: Attach the wall plate assembly to the wall using the lag bolts and washers. Tighten all bolts securely.
- Colgar TV: Levante con cuidado el televisor con los soportes incluidos y engánchelo a la placa de pared. Asegúrese de que esté bien fijado al soporte.
- Fije el televisor al soporte: Use the safety screws or locking mechanisms on the TV brackets to prevent the TV from accidentally lifting off the wall plate.
Guía de video de instalación
Video 1: General Installation Guide for Perlegear TV Mounts. This video demonstrates the steps for mounting the TV bracket to the TV and securing the wall plate to various wall types, followed by hanging the TV.
Instrucciones de funcionamiento (ajustes)
This full-motion TV mount allows for various adjustments to achieve optimal viewángulos de ing.
- Extensión: Retire con cuidado el televisor de la pared para extender los brazos hasta 15 pulgadas.
- Girar: Pivot the TV left or right up to ±45° to adjust the horizontal viewángulo de ing.
- Inclinación: Loosen the tilt knobs on the TV brackets, adjust the screen to your desired vertical angle (+5° up / -15° down), and then re-tighten the knobs to secure the position. This helps reduce glare.
- Ajuste de nivel: After installation, you can fine-tune the TV's level by rotating it up to ±3°.

Figura 5: Ajustable Viewángulos de ing
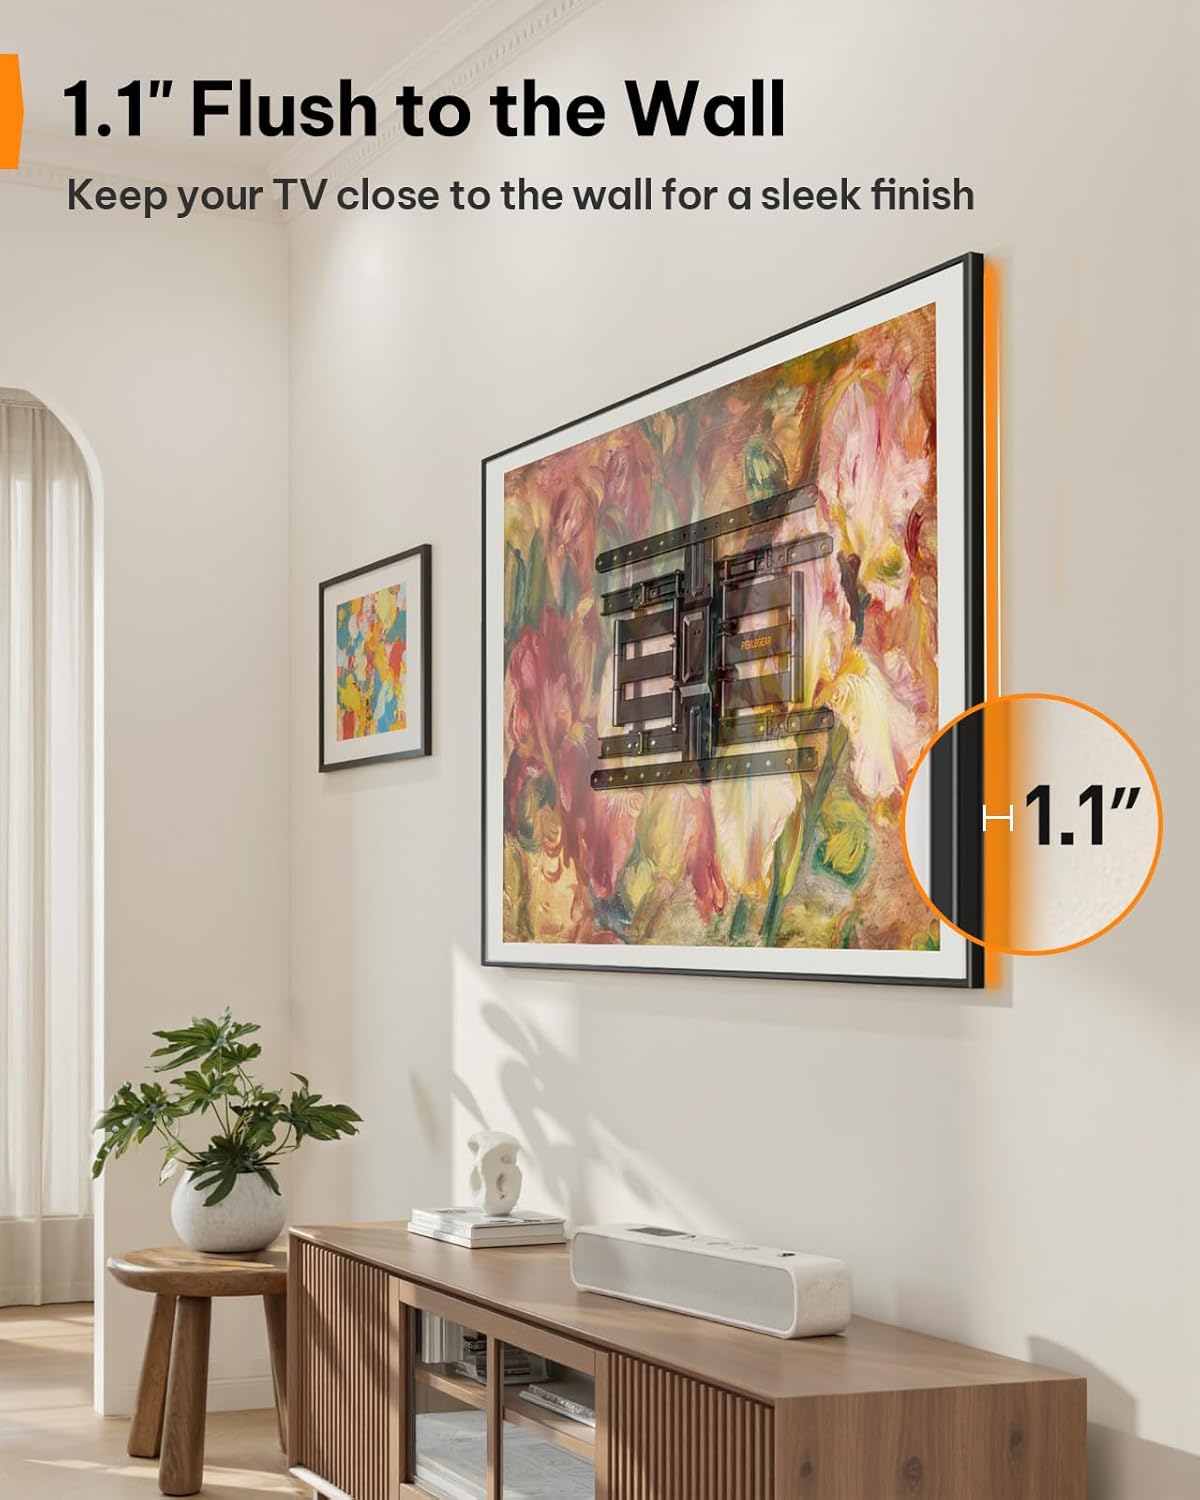
Figure 6: Ultra-Slim Profile
Vídeo de características del producto
Video 2: Perlegear Ultra Slim TV Mount Features. This video showcases the mount's slim profile, cable management, swivel, and tilt capabilities in a modern living room setting.
Mantenimiento
El mantenimiento regular garantiza la longevidad y el funcionamiento seguro de su soporte de TV.
- Comprobar conexiones: Inspeccione periódicamente todos los tornillos y pernos para asegurarse de que estén bien apretados. Vuelva a apretarlos si es necesario.
- Limpio: Limpie el soporte con un paño suave y seco para eliminar el polvo. Evite usar limpiadores abrasivos o disolventes.
- Lubricación: The articulating arms are designed for smooth movement. If movement becomes stiff over time, a small amount of silicone-based lubricant can be applied to the pivot points.
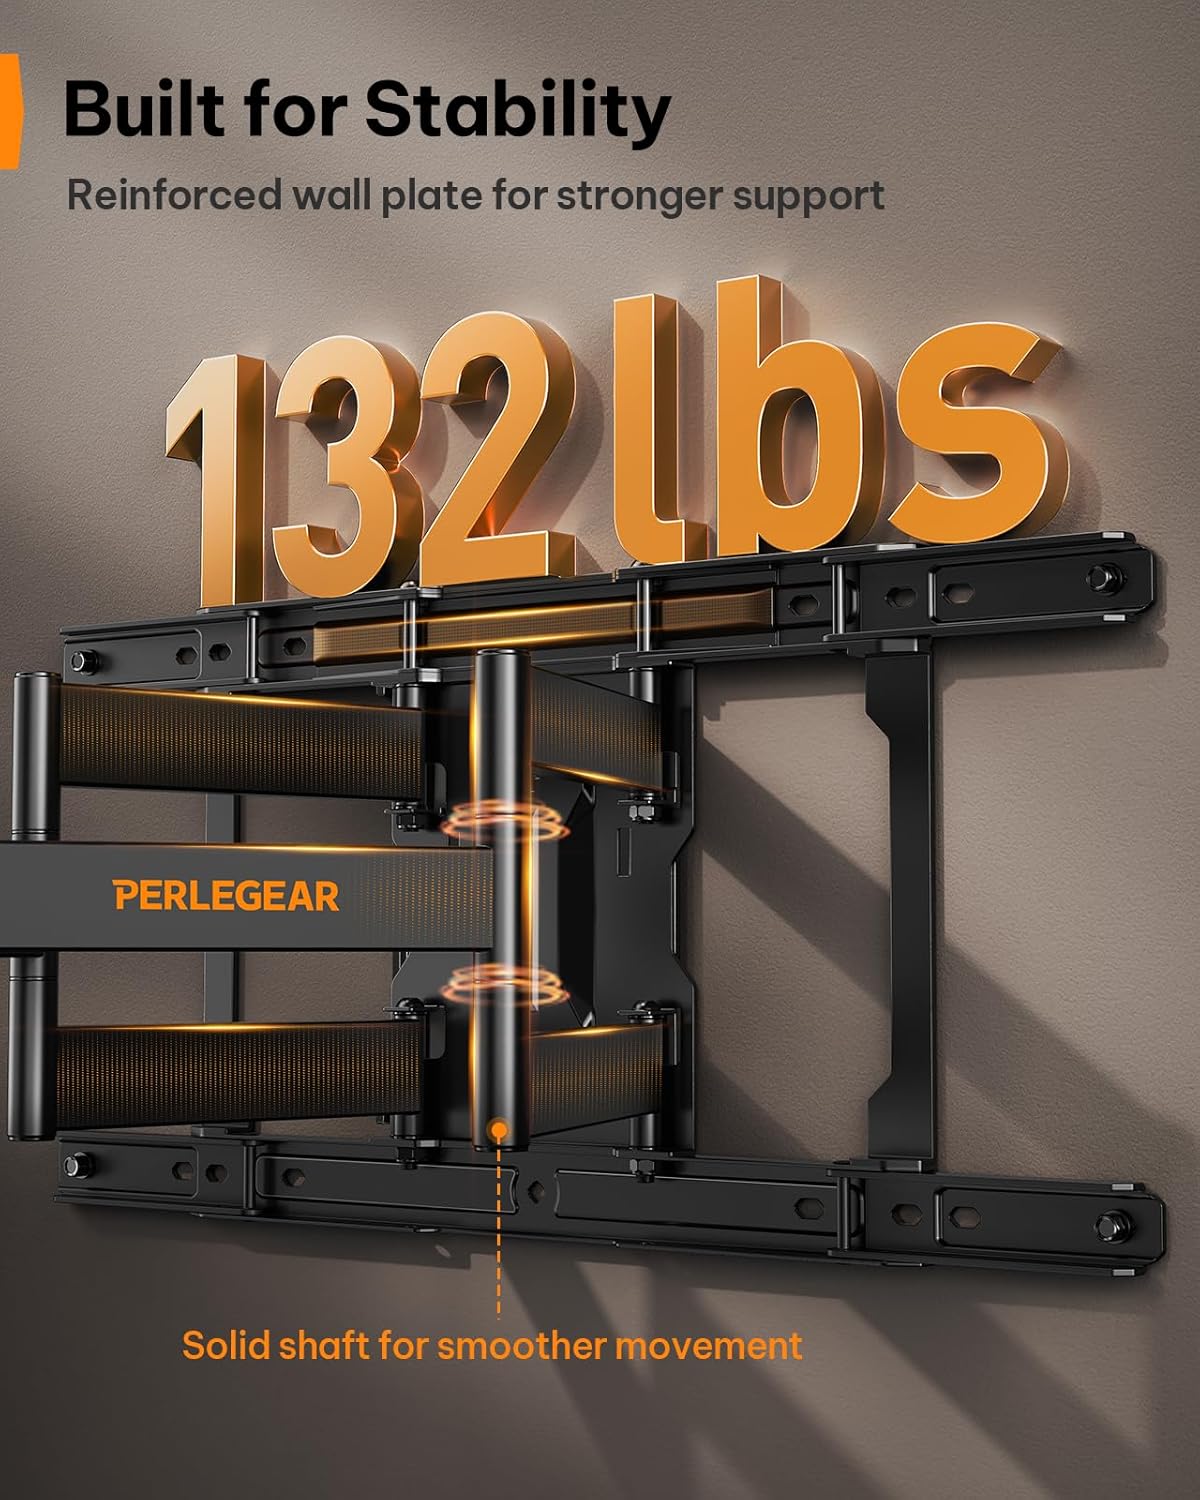
Figure 7: Built for Stability
Solución de problemas
| Problema | Posible causa | Solución |
|---|---|---|
| El televisor no está nivelado después de la instalación. | Pequeña desalineación durante la instalación. | Use the ±3° level adjustment feature to fine-tune the TV's position. |
| El soporte se siente suelto en la pared. | Los pernos tirafondos no están completamente apretados o se utilizaron anclajes de pared incorrectos. | Ensure all lag bolts are securely tightened. Verify correct anchors were used for your wall type. If on wood studs, ensure bolts are in the center of the stud. |
| El televisor no encaja en el soporte. | Patrón VESA o tamaño/peso del televisor incorrectos. | Double-check your TV's VESA pattern and weight against the mount's specifications (200x200mm to 600x400mm, max 132 lbs). |
| Los brazos de montaje son rígidos para moverlos. | Falta de lubricación o acumulación de polvo. | Apply a small amount of silicone-based lubricant to the pivot points of the articulating arms. Clean any dust or debris. |
Garantía y soporte
This Perlegear TV wall mount comes with a 5-year warranty. For warranty claims, technical assistance, or any questions regarding installation or operation, please contact Perlegear customer support.
You can find contact information on the official Perlegear websitio o a través de su plataforma de compra.