
1. Introducción
The PHYSEN Smart WiFi Door Sensor Chime Window Sensor Alarm system provides real-time monitoring and alerts for your home or business. This system offers instant notifications via the Tuya/Smart Life App, ensuring you are always aware of activity at your doors or windows. Designed for ease of use, it features a loud chime, customizable settings, and simple wire-free installation.
This manual provides detailed instructions for setting up, operating, and maintaining your PHYSEN Smart WiFi Door Sensor Chime system to ensure optimal performance and security.
2. Producto terminadoview
2.1 Componentes
- 1 x WiFi Receiver (Chime Unit)
- 2 x WiFi Sensors (Door/Window Contact Sensors)
- Mounting Accessories (Adhesive pads)
2.2 Características principales
- Real-Time App Alerts: Receive instant push notifications on your smartphone when a door or window is opened.
- Loud Chime: Adjustable volume up to 110dB with 5 levels, suitable for various environments.
- Tonos de llamada personalizables: Assign unique ringtones to different sensors for easy identification.
- Instalación sin cables: Simple plug-and-play setup with included adhesive.
- Sistema ampliable: Supports up to 20 sensors for comprehensive coverage.
- Compartir en familia: Share device access with multiple family members via the app.
- Memoria automática: Retains melody and volume settings after power outages.
- Sin cuotas mensuales: Free app push notifications.
- Amplia aplicación: Suitable for doors, windows, safes, refrigerators, and more.

Image: The PHYSEN Smart WiFi Door Sensor Chime system, showing the plug-in receiver and two contact sensors.
3. Instrucciones de configuración
3.1 Descargar la aplicación
- Plug the WiFi Receiver (Gateway) into an electrical outlet.
- Descargue la aplicación "Smart Life" o "Tuya Smart" de la tienda de aplicaciones de su dispositivo.
- For iPhone: Download "Smart-Life Living" from the App Store.
- For Android: Download "SmartLife-Smart Living" from Google Play.
- Open the Smart Life/Tuya Smart app and log in. If you do not have an account, create one.

Image: Visual guide for downloading the Smart Life app and logging in.
3.2 Add Gateway to the App
- In the app, hold the Ringtone button on the Gateway for about 5 seconds until the indicator light flashes rapidly.
- Tap the "+" button in the top right corner of the app. It will discover nearby devices. Select "Add" for the Wireless Gateway.
- Ingrese su contraseña de red Wi-Fi. Nota: Solo se admiten redes de 2.4 GHz.
- After successful addition, you will receive notifications on your phone. You can rename the gateway for easier identification.

Image: Steps for connecting the gateway to your home Wi-Fi network.
3.3 Instalar sensores
The sensors are designed for wire-free installation using the included adhesive. Ensure the two parts of the sensor are aligned and placed within 1 cm of each other when the door/window is closed.
- Limpie la superficie donde desea instalar el sensor.
- Peel off the protective backing from the adhesive pads on the back of each sensor part.
- Attach the larger sensor unit to the fixed frame of the door/window.
- Attach the smaller magnetic unit to the moving part of the door/window, ensuring it aligns with the larger unit when closed. The gap between the two parts should be less than 1 cm.
- Test the sensor by opening and closing the door/window to confirm it triggers an alert.

Image: A contact sensor installed on a door, showing the two parts aligned.

Image: Various installation scenarios for the contact sensors, including doors, windows, safes, and refrigerators.
4. Instrucciones de funcionamiento
4.1 Notificaciones de la aplicación
Once the gateway and sensors are set up, you will receive instant notifications on your smartphone whenever a sensor is triggered. You can name each transmitter in the app to clearly identify which one has been activated.

Image: A smartphone displaying real-time alerts from sensors in different rooms (Kitchen, Living Room, Bedroom).
4.2 Configuraciones personalizadas
The app allows you to customize various settings for your chime and sensors.
- Selección de tono de llamada: Choose from 32 available ringtones. You can assign a different ringtone to each sensor to distinguish between triggered locations.
- Ajuste de volumen: Adjust the chime volume from 0 to 110dB across 5 levels.
- Selección de modo: Choose between three modes:
- Luz y sonido: The gateway flashes its indicator light and sounds the ringtone.
- Sólo sonido: The gateway only sounds the ringtone.
- Sólo luz: The gateway only flashes its indicator light.

Image: App interface for customizing ringtones, volume, and alert modes (Light & Sound, Sound, Light).

Image: Step-by-step app guide for configuring ringtones, alert modes, and volume levels for each transmitter.
4.3 Do Not Disturb Schedule
You can set a "Do Not Disturb" schedule within the app to prevent the chime from sounding during specific times or days. During these periods, the gateway will not flash or emit sounds, but app notifications will still be sent to your phone.

Image: App interface for managing notifications, setting a Do Not Disturb schedule, and viewing notification history.
4.4 Historial de notificaciones
The app maintains a history of all triggered sensor events. By assigning distinct names to each transmitter, you can easily identify which sensor was triggered and when.
4.5 Compartir en familia
Share device access with family members or trusted individuals. This allows multiple users to receive alerts simultaneously and manage the device settings from their own smartphones.
- Enter the transmitter page in the app and click the circled top-right icon.
- Find the "Share Device" button and tap to open the sharing page.
- Share via any available channel (e.g., email, messaging apps). Up to 20 people can be shared per gateway.

Image: Guide on how to share the device with family members through the app.
5. Mantenimiento
5.1 Limpieza
Wipe the WiFi Receiver and sensors with a soft, dry cloth. Do not use abrasive cleaners or solvents, as these can damage the device surfaces.
5.2 Battery Replacement (Sensors)
The contact sensors are battery-powered. When the battery is low, the sensor's indicator light may flash differently, or you may receive a low battery notification in the app. To replace the battery:
- Abra suavemente el sensor casing.
- Retire la batería vieja.
- Insert a new battery of the same type (typically CR2032, refer to sensor markings for confirmation), ensuring correct polarity.
- Cerrar el sensor casing de forma segura.
- Test the sensor to ensure it is functioning correctly.
6. Solución de problemas
- Sin notificaciones de aplicaciones:
- Asegúrese de que su teléfono inteligente tenga una conexión a Internet estable.
- Check if app notifications are enabled in your phone's settings and within the Smart Life/Tuya Smart app.
- Verify the gateway is connected to your 2.4GHz Wi-Fi network.
- Check if the "Do Not Disturb" schedule is active.
- El timbre no suena:
- Ensure the WiFi Receiver is plugged into a working outlet.
- Check the volume setting in the app; increase if necessary.
- Verify the mode setting in the app is not set to "Light Only".
- Confirm the sensor is properly paired with the gateway.
- El sensor no se activa:
- Ensure the two parts of the sensor are correctly aligned and within 1 cm when the door/window is closed.
- Check the sensor battery and replace if necessary.
- Verify the sensor is within range of the WiFi Receiver (up to 500 feet in open area, 100 feet within router signal range).
- Connectivity Issues (Gateway):
- Asegúrese de que su enrutador Wi-Fi funcione en una frecuencia de 2.4 GHz. Este dispositivo no es compatible con Wi-Fi de 5 GHz.
- Restart your Wi-Fi router and the WiFi Receiver.
- If issues persist, try re-pairing the gateway with the app.
7. Especificaciones
| Característica | Especificación |
|---|---|
| Marca | PHYSEN |
| Número de modelo | Wifi Sensor |
| Color | Blanco |
| Tecnología de conectividad | Inalámbrico (Wi-Fi de 2.4 GHz) |
| Dispositivos compatibles | Smartphone (Tuya/Smart Life App) |
| Tipo de alerta | Entry (Door/Window Open) |
| Método de control | Aplicación |
| Alcance máximo | 500 pies (área abierta) |
| Item Dimensions (Receiver) | 3.2 x 3.2 pulgadas (aprox.) |
| Item Dimensions (Sensor) | 2.9 x 0.9 inches (main unit), 1.3 x 0.5 inches (magnetic unit) (approx.) |
| Método de instalación | Autoadhesivo |
| Medios integrados | Wifi Receiver*1, Wifi Sensor*2 |
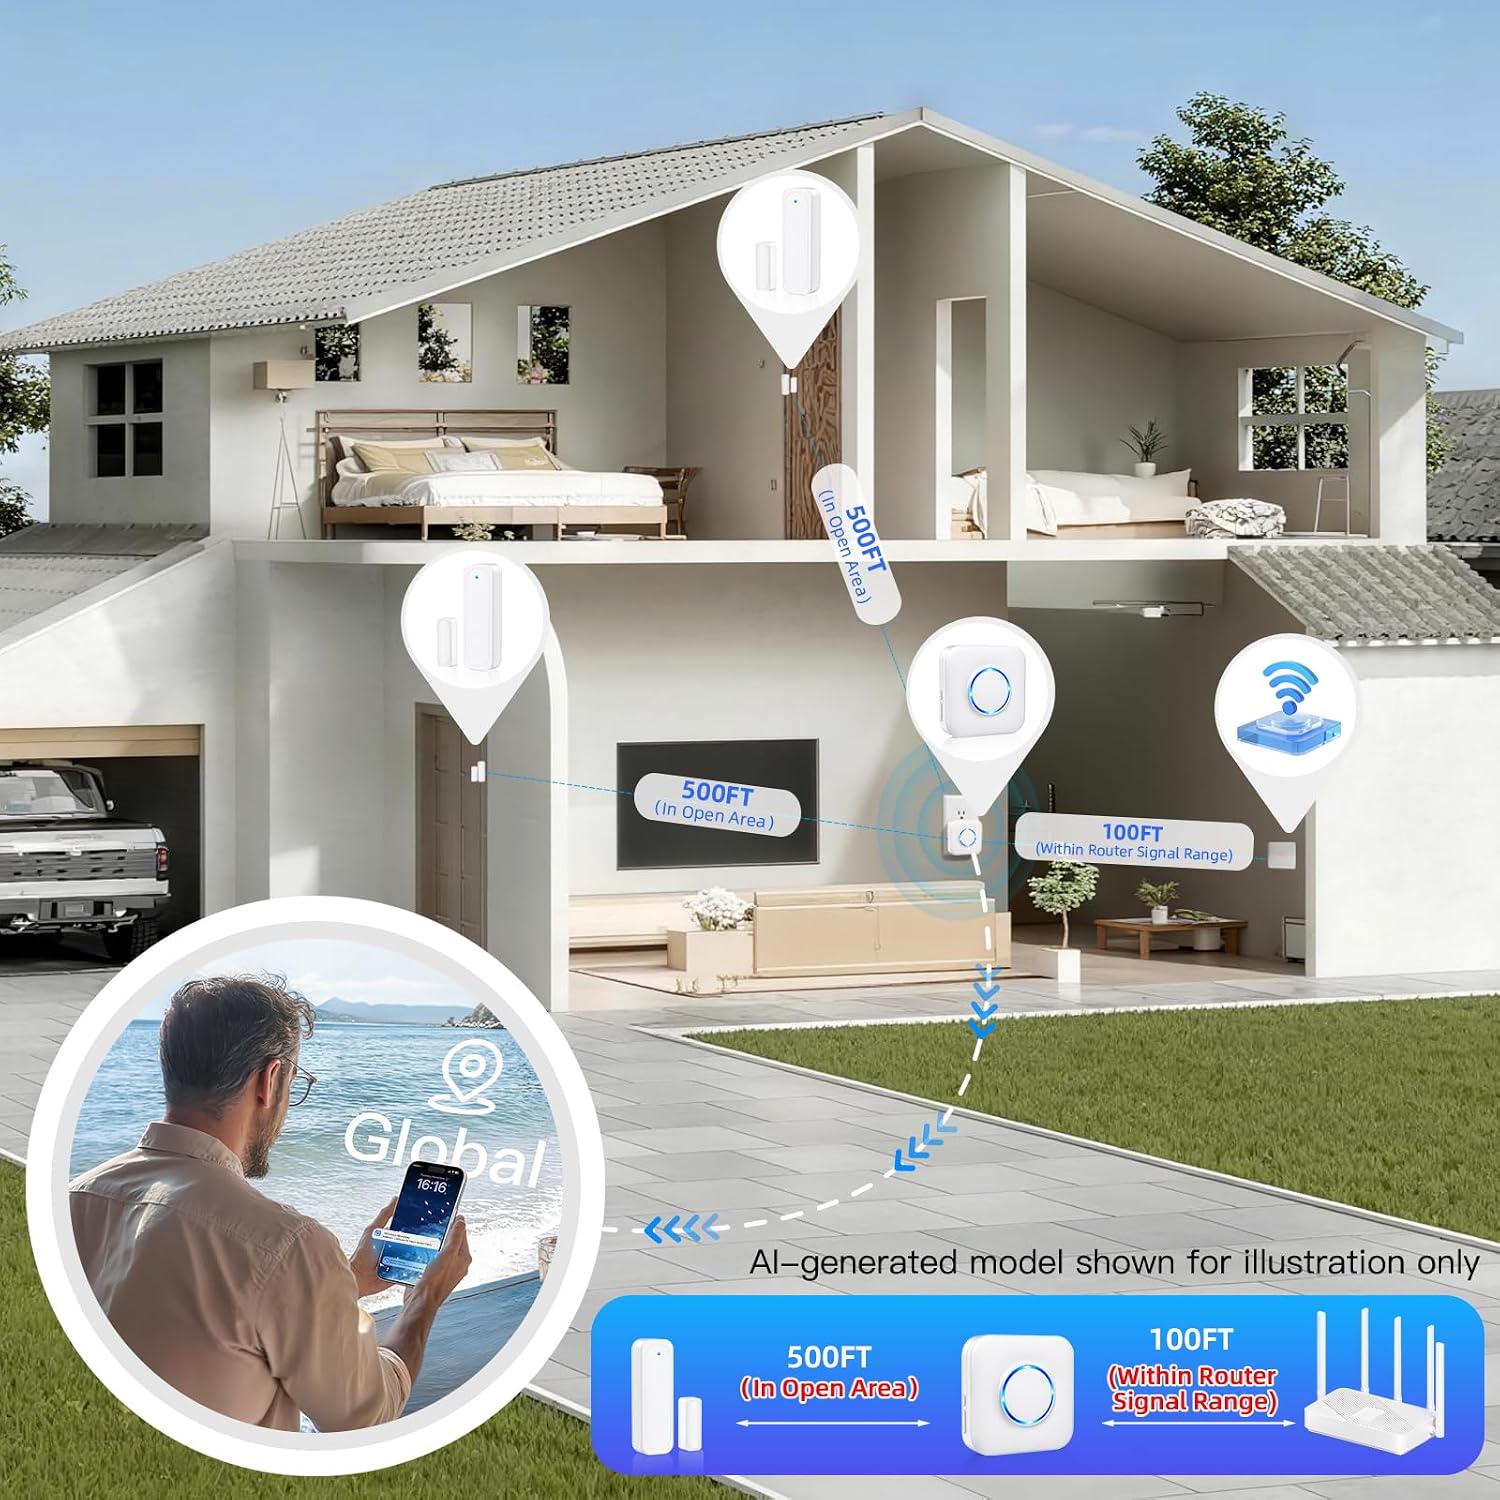
Imagen: Detallada view of the WiFi Receiver and contact sensor with their approximate dimensions and labeled components.
8. Garantía y soporte
For warranty information, technical support, or any inquiries regarding your PHYSEN Smart WiFi Door Sensor Chime Window Sensor Alarm, please refer to the product packaging or contact PHYSEN customer service directly. Contact details are typically available on the manufacturer's official websitio o a través del minorista donde se compró el producto.
Conserve su comprobante de compra para reclamos de garantía.