
1. Producto terminadoview
The Keenso F4 V3S PLUS Brushless ESC Stack is a high-performance 4-in-1 controller designed for FPV drones and RC airplanes. This integrated unit combines a flight controller and a 45A Electronic Speed Controller (ESC) into a compact design, simplifying installation and wiring.
Las características principales incluyen:
- High Performance 45A ESC: Integrates four 45A ESCs for efficient power management and simplified setup.
- Anti-Jamming & Fast Response: Supports various throttle modes including Oneshot, Multishot, and Dshot for rapid signal processing and interference resistance.
- Powerful BLHeli_S Firmware: Facilitates easy ESC parameter configuration, firmware updates, and compatibility with Cleanflight and Betaflight firmware.
- Artesanía de primera calidad: Constructed with industrial-grade LDO and high-resistance MOS for enhanced durability, strong load capacity, and high-temperature resilience.
- Funcionalidad mejorada: Equipped with a gyroscope and barometer for superior control and flight stability.
2. Contenido del paquete
Verifique que todos los artículos enumerados a continuación estén incluidos en su paquete:
- 1 x 4-in-1 ESC (Electronic Speed Controller)
- 1 x controlador de vuelo
- 1 x Capacitance (Capacitor)
- 3 x Connecting Wires (various types)
- 2 x Accessories (unspecified, typically connectors or small parts)
- 8xDampalmohadillas para orejas
- 4 x tuercas

Imagen 2.1: Másview de todos los componentes incluidos.

Imagen 2.2: Detallada view of the ESC and Flight Controller boards with accompanying parts.

Image 2.3: Components laid out for inspection.
3. Especificaciones técnicas
3.1. 4-in-1 ESC Parameters
| Parámetro | Valor |
|---|---|
| ESC Size | Aprox. 42 x 41 mm / 1.7 x 1.6 pulgadas |
| Distancia del agujero | Aprox. 30.5 x 30.5 mm / 1.2 x 1.2 pulgadas |
| Corriente continua | 45A |
| Corriente de ráfaga | 50A (10S) |
| Procesador | EFM8BB21F16G |
| Firmware | BLS J H 30 7 |
| Drive Signal Support | DShot300/600, Multshot, Oneshot, PMW |
| Vol de entradatage | 7.4 to 22.2V (2 to 6S LiPo) |
| Peso del ESC | Aprox. 12 g/0.4 oz |
3.2. Flight Controller Parameters
| Parámetro | Valor |
|---|---|
| Tamaño del controlador | Aprox. 36 x 36 mm / 1.4 x 1.4 pulgadas |
| Distancia del agujero de montaje | Aprox. 30.5 x 30.5 mm / 1.2 x 1.2 pulgadas |
| MCU | F405 |
| Funciones admitidas | Drag and drop OSD via Betaflight configuration, SBUS, PPM, Spketrum ports, Micro storage card black box |
| Giroscopio | Incluido |
| Barómetro | BMP280 |
| Salida BEC | 5 V/3 A, 9 V/3 A |
| Peso del controlador | Aprox. 7 g/0.2 oz |
3.3. Información general del producto
- Marca: Keenso
- Nombre del modelo: Keensox6h89r54l1
- Material: Componente electrónico
- Solicitud: FPV UAV, RC Airplanes
4. Configuración e instalación
Proper installation is crucial for the performance and safety of your FPV drone or RC airplane. Always refer to the specific wiring diagrams for your frame and components.
4.1. Comprobaciones previas a la instalación
- Ensure your workspace is clean and static-free.
- Verifique que todos los componentes estén presentes y sin daños.
- Gather necessary tools: soldering iron, solder, flux, wire cutters, heat shrink tubing, multimeter.
4.2. Mounting the ESC Stack
- Adjunte la damping pads to the mounting holes on your frame.
- Carefully place the 4-in-1 ESC board onto the damping pads, aligning the mounting holes.
- Place the flight controller board on top of the ESC, ensuring proper orientation and alignment.
- Secure the stack using the provided nuts or standoffs, ensuring not to overtighten.
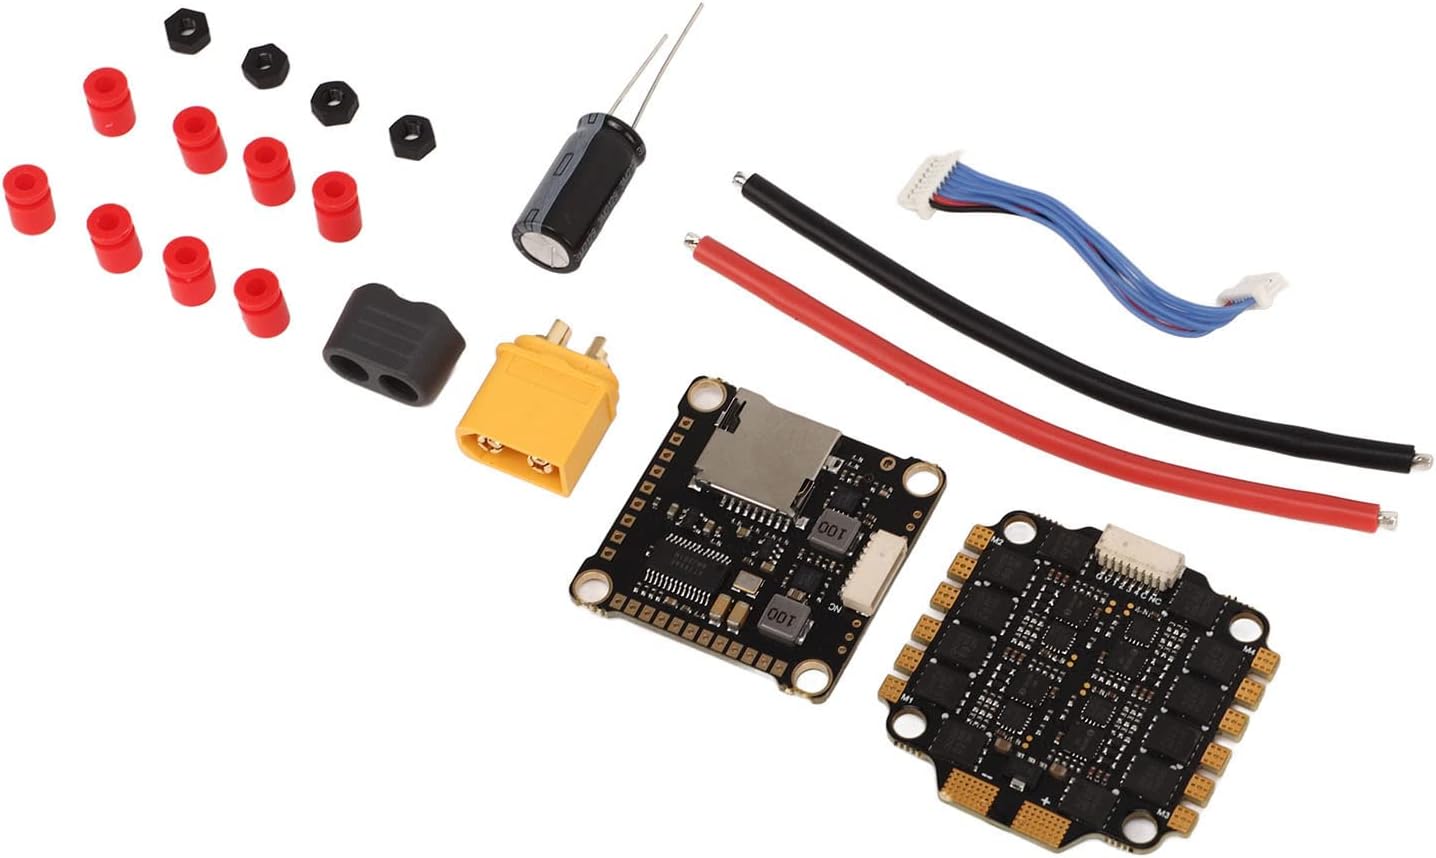
Imagen 4.1: Detallada view of the ESC and Flight Controller boards, highlighting mounting points.
4.3. Conexiones de cableado
Connect the ESC stack to your drone's power distribution board (PDB) or direct battery connection, motors, receiver, and other peripherals. Always double-check polarity before powering on.
- Entrada de energía: Solder the main battery leads (red for positive, black for negative) to the designated pads on the 4-in-1 ESC. Ensure the capacitor is soldered across the main battery pads for voltage spike suppression.
- Conexiones de motores: Solder the three motor wires from each motor to the corresponding motor pads on the ESC. The order of wires may need adjustment in software for correct motor direction.
- Controlador de vuelo a ESC: Use the provided connecting wire harness to link the flight controller to the 4-in-1 ESC. This typically carries telemetry, current sensing, and motor control signals.
- Conexión del receptor: Connect your receiver (SBUS, PPM, or Spektrum) to the appropriate UART port on the flight controller. Refer to the flight controller's pinout diagram.
- Otros periféricos: Connect FPV camera, video transmitter (VTX), GPS, or other accessories to the designated pads/ports on the flight controller, paying attention to voltage requirements (5V/9V BEC outputs are available).
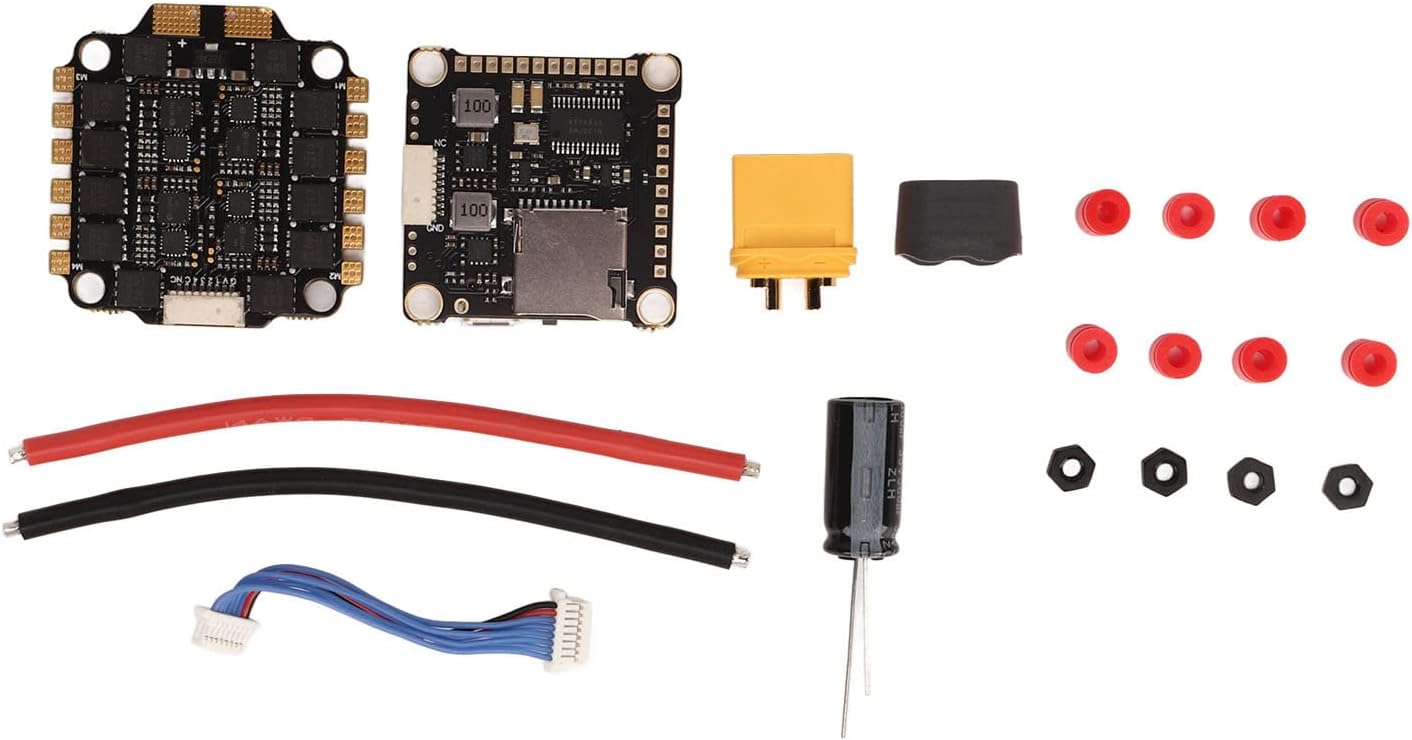
Image 4.2: Connection points on the ESC and Flight Controller.

Image 4.3: Included connecting wires.

Image 4.4: Included capacitor for power filtering.
4.4. Configuración de firmware
The flight controller supports Betaflight and Cleanflight firmware. The ESCs utilize BLHeli_S firmware.
- Controlador de vuelo: Connect the flight controller to your computer via USB. Use the Betaflight Configurator or Cleanflight Configurator software to flash the latest firmware and configure settings such as PID tuning, motor output, receiver protocols, and OSD.
- ESC: Use the BLHeliSuite software (accessible through Betaflight/Cleanflight passthrough) to configure ESC settings, calibrate motors, reverse motor direction if needed, and update BLHeli_S firmware.
5. Instrucciones de funcionamiento
Once installed and configured, the Keenso F4 V3S PLUS ESC Stack is ready for operation.
5.1. Comprobaciones previas al vuelo
- Asegúrese de que todas las conexiones estén seguras y libres de cortocircuitos.
- Verify propeller direction and tightness.
- Compruebe el volumen de la bateríatage y nivel de carga.
- Confirm radio control link and arming switch functionality.
5.2. Powering On and Arming
- Connect the flight battery to the ESC stack. You should hear a series of beeps indicating successful initialization.
- Coloque el dron en una superficie nivelada.
- Arm the motors using your configured arming switch on your radio transmitter. The motors will typically spin slowly or make a distinct sound to indicate they are armed.
5.3. Throttle Modes
The ESC supports various throttle protocols for precise motor control:
- DShot300/600: Digital protocol offering high resolution and noise immunity. Recommended for optimal performance.
- Disparo múltiple: Analog protocol, faster than Oneshot.
- Oneshot125: Analog protocol, faster than standard PWM.
- PWM: Standard analog protocol, generally not recommended for FPV drones due to latency.
Select the desired throttle mode in your flight controller software (e.g., Betaflight Configurator).
6. Mantenimiento
Regular maintenance helps ensure the longevity and reliability of your ESC stack.
- Inspección visual: Periodically check for any signs of physical damage, loose connections, or burnt components.
- Limpieza: Keep the boards free from dust, dirt, and debris. Use compressed air or a soft brush. Avoid using liquids directly on the electronics.
- Actualizaciones de firmware: Regularly check for and apply the latest firmware updates for both the flight controller (Betaflight/Cleanflight) and ESCs (BLHeli_S) to benefit from performance improvements and bug fixes.
- Gestión del calor: Ensure adequate airflow around the ESC stack, especially during intense flight, to prevent overheating.
7. Solución de problemas
Esta sección aborda problemas comunes que podrías encontrar.
7.1. No Power / No Initialization Beeps
- Comprobar la batería: Asegúrese de que la batería esté cargada y conectada correctamente.
- Comprobar polaridad: Verify that the battery leads are connected with correct polarity to the ESC. Reverse polarity can cause severe damage.
- Inspeccionar la soldadura: Look for cold solder joints or bridges on the main power pads.
7.2. Motors Not Spinning / Incorrect Direction
- Armamento: Ensure the flight controller is armed.
- Conexiones de motores: Verify all motor wires are securely soldered to the ESC.
- BLHeli_S Configuration: Use BLHeliSuite to check motor direction and calibrate ESCs. Motor direction can be reversed in the software.
- Throttle Protocol: Confirm the correct DShot/Multishot/Oneshot protocol is selected in Betaflight/Cleanflight.
7.3. Unstable Flight / Jittery Motors
- Ajuste de PID: Adjust PID settings in Betaflight/Cleanflight.
- DampAlmohadillas de infusión: Ensure the ESC stack is properly mounted on damping pads to reduce vibrations.
- Hélices: Check for damaged or unbalanced propellers.
- Condensador: Verify the capacitor is correctly installed across the main power leads to filter electrical noise.
7.4. Problemas de conexión USB
- Cable USB: Try a different USB cable, ensuring it is a data-capable cable.
- Conductores: Install necessary drivers (e.g., STM32 Virtual COM Port Driver, Zadig for DFU mode) for your flight controller.
- Configurador: Ensure you are using the correct version of Betaflight/Cleanflight Configurator.
8. Garantía y soporte
For warranty information and technical support, please refer to the official Keenso webSitio web o contacte a su vendedor. Conserve su comprobante de compra para cualquier reclamación de garantía.
This product has no known safety hazards to users when installed and operated correctly.