
1. Másview
The Philips TAZ2200 is a versatile portable sound machine designed for enjoying various audio formats. It features a top-loading CD player, a front-loading cassette player, FM radio, Bluetooth 6.0 connectivity, USB playback, and a 3.5mm audio input. Equipped with dynamic bass boost and 6W stereo speakers, it delivers rich sound. The unit can be powered by AC mains or batteries and includes a carrying handle for portability.
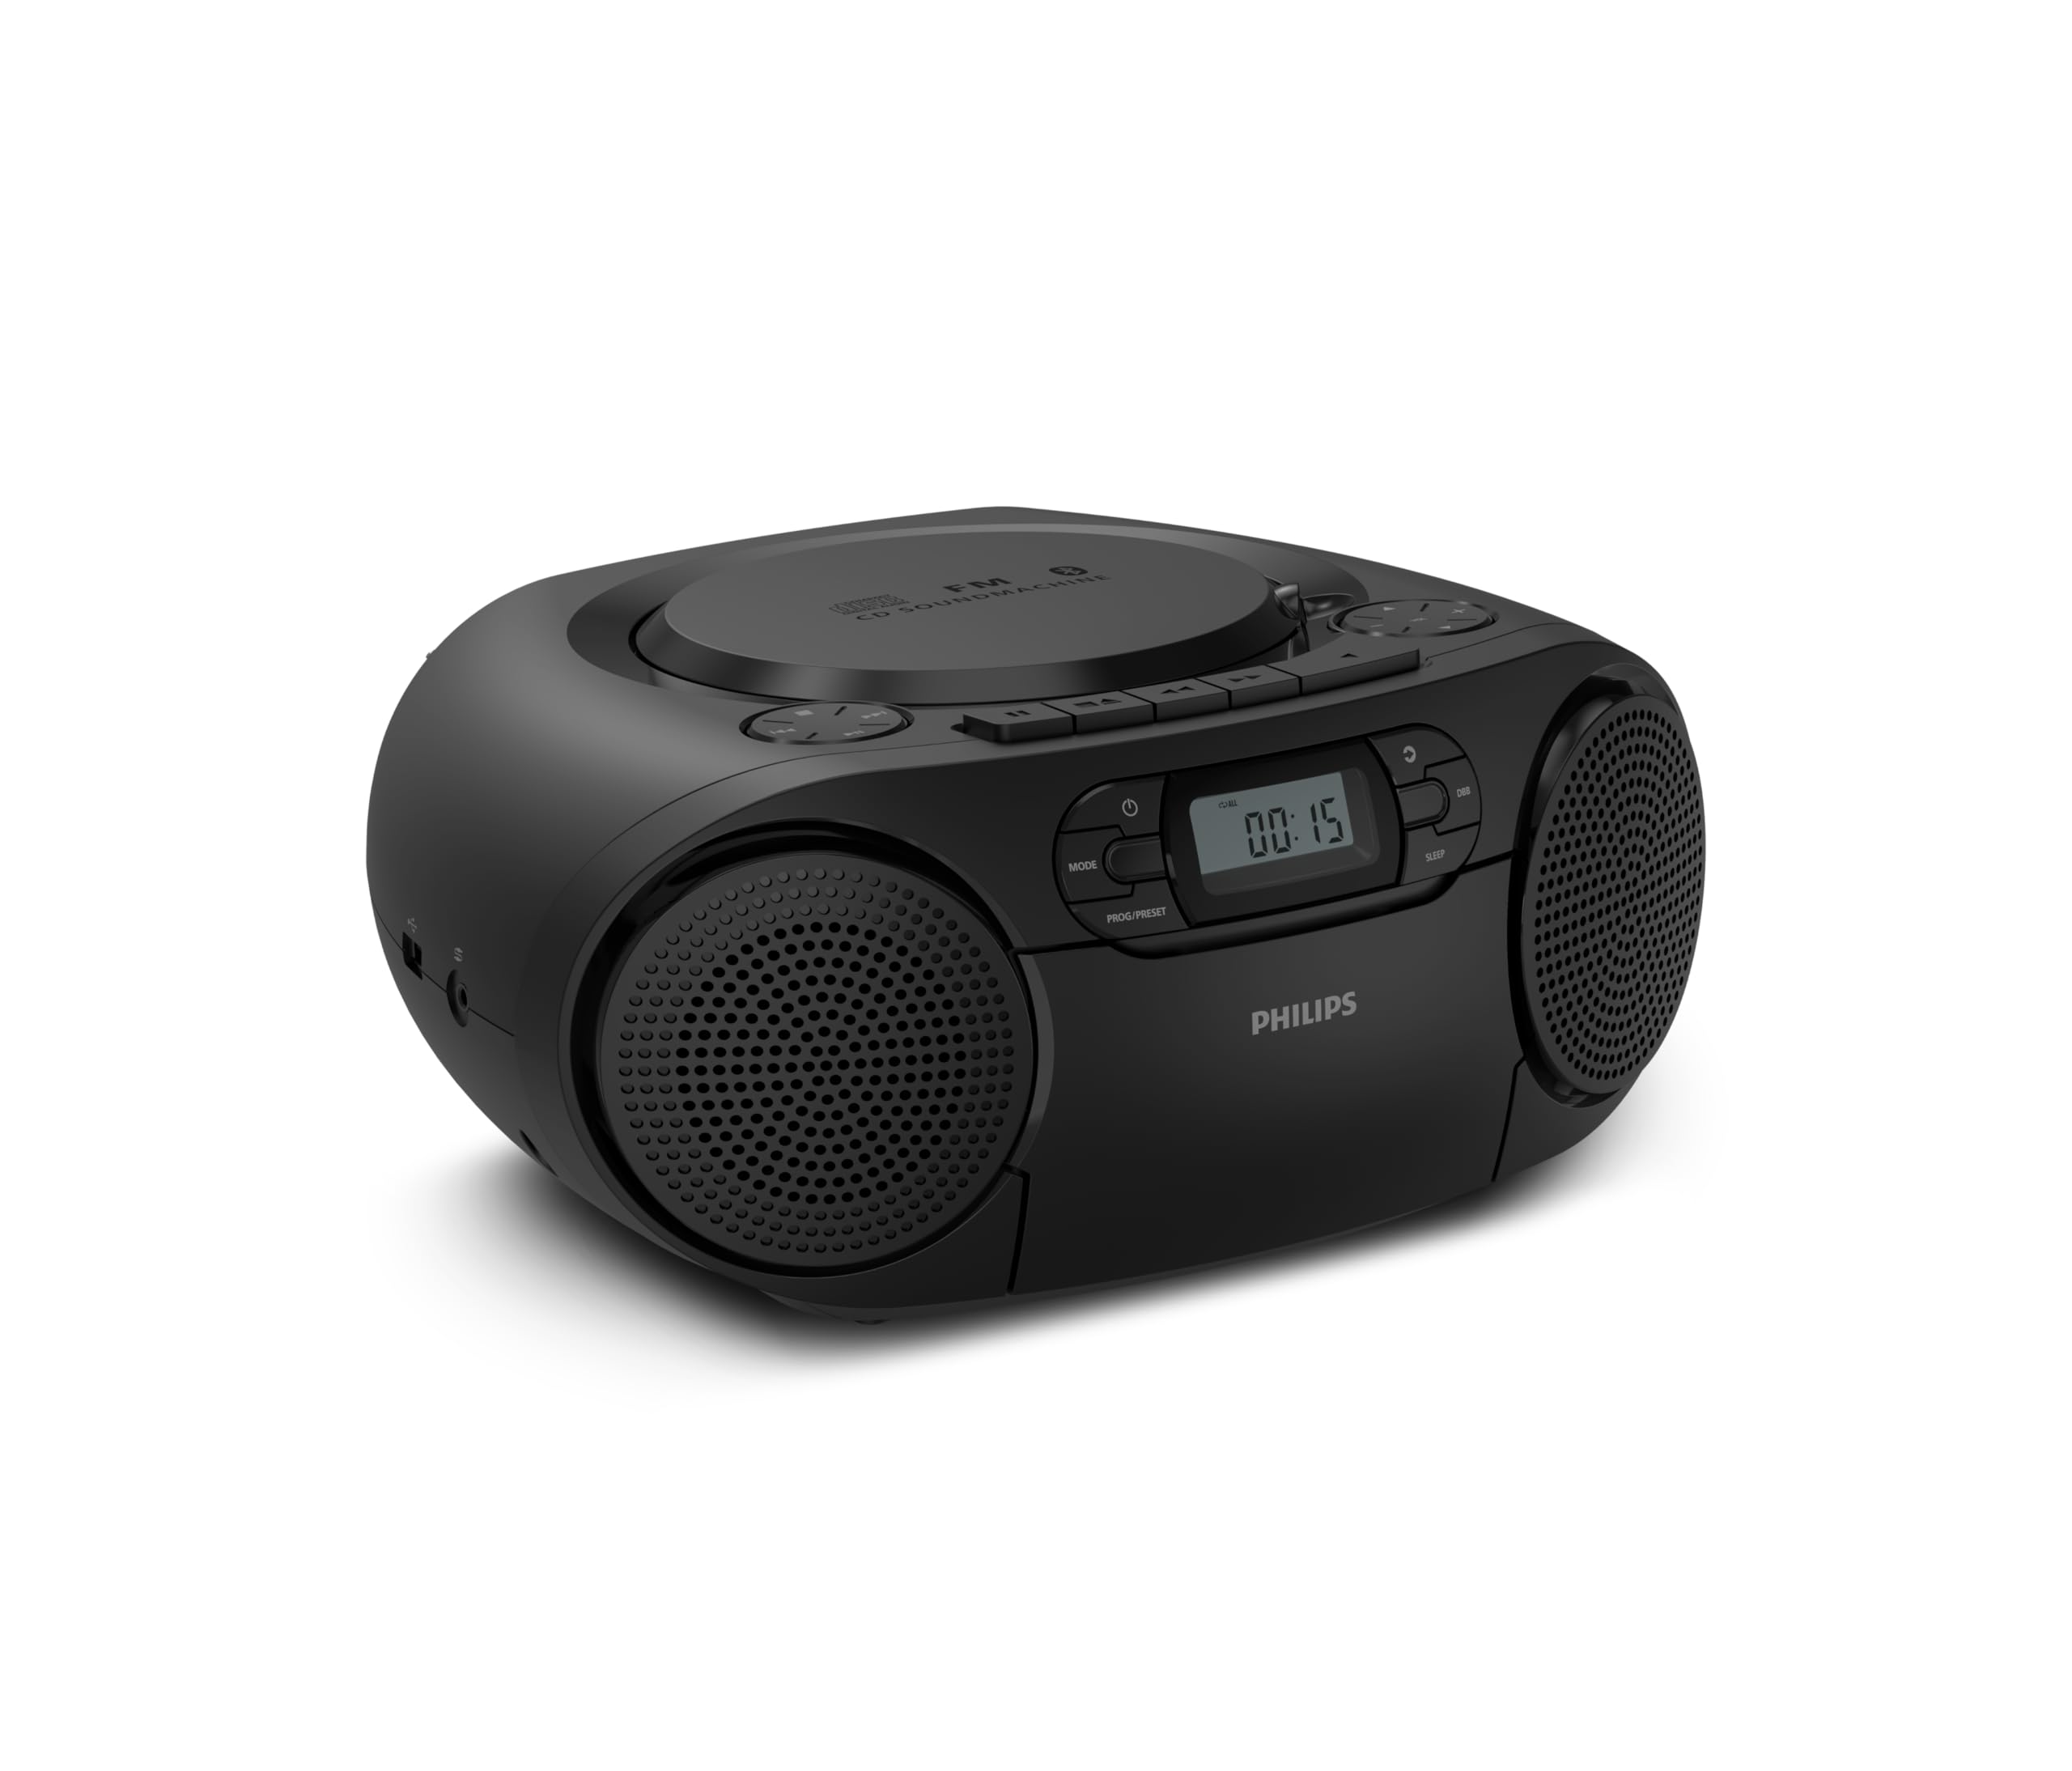
Frente view of the Philips TAZ2200 CD Soundmachine, showing the main display and control buttons.
2. Información de seguridad
Please read these safety instructions carefully before using your device and keep them for future reference. Incorrect use may result in hazards.
- Fuente de energía: Utilice únicamente el adaptador de corriente o las baterías especificadas. Asegúrese de que el voltage coincide con los requisitos de la unidad.
- Agua y humedad: No exponga la unidad a la lluvia, la humedad, goteos ni salpicaduras. No coloque objetos con líquido, como jarrones, sobre la unidad.
- Ventilación: Ensure adequate ventilation. Do not block any ventilation openings. Maintain a minimum distance around the unit for sufficient ventilation.
- Calor: No coloque la unidad cerca de fuentes de calor como radiadores, rejillas de calefacción, estufas u otros aparatos (incluidos ampificadores) que producen calor.
- Baterías: Follow correct polarity when inserting batteries. Do not mix old and new batteries, or different types of batteries. Remove batteries if the unit is not used for a long period.
- Limpieza: Desconecte la unidad de la toma de corriente antes de limpiarla. Utilice un paño suave y seco. No utilice limpiadores líquidos ni en aerosol.
- Servicio: No intente reparar este producto usted mismo. Refiera todo el servicio a personal de servicio calificado.
3. ¿Qué hay en la caja?
Al desembalar, asegúrese de que estén presentes todos los elementos enumerados a continuación:
- Philips TAZ2200 CD Soundmachine
- Cable de alimentación
- Guía de inicio rápido
- Folleto de garantía
- Ficha de seguridad
4. Controles y conexiones
Controles del panel frontal
The front panel features the main display, power button, mode selection, program/preset buttons, and dynamic bass boost (DBB) control. Playback controls for CD and USB are also located here.

Frente detallado view showing the display, power, mode, program/preset, and DBB buttons.
Conexiones laterales y traseras
The side of the unit provides a USB port for digital audio playback and a 3.5mm audio input jack for connecting external devices.

Lado view illustrating the USB port and Audio Input jack.
The top of the unit houses the CD compartment and additional playback controls, while the rear features the AC power input and the FM antenna.

Arriba view showing the CD compartment and associated controls.

Trasero view displaying the AC power input and the telescopic FM antenna.
5. Configuración
5.1 Fuente de alimentación
Corriente alterna
- Asegúrese de que la unidad esté apagada.
- Connect the supplied power cable to the AC IN socket on the rear of the sound machine.
- Plug the other end of the power cable into a wall power outlet.
Energía de la batería
For portable use, the unit can operate on 6 x C-type batteries (not included).
- Abra la tapa del compartimiento de la batería ubicada en la parte inferior de la unidad.
- Insert 6 C-type batteries, ensuring correct polarity (+/-) as indicated inside the compartment.
- Cierre bien la tapa del compartimento de la batería.
5.2 Ajuste de la antena
For optimal FM radio reception, fully extend the telescopic antenna located at the rear of the unit. Adjust its position and angle to achieve the clearest signal.
6. Instrucciones de funcionamiento
6.1 Funcionamiento general
- Encendido/apagado: Presione el FUERZA para encender o apagar la unidad.
- Control de volumen: Utilice el VOL+ or VOLUMEN - botones para ajustar el nivel de volumen.
- Refuerzo dinámico de graves (DBB): Presione el DBB button to activate or deactivate the dynamic bass boost feature for enhanced bass sound.
- Selección de modo: Presione el MODO button repeatedly to switch between CD, Cassette, FM Radio, Bluetooth, USB, and Audio Input modes.
6.2 Reproducción de CD
- Abra la tapa del compartimiento de CD en la parte superior de la unidad.
- Place a CD (CD, CD-R, or CD-RW) with the label side facing up onto the spindle.
- Cierre la tapa del compartimento del CD.
- Presione el MODO para seleccionar el modo CD.
- Presione el REPRODUCIR/PAUSA para iniciar la reproducción.
- Utilice el SALTAR botones (|< or >> |) para saltar pistas.
- Mantenga pulsado |< or >> | to search within a track.
- Presione el DETENER para detener la reproducción.
6.3 Reproducción de casetes
- Open the cassette compartment door on the front of the unit.
- Inserte una cinta de casete con el borde abierto hacia arriba.
- Cierre la puerta del compartimiento del casete.
- Presione el MODO Botón para seleccionar el modo Cassette.
- Presione el JUGAR para iniciar la reproducción.
- Utilice el AVANCE RÁPIDO or REBOBINAR Botones para avanzar o rebobinar rápidamente la cinta.
- Presione el DETENER para detener la reproducción.
6.4 Radio FM
- Presione el MODO Botón para seleccionar el modo de radio FM.
- Auto escáner: Mantenga pulsado el PROG/PRESET Botón para escanear y almacenar automáticamente las estaciones FM disponibles.
- Sintonización manual: Presione el SINTONIZACIÓN botones (|< or >> |) para sintonizar manualmente una frecuencia deseada.
- Guardar ajustes preestablecidos: After tuning to a station, press PROG/PRESET una vez, luego usar |< or >> | para seleccionar un número preestablecido y presione PROG/PRESET De nuevo para confirmar.
- Recuperación de preajustes: En el modo FM, presione PROG/PRESET repeatedly to cycle through saved preset stations.
6.5 Reproducción Bluetooth
- Presione el MODO button to select Bluetooth mode. The display will show 'BT' and flash, indicating it's in pairing mode.
- En su dispositivo con Bluetooth (teléfono inteligente, tableta), habilite Bluetooth y busque los dispositivos disponibles.
- Select "Philips TAZ2200" from the list of devices.
- Once paired, the unit will emit a confirmation sound, and 'BT' will stop flashing.
- Start playing audio on your connected device. The sound will be streamed to the sound machine.
Reproducción USB 6.6
- Inserte una unidad flash USB en el puerto USB ubicado en el costado de la unidad.
- Presione el MODO botón para seleccionar el modo USB.
- La unidad detectará automáticamente y comenzará a reproducir audio compatible. fileFormatos de archivo MP3, WAV, WMA.
- Utilice los controles de reproducción (REPRODUCIR/PAUSA, SALTAR, DETENER) como lo haría para la reproducción de CD.
6.7 Entrada de audio (AUX)
- Connect one end of a 3.5mm audio cable (not included) to the AUDIO IN jack on the side of the sound machine.
- Connect the other end of the audio cable to the headphone jack or audio output of your external device (e.g., MP3 player, turntable).
- Presione el MODO button to select Audio Input mode.
- Start playing audio on your external device. The sound will be played through the sound machine.
7. Mantenimiento
- Limpieza de la unidad: Limpie el exterior de la unidad con un paño suave y ligeramente húmedo.amp Paño. No utilice limpiadores abrasivos ni disolventes.
- Cuidado del reproductor de CD: Keep the CD compartment clean. If the lens is dirty, use a specialized CD lens cleaner. Avoid touching the lens.
- Cuidado del reproductor de casetes: Limpie periódicamente los cabezales de la cinta y los rodillos de presión con un hisopo de algodón ligeramente húmedo.ampenriquecido con alcohol isopropílico.
- Reemplazo de batería: If using batteries, replace all 6 C-type batteries when the unit's performance diminishes or if the unit will not be used for an extended period.
- Almacenamiento: Cuando no esté en uso, guarde la unidad en un lugar limpio y seco, alejado de la luz solar directa y de temperaturas extremas.
8. Solución de problemas
If you encounter any issues with your Philips TAZ2200, please refer to the table below for common problems and solutions.
| Problema | Posible causa | Solución |
|---|---|---|
| Sin poder | Cable de alimentación no conectado; baterías agotadas o insertadas incorrectamente. | Verifique la conexión de alimentación de CA; reemplace las baterías o asegúrese de que la polaridad sea correcta. |
| Sin sonido | Volumen demasiado bajo; Modo incorrecto seleccionado; Auriculares conectados. | Increase volume; Select the correct source mode (CD, FM, BT, etc.); Disconnect headphones. |
| El CD no se reproduce | CD insertado incorrectamente; el CD está sucio o rayado; formato de CD no compatible. | Insert CD with label side up; Clean or replace CD; Ensure CD is CD-R/RW compatible. |
| El casete no se reproduce | Cassette inserted incorrectly; Tape is damaged. | Insert cassette correctly; Try a different cassette. |
| Recepción de FM deficiente | Antena no extendida o posicionada correctamente; señal débil. | Extienda y ajuste completamente la antena telescópica; intente mover la unidad a una ubicación diferente. |
| El Bluetooth no se conecta | Unit not in pairing mode; Bluetooth device too far; Device already paired with another unit. | Ensure unit is in Bluetooth mode and flashing; Move device closer; Disconnect from other devices. |
| Problemas de reproducción USB | La unidad USB no se insertó correctamente; Incompatible file formato; unidad USB dañada. | Vuelva a insertar la unidad USB; asegúrese files are MP3, WAV, or WMA; Try a different USB drive. |
9. Especificaciones
| Característica | Especificación |
|---|---|
| Marca | PHILIPS |
| Número de modelo | TAZ2200/10 |
| Tecnología de conectividad | Bluetooth 6.0, USB, Audio Input (3.5mm) |
| Tipo de altavoz | Stereo (2 speakers) |
| Potencia de salida | 6 vatios (máx.) |
| Medios compatibles | CD, CD-R, CD-RW, Cassette, USB (MP3, WAV, WMA) |
| Sintonizador de radio | Digital FM with 20 presets |
| Fuente de poder | AC (wired), 6 x C-type batteries (not included) |
| Dimensiones (LxAnxAl) | 24.5 x 28.5 x 12.5 cm |
| Peso | 1.35 kilogramos |
| Color | Plata |
10. Garantía y soporte
10.1 Garantía del producto
This Philips TAZ2200 CD Soundmachine comes with a 2 año de garantía A partir de la fecha de compra. Conserve el comprobante de compra para reclamaciones de garantía. La garantía cubre defectos de fabricación y mal funcionamiento en condiciones normales de uso.
10.2 Atención al cliente
For technical assistance, troubleshooting beyond this manual, or warranty service, please refer to the contact information provided in the warranty booklet included with your product. You can also visit the official Philips support website for your region for further assistance and FAQs.