Introducción
This manual provides detailed instructions for the setup, operation, and maintenance of your Supersonic SC371 Digital Projection Alarm Clock with AM/FM Radio. Please read this manual thoroughly before using the device to ensure proper function and to maximize your user experience.
Información de seguridad
- No exponga la unidad a temperaturas extremas, luz solar directa, polvo o humedad.
- Ensure the power adapter is compatible with your local power supply (AC 120V, 60Hz).
- No intente desmontar ni modificar la unidad. Encargue cualquier reparación a personal cualificado.
- Mantenga la unidad alejada del agua u otros líquidos.
- Use only the specified battery type for backup (9V, not included).
Contenido del paquete
Por favor, compruebe que todos los artículos estén presentes en el paquete:
- Supersonic SC371 Digital Projection Alarm Clock with Radio
- Adaptador de corriente alterna
- Manual de usuario (este documento)
Producto terminadoview
The Supersonic SC371 is a versatile digital alarm clock featuring a clear LED display, built-in time projection, and an integrated AM/FM radio. It includes an alarm with sleep/snooze timers and a 3.5mm audio input for external devices.
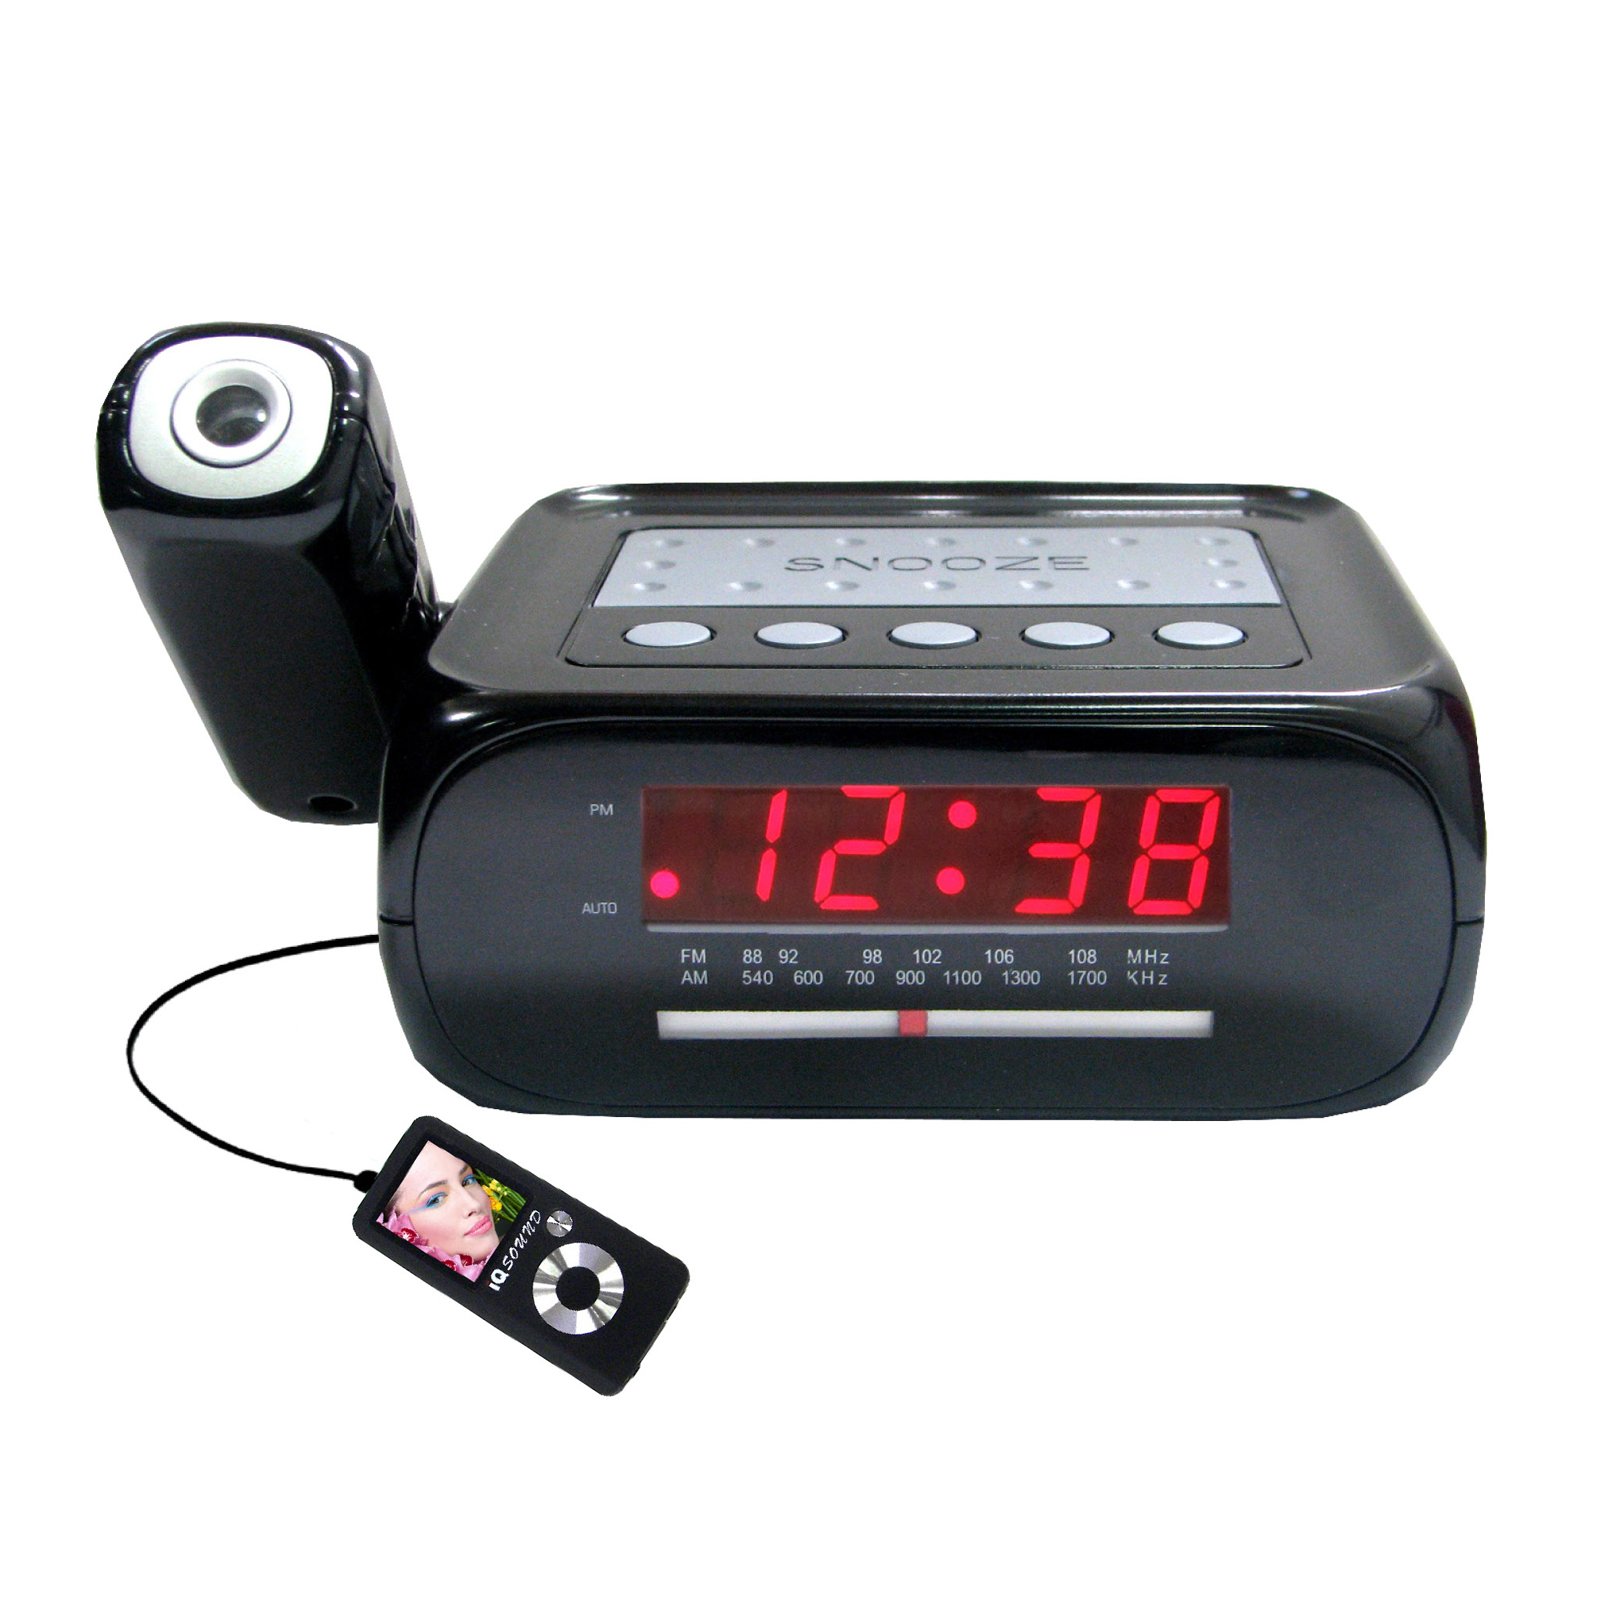
Imagen: Frente view of the Supersonic SC371 Digital Projection Alarm Clock, showing the LED display and control buttons.
Características principales:
- Digital Clock with LED Display
- Built-in Time Projection
- Sintonizador de radio AM/FM
- Alarm Clock with Sleep/Snooze Timers
- Wake Up to Music or Buzzer
- 3.5mm Audio Input Jack for Portable Audio Players
Configuración
1. Conexión de alimentación
Connect the AC power adapter to the DC IN jack on the back of the unit, then plug the adapter into a standard AC 120V, 60Hz wall outlet. The unit will power on and the LED display will illuminate.
2. Batería de respaldo (opcional)
For battery backup functionality, insert one 9V battery (not included) into the battery compartment located on the bottom of the unit. This battery will preserve time and alarm settings during a power outage, but the display and projection will not operate.
Instrucciones de funcionamiento
Ajuste de la hora
- Mantenga pulsado el TIEMPO ESTABLECIDO Botón. Los dígitos de la hora comenzarán a parpadear.
- Utilice el HORA botón para ajustar la hora.
- Utilice el MINUTO botón para ajustar los minutos.
- Prensa TIEMPO ESTABLECIDO nuevamente para confirmar y salir del modo de configuración de la hora.
Configuración de la alarma
- Mantenga pulsado el SET DE ALARMAS Botón. Los dígitos de la hora de la alarma parpadearán.
- Utilice el HORA Botón para configurar la hora de alarma deseada.
- Utilice el MINUTO para configurar los minutos de alarma deseados.
- Prensa SET DE ALARMAS nuevamente para confirmar la hora de la alarma.
- Presione el ALARMA ENCENDIDA / APAGADA button to activate or deactivate the alarm. An indicator will appear on the display when the alarm is active.
Función de repetición
Cuando suene la alarma, presione el DORMITAR Botón para silenciar la alarma temporalmente durante aproximadamente 9 minutos. La alarma sonará de nuevo después del periodo de repetición.
Operación de radio (AM/FM)
- Presione el ENCENDIDO/APAGADO DE RADIO Botón para encender la radio.
- Presione el BANDA Botón para cambiar entre las bandas AM y FM.
- Utilice el SINTONIZACIÓN perilla o botones (si están disponibles) para seleccionar la estación deseada.
- Ajuste el volumen con el VOLUMEN perilla.
- Para apagar la radio, presione el botón ENCENDIDO/APAGADO DE RADIO botón de nuevo.
Proyección del tiempo
The unit features a built-in projector to display the time on a wall or ceiling. Locate the PROYECCIÓN button or switch. Press or slide it to activate the projection. You may be able to adjust the focus and angle of the projection using dedicated controls on the unit.
Uso de la entrada auxiliar
Connect an external audio device (e.g., MP3 player, smartphone) to the 3.5mm Audio Input Jack using a standard 3.5mm audio cable (not included). The unit will automatically switch to AUX mode, allowing you to play audio from your connected device through the clock's speaker.
Mantenimiento
Limpieza
To clean the unit, gently wipe the surfaces with a soft, dry cloth. Do not use abrasive cleaners, waxes, or solvents, as these can damage the finish. Ensure the unit is unplugged before cleaning.
Reemplazo de batería
If the battery backup feature is used, replace the 9V battery annually or when the unit fails to retain settings during a power interruption.
Solución de problemas
| Problema | Posible causa | Solución |
|---|---|---|
| La unidad no se enciende. | Adaptador de corriente no conectado o defectuoso. | Asegúrese de que el adaptador de CA esté enchufado de forma segura a la unidad y a un tomacorriente de pared que funcione. |
| Projection does not work or is dim. | Projection feature not activated; unit too far from surface; projector lens obstructed. | Activate the projection feature. Adjust the unit's distance from the projection surface. Clean the projector lens if necessary. |
| Estática de radio o mala recepción. | Señal débil; antena no extendida. | Extienda completamente la antena FM. Reubique la unidad para una mejor recepción. |
| La alarma no suena. | Alarma no configurada o desactivada; volumen demasiado bajo. | Ensure the alarm is set and activated (check display indicator). Increase the volume. |
Presupuesto
| Característica | Especificación |
|---|---|
| Número de modelo | SC371 |
| Tipo de pantalla | LED digitales |
| Fuente de poder | CA 120 V, 60 Hz (eléctrico con cable) |
| Batería de respaldo | 1 x 9 V (no incluida) |
| Características especiales | Alarm, Audio Input, Projection Clock, Radio, Snooze |
| Dimensiones (LxAnxAl) | 18.52 x 9.42 x 8.71 cm (7.29 x 3.71 x 3.43 pulgadas) |
| Peso del artículo | 517 g (1.14 libras) |
| Tipo de montaje | Superficie de la mesa |
Garantía y soporte
Los productos Supersonic están diseñados para brindar confiabilidad y rendimiento. Para obtener información sobre la garantía o asistencia técnica, consulte la tarjeta de garantía incluida con su compra o visite el sitio web oficial de Supersonic. webSitio. Conserve su recibo de compra como comprobante de compra para cualquier reclamación de garantía.