Introducción
Welcome to the world of homemade bread with your new Oster Expressbake Bread Maker. This appliance is designed to simplify the bread-making process, offering a variety of settings for different bread types, doughs, and even jams. Enjoy fresh, delicious bread with minimal effort.
Producto terminadoview y características clave
The Oster Expressbake Bread Maker (CKSTBR9050-NP) is a versatile kitchen appliance designed for ease of use and consistent results. It features a compact design and intuitive controls.
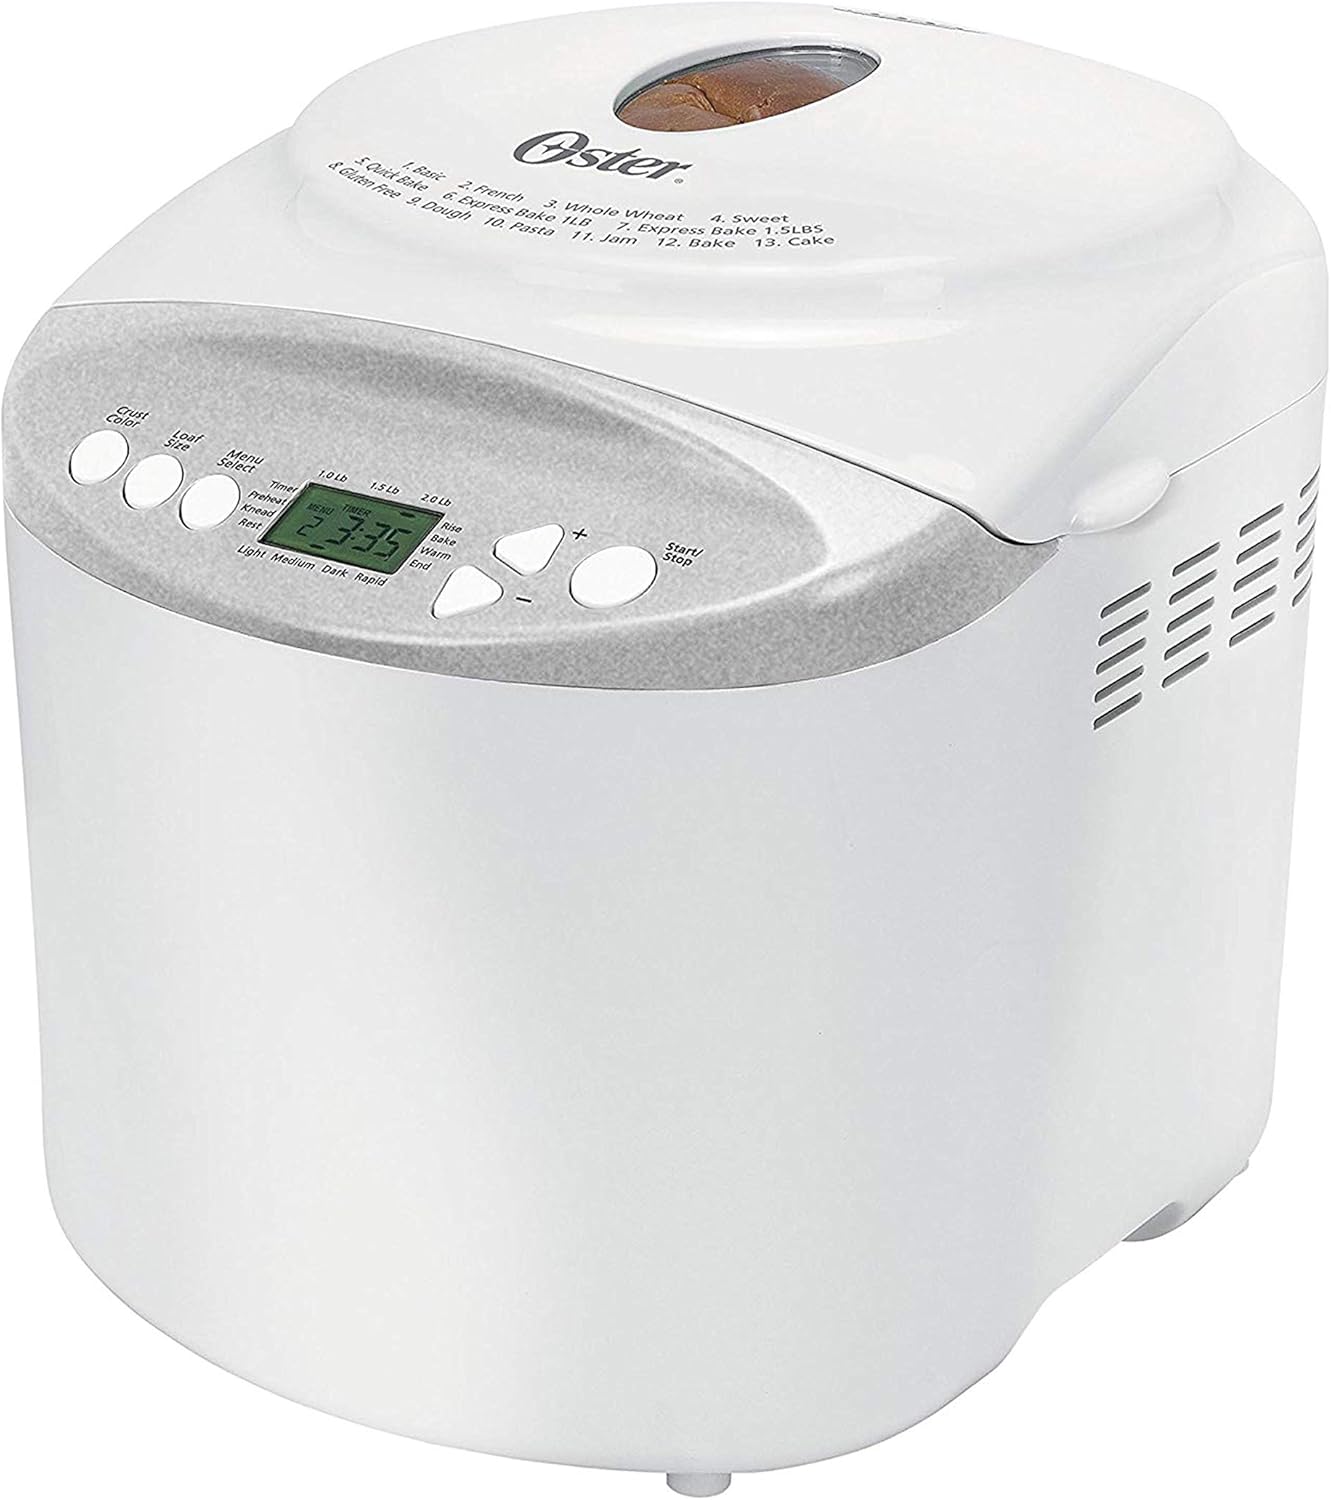
Frente view of the Oster Expressbake Bread Maker, showing the control panel and viewventana de ing.

Interno view highlighting the removable lid, nonstick aluminum pan, and easy-to-read LCD display.
Características principales:
- 2-Pound Loaf Capacity: Ideal for families, allowing for larger bread batches.
- 13 configuraciones: Offers a wide range of options for various breads, doughs, and jams.
- Gluten-Free Setting: Dedicated program for preparing gluten-free bread.
- Express Bake Setting: Bakes bread in under an hour for quick results.
- Crust Color Selection: Choose from light, medium, or dark crusts.
- Temporizador programable de 13 horas: Allows for delayed baking, so you can wake up to fresh bread.
- Accesorios convenientes: Includes a measuring cup and spoon.
Product Features Video: A Closer Look
This video provides a detailed visual overview of the Oster Expressbake Bread Maker, showcasing its various components and features, including the bread pan, kneading paddle, and control panel. It highlights the ease of use and the different settings available.
Guía de configuración
- Desembalaje: Retire con cuidado todos los materiales de embalaje de la panificadora y sus accesorios.
- Limpieza: Before first use, wash the bread pan and kneading paddle with warm, soapy water. Wipe the exterior of the unit with a damp paño. Asegúrese de que todas las piezas estén completamente secas antes del montaje.
- Colocación: Coloque la panificadora sobre una superficie estable, plana y resistente al calor, alejada de la luz solar directa y de fuentes de calor. Asegúrese de que haya una ventilación adecuada alrededor de la unidad.
- Instalar el molde para pan: Insert the kneading paddle onto the shaft inside the bread pan. Place the bread pan into the bread maker, ensuring it clicks securely into place.
- Conexión de energía: Enchufe el cable de alimentación a una toma eléctrica con conexión a tierra.

The included measuring cup and spoon are essential for accurate ingredient measurement.

The control panel displays the 13 available settings for various bread types and functions.
Instrucciones de funcionamiento
Siga estos pasos para hornear pan con éxito:
- Añadir ingredientes: Always add liquid ingredients first, followed by dry ingredients. Create a small well in the dry ingredients for the yeast, ensuring it does not come into direct contact with liquids or salt initially.
- Seleccionar programa: Press the "Menu Select" button to choose from the 13 available settings (e.g., Basic, French, Whole Wheat, Sweet, Gluten-Free, Express Bake, Dough, Jam, Cake).
- Elija el tamaño del pan: Press the "Loaf Size" button to select your desired loaf size (1.0 lb, 1.5 lb, or 2.0 lb).
- Seleccionar el color de la corteza: Press the "Crust Color" button to choose your preferred crust shade (Light, Medium, or Dark).
- Comience a hornear: Press the "Start/Stop" button to begin the baking cycle. The machine will automatically knead, rise, and bake the bread.
- Delayed Baking (Optional): To use the 13-hour programmable timer, add ingredients, then set the desired delay time before pressing "Start/Stop".
Consejos importantes para obtener los mejores resultados:
- Ensure all ingredients are at room temperature unless otherwise specified in the recipe.
- Measure ingredients precisely. Use the provided measuring cup and spoon for accuracy.
- During the kneading cycle, use a rubber spatula to scrape down any flour from the sides of the pan to ensure all ingredients are incorporated.
- Avoid opening the lid during the baking cycle, especially during the rising phase, as this can affect the bread's texture.
Mantenimiento y limpieza
Un mantenimiento adecuado garantiza la longevidad y el rendimiento óptimo de su panificadora.
- Después de cada uso: Unplug the bread maker and allow it to cool completely before cleaning.
- Molde para pan y paleta amasadora: Remove the bread pan and kneading paddle. Wash them with warm, soapy water. Do not use abrasive cleaners or scouring pads, as this can damage the nonstick coating. Rinse thoroughly and dry completely.
- Exterior: Limpie el exterior de la panificadora con un paño suave y seco.amp paño. No sumerja la unidad en agua ni en ningún otro líquido.
- Tapa: The inner lid is detachable for easy cleaning. Wipe it down with a damp paño.
- Almacenamiento: Store the bread maker in a dry, cool place when not in use.
Solución de problemas
Si tiene problemas con su panificadora, consulte los problemas y soluciones comunes a continuación:
| Problema | Posible causa | Solución |
|---|---|---|
| Bread is too dense or flat | Too much liquid, old yeast, or incorrect ingredient order. | Reduce liquid slightly. Ensure yeast is fresh. Always add liquids first, then dry ingredients, with yeast last in a well. |
| Bread did not rise | Inactive yeast, water too hot/cold, or too much salt/sugar. | Check yeast expiration. Use water between 77°-85°F. Measure salt and sugar accurately. |
| Paleta de amasar atascada en el pan | Ocurrencia común. | Allow bread to cool. Use the provided metal hook to carefully remove the paddle. |
| La maquina no arranca | Not plugged in, lid not closed, or incorrect program selection. | Ensure power cord is securely plugged in. Close the lid firmly. Verify program settings. |
Especificaciones del producto
- Número de modelo: CKSTBR9050
- Color: Blanco
- Capacidad de pan: Hasta 2 libras
- Número de programas: 13
- Dimensiones del producto: 12.1" de profundidad x 13.5" de ancho x 13.2" de alto
- Peso del artículo: 8 libras
- Fabricante: Oster
- Código postal: 750343688389, 034264440203
- Primera fecha disponible: 17 de enero de 2011

Detailed dimensions of the Oster Expressbake Bread Maker.
Garantía y soporte
For detailed warranty information and customer support, please refer to the official user guide provided with your product or visit the Oster website. A digital version of the user guide is often available for download.
Para obtener ayuda adicional, también puede consultar la Guía del usuario (PDF).


