1. Introducción
This manual provides detailed instructions for the installation, operation, and maintenance of the Intermatic iOS-DOV-WH Commercial Grade in-Wall PIR Occupancy/Vacancy Sensor. This device is designed to automatically control lighting based on human presence, enhancing energy efficiency in various indoor environments.
The sensor utilizes Passive Infrared (PIR) technology to detect motion by sensing changes in infrared energy (body heat). When motion is detected, the connected lights can be automatically turned ON (Occupancy mode) or manually turned ON and automatically turned OFF (Vacancy mode).
2. Información de seguridad
WARNING: Risk of Electric Shock. May cause serious injury or death.
- Turn OFF power at the circuit breaker or fuse box before installation or servicing.
- La instalación debe ser realizada por un electricista calificado de acuerdo con todos los códigos eléctricos nacionales y locales.
- No utilice este dispositivo con cargas que excedan sus capacidades nominales especificadas.
- Asegúrese de que todas las conexiones de cables estén seguras y adecuadamente aisladas.
- This device requires a neutral wire for operation. Verify the presence of a neutral wire in the electrical box before proceeding with installation.
3. Características del producto
- Passive Infrared (PIR) Sensing: Detects human presence by sensing motion and body heat, ensuring reliable light control.
- Cobertura de 180°: Provides wide-angle detection up to 1200 sq. ft. (non-obstructed views) for comprehensive area monitoring.
- User-Selectable Modes: Offers flexible operation with selectable Occupancy (automatic ON/OFF) or Vacancy (manual ON/automatic OFF) modes.
- Zero-Crossing Technology: Extends the life of the sensor and connected lighting by minimizing electrical stress during switching.
- Adjustable Ambient Light Sensor: Prevents lights from turning on when sufficient natural light is present, with adjustable sensitivity (30% - 100%).
- Retraso de tiempo ajustable: Allows setting the time lights remain ON after the last detected motion, from 15 seconds to 30 minutes.
- Adjustable Sensitivity (Range): Fine-tunes the detection area to prevent unwanted triggers.
4. Contenido del paquete
- Intermatic iOS-DOV-WH Occupancy/Vacancy Sensor
- Placa de pared decoradora
- Tornillos de montaje
- Tuercas de alambre
- Manual de instrucciones
5. Instalación (Configuración)
5.1 Lista de verificación previa a la instalación
- Asegúrese de que la energía esté apagada en el disyuntor.
- Confirm the electrical box contains a neutral wire (typically white). This sensor requires a neutral connection.
- Verify the existing wiring configuration (single-pole only; not for 3-way or 4-way applications).
5.2 Instrucciones de cableado
The iOS-DOV-WH sensor is designed for single-pole applications. Follow these steps for wiring:
- Apague la energía en el disyuntor.
- Remove the existing wall switch and disconnect its wires.
- Identify the wires in the electrical box:
- LINE (Hot): Typically black, supplying power from the circuit breaker.
- CARGA Typically black, going to the light fixture.
- NEUTRAL: Typically white, required for the sensor's operation.
- SUELO: Cable de cobre desnudo o cable verde.
- Connect the sensor's wires to the corresponding house wires using wire nuts:
- Connect the sensor's Negro wire to the house LINE (Hot) cable.
- Connect the sensor's Rojo wire to the house CARGA cable.
- Connect the sensor's Blanco wire to the house NEUTRAL cable.
- Connect the sensor's Verde wire to the house SUELO cable.
- Carefully push all wires into the electrical box.

Imagen 1: Trasero view of the Intermatic iOS-DOV-WH sensor, illustrating the wiring terminals and the product specification label. The label indicates the model number, voltage, frequency, and load ratings for resistive, incandescent, fluorescent, and motor loads.
5.3 Montaje
- Mount the sensor into the electrical box using the provided mounting screws. Ensure the "TOP" indicator on the sensor's metal strap is facing upwards.
- Attach the decorator wall plate over the sensor.
- Encienda la alimentación en el disyuntor.

Imagen 2: Lado profesionalfile of the Intermatic iOS-DOV-WH sensor, demonstrating its depth when mounted on a standard electrical bracket. This view helps assess the required space within the wall box.

Imagen 3: Frente view of the Intermatic iOS-DOV-WH sensor, fully installed with its white decorator wall plate. The PIR lens and manual override button are visible.
6. Operación
The iOS-DOV-WH sensor offers three operational modes: OFF, Occupancy (OCC), and Vacancy (VAC).

Imagen 4: Un primer plano view of the mode selection switch located at the bottom of the sensor. The switch allows selection between "OFF", "OCC" (Occupancy), and "VAC" (Vacancy) modes.
- Modo apagado: In this mode, the sensor acts as a standard manual switch. Press the button to turn lights ON, and press again to turn them OFF. Motion detection is disabled.
- Modo de ocupación (OCC): Lights turn ON automatically when motion is detected and turn OFF automatically after a set time delay when no motion is detected. This is ideal for high-traffic areas where automatic lighting is desired.
- Modo vacante (VAC): Lights must be turned ON manually by pressing the button. They will turn OFF automatically after a set time delay when no motion is detected. This mode is suitable for areas where manual control over initial light activation is preferred, but automatic shut-off is desired for energy savings.
A small LED indicator on the sensor will illuminate briefly when motion is detected. This helps confirm sensor operation.

Imagen 5: Un detallado view of the red LED indicator light on the front of the Intermatic iOS-DOV-WH sensor. This LED illuminates when motion is detected, providing visual feedback of the sensor's activity.
7. Ajustes
The sensor features three adjustable dials located behind the lower cover plate. Gently pry open the bottom section of the sensor to access these controls.

Imagen 6: A close-up showing the three adjustment dials for "TIME", "RANGE", and "LIGHT" on the Intermatic iOS-DOV-WH sensor. These dials are used to fine-tune the sensor's performance.
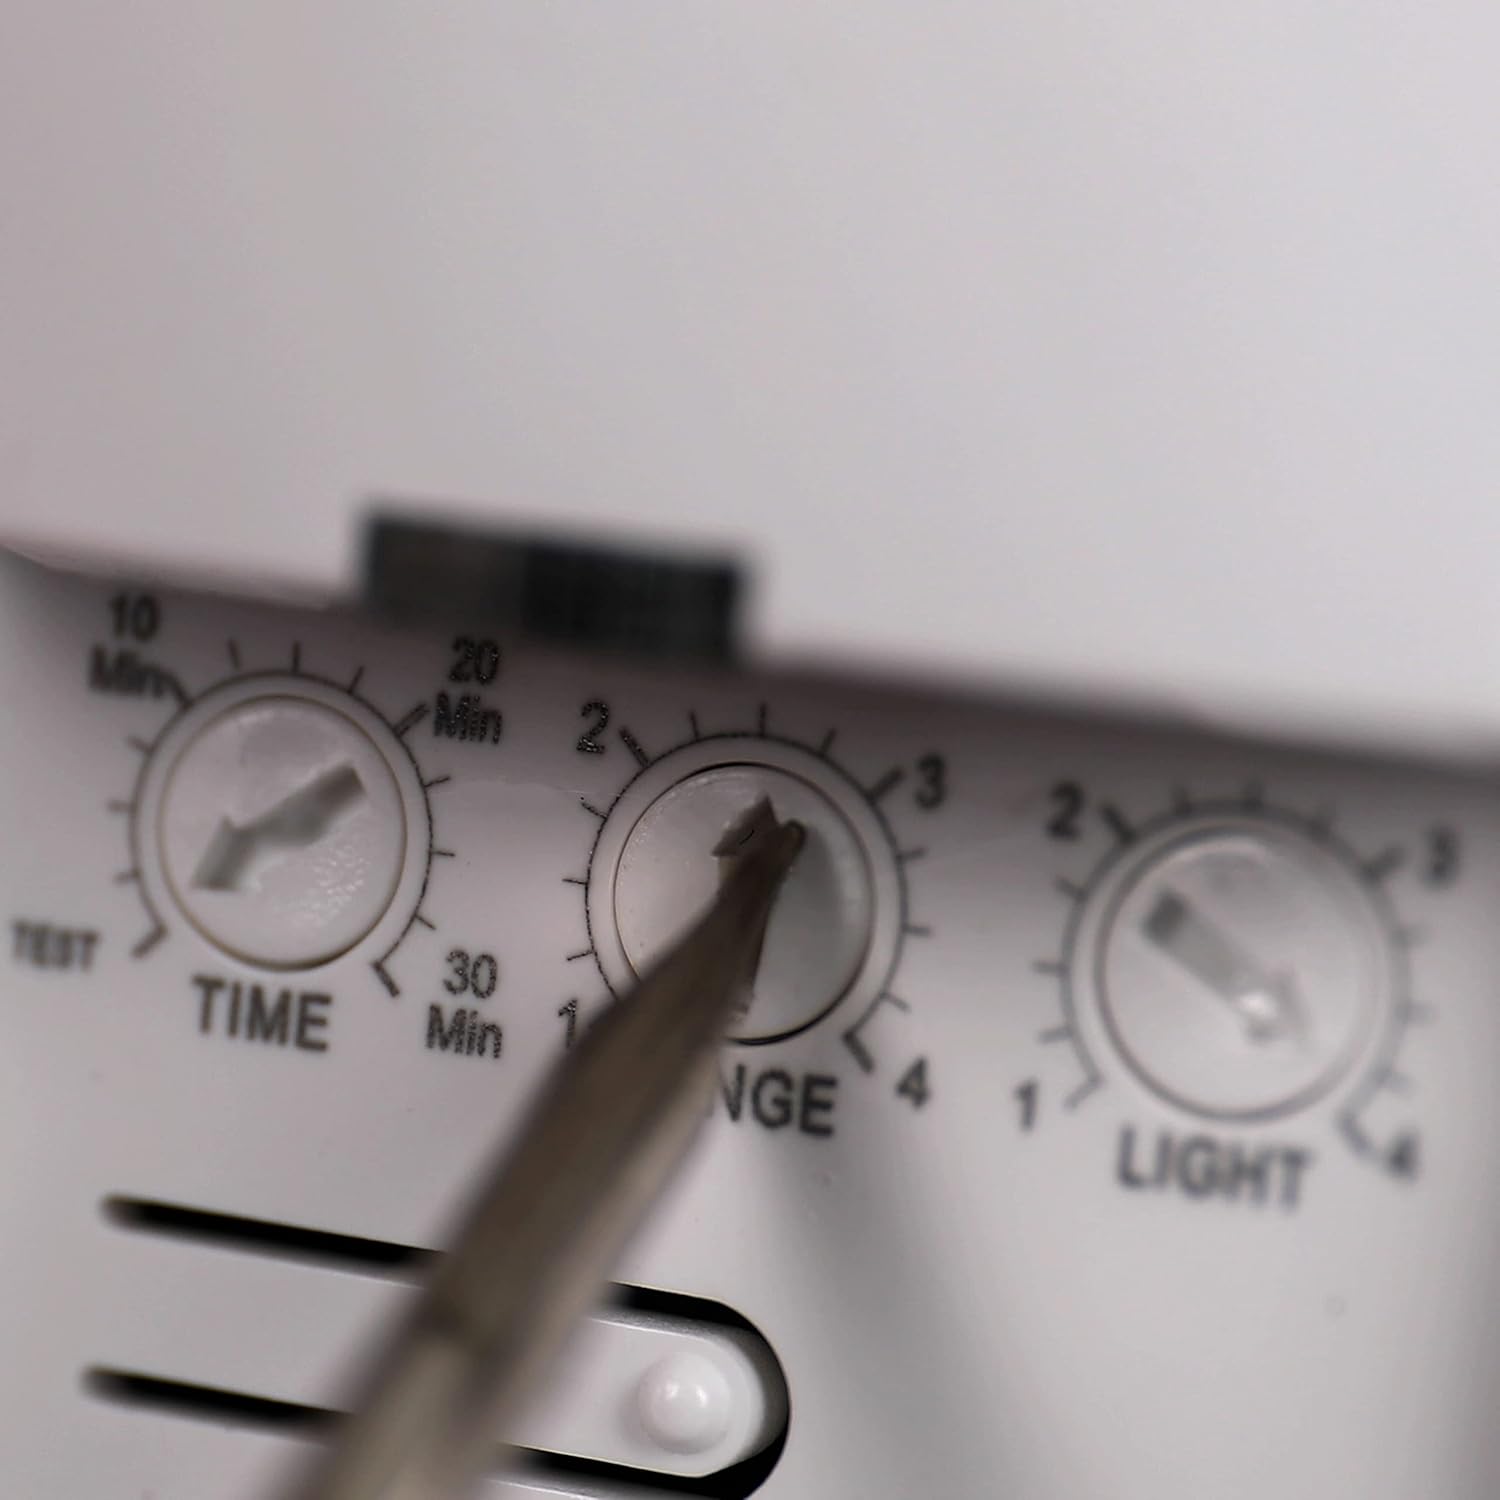
Imagen 7: This image illustrates the use of a small screwdriver to adjust the "RANGE" dial on the Intermatic iOS-DOV-WH sensor, providing a visual guide for users making adjustments.
- TIEMPO (Retardo de tiempo): Adjusts how long the lights remain ON after the last detected motion. Settings typically range from 15 seconds (TEST mode) to 30 minutes.
- Modo de prueba: For quick testing of coverage, the lights will turn off after approximately 15 seconds.
- RANGE (Sensitivity): Controls the detection sensitivity and coverage area of the PIR sensor. Adjust this to prevent false triggers or to ensure adequate coverage.
- LIGHT (Ambient Light Sensor): Determines the ambient light level at which the sensor will allow the lights to turn ON. If the natural light level is above the set threshold, the lights will not turn on, even with motion. This saves energy during daylight hours.
8. Mantenimiento
- The sensor requires minimal maintenance.
- Limpie periódicamente la lente del sensor con un paño suave.amp cloth to ensure optimal performance. Do not use abrasive cleaners.
- There are no user-serviceable parts inside the sensor. Do not attempt to open or repair the unit.
9. Solución de problemas
| Problema | Posible causa | Solución |
|---|---|---|
| Las luces no se encienden. |
|
|
| Las luces no se apagan. |
|
|
| Lights turn ON/OFF too frequently (false triggers). |
|
|
10. Especificaciones
| Número de modelo | iOS-DOV-WH |
| Volumentage | 120 voltios CA, 60 Hz |
| Capacidad de carga |
|
| Cobertura | 180°, up to 1200 sq. ft. |
| Retardo de tiempo | 15 seconds (Test) to 30 minutes |
| Sensor de luz ambiental | Adjustable (30% - 100%) |
| Temperatura de funcionamiento | 32 °F a 131 °F (0 °C a 55 °C) |
| Dimensiones | 3 x 2 x 4.8 pulgadas (aproximadamente) |
| Color | Blanco |
| Material | Plástico |
11. Garantía y soporte
This Intermatic iOS-DOV-WH sensor comes with a Garantía limitada de 5 años a partir de la fecha de compra. Esta garantía cubre defectos de materiales y mano de obra en condiciones normales de uso.
For warranty claims, technical assistance, or further information, please contact Intermatic Customer Support. Refer to the official Intermatic websitio o embalaje del producto para obtener los datos de contacto más actualizados.
Do not return the product to the place of purchase without prior authorization from Intermatic.


