1. Introducción
Gracias por la compraasing the Sharp XL-HF201P Micro Hi-Fi System. This system is designed to provide high-quality audio playback from various sources, including CDs, USB devices, and iPods. This manual provides essential information for the safe and efficient operation of your new audio system. Please read it thoroughly before use and retain it for future reference.
2. Información importante de seguridad
- Fuente de energía: Conecte la unidad únicamente a una toma de CA del volumentage se especifica en el panel trasero de la unidad.
- Ventilación: Asegúrese de que haya una ventilación adecuada. No obstruya las aberturas de ventilación. Evite colocar la unidad sobre superficies blandas que puedan obstruir las rejillas de ventilación.
- Agua y humedad: No exponga la unidad a la lluvia, la humedad ni a goteos o salpicaduras de líquidos. No coloque objetos con líquido, como jarrones, sobre la unidad.
- Calor: Mantenga la unidad alejada de fuentes de calor como radiadores, rejillas de calefacción, estufas u otros aparatos (incluidos ampificadores) que producen calor.
- Limpieza: Desconecte la unidad del tomacorriente antes de limpiarla. Utilice únicamente un paño seco.
- Servicio: No intente reparar este producto usted mismo. Refiera todo el servicio a personal de servicio calificado.
3. Contenido del paquete
Compruebe que todos los artículos enumerados a continuación estén incluidos en su paquete:
- Unidad principal (reproductor/receptor de CD)
- Left Speaker (x1)
- Right Speaker (x1)
- Control remoto (con 2 pilas AA)
- Antena FM
- Antena de cuadro AM
- Cable de alimentación
- Manual de instrucciones (este documento)
4. Configuración
4.1 Desembalaje y colocación
Carefully remove all components from the packaging. Place the main unit and speakers on a stable, flat surface. Ensure there is sufficient space around the unit for proper ventilation.
4.2 Conexión de los altavoces
Connect the speaker wires to the corresponding terminals on the main unit and speakers. Match the positive (+) and negative (-) terminals. For optimal sound, ensure the wires are securely connected. If the speaker wires do not insert directly into the screw-knobs, wrap the bare wire ends around the terminal posts and then tighten the screw-knobs to secure them.
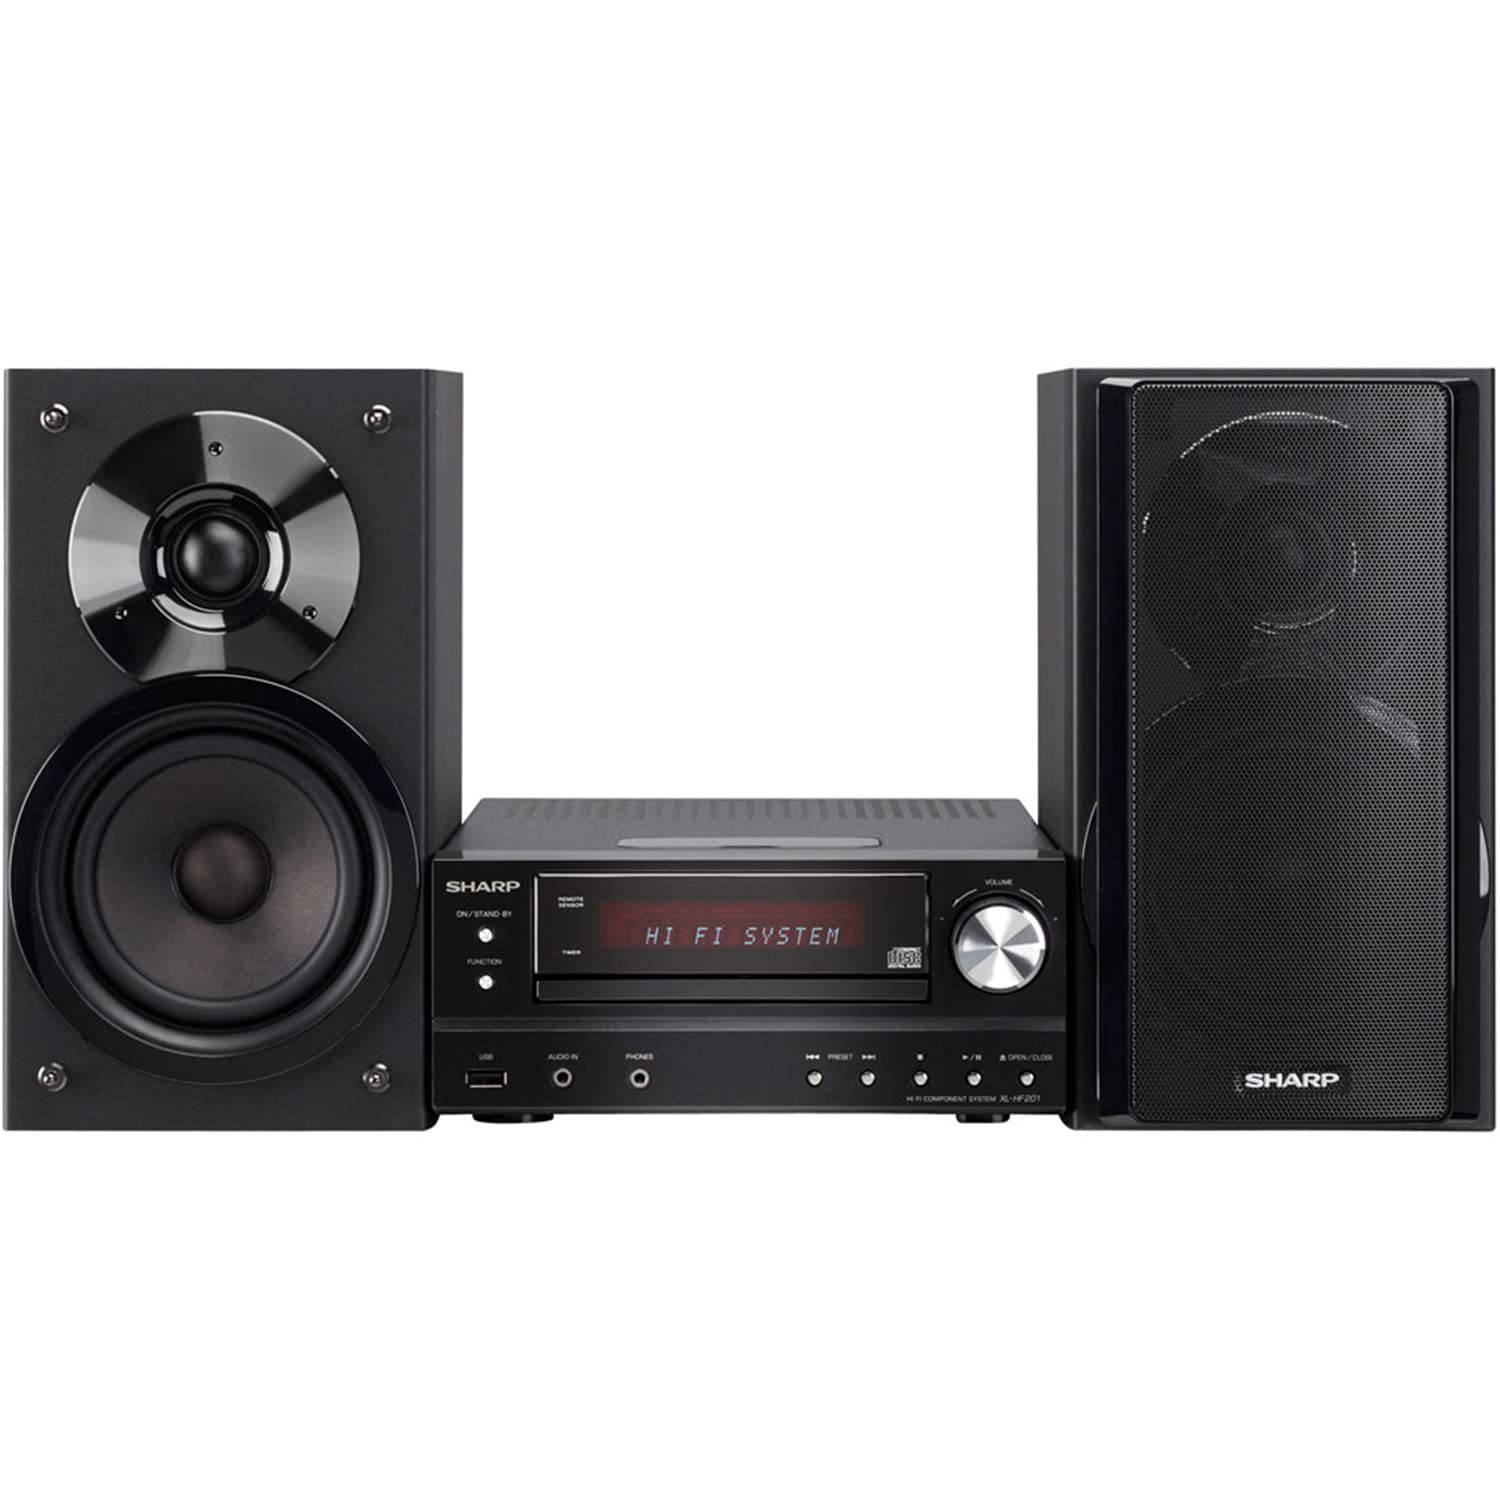
Image 4.2.1: The Sharp XL-HF201P Micro Hi-Fi System, showing the main unit and two speakers. This image illustrates the overall appearance of the system, which includes a central receiver with a CD tray and an iPod dock on top, flanked by two dark-colored speakers.
4.3 Conexión de las antenas
- Antena FM: Connect the supplied FM wire antenna to the FM antenna terminal on the rear of the main unit. Extend the wire for better reception.
- Antena AM: Assemble the AM loop antenna and connect it to the AM antenna terminals. Position the antenna for optimal AM reception.
4.4 Conexión de alimentación
After all other connections are made, plug the power cord into the AC inlet on the rear of the main unit, then plug the other end into a wall outlet.
5. Instrucciones de funcionamiento
5.1 Encendido y apagado
Presione el FUERZA Botón en el panel frontal o el control remoto para encender o apagar la unidad (modo de espera).
5.2 Selección de fuente
Presione el FUNCIÓN button on the front panel or the remote control repeatedly to cycle through available sources: CD, USB, iPod, FM, AM, AUX.
5.3 Reproducción de CD
- Seleccione el CD función.
- Presione el ABRIR/CERRAR botón para abrir la bandeja de CD.
- Place a CD (CD-DA, MP3, WMA) with the label side up on the tray.
- Prensa ABRIR/CERRAR de nuevo para cerrar la bandeja. La reproducción comenzará automáticamente.
- Usar REPRODUCIR/PAUSA, DETENER, SALTAR (forward/backward) buttons for control.
Reproducción USB 5.4
- Insert a USB device (containing MP3 or WMA files) en el puerto USB del panel frontal.
- Seleccione el USB función.
- Playback will begin automatically or you may need to select a track.
- Usar REPRODUCIR/PAUSA, DETENER, SALTAR Botones de control.
5.5 Base para iPod/iPhone
- Carefully place your compatible iPod or iPhone onto the dock connector on top of the main unit.
- Seleccione el iPod función.
- Your device will begin charging and you can control playback using the system's remote or your device's controls.
5.6 Sintonización de radio
- Seleccione el FM or AM función.
- Utilice el SINTONIZACIÓN buttons (or knob on the unit) to manually tune to a station.
- Mantenga pulsado el SINTONIZACIÓN Botones para escaneo automático de estaciones.
- Para presintonizar estaciones, sintonice la estación deseada y luego presione MEMORIA Seguido de un botón con un número preestablecido.
5.7 Control de volumen
Ajuste el volumen con el VOLUMEN +/- buttons on the remote control or the volume knob on the main unit.
6. Mantenimiento
6.1 Limpieza de la unidad
Wipe the exterior of the unit with a soft, dry cloth. Do not use abrasive cleaners, waxes, or solvents as they may damage the finish. For stubborn stains, lightly dampen the cloth with water and mild detergent, then wipe dry.
6.2 Cuidado de la lente del CD
Avoid touching the CD lens. If the lens becomes dirty, use a commercially available CD lens cleaner. Do not use compressed air or liquid cleaners directly on the lens.
7. Solución de problemas
| Problema | Posible causa | Solución |
|---|---|---|
| Sin poder | El cable de alimentación no está conectado de forma segura. | Verifique la conexión del cable de alimentación a la unidad y al tomacorriente de pared. |
| Sin sonido | El volumen está demasiado bajo o silenciado. Los cables de los altavoces no están conectados correctamente. | Increase volume. Check speaker wire connections, ensuring correct polarity (+/-). |
| El CD no se reproduce | CD is dirty, scratched, or inserted incorrectly. Incorrect function selected. | Clean or replace CD. Insert CD with label side up. Select CD function. |
| Dispositivo USB no reconocido | El dispositivo USB no está formateado correctamente o contiene archivos no admitidos files. | Ensure USB device is FAT16/FAT32 formatted and contains MP3/WMA files. Try another USB device. |
| Mala recepción de radio | Antenna not properly positioned or connected. Interference. | Ajuste la posición de la antena. Aleje la unidad de otros dispositivos electrónicos. |
| El control remoto no funciona | Las pilas están agotadas o mal insertadas. Hay una obstrucción entre el control remoto y la unidad. | Replace batteries (2 AA). Ensure clear line of sight to the unit's remote sensor. |
8. Especificaciones
- Marca: Afilado
- Modelo: XL-HF201P
- Potencia de salida: 100 vatios RMS
- Medios compatibles: CD-DA, MP3, WMA (CD, USB)
- Conectividad: USB, iPod Dock, AUX Input, FM/AM Tuner
- Tipo de altavoz: Subwoofers (integrated into speaker design)
- Fuente de energía: Eléctrico con cable
- Dimensiones del producto (unidad principal): Aproximadamente 13 x 15.09 x 20.15 pulgadas
- Peso del artículo: Aproximadamente 20.3 libras
- Pilas (Remotas): 2 pilas AA (incluidas)
9. Garantía y soporte
Para obtener información sobre la garantía y asistencia al cliente, consulte la tarjeta de garantía incluida con su producto o visite el sitio web oficial de Sharp. website. You may also contact Sharp customer service directly for assistance with product registration, technical support, or service inquiries.
Soporte en línea: www.sharpusa.com


