1. Introducción
This manual provides detailed instructions for the proper use and maintenance of your TFA 38.2028.02 Digital Timer and Stopwatch. This device is designed for precise timekeeping in various applications, featuring a reversible display, touch-sensitive buttons, and magnetic mounting options. Please read this manual thoroughly before operating the device.
2. Características del producto
- Reversible Display: Permite fácil viewdesde diferentes ángulos.
- Touch-Sensitive Buttons: For intuitive operation.
- Iluminar desde el fondo: Proporciona una visibilidad clara en condiciones de poca luz.
- Montaje magnético: Securely attaches to metallic surfaces.
- Wall or Tabletop Mounting: Opciones de ubicación versátiles.
- Rango de temporizador: Counts up to 99 minutes and 59 seconds.
- Diseño compacto: Dimensiones de 76 x 25 x 76 mm.
3. Contenido del paquete
- TFA 38.2028.02 Digital Timer and Stopwatch Unit
- Manual de usuario (este documento)
Note: 2 x 1.5V AAA batteries are required and not included in the package.
4. Configuración
4.1 Instalación de la batería
- Localice la tapa del compartimiento de la batería en la parte posterior de la unidad.
- Deslice o levante suavemente la tapa para abrir el compartimento.
- Inserte dos (2) baterías AAA de 1.5 V, asegurándose de la polaridad correcta (+/-) como se indica dentro del compartimiento.
- Vuelva a colocar la tapa del compartimiento de la batería, asegurándose de que encaje firmemente en su lugar.
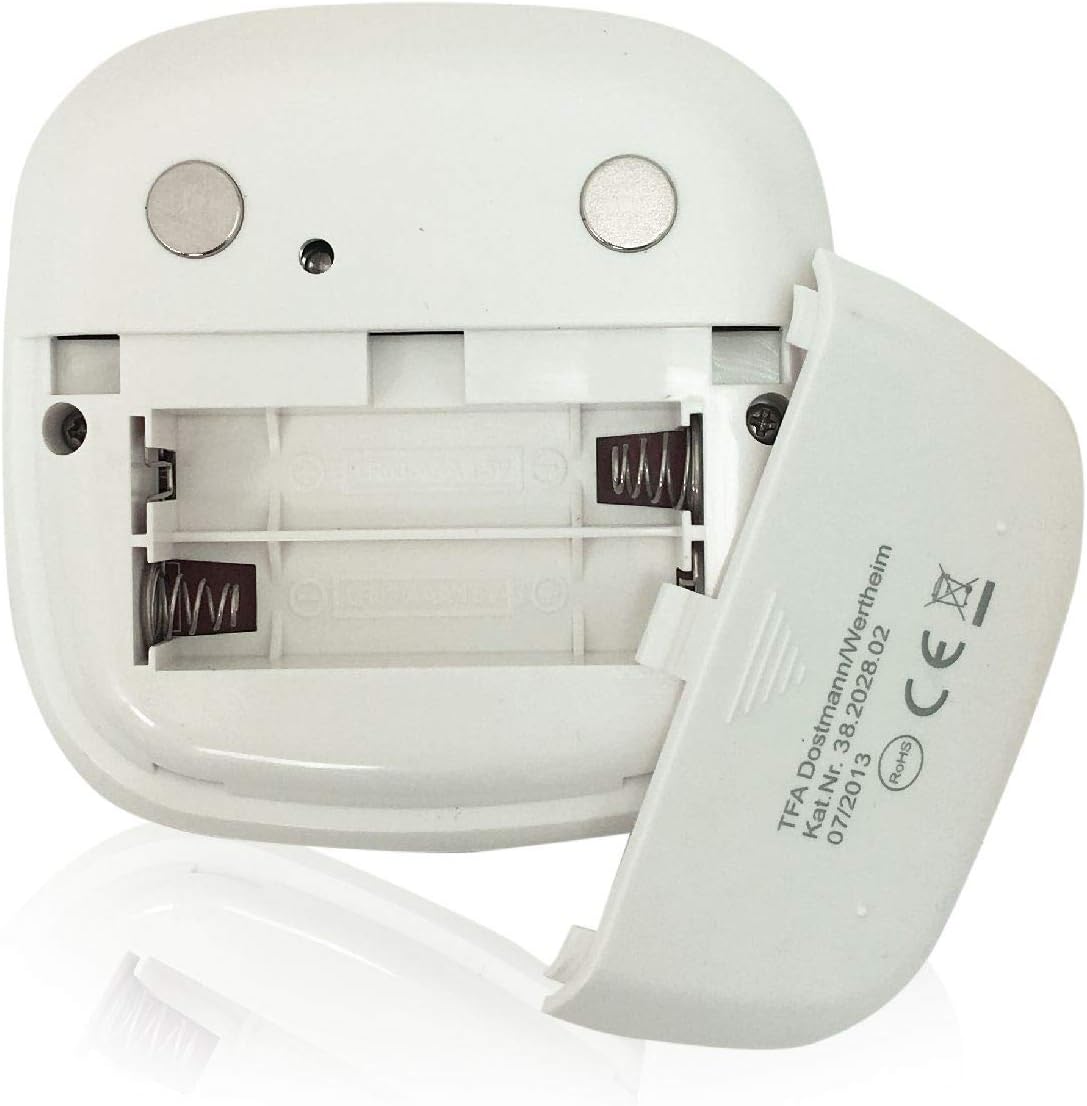
Imagen: Trasera view of the timer with the battery compartment open, illustrating where to insert the two AAA batteries.
4.2 Encendido inicial
Once batteries are installed, the display will illuminate, and the device will be ready for use. The default display shows "00:00".
5. Instrucciones de funcionamiento

Imagen: Frente view of the TFA 38.2028.02 timer, highlighting the digital display and the three touch-sensitive buttons: 'M' for minutes, 'S' for seconds, and 'S/S' for Start/Stop.
5.1 Funciones de los botones
- M (Minutes): Press to increase minutes. Hold to rapidly increase minutes.
- S (Seconds): Press to increase seconds. Hold to rapidly increase seconds.
- S/S (Start/Stop): Press to start or stop the timer/stopwatch.
5.2 Configuración del temporizador (cuenta regresiva)
- Ensure the display shows "00:00". If not, press M y S simultaneously to reset.
- Presione el M Botón para configurar los minutos deseados (hasta 99 minutos).
- Presione el S Botón para configurar los segundos deseados (hasta 59 segundos).
- Una vez configurado el tiempo deseado, presione el botón S/S Botón para iniciar la cuenta regresiva.
- Para pausar la cuenta regresiva, presione S/S otra vez. Prensa S/S Para reanudar.
- When the timer reaches "00:00", an alarm will sound. Press any button to stop the alarm.
5.3 Uso del cronómetro (cuenta progresiva)
- Ensure the display shows "00:00". If not, press M y S simultaneously to reset.
- Presione el S/S button to start the count-up. The display will begin counting from "00:00".
- Para pausar el cronómetro, presione S/S otra vez. Prensa S/S Para reanudar.
- To reset the stopwatch to "00:00", pause the stopwatch, then press M y S simultáneamente.
5.4 Función de luz de fondo
The display features a backlight for improved visibility. The backlight activates automatically when buttons are pressed and typically remains on for approximately 30-40 seconds before dimming to conserve battery life.
6. Opciones de montaje
The TFA 38.2028.02 timer offers flexible mounting solutions:
- Fijación magnética: The back of the timer is equipped with magnets, allowing it to be securely attached to refrigerators, oven hoods, or any other metallic surface.
- Colocación de la mesa: The timer's design allows it to stand upright on a flat surface, such as a kitchen counter or desk.
- Montaje en pared: The unit can also be mounted on a wall using a small hook or screw (not included) through the designated hole on the back.

Imagen: Trasera view of the timer, showing the integrated magnets for secure attachment to metallic surfaces and the model number.
7. Mantenimiento
7.1 Limpieza
Para limpiar el temporizador, límpielo con un paño suave y húmedo.amp cloth. Do not use abrasive cleaners or immerse the device in water. Avoid getting moisture into the battery compartment or display area.
7.2 Reemplazo de batería
When the display becomes dim or the device stops responding, it is time to replace the batteries. Follow the battery installation steps in Section 4.1. Always use fresh 1.5V AAA batteries and dispose of old batteries responsibly.
8. Solución de problemas
| Problema | Posible causa | Solución |
|---|---|---|
| El dispositivo no se enciende. | Las baterías están agotadas o instaladas incorrectamente. | Verifique la polaridad de la batería o reemplácela con baterías AAA nuevas. |
| La pantalla está tenue o parpadea. | Batería baja. | Reemplace las baterías. |
| Los botones no responden. | Low battery power or temporary software glitch. | Replace batteries. If problem persists, remove batteries for 1 minute and reinsert. |
| Timer alarm is too quiet. | Alarm volume is fixed and cannot be adjusted. | Ensure the timer is placed in a location where the alarm can be heard. |
9. Especificaciones
| Característica | Detalle |
|---|---|
| Número de modelo | 38.2028.02 |
| Marca | TFA |
| Dimensiones (L x An x Al) | 76 x 25 x 76 mm (approximately 2.5P x 7.6l x 7.6H cm) |
| Peso | 92 gramos |
| Material | Plastic with integrated magnets |
| Fuente de alimentación | 2 pilas AAA de 1.5 V (no incluidas) |
| Rango del temporizador | Hasta 99 minutos, 59 segundos |
| Mostrar | Digital with backlight |
| Opciones de montaje | Magnetic, Tabletop, Wall-mountable |

Image: The timer held in a hand, visually demonstrating its compact size and indicating its dimensions (7.6 cm x 7.6 cm x 2.5 cm).
10. Garantía y soporte
TFA products are manufactured with quality and precision. For specific warranty information, please refer to the documentation provided with your purchase or visit the official TFA website. For technical support or inquiries, please contact TFA customer service through their official channels.
Conserve este manual para futuras consultas.