1. Introducción
This manual provides essential instructions for the proper setup, operation, and maintenance of your SentrySafe Executive Security Safe, Model PLX510487. This safe is designed to protect your valuables with an electronic lock and pry-resistant steel construction. Please read this manual thoroughly before using your safe to ensure optimal performance and security.
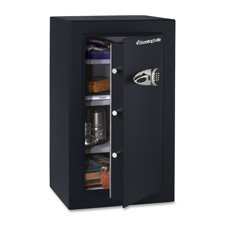
Figure 1: SentrySafe Executive Security Safe (Model PLX510487)
2. Información de seguridad
- Do not store safe keys inside the safe. Always keep override keys in a secure location away from the safe.
- Asegúrese de que la caja fuerte esté montada de forma segura para evitar su extracción no autorizada.
- Mantenga el teclado electrónico seco y limpio.
- This safe is not water resistant. Do not expose it to water or high humidity.
- Keep children away from the safe and do not allow them to operate the electronic lock.
3. Contenido del paquete
Verifique que todos los componentes estén presentes en el paquete:
- SentrySafe Executive Security Safe (PLX510487)
- Teclas de anulación (2)
- Mounting Bolts (for wall mounting)
- Manual de usuario (este documento)
4. Configuración
4.1 Desembalaje
- Retire con cuidado la caja fuerte de su embalaje.
- Inspect the safe for any signs of damage. If damaged, contact customer support.
- Conserve los materiales de embalaje para un futuro transporte si es necesario.
4.2 Instalación de la batería
The electronic lock requires four (4) AA alkaline batteries (not included).
- Localice el compartimiento de la batería en el interior de la puerta de la caja fuerte.
- Abra la tapa del compartimiento de la batería.
- Inserte cuatro pilas alcalinas AA nuevas, asegurándose de la polaridad correcta (+/-).
- Cierre bien la tapa del compartimento de la batería.
4.3 Montaje de la caja fuerte
For enhanced security, it is recommended to wall mount the safe.
- Elija una ubicación adecuada para el montaje, asegurándose de que sea una superficie sólida capaz de soportar el peso de la caja fuerte.
- Open the safe door and locate the pre-drilled mounting holes on the back panel.
- Position the safe against the wall and mark the drilling points through the mounting holes.
- Drill pilot holes into the wall at the marked locations.
- Align the safe with the drilled holes and secure it using the provided mounting bolts. Tighten all bolts firmly.
4.4 Initial Code Setup
Upon first use, you will need to set your personal electronic access code.
- With the safe door open, press the red reset button located on the inside of the door, near the hinge. The yellow indicator light on the keypad will illuminate.
- Dentro de 5 segundos, ingrese el código deseado de 3 a 8 dígitos en el teclado.
- Press the 'A' or 'B' button to confirm your new code. The yellow light will turn off, and a beep will confirm the code is set.
- Pruebe el nuevo código con la puerta abierta antes de cerrarla.
5. Operación de la caja fuerte
5.1 Opening the Safe with Electronic Code
- Introduzca su código personal de 3 a 8 dígitos en el teclado.
- Press the 'A' or 'B' button. The green indicator light will illuminate, and you will hear a beep.
- Dentro de 5 segundos, gire la manija en el sentido de las agujas del reloj para abrir la puerta de la caja fuerte.
5.2 Opening the Safe with Override Key
In case of forgotten code or battery failure, use the override key.
- Localice la cubierta de la cerradura en el panel del teclado.
- Retire la cubierta.
- Insert the override key and turn it counter-clockwise.
- While holding the key turned, turn the handle clockwise to open the safe door.
- Retire la llave y vuelva a colocar la tapa de la cerradura después de usarla.
5.3 Cierre y bloqueo de la caja fuerte
- Cierre firmemente la puerta de la caja fuerte.
- Turn the handle counter-clockwise until it is fully engaged and the door is secured.
- La caja fuerte se bloqueará automáticamente.
5.4 Cambio del código de usuario
- Open the safe door using your current code or override key.
- Press the red reset button on the inside of the door. The yellow indicator light will illuminate.
- Dentro de 5 segundos, ingrese su nuevo código de 3 a 8 dígitos.
- Press the 'A' or 'B' button to confirm. The yellow light will turn off, and a beep will confirm the new code.
- Pruebe el nuevo código con la puerta abierta antes de cerrarla.
6. Mantenimiento
6.1 Reemplazo de batería
When the batteries are low, the red indicator light will flash when you enter your code. Replace batteries promptly to avoid lock-out.
- Abre la puerta de la caja fuerte.
- Replace all four AA alkaline batteries as described in Section 4.2.
- Your electronic code will be retained during battery replacement.
6.2 Limpieza
Limpie el exterior de la caja fuerte con un paño suave.amp Paño. No utilice limpiadores abrasivos ni disolventes, ya que pueden dañar el acabado o los componentes electrónicos.
7. Solución de problemas
- La caja fuerte no se abre con el código:
- Ensure batteries are fresh and installed correctly. Replace if necessary.
- Vuelva a introducir el código con cuidado. Asegúrese de que ningún botón esté atascado.
- Try using the override key to open the safe. - El teclado no responde:
- Check battery installation and replace batteries.
- Ensure no debris is obstructing the buttons. - Código olvidado:
- Use the override key to open the safe.
- Once open, follow the steps in Section 5.4 to set a new user code. - Door does not close/lock properly:
- Asegúrese de que no haya elementos que obstruyan la puerta o los pestillos de bloqueo.
- Check that the handle is fully turned counter-clockwise to engage the locking mechanism.
8. Especificaciones
| Marca | SentrySafe |
| Número de modelo | PLX510487 |
| Tipo de bloqueo | Electrónica, Llave |
| Capacidad | 6 pies cúbicos |
| Material | Acero aleado |
| Tipo de montaje | Montaje en pared |
| Componentes incluidos | Pernos, llaves |
| Peso del artículo | 241 libras |
| Nivel de resistencia al agua | No resistente al agua |
| Dimensiones del producto | 23.8 x 21.5 x 38.3 pulgadas |
| Código Postal | 635665104871 |
9. Garantía y soporte
SentrySafe products are manufactured to high-quality standards. For specific warranty information, please refer to the warranty card included with your purchase or visit the official SentrySafe website. For technical support, replacement parts, or further assistance, please contact SentrySafe customer service directly.
SentrySafe Official Websitio: www.sentrysafe.es


